Punch Needle Pillow: Beginner-Friendly DIY Cushion Guide
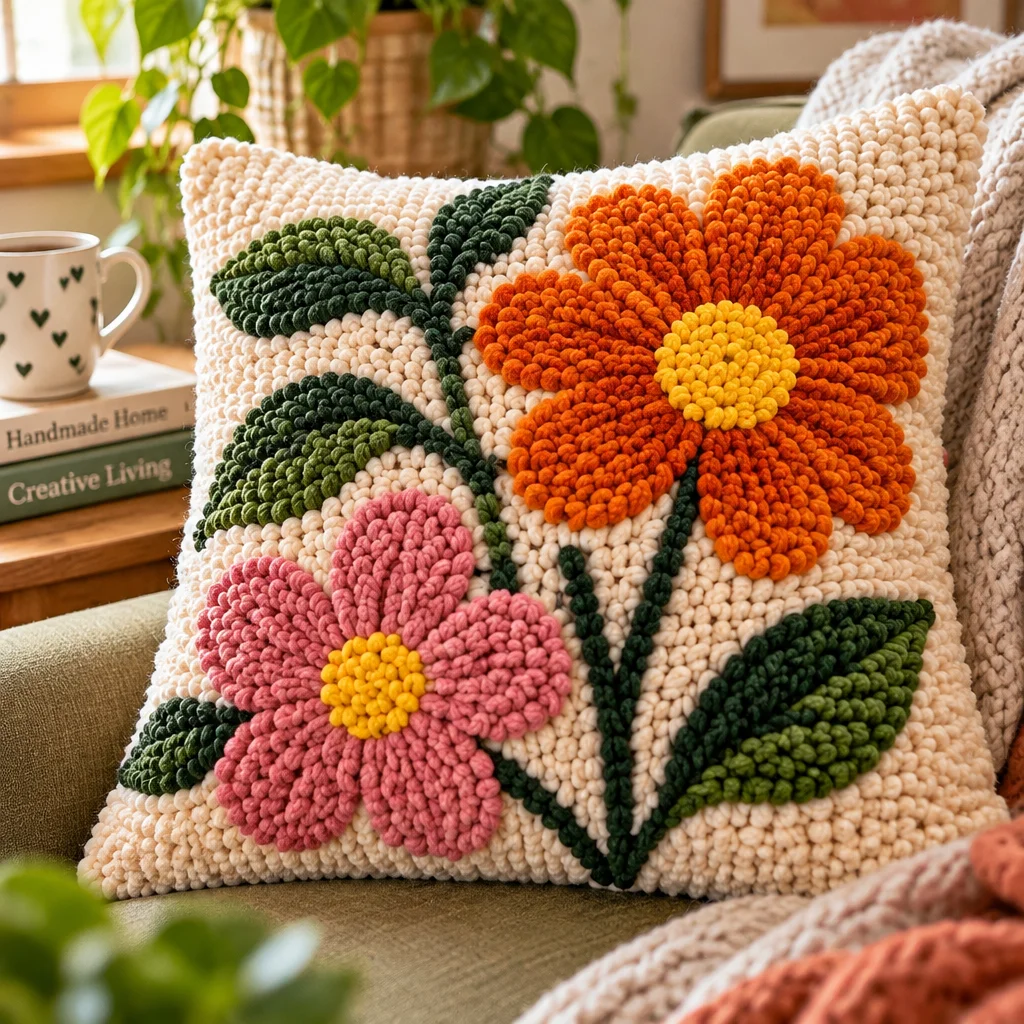
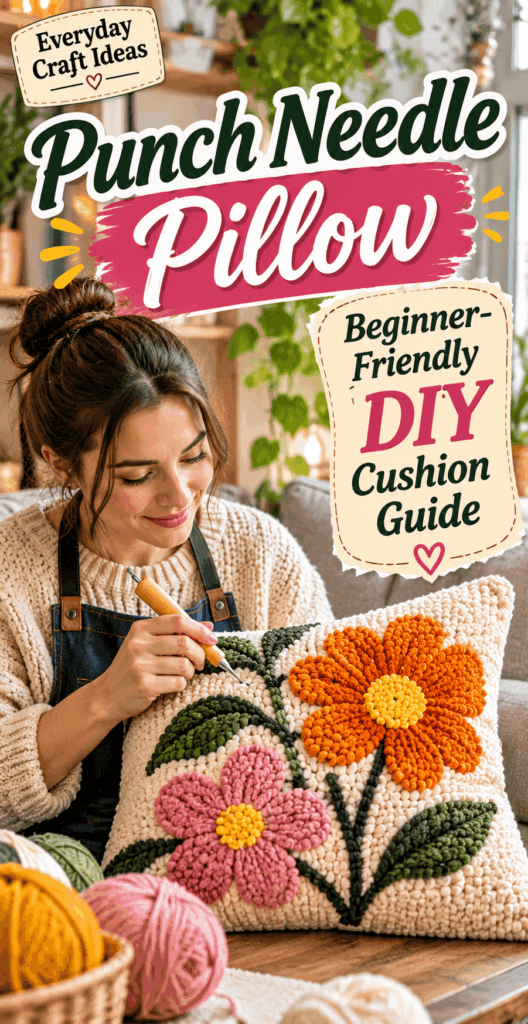
A Punch Needle Pillow is one of the most satisfying beginner sewing and fiber crafts because you get fast, visible texture with a cozy, professional look. The finished cushion has a plush, looped front that feels like a tiny rug, plus a simple fabric backing so it can actually be used on a couch or bed. If you can thread a needle tool and sew straight seams, you can make this project. Expect a relaxed weekend pace: you will spend time punching the design, then finish it like a basic pillow cover.
New to sewing pillow covers? It helps to glance at a straightforward sewing approach like this easy pillowcase sewing pattern, especially if you want an envelope closure instead of a zipper. Later, when you are ready to refine your finish, the same pillowcase pattern tutorial can guide your seam planning. In this guide, you will learn size planning, materials that actually work for punch needle, clean finishing steps, and beginner-proof troubleshooting so your loops stay put.
Plan Your Punch Needle Pillow Design
Choose a cushion size and simple motif
Start by deciding the insert size you want, because that determines everything else. Beginner-friendly sizes are 16 x 16 inches or 18 x 18 inches: large enough for bold shapes but not so big that punching feels endless. If you already own inserts, measure them first. Choose a simple motif with big shapes rather than tiny details. Punch needle looks best when you embrace chunkier forms like arches, stripes, flowers with rounded petals, or a sunburst.
Sketch your design on paper at full size or print a template. Keep at least 1.5 to 2 inches of plain space around the design for finishing and seams, because you do not want to punch right up to the edge and then lose loops in the seam.
Select foundation cloth, yarn and pillow backing
Your foundation cloth must be open enough for loops to form and hold. Monk’s cloth is the classic choice for a Punch Needle Pillow. It is stable, grippy, and forgiving. Good alternatives are rug warp, “punch needle cloth,” or quality linen with an even weave. Avoid stretchy knits and loosely woven burlap that sheds.
Match yarn size to your needle. Many beginners use worsted weight yarn with an adjustable punch needle designed for that thickness. If you want a chunkier, rug-like surface, use bulky yarn and the correct larger needle. For the backing fabric, choose a tightly woven cotton canvas, home decor cotton, or upholstery-weight fabric. A sturdier backing helps the pillow hold shape and protects the looped front from abrasion.
Choose an insert or envelope-cover closure
You can sew your pillow as a permanent closed cover (insert sewn inside) or as a removable cover. Removable is more practical for cleaning. The easiest removable option is an envelope closure: two overlapping backing panels that you sew to the punched front. If you like that simple construction, adapt ideas from this easy envelope-style pillowcase sewing pattern and scale it to your cushion size.
If you prefer a crisp, tailored look, install a zipper on the back panel. Zippers are not required for success, but they do make insertion smoother and reduce bulk. For absolute beginners, envelope closure is the fastest path to a pillow you will actually finish.
Punch Needle Pillow Designs to Consider
Bold abstract arch pillow
Arches are beginner gold: they look modern and forgive slight unevenness in loop height. Use two to four colors and make each arch band wide. A simple stacked-arch layout also lets you practice changing yarn colors cleanly.
Floral center-motif pillow
A single large flower in the center reads well from across a room and is easier than repeating tiny blooms. Use a round outline plus five to eight thick petals. Add a contrasting center circle for instant polish.
Checkerboard accent cushion
A checkerboard is excellent for practicing consistent spacing. Make large squares, around 2 to 3 inches each, so you are not constantly turning corners. Use high-contrast yarns to highlight the texture.
Retro sunburst pillow
Sunbursts are forgiving because rays can vary slightly in width and still look intentional. Work from the center outward and change colors in rings. This is a great stash-buster design.
Minimal line-art cushion
Line-art works best when the line is thick. Think one continuous outline of a face or vase. Keep the background a single color so the line stands out. If your needle and yarn create very thick loops, simplify the drawing further.
Two-tone textured stripes
Stripes are the fastest to punch. Alternate two colors in thick horizontal bands and consider varying loop height if your needle allows it, creating a subtle ribbed look. Stripes also make it easier to square up the fabric because you can visually check if lines are drifting.
Whichever design you choose, keep the edges calm and unbusy. The most successful Punch Needle Pillow fronts have a clear focal area and enough negative space to let the texture shine.
How to Punch the Decorative Front
Transfer and center the pattern
Before punching, plan your finish size. Your punched design area should be larger than the finished pillow front so you have room for seam allowances and squaring. A common approach is to punch a panel that is 2 inches wider and taller than your insert size, then trim and sew.
- Prep the fabric. Cut monk’s cloth at least 4 inches larger than your intended finished front. This gives you handling space and reduces distortion.
- Mark the center lines. Fold the cloth in half vertically and horizontally, finger-press creases, then draw light center lines with a fabric marker.
- Transfer the design. Use a window or lightbox to trace onto the cloth, aligning the design center to your center marks. Keep lines simple and bold. Thin details disappear in loop texture.
- Hoop or frame tightly. Use a gripper strip frame or a sturdy embroidery hoop. The cloth should sound drum-tight when tapped. Tight tension is the secret to even loops.
Fill large color areas with even loops
- Thread and test. Thread your punch needle, then test on scrap to confirm loop height and yarn flow. The yarn should feed freely without tugging.
- Punch with consistent depth. Push the needle all the way down to the handle stop each time. Partial punches create uneven loop height on the front.
- Work in rows. Fill shapes in tidy rows or spirals, keeping stitches close enough that the foundation does not show through. For worsted yarn, many beginners aim for stitches about 1/8 to 1/4 inch apart, adjusting by look.
- Control direction changes. Lift the needle only slightly between punches. Lifting too high can pull loops out. For corners, use shorter steps rather than forcing a sharp turn.
- Change colors neatly. End a color by leaving a 2 to 3 inch tail on the back. Start the new color with a similar tail. You will secure them later.
Secure the reverse and check edge allowances
- Inspect coverage. Flip the work and check for thin areas. Add stitches where the cloth shows through, especially near outlines.
- Stabilize the back. Apply a thin, even layer of flexible fabric glue or rug canvas adhesive to the back of the punched area only, keeping glue away from seam allowance. This step helps prevent loops from backing out with use.
- Let it cure fully. Drying time varies by product. Do not rush: sewing over damp glue can gum up needles and weaken adhesion.
- Square and measure. After curing, remove from frame and gently steam from the back (not pressing hard) if the panel looks wavy. Confirm you still have at least 1/2 inch seam allowance beyond the punched area on all sides.
Sew and Finish the Cushion Cover
Cut backing panels and plan seam allowances
For a removable Punch Needle Pillow cover, envelope backing is simplest. Cut one punched front panel and two backing panels. For an 18 x 18 inch finished cover, cut the front about 19 x 19 to allow trimming and squaring. Then cut two backing rectangles each 19 inches tall; make one 12 inches wide and the other 14 inches wide so they overlap generously. Hem the inner edges of both backing panels with a double-fold hem for a clean finish that will not fray.
If you want more detail on envelope construction and hem options, this easy pillowcase sewing pattern is a helpful reference for neat hems and straightforward assembly logic.
Join the punch-needle front to the backing
- Trim the front panel square. Measure from the design center outward to ensure the motif is centered, then trim edges so the panel is perfectly square. This prevents a twisted final pillow.
- Finish raw edges. Monk’s cloth frays. Use a zigzag stitch around the front panel edges, or serge if you have one. Do the same for backing pieces.
- Place layers correctly. Lay the punch-needle front right side up. Place backing panels right side down on top, aligning outer edges and overlapping in the center.
- Pin thoughtfully. Pin around all edges, adding extra pins near corners. Avoid crushing loops by pinning within the seam allowance, not through the punched design.
- Sew the perimeter. Stitch around with a 1/2 inch seam allowance. Use a slightly longer stitch length for thick layers. Reinforce at corners with backstitching.
- Clip corners and reduce bulk. Clip corner points (do not cut stitches) and, if necessary, grade seam allowances so the thick front does not create a lumpy edge.
Turn, insert and shape the finished pillow
- Turn right side out. Turn through the envelope opening. Use a blunt tool to push corners gently. Avoid sharp points that can poke through cloth.
- Shape and steam. Finger-press seams, then lightly steam the backing side. Keep the iron away from loops to avoid flattening.
- Insert the pillow form. Fold the insert in half, slide it in, then let it expand. Distribute filling into corners. A slightly larger insert (like an 18 x 18 insert in a 17.5 x 17.5 cover) makes the pillow look plush.
- Fluff the punch needle surface. With clean hands, gently lift and fluff loops. If needed, use a wide-tooth comb very lightly to revive texture.
“I made my first Punch Needle Pillow with an envelope back, and the biggest help was leaving a wider seam allowance than I thought I needed. Once I glued the back and squared it up, sewing was much less stressful, and the loops have held up great on our couch.”
Care and Troubleshooting
Prevent pulled loops and uneven fabric tension
The two most common beginner issues are loops pulling out and fabric warping. Loops pull out when the foundation cloth is too loose in the frame, when you lift the needle too high between punches, or when the back is not stabilized. Keep cloth drum-tight, punch to full depth, and lift only enough to move to the next stitch. Stabilizing glue on the back is worth the time for a pillow that will be handled.
If your panel looks wavy, it usually means your tension changed mid-project or stitches are packed tighter in one area. Re-stretch the cloth on the frame before continuing, and aim for consistent spacing. After finishing, gentle steam from the back and careful squaring can correct mild distortion. Also protect the surface: place the pillow where pets will not constantly snag loops, and avoid rough jewelry catching the texture.
Clean gently and protect raised texture
A Punch Needle Pillow is durable, but it is still a textured textile. Spot clean first: dab with a mild detergent solution and a clean cloth, then blot dry. If your cover is removable and your glue is fully cured, hand washing in cool water is safest. Avoid aggressive wringing, which can distort the weave and loosen loops. Roll in a towel to remove water and dry flat. If you must machine wash, use a delicate cycle, cold water, a laundry bag, and air dry, but expect more wear over time. Never iron the looped surface; steam from the backing side instead.
Frequently Asked Questions About Punch Needle Pillow: Beginner-Friendly DIY Cushion Guide
Can I use regular fabric for a punch needle pillow?
Most regular quilting cotton is too tightly woven for punch needle loops to form and stay consistent. You might manage with very thin thread and a fine needle, but it is frustrating for beginners and the loops can fall out. Choose monk’s cloth, punch needle cloth, rug warp, or evenly woven linen instead. If you are unsure, test by punching a small square: if the needle struggles to pass through or the hole stays gaping, switch fabrics.
How do I keep punch needle loops from coming out?
Three things help most: correct fabric, correct tension, and backing stabilization. Use a foundation cloth designed for punch needle, keep it drum-tight on a frame or hoop, and punch to the needle’s full depth every time. Avoid pulling the needle up high between stitches. After finishing, apply a flexible fabric glue or adhesive to the back of the punched area only and let it cure fully before sewing the cover.
Can a punch needle pillow cover be washed?
Yes, but treat it gently. If you used a flexible adhesive and let it cure, hand washing is usually safe. Spot cleaning is even better for longevity. Machine washing can work on delicate, cold, inside a laundry bag, but it increases the chance of fuzzing and loop wear, especially if your pillow rubs against other items. Always air dry flat and fluff the loops by hand once dry.
What punch needle is best for beginners making a pillow?
An adjustable punch needle that comfortably handles worsted weight yarn is the easiest starting point because yarn is widely available and punches quickly. Look for a needle with clear depth settings and a comfortable handle. Pair it with a threader if included. Before committing to a whole pillow, punch a 4 x 4 inch sample to confirm your yarn feeds smoothly and the loop height looks right for a cushion.
Do I need a frame, or is a hoop enough?
A sturdy hoop can work for small pillow fronts, but many beginners find it hard to keep consistent tension across a larger area. A gripper strip frame holds monk’s cloth very firmly, which improves loop consistency and reduces pull-outs. If you use a hoop, choose one with a strong tightening mechanism and re-tighten often. Any time you see ripples forming, pause and tighten the fabric before continuing.
How much yarn should I buy for a Punch Needle Pillow?
Yarn use depends on loop height, stitch density, and how much of the front you cover. As a rough starting point for an 18 x 18 inch front with a medium-density design, many crafters are comfortable with 2 to 4 skeins of worsted yarn total, spread across colors. Buy an extra skein of your background color so you do not run short mid-panel. Keep labels so you can match dye lots if needed.
Why does my yarn keep slipping out of the needle?
This is usually a threading issue or a mismatch between yarn thickness and needle size. Re-thread carefully, making sure the yarn passes through the needle channel and out the tip correctly. If the yarn is very smooth or thin for your needle, it may not grip and will pop out. Try a slightly thicker yarn or a smaller needle. Also check that you are not pulling the working yarn too tightly from the skein.
How do I keep the pillow front from fraying while I sew?
Monk’s cloth frays easily, so plan to finish edges early. Before assembling, zigzag or serge around the perimeter of the punched front and backing pieces. You can also apply a narrow line of fray-check product outside the seam allowance, but avoid stiffening the area you need to fold and sew. Handling the panel gently and trimming only after squaring also reduces fraying.
Should the loops be on the front or the back of the work?
Traditionally, the loops appear on the opposite side from where you punch, meaning you punch from the back and the loops form on the front. Many punch needle patterns assume this. Decide early and stay consistent. For pillows, loops-on-front is the classic cozy look. If you accidentally punch from the wrong side, you will get a flatter “stitch” look. It can still be attractive, but the texture will be different.
Final Thoughts
A Punch Needle Pillow is an ideal first project if you want a functional finish and a modern, textured result without advanced sewing. Keep your first design bold, leave generous seam allowance, and stabilize the back before assembling the cover. Those three choices prevent most beginner frustrations. For a stress-free build, start with an 18 x 18 inch insert and an envelope backing, then focus your energy on clean, even punching. Your next sensible step is to make a small practice swatch using the same cloth, yarn, and glue so you can confirm loop density and drying behavior before committing to the full front panel.