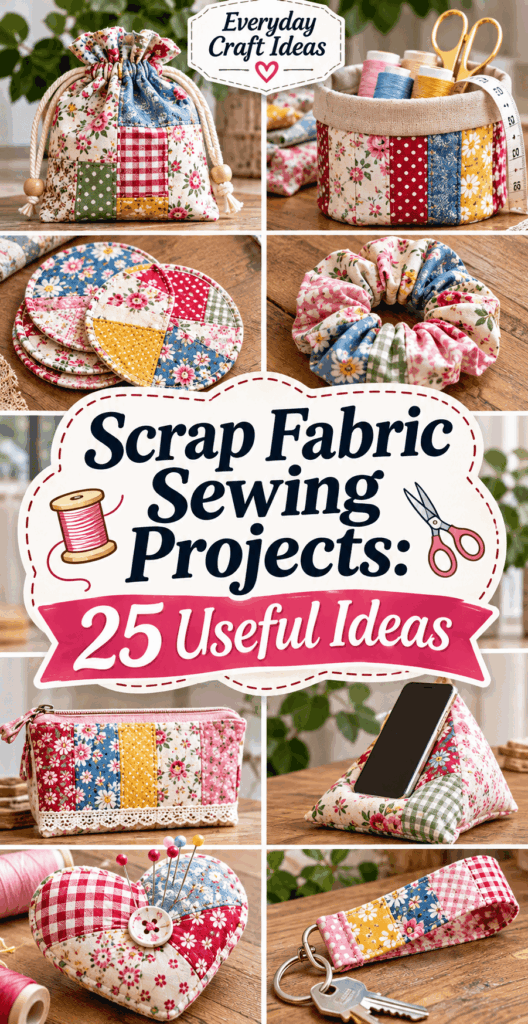
Scrap Fabric Sewing Projects: 25 Useful Ideas
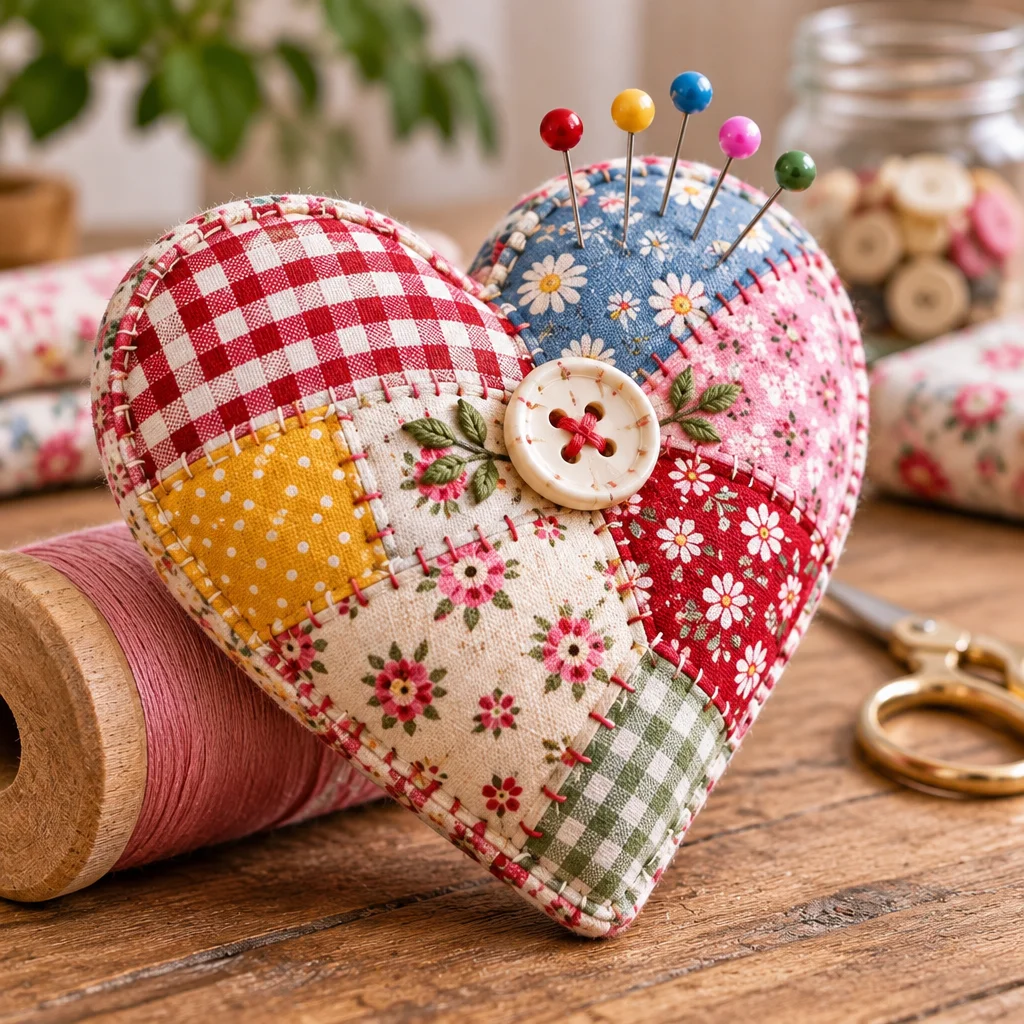
Scrap fabric sewing projects are one of the fastest ways to build skills and reduce waste at the same time. If you have a drawer of offcuts from hems, masks, quilting, or clothing repairs, you already have the main “supply.” Most of the ideas below take 10 to 60 minutes each, use simple seams, and can be finished on a basic sewing machine or even by hand with a sturdy needle.
The outcome is practical: you get useful items like key fobs, coasters, zipper pouches, reusable wipes, and patchwork pieces that actually fit your life. Cost stays low because scraps, leftover thread, and repurposed notions (buttons, old zippers, elastic) do the heavy lifting. Difficulty ranges from beginner (straight stitching and turning) to confident beginner (piecing, topstitching, adding closures).
This list suits anyone who wants quick wins, gifts you can batch sew, or a “practice project” that still ends up functional. If you are learning seam allowance consistency, pressing habits, or zipper installation, these mini makes are low-pressure and highly rewarding.
Supplies, Materials, and Beginner Setup
You can complete most scrap fabric sewing projects with a short, reliable toolkit. Start with woven cotton scraps because they press well and do not stretch as much as knits. If you only have knit scraps, choose projects that do not need crisp corners (like headbands or T-shirt yarn).
- Sewing machine (optional but helpful): A basic straight stitch is enough. If sewing by hand, use a backstitch for strength.
- Needles and thread: Universal 80/12 needles handle quilting cotton. Use a ballpoint for knits. Match thread weight to fabric, all-purpose polyester works for most items.
- Cutting tools: Fabric scissors are fine. A rotary cutter, ruler, and mat make patchwork more accurate.
- Pressing tools: An iron and ironing board (or heat-safe mat) are non-negotiable for neat results. Press seams as you go.
- Stabilizers and interfacing: Fusible woven interfacing helps light cotton behave. Thin batting or felt adds structure to coasters and pouches.
- Safety: Store pins in a magnetic dish, keep rotary blades closed, and press on a stable surface to prevent burns.
Budget substitutions: cereal-box cardboard can become a template, old jeans can replace heavy canvas, and thrifted belts or bags can donate buckles and zippers.
Sorting scraps by size
Sorting is the secret that makes scrap fabric sewing projects feel fun instead of chaotic. Give yourself three simple size categories and you will instantly know what you can sew without digging for the “perfect” piece.
- Tiny: Smaller than 2 x 2 inches. Examples: corners trimmed from quilt blocks, narrow bias strips, little triangles. Best for stuffing, applique, zipper pulls, or crumb quilting.
- Small: Around 3 x 3 inches up to 6 x 6 inches. Examples: mask leftovers, pocket linings, fat-quarter edges. Great for coasters, key fobs, scrunchies, and patchwork panels.
- Medium and long: Anything bigger than 6 x 6 inches or long strips (like 2 x 12 inches). Use for pouches, bowl cozies, mug rugs, book sleeves, and quilted laptop sleeves.
Realistic constraints: pieces with deep creases, sun fading, or old stains are still usable in hidden layers (lining, interfacing side, inside of coasters). Very stretchy fabric can distort patchwork unless stabilized. If your scraps are oddly shaped, trim them into rectangles or squares first. That small step saves time later and keeps seam allowances consistent.
Design variations: sort by color family, by fabric type (woven vs knit), or by “purpose” (pouch-sized, patchwork-sized, stuffing). The goal is speed: you want to pick a bin and start sewing immediately.
Tiny accessories
Tiny makes are perfect when you have 15 minutes and want a finish. Here are 10 tiny scrap fabric sewing projects with realistic sizing and quick notes.
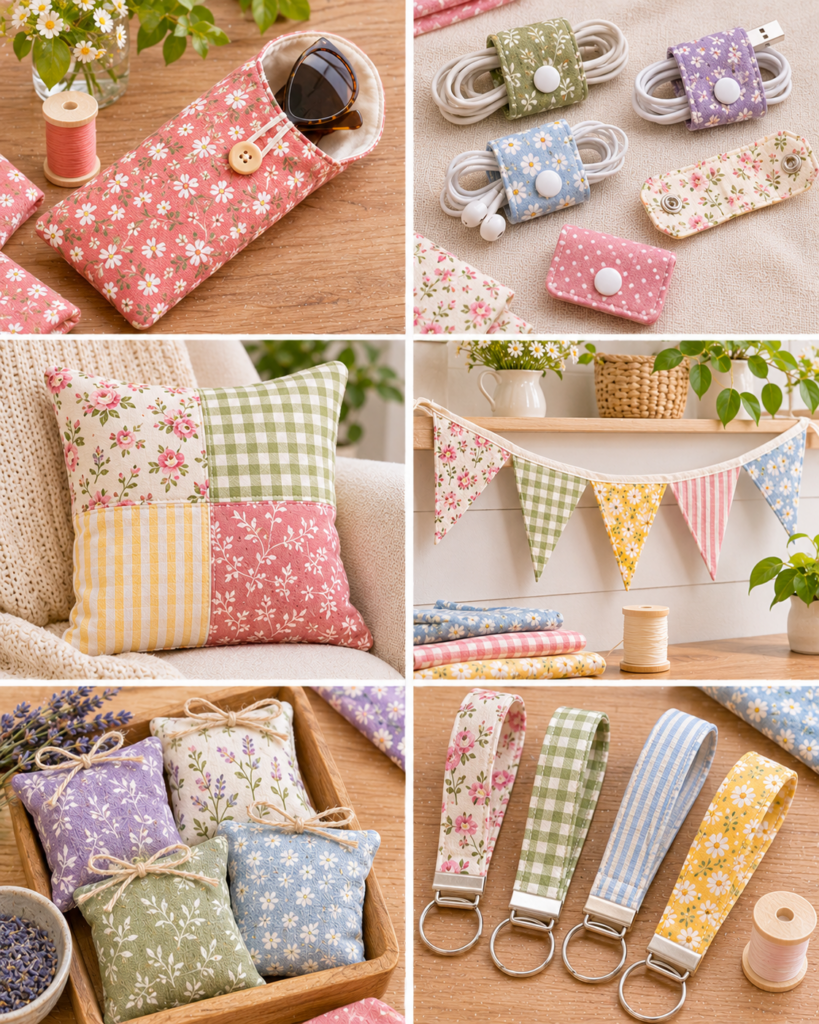
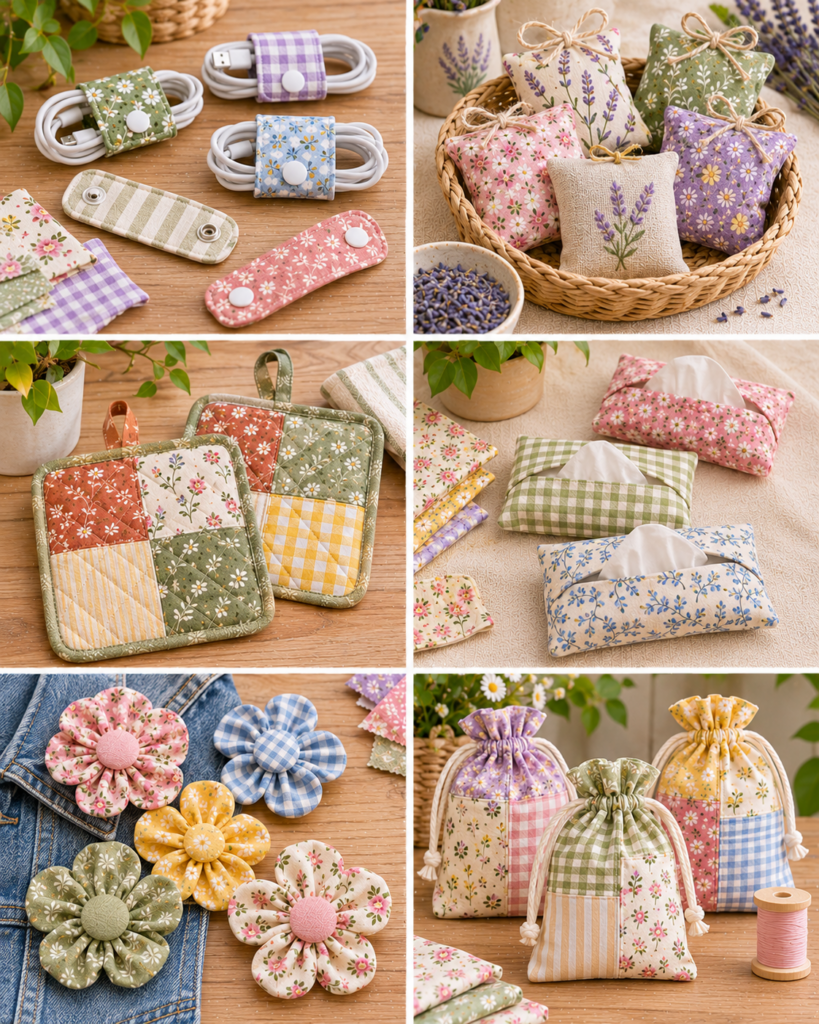
- Fabric key fob (20 to 30 min, beginner): Use a 2.5 x 10 inch strip, fuse interfacing, fold like bias tape, stitch, add hardware.
- Mini coin pouch (45 to 60 min, beginner+): Needs a small zipper and two 4 x 6 inch pieces. Add a tab for easier opening.
- Chapstick holder (15 to 25 min): Great for narrow scraps. Add a snap or small Velcro dot.
- Scrunchie (15 to 20 min): Woven cotton or rayon works well. Use 3 x 18 inch strip plus elastic.
- Bookmarks (10 to 20 min): Interface for stiffness, topstitch edges. Add a ribbon loop from tiny scraps.
- Mug tea bag catcher coaster (20 to 30 min): A 4 inch square with batting and a diagonal pocket.
- Hair bow or bow tie (20 to 40 min): Use fusible interfacing to keep it crisp.
- Needle book (45 to 60 min): Felt pages inside, fabric cover outside. Add a scrap ribbon tie.
- Zipper pull tabs (10 min batch): Fold a 1 x 3 inch strip, stitch, thread through zipper head.
- Applique patches (30 min): Fuse web to scrap shapes, stitch around edges with a zigzag.
Constraint to watch: anything that takes stress (key fobs, tabs) should be interfaced and stitched with a shorter stitch length (2.0 to 2.5). For extra durability, topstitch twice and backstitch at stress points.
Patchwork home projects
If you want visible, satisfying results, patchwork home items use scraps efficiently and look intentional. These 7 scrap fabric sewing projects work well with quilting cotton, linen blends, or light denim.
- Patchwork throw pillow cover (2 to 3 hours): Piece a 16 x 16 inch front, add an envelope back. Interface lighter fabrics to prevent rippling.
- Mug rug (45 to 75 min): Think “mini placemat.” Add batting, quilt lines, bind with bias tape.
- Coasters set (60 to 90 min batch): 4 x 4 or 5 x 5 inches. Use absorbent layers like cotton batting or terry cloth.
- Table runner (3 to 5 hours): Use strip piecing for speed. Keep seams pressed to one side for flatter quilting.
- Pot holders (1.5 to 2 hours): Use heat-safe batting made for hot items plus a cotton top. Avoid polyester batting near heat.
- Quilted placemats (2 to 4 hours): Great for learning straight-line quilting. Bind edges for a polished finish.
- Fabric bunting (1 to 2 hours): Triangle flags from medium scraps, stitch to bias tape. Perfect for parties or a craft room.
Realistic constraint: patchwork grows and shrinks as you sew. Measure frequently and square up with a ruler. If your seams feel bulky, press them open for a flatter finish, especially on runners and placemats.
Reusable practical makes
Reusable items are where scrap fabric sewing projects really pay off over time. You reduce disposable products and you get handmade items that fit your routine. Here are 8 useful ideas that are beginner-friendly and easy to wash.
- Reusable makeup wipes (30 to 60 min batch): Cotton flannel or jersey on one side, terry or bamboo on the other. Serge or zigzag edges to prevent fraying.
- Unpaper towels (60 to 90 min batch): Use cotton and flannel. Add snaps if you want them to roll onto a tube.
- Produce bags (45 to 75 min): Lightweight cotton or mesh. Add a drawstring casing. Avoid thick seams that make the top bulky.
- Snack bag (60 to 90 min): Cotton outside, food-safe liner inside if you have it. If not, use it only for dry snacks and wash often.
- Bowl cozy (60 to 90 min): Must be 100 percent cotton fabric, cotton thread, and cotton batting for microwave safety. Quilt it so layers do not shift.
- Fabric gift bags (30 to 60 min): French seams for a clean interior. Make a set in multiple sizes from medium scraps.
- Dusting cloths (20 to 40 min): Flannel squares with a simple hem. Keep a basket under the sink for quick grabbing.
- Apron pockets add-on (30 to 45 min): Upgrade an old apron by adding patch pockets from fun scraps.
Troubleshooting tip: if reusable items curl in the wash, your fabric grain may be off. Square your pieces before sewing and prewash if the fabric is likely to shrink.
Piecing and stabilizers
Successful scrap fabric sewing projects depend on controlling stretch, bulk, and seam strength. Stabilizers are not “cheating,” they are what make small pieces behave like one solid fabric.
- Choose a piecing seam allowance: A consistent 1/4 inch is standard for patchwork. If you prefer 3/8 inch for durability, commit to it across the whole project.
- Press, do not iron: Lift and press seams to avoid stretching bias edges. Then press seams to one side or open depending on bulk.
- Use interfacing under crumb piecing: For very tiny pieces, fuse lightweight woven interfacing to a foundation fabric, then stitch scraps on top. This prevents distortion.
- Add structure where hands pull: Key fobs, pouches, and tote corners benefit from fusible fleece or medium interfacing.
- Mind thickness at intersections: Grade seam allowances by trimming one side narrower, or use a hump jumper tool when topstitching over bulky joins.
Design variation: try “quilt as you go” panels for pouches, then cut the pouch pieces from the quilted fabric. It turns chaotic scraps into a stable, professional-looking textile.
Safety note: follow the interfacing manufacturer heat settings and use a pressing cloth to avoid scorching synthetic blends.
Color coordination
Color is what makes scrap fabric sewing projects look curated instead of random. A simple plan helps, even if your scraps are wildly varied.
- Pick a base neutral: Use one grounding fabric like cream, denim, charcoal, or black. Mix scraps around it so the eye has a place to rest.
- Repeat 2 to 3 accent colors: For example, navy plus mustard plus blush. Even tiny repeats across a patchwork panel make it feel intentional.
- Use value, not just color: Spread light, medium, and dark pieces evenly. If all your darks land in one corner, the project looks unbalanced.
- Control print scale: Combine small prints with solids, and use large prints as occasional “feature” patches so they do not overwhelm.
Realistic constraint: not every scrap will match. Give yourself permission to set aside “orphan” colors for a different project category, like a rainbow crumb quilt or kids items where playful mixing works.
Quick trick: snap a photo in black and white. If the values look evenly distributed, your patchwork will read well even with mixed prints.
Zero-waste tips and storage
Zero-waste is not all-or-nothing. The easiest system is one you will maintain. Set up a small workflow so scraps move from “pile” to “project” without guilt.
- Keep a “crumb jar”: Tiny snippets go into one container. When it is full, use it for stuffing (draft stoppers, pin cushions) or crumb piecing on a foundation.
- Pre-cut common shapes: If you often quilt, cut scraps into 2.5 inch strips, 5 inch squares, and 2 inch squares. These sizes feed countless patterns and reduce decision fatigue.
- Store by project category: One bin for pouch-sized pieces, one for patchwork pieces, one for batting and interfacing offcuts. Label them clearly.
- Use awkward strips as binding: Join strips on a diagonal seam to create continuous binding. Press seams open to reduce bulk.
Variation: if space is tight, store scraps in large envelopes sorted by color. Add a note on each envelope with ideas that match the size inside, like “coasters, tabs, applique.”
Reader testimonial: “I started sorting my scraps into ‘tiny, small, and pouch-sized’ like you suggested, and it totally changed how often I sew. I made four mug rugs in one afternoon because I could grab a stack and start stitching right away.”
Common Mistakes and How to Fix Them
Most frustrations with scrap fabric sewing projects come from a few predictable issues. Here is how to fix them without starting over.
- Pieces warp or don’t line up: Cause is stretching on the bias or skipping pressing. Fix by using a walking foot (if you have one), shortening stitch length slightly, and pressing each seam before adding the next piece. Square up your block often.
- Patchwork panel ends up too small: Add a border. Borders look intentional and help you hit a target size for pillows, pouches, and placemats.
- Bulky seams that won’t topstitch: Grade seams (trim one side narrower), press seams open at thick intersections, and use a denim needle for heavy layers like jean scraps.
- Fraying edges inside pouches: Finish seams with zigzag, serger, or bias binding. For very small pouches, a simple lining hides raw edges best.
- Wavy zipper installation: Stabilize zipper area with interfacing and avoid stretching fabric as you sew. Baste first, then stitch again for a clean finish.
- Items not washable or misshapen after washing: Prewash fabrics when possible, use consistent fiber types in one project, and choose cotton thread for microwave-safe makes like bowl cozies.
Frequently Asked Questions About Scrap Fabric Sewing Projects: 25 Useful Ideas
What can I sew with tiny scraps?
Tiny scraps are best used where size variation is fine or where pieces are stitched onto a foundation. Make zipper pull tabs, patch appliques, needle book decorations, or crumb-quilt panels for pouches. You can also use tiny pieces as stuffing for pin cushions or draft stoppers. If you want them visible, sew them onto lightweight interfacing or muslin as a base, then trim the finished panel into usable shapes.
How do I combine fabric types?
Combine similar weights whenever possible. If you mix quilting cotton with denim or canvas, stabilize the lighter fabric with fusible interfacing so it feeds evenly. Avoid mixing very stretchy knits into woven patchwork unless you use a knit stabilizer or fuse interfacing first, because knits can ripple and distort. For washable items, try to keep fiber care similar, like cotton with cotton, to reduce uneven shrinking.
Which projects are quickest?
The quickest scrap fabric sewing projects are bookmarks, zipper pull tabs, scrunchies, simple coasters, and fabric gift bags. To make them even faster, batch your steps: cut all pieces first, then fuse interfacing to everything, then sew assembly-line style. If you are short on time, skip zippers and choose envelope closures, ties, or simple fold-over designs that only need straight seams.
Do I need a sewing machine for these projects?
Not for all of them. Hand sewing works well for bookmarks, scrunchies (with patience), applique patches, and small repairs. For items that take stress like key fobs, pouch seams, and bowl cozies, a machine stitch is faster and usually stronger. If you hand sew, use backstitch for seams and reinforce stress points with extra stitches.
What stitch length should I use?
For general seams on quilting cotton, a 2.5 mm stitch length is a good default. Shorten to about 2.0 to 2.2 mm for small items and stress areas like key fobs and tabs, because shorter stitches hold better. Lengthen to around 3.0 mm for topstitching if you want a neat, professional look, especially on pouches and placemats.
How do I make patchwork look neat as a beginner?
Cut accurately, sew with a consistent seam allowance, and press every seam. Squaring up is the big difference maker: trim blocks to a true rectangle or square before joining them to other pieces. Also, choose one unifying fabric (a neutral or a repeated print) so the overall look feels planned even if the scraps are varied.
Can I use old clothing as scrap fabric?
Yes, but prep it first. Wash and dry it, then cut around worn areas. Remove bulky seams and hems unless you want them as a design detail. T-shirt jersey works best for stretchy items like headbands or wipes, while woven shirts and jeans work well for pouches, coasters, and patchwork panels. Stabilize thin fabrics with interfacing.
What is the best way to finish edges without a serger?
A zigzag stitch, an overcast stitch (if your machine has one), or pinking shears can reduce fraying. For a very clean look, line your project or use French seams on simple shapes like gift bags. Bias binding is excellent for flat items like mug rugs and placemats, and it also protects edges from heavy washing.
How do I care for finished items so they last?
Wash similar fibers together, use cool to warm water for cotton projects, and avoid high heat drying if items include interfacing that might bubble. Press after washing to restore shape, especially for patchwork runners and placemats. For bowl cozies and pot holders, inspect for worn spots and replace if batting becomes thin or seams open near heat-exposed areas.
Final Thoughts
Scrap fabric sewing projects are the perfect mix of practical and satisfying: you reduce clutter, learn core techniques, and end up with items you will genuinely use. Start with one category that matches your scrap sizes, like tiny accessories for quick wins or patchwork home projects for a bigger visual payoff. As you sew, focus on consistent seam allowances, pressing, and adding stabilizers when needed, because those habits translate directly into better garments and quilts later. Your next natural step is to make a coordinated set, like matching coasters plus a mug rug, or a pouch trio in the same color palette, so your scraps become a cohesive collection rather than random leftovers.