Crafts to Do When Bored: 30 Easy Ideas
When you’re stuck at home, waiting out a rainy afternoon, or just feeling restless, crafts to do when bored are a simple way to turn that energy into something satisfying you can actually use. The best part is you do not need to be “artsy” to make something cute and functional. With a few basic supplies and a clear plan, you can finish a mini project in five minutes or settle into a longer, relaxing make that upgrades your room or gifts drawer.
Below you’ll find 30 easy craft ideas grouped by time, materials, and tools. Each section includes beginner-friendly steps, realistic constraints (like drying time), and quick troubleshooting so your finished project looks intentional, not accidental. Pick one idea, set a timer, clear a small workspace, and you’ll be surprised how fast boredom turns into momentum.
Why This Project Is Worth Making
Keeping a short list of crafts to do when bored is genuinely useful because it turns “I have nothing to do” into a repeatable routine. Most of the ideas in this article take 5 to 45 minutes, cost $0 to $10 if you already have basics, and are suitable for beginners, teens, and adults. You’ll end up with something tangible: a bookmark, a cord organizer, a mini wall print, a plant label set, or a gift tag stash for future birthdays.
Difficulty stays low because these projects use simple skills: folding, cutting, gluing, wrapping, and basic hand stitching. They are also easy to pause, which matters if you craft in short bursts. If you live in a small space, many of these are “tray crafts” you can do at a coffee table with a small box of supplies.
These boredom crafts are also great if you want calm, screen-free time. Repetitive steps like weaving paper strips or winding yarn can be relaxing without requiring deep focus. If you are crafting with kids, choose non-toxic supplies and skip hot glue unless an adult is handling it. You do not need perfection, you need a finished object and a small win.
Supplies, Materials, and Beginner Setup
A small, flexible craft kit makes crafts to do when bored much easier because you can start immediately instead of hunting for tools. You can build this over time from what you already have.
- Cutting tools: Scissors are enough for most projects. A craft knife is optional for cleaner edges on cardstock, but use a cutting mat and store blades safely.
- Adhesives: Glue stick for paper, white PVA glue for stronger bonds, and double-sided tape for clean, instant sticking. Hot glue is fast but can burn skin, so use finger guards or tweezers for small parts.
- Marking tools: Pencil, fine marker, and a ruler. A bone folder is nice for crisp folds, but the back of a spoon works.
- Basic fibers: A small ball of yarn, embroidery floss, a sewing needle, and a few buttons or beads. Old T-shirts substitute for fabric strips.
- Finishing supplies: Clear tape, washi tape, and optional acrylic sealer for items that will be handled a lot.
Beginner setup: protect your surface with scrap cardboard, keep a small trash bowl for paper bits, and work in good light. Safety notes: ventilate if you use spray adhesive or paint, do not heat-seal synthetic ribbon without supervision, and keep sharp tools and small beads away from young children and pets.
Choose by time and materials
If you want fast results, choose from these crafts to do when bored based on what is already in your house. Time estimates assume you have supplies ready.
- 5 to 10 minutes, paper only: origami corner bookmark, gift tags, paper chain garland, mini envelopes for notes.
- 10 to 25 minutes, paper plus tape/glue: magazine collage postcard, layered silhouette art, decorated storage labels.
- 20 to 45 minutes, yarn/fabric: tassel keychain, braided T-shirt bracelet, no-sew fleece coaster, simple scrunchie with hand stitches.
- 30 to 60 minutes, upcycling: tin can pen holder, cereal box drawer divider, jar lantern, cardboard phone stand.
Realistic constraints help you pick wisely. Wet glue needs drying time, so choose tape if you need “finish now.” Paint often needs two coats plus drying, so pick markers or collage for immediate payoff. If you are short on space, avoid glitter (it travels) and choose colored paper or washi tape instead.
Design variations: pick one “rule” before you start, such as only two colors, only geometric shapes, or one repeated motif (stars, daisies, stripes). Limiting choices prevents decision fatigue and makes your finished craft look cohesive.
Five-minute paper ideas
Paper projects are perfect crafts to do when bored because they start instantly and clean up quickly. Use printer paper, notebook paper, old magazines, or packaging paper.
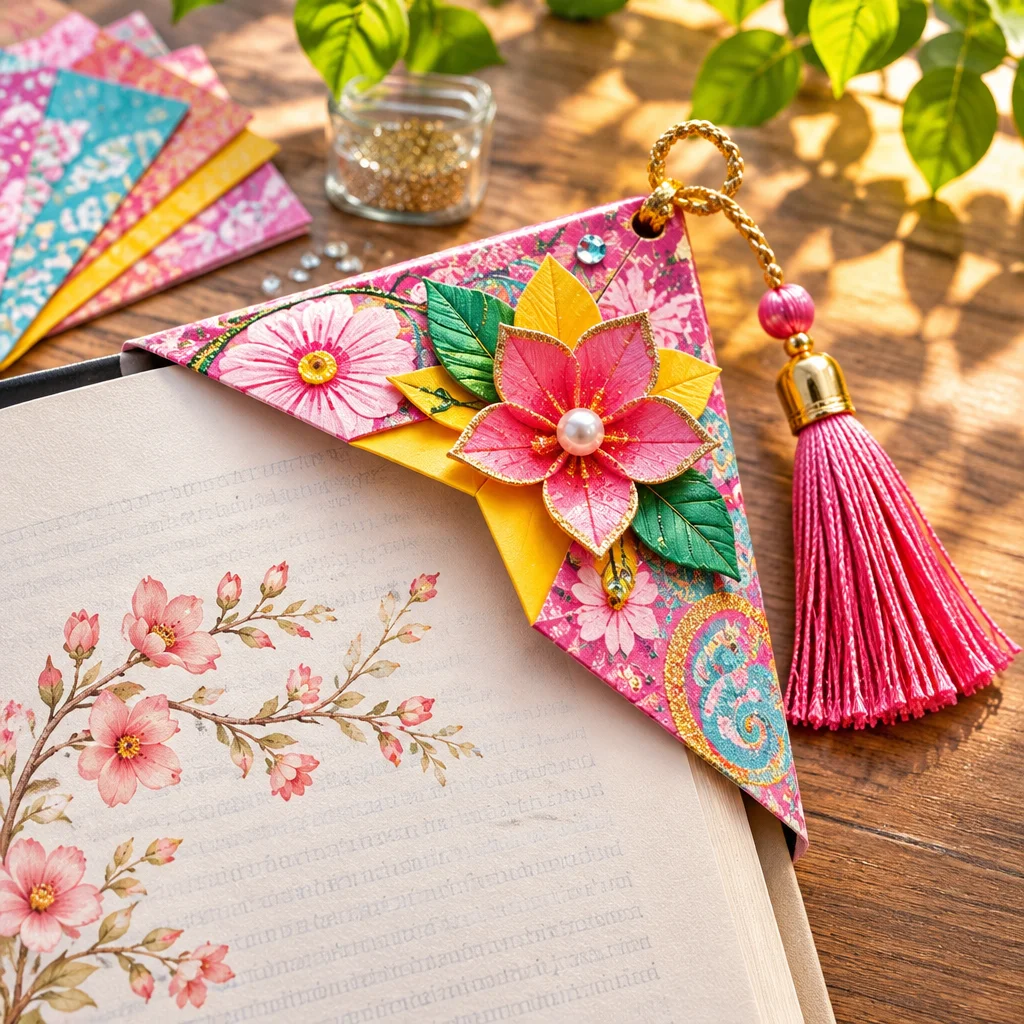
- Origami corner bookmark (5 minutes): Fold a square into a triangle, fold corners up to form a pocket, then fold flaps down into the pocket. Decorate with a face or pattern. Troubleshoot: if it slips off pages, your folds are loose. Sharpen creases with a ruler edge.
- Mini gift tags (5 minutes): Cut rectangles, punch a hole, and reinforce the hole with clear tape before tying string. Variation: stamp with potatoes or draw icons (cake, heart, leaf).
- Paper rosette (5 to 8 minutes): Accordion-fold a strip, glue ends to form a ring, then glue a circle on top. Use for wall decor or a card front. Tip: double-sided tape prevents wrinkly glue marks.
- Weaved paper placemat sample (8 to 10 minutes): Cut slits in one sheet, weave strips through. It is small but teaches weaving basics. Keep strip width consistent for a tidy grid.
- Quote card (5 minutes): Use a thick index card, write a short quote, border with washi tape, and tape it near your desk. Seal lightly with clear tape if it will be handled.
Finishing advice: if edges look messy, trim all sides after folding and gluing so everything aligns. Avoid soaking paper with wet glue; use a thin layer or glue stick for flat results.
Yarn and fabric mini makes
These crafts to do when bored are tactile and satisfying, and they turn scraps into useful items. If you do not sew, start with wrapping, braiding, or simple knots.
- Tassel keychain (10 to 15 minutes): Wrap yarn around a book, tie tightly at one end, cut the loops at the other end, and wrap a short strand around the “neck” to form the tassel. Add a key ring with a lark’s head knot. Troubleshoot: if it looks thin, wrap more times.
- No-sew T-shirt braid bracelet (10 minutes): Cut three long strips from an old T-shirt, stretch them to curl edges, braid, and tie ends. Variation: add a bead by threading it onto one strip before braiding.
- Simple felt heart pin (20 minutes): Cut two hearts, blanket stitch around the edge, and add a safety pin on the back. Stuff lightly with cotton for dimension. Safety: use sharp needles carefully and store them in a container.
- Pom-pom (10 minutes): Use a fork: wrap yarn around the tines, tie tightly through the middle, cut loops, then fluff and trim. Make multiple for a garland.
- Hand-sewn scrunchie (30 to 45 minutes): Sew a fabric tube with a running stitch, turn right side out, thread elastic through, and stitch ends closed. Tip: press fabric with a warm iron (ask an adult if needed) for crisp seams.
Care notes: yarn items can pill if rubbed. Trim fuzz with small scissors. Fabric accessories last longer if you knot ends securely and hide knots inside folds.
Upcycled household projects
Upcycling is my favorite category of crafts to do when bored because the “materials” are usually free: jars, cardboard, cans, and packaging. Clean items first and remove labels with warm soapy water or rubbing alcohol.
- Tin can desk organizer (30 to 45 minutes): Sand or cover the rim with tape to remove sharpness, wrap with paper or fabric, then seal with glue. Add labels for pens, brushes, or scissors. Safety: check for sharp edges before handling.
- Cereal box drawer dividers (20 to 30 minutes): Cut strips to drawer height, notch them to interlock, and tape corners. Variation: cover with contact paper for durability.
- Jar lantern (25 minutes plus drying): Brush diluted glue onto a jar, apply tissue paper pieces, then add a battery tea light. Avoid real flames in decorated jars because paper and glue can be flammable.
- Cardboard phone stand (20 minutes): Use thick corrugated cardboard, cut two side pieces and a base, and slot-fit them. Reinforce with tape. Troubleshoot: if it tips, widen the base or lower the angle.
- Magazine bead necklace (45 minutes): Cut long triangles, roll tightly around a skewer, glue the end, then seal with Mod Podge. String after fully dry.
Finishing tip: upcycled crafts look more polished when you repeat one color across parts, like black-and-white labels on every container.
Relaxing creative crafts
When boredom feels more like stress, choose crafts to do when bored that are repetitive and calming. These are also great for evenings because they are quiet and low-mess.
- Zentangle-style doodle tiles (15 to 30 minutes): Cut cardstock squares, draw patterns in pen, and add light shading. Variation: limit yourself to three patterns for a cohesive set.
- Watercolor gradient bookmarks (20 minutes plus drying): Tape edges, paint a gradient, let dry flat, then peel tape for crisp borders. Troubleshoot: muddy colors happen when paper is too wet. Use less water and allow layers to dry.
- Air-dry clay pinch bowl (30 minutes plus drying): Pinch from the center outward, smooth with a damp finger, and let dry 24 to 48 hours. Seal lightly if it will hold small items. Do not use for food unless clay is labeled food-safe and properly sealed.
- Simple stamp carving with erasers (30 to 45 minutes): Use a soft carving block or an eraser and carve shallow lines. Safety: carve away from fingers with a proper carving tool, not a kitchen knife.
- Washi tape collage (10 to 20 minutes): Layer tape on cardstock, then cut shapes from the taped sheet to make clean, graphic art.
Reader testimonial: “I tried the corner bookmark and the tassel keychain from your boredom craft list. The bookmark finally stays on after I creased it with a ruler like you suggested, and I made three tassels from leftover yarn. It was the perfect screen break.”
No-special-tools options
If you only have household basics, you still have plenty of crafts to do when bored. Think folding, tying, tearing, and stacking instead of measuring and cutting perfectly.
- Paper tearing collage (10 to 20 minutes): Tear shapes instead of cutting for softer edges. Glue to a page and press under a book to dry flat.
- Twine-wrapped pencil (10 minutes): Coat the pencil lightly with glue stick or a thin layer of white glue, then wrap string tightly. Clamp the end with a clothespin until dry.
- Ribbon or fabric strip bookmarks (5 to 10 minutes): Tie a knot at the end, add a bead if you have one, and seal fraying with clear nail polish if needed. Let dry before use.
- Nature rubbing art (10 minutes): Place a leaf under paper and rub with a crayon or pencil side. Layer multiple leaves for a print-like effect.
- Hand-tied mini garland (15 minutes): Tear paper strips and tie onto a longer string. Alternate colors for a tidy pattern.
Constraint to note: without a ruler, symmetry is harder. Lean into organic shapes, repeating colors, and simple patterns. Your results will look intentional if the palette is consistent.
Skill and cost guide
Use this quick guide to match your energy level to the right crafts to do when bored. “Cost” assumes you may need tape, glue, or paper you do not already have.
- Level 1 (absolute beginner, $0 to $3): paper tags, doodle tiles, nature rubbings, torn-paper collage. These rely on simple shaping and are forgiving.
- Level 2 (confident beginner, $0 to $7): rosettes, corner bookmarks, jar lanterns with tissue, tassels, pom-poms. These add assembly steps and benefit from neat finishing.
- Level 3 (patient beginner, $3 to $10): hand-sewn felt pins, scrunchies, magazine beads, simple stamp carving. These involve drying time, stitching, or careful cutting, so plan for a slower pace.
Realistic timing: “30 minutes” crafts often include 10 more minutes of cleanup, pressing, or waiting for glue to grab. If you want a truly quick win, use tape instead of wet glue, markers instead of paint, and pre-cut paper (index cards, sticky notes).
Design variations that elevate any level: choose a theme (coastal, retro, minimal), repeat one motif across several makes, or batch-produce a set (six tags, four bookmarks, three postcards). Batching saves time because you only set up once.
Common Mistakes and How to Fix Them
Even easy crafts to do when bored can go sideways for predictable reasons. Here are fixes that work without restarting.
- Wrong size: If a bookmark is too loose, refold with sharper creases and reduce the square size slightly. If a phone stand tips, widen the base or add a folded “kickstand” triangle behind it.
- Warped paper: Too much wet glue causes wrinkles. Switch to glue stick, use a thin coat of PVA, and press under a heavy book with scrap paper on top to prevent sticking.
- Weak joints: For cardboard builds, align corrugation direction for strength and reinforce stress points with tape. For yarn tassels, double-knot and add a tiny dot of glue to the knot.
- Messy edges: Trim edges after assembly rather than before. A final “squaring up” cut makes crafts look cleaner instantly.
- Colors look random: Limit to 2 to 4 colors. If it already feels busy, add a neutral layer (white cardstock backing, kraft paper border) to calm it down.
- Finish rubs off: Marker on glossy packaging can smear. Seal with clear tape or use paint pens designed for slick surfaces.
Safety reminder: if you are frustrated, pause before using sharp tools. Many craft slips happen when rushing to “just finish.”
Frequently Asked Questions About Crafts to Do When Bored: 30 Easy Ideas
Do I need a glue gun?
No. Many crafts to do when bored work better with glue stick or double-sided tape because they dry flat and clean. Use a glue gun only for thicker items like wrapping a tin can, and let the glue cool slightly before pressing materials to avoid burns.
How do I keep paper crafts from falling apart?
Make crisp folds, use the right adhesive (glue stick for flat paper, PVA for heavier pieces), and reinforce stress points with a small tab of tape on the back. Press glued items under a book while drying to improve bonding and reduce warping.
What if I do not have cardstock?
Glue two sheets of regular paper together with a glue stick, then press them flat under a book for 10 minutes. You can also cut up cereal boxes for sturdy backing. Cover printed packaging with a plain paper layer if you want a clean look.
How do I make crafts look less “kid-like”?
Limit your palette, repeat shapes, and focus on clean edges. Neutrals plus one accent color (black, white, kraft, plus gold or teal) looks instantly modern. Finish with a border, a label, or a consistent layout.
Are these crafts safe for kids?
Many are, with supervision. Avoid small beads for toddlers, use blunt scissors, and choose non-toxic glue. Skip hot glue, craft knives, and stamp carving unless an adult handles those steps. Battery tea lights are safer than candles in jar lanterns.
How do I store finished mini crafts? Keep tags, bookmarks, and cards in a labeled envelope or small box. Store yarn items in a zip pouch to prevent tangling. If you make multiples, bundle them with a rubber band or ribbon so they stay neat and ready to gift.
Final Thoughts
The best crafts to do when bored are the ones that match your time, tools, and energy today. If you want an instant win, make a corner bookmark or a set of gift tags. If you need something calming, try doodle tiles or a simple watercolor gradient. If you want practical results, upcycle a jar or box into desk storage. Choose one idea, keep the materials simple, and focus on clean finishing like crisp folds and tidy edges.
Your next natural step is to build a tiny “boredom craft kit” in a shoebox: scissors, tape, glue stick, a few papers, and a bit of yarn. When boredom hits again, you will be ready to start in under a minute and finish with something you are proud to use or share.