Cardboard Crafts for Adults: 20 Clever Ideas
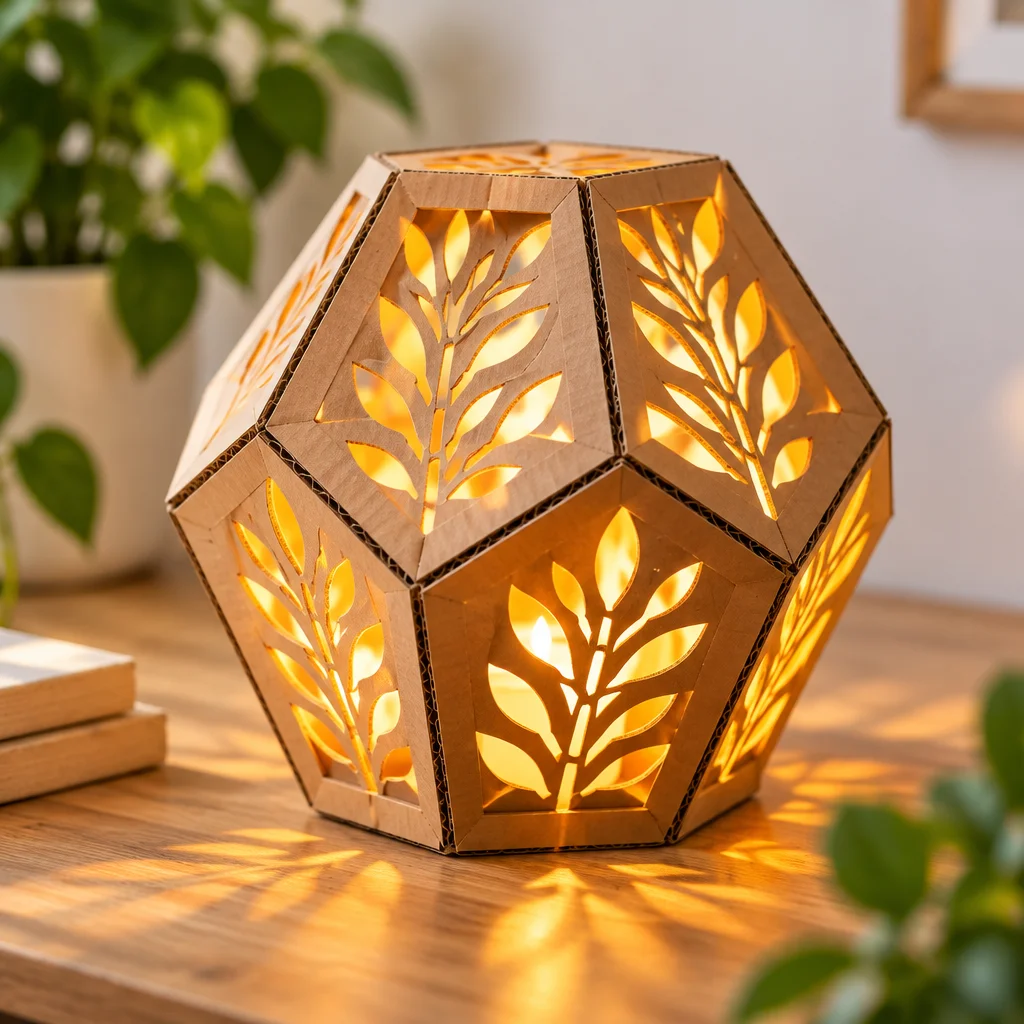
Cardboard Crafts for Adults are one of the most satisfying ways to turn “about-to-be-recycled” boxes into organizers, home decor, and gift-ready projects that actually last. If you want clever ideas that look polished (not like a kid’s school project), the key is learning a few structural basics, choosing the right cardboard, and finishing it well. In this guide, I’ll walk you through 20 adult-friendly ideas with practical construction tips, plus the techniques that make cardboard strong and professional-looking. If you’re crafting seasonally, you might also like these fresh spring craft ideas for adults or these pretty Valentine’s crafts for adults for decor pairings that work beautifully with cardboard bases.
Getting started with cardboard crafts
Before you jump into Cardboard Crafts for Adults, set yourself up for clean cuts, strong joins, and frustration-free assembly. Cardboard crafting is beginner-friendly, but it rewards patience and accurate measuring. Most of the projects below can be made in 30 to 120 minutes, and many use the same core tools. Plan for a tidy workspace, a cutting surface, and drying time if you’re painting or sealing.
Here’s a practical starter kit (with notes on why each item matters):
- Self-healing cutting mat or thick corrugated sacrificial board: protects your table and keeps blades from snagging.
- Metal ruler (18 inches or longer): a must for straight edges and safe knife control.
- Craft knife/utility knife with snap-off blades: sharp blades reduce tearing and crushed edges.
- PVA/wood glue and hot glue: PVA for strength, hot glue for quick tacking and shaping.
- Clips or painter’s tape: hold seams tightly while glue cures, which makes a huge difference in durability.
- Acrylic paint, primer, or paper to cover: finishing is what takes a cardboard piece from “temporary” to “decor.”
Start with smaller builds (desk or drawer organizers) to practice measuring, squaring corners, and clean finishing. Save large-load projects like bookends for when you’re comfortable laminating layers and reinforcing joins.
Cardboard types, safe cutting and strong adhesives
Not all cardboard is equal. Single-wall corrugated (most shipping boxes) is versatile and easy to cut. Double-wall corrugated is stiffer, better for load-bearing pieces like bookends and shelf bins, but takes more passes with a knife. Chipboard (cereal boxes) is thin and great for templates, drawer dividers, and smooth surface layers.
Cutting safety is non-negotiable: always cut away from your body, keep your non-cutting hand behind the ruler edge, and use multiple light passes instead of forcing one deep cut. Switch blades often; dull blades cause tearing and slips. For adhesives, use PVA/wood glue when you need real strength, especially on corrugated edges. Use hot glue to tack pieces in place quickly, then reinforce with PVA along the seam for long-term hold. If you use spray adhesive for paper or fabric, ventilate well and protect surfaces from overspray.
20 clever cardboard craft ideas for adults
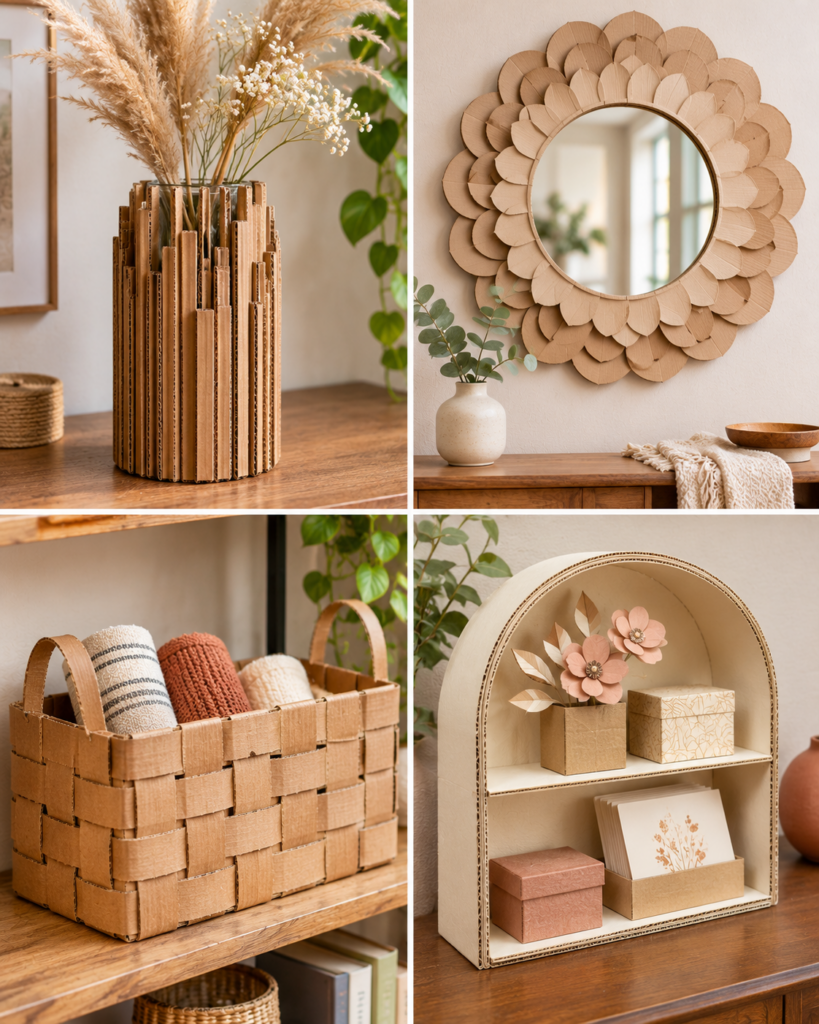
These Cardboard Crafts for Adults are grouped by function so you can pick what you need right now: desk organization, closet and shelf storage, wall decor, gifting, and workshop helpers. Most projects use the same building blocks: rectangles, clean folds, and reinforced corners. As you browse, notice how many can be customized just by changing the cover material or paint finish. If you like decorating for holidays, cardboard bases also pair nicely with seasonal details from these Thanksgiving crafts for adults or these Easter craft ideas for adults.
Pen holders, letter sorters, phone stands and drawer dividers
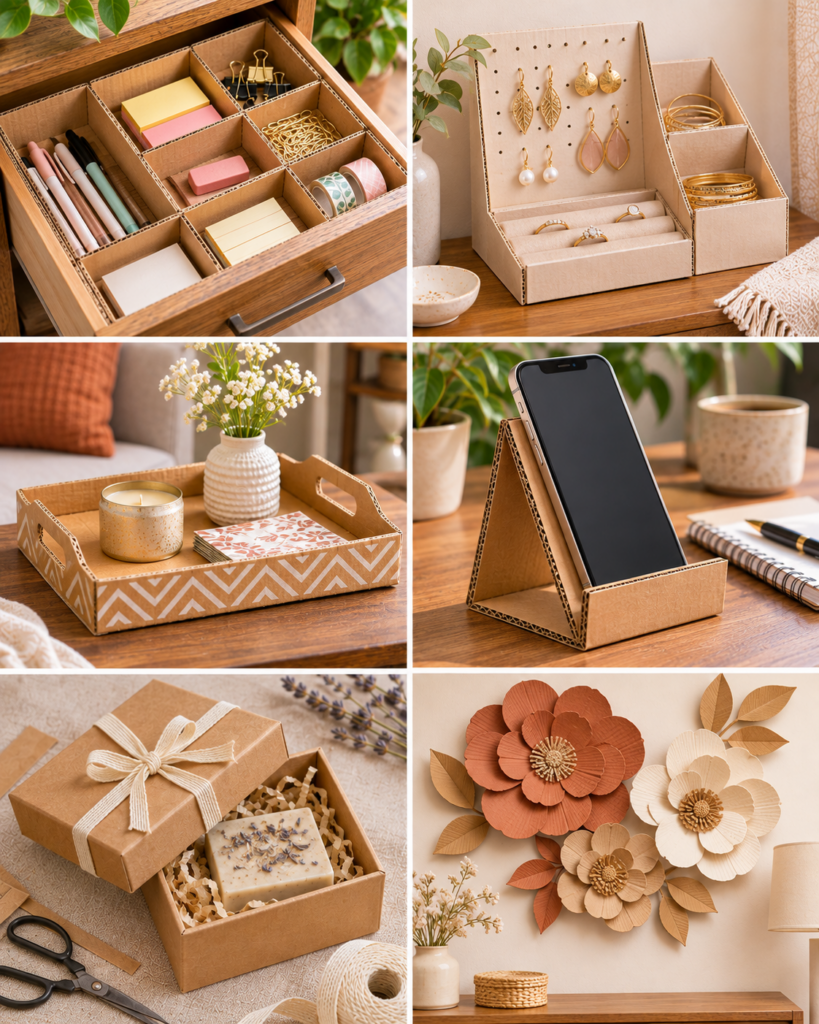
- Pen holder tower: Roll chipboard into tubes, glue onto a weighted base, and wrap with paper for a sleek desktop organizer.
- Angled letter sorter: Make three stepped slots from corrugated panels; reinforce the base with an extra layer so it doesn’t tip.
- Minimal phone stand: Cut a single piece with a back leg and a charging-cable notch; laminate two layers for stiffness.
- Drawer dividers: Use chipboard strips with slotted joints; test-fit inside the drawer before gluing for a snug grid.
Troubleshooting: if dividers bow, your strips are too thin or too tall for the drawer length. Add a second layer (laminate) or reduce height by 1/4 inch. For a phone stand that wobbles, widen the base and add a triangular side brace.
Fabric-covered boxes, magazine holders, shelf bins and jewelry organizers
- Fabric-covered keepsake box: Build a simple lid-and-base box, then cover with cotton using spray adhesive and crisp folded corners.
- Magazine holder: Cut the classic angled profile; add an internal spine strip so the handle area doesn’t collapse.
- Labeled shelf bins: Use double-wall cardboard if possible; add a glued-in false bottom to hide seams and add weight.
- Jewelry organizer with compartments: Make shallow trays and stack them in a sleeve; line with felt to prevent scratches.
Variation tip: cover the front panel with textured wallpaper samples, faux leather, or linen for a boutique look. If fabric bubbles, you applied too much glue or didn’t smooth from center outward. Lift gently and re-squeegee with a card.
Layered wall art, arch frames, trays and geometric sculptures
- Layered wall art: Stack cut shapes (botanical, abstract waves, city map outlines) for shadow depth; edge-paint for crisp lines.
- Arch frame: Create an arched window shape from laminated layers; add a backing panel and hang with picture strips.
- Decorative tray: Build a shallow box with mitered corners; line with paper and seal for wipeable use (decor only, not food).
- Geometric sculpture: Score fold lines to make prisms or faceted shapes; fill seams with lightweight spackle before painting.
Finishing advice: layered art looks more professional when you darken cut edges (paint marker or acrylic) so the corrugation doesn’t show. For sculptures, score before folding to avoid cracking the top paper layer.
Rigid gift boxes, photo frames, hanging stars and wreaths
- Rigid gift box: Make thick “book board style” panels by laminating two corrugated layers with grains crossed for stiffness.
- Photo frame: Build a sandwich frame with a window mat; add a folded stand leg or wall hanger tab.
- Hanging star: Cut two star shapes, add a spacer strip around the edge for dimension, then wrap in metallic paper.
- Wreath base: Spiral-cut a ring, laminate two rings, and wrap with ribbon, twine, or fabric strips for seasonal wreaths.
Tip for gift boxes: keep the lid slightly larger by adding 1/8 inch clearance on each side, and test-fit before covering. If you like holiday crafting, a cardboard wreath base works beautifully under florals, ornaments, or paper accents you can adapt from your seasonal decor plans.
Cable organizers, seed packet holders, bookends and craft-tool caddies
- Cable organizer dock: Make a low channel with labeled slots; add a weighted base so it doesn’t scoot on your desk.
- Seed packet holder: Create a file-box style organizer with dividers labeled by planting month; seal it to handle shed humidity.
- Bookends: Build L-shapes, then laminate 3 to 5 layers for each side and add a triangular gusset for strength.
- Craft-tool caddy: Combine a handle spine with side walls and internal sections for scissors, brushes, and rulers.
Load-bearing note: bookends and caddies are where Cardboard Crafts for Adults feel most “real,” but only if you reinforce properly. If your bookend leans, add more layers to the vertical panel and widen the foot.
“I made the magazine holders and matching shelf bins using shipping boxes and linen-look contact paper. The big difference was laminating the base and taping the seams while the glue dried. They’ve been on my office shelf for months and still look crisp.”
How to build sturdy cardboard crafts
If you want Cardboard Crafts for Adults that survive daily use, focus on structure first, decoration second. Most “flimsy” results come from rushed cuts, weak end-grain glue joints, and unreinforced corners. The good news is that cardboard becomes surprisingly strong when you laminate layers, align corrugation thoughtfully, and clamp or tape joints while the glue cures.
Use these techniques for nearly every organizer, tray, or box in this article. You’ll notice your pieces look straighter, edges stay sharp, and surfaces don’t ripple as much during finishing.
Cutting straight edges with a ruler and craft knife
- Measure twice and mark lightly: Use pencil tick marks and connect them with the ruler. Heavy lines can show through light paper covers.
- Clamp the ruler with your hand position stable: Keep fingers on top of the ruler, never alongside the blade path.
- Make 3 to 6 light passes: Let the blade do the work. Light passes prevent the top paper from tearing and keep corners square.
- Rotate the cardboard, not your wrist: Turning the work helps you keep the knife vertical, which improves edge quality.
- Clean up fuzzed edges: A quick sanding block pass or edge-paint hides minor imperfections before finishing.
Why it matters: straight, vertical cuts make seams close tightly. Tight seams need less filler, less glue, and look far more professional.
Reinforcing corners, bases and glued joints
- Laminate for strength: Glue two panels together with corrugation running perpendicular. Weight them flat while drying to avoid warping.
- Add corner gussets: Glue small triangles or L-strips inside corners of boxes, bins, and bookends. This stops racking and leaning.
- Use glue correctly: PVA needs thin, even coverage and pressure. After applying, press and tape or clip for 20 to 40 minutes.
- Reinforce seams with paper tape: Kraft paper tape or gummed tape over internal seams spreads stress and prevents splitting.
- Double up bases: The base takes the most abuse. Add a second layer or a hidden “false bottom” panel for stiffness and a clean interior.
Safety note: hot glue can burn. Use it for quick tacks, then keep fingers away from fresh glue lines. For heavy reinforcement, rely on PVA plus pressure rather than thick hot glue blobs, which can create bumps under paper coverings.
Making recycled cardboard look finished
The difference between “recycled” and “handmade boutique” is almost always the finish. Cardboard edges, seams, and printed box graphics need either coverage or intentional styling. For Cardboard Crafts for Adults, I recommend choosing one finish style per project: fabric wrap, decorative paper, or paint. Mixing too many finishes can look busy unless you keep a tight color palette.
Always do a quick surface prep: remove tape, trim crushed corners, and sand raised spots lightly. If the cardboard has oily marks or glossy printing, cover it rather than trying to paint over it directly.
Covering cardboard with fabric or decorative paper
- Cut your cover oversized: Leave 1/2 to 1 inch excess to wrap edges neatly.
- Apply adhesive evenly: Spray adhesive is great for large faces; PVA thinned slightly with water works for paper if applied with a foam brush.
- Smooth from center outward: Use a card or brayer to push out air bubbles for a crisp finish.
- Miter corners: Trim fabric or paper at corners so layers don’t bulge. Fold like wrapping a gift for clean points.
- Line the inside: Add a final interior liner piece to hide raw wrap edges and make it feel store-bought.
Troubleshooting: if paper wrinkles, your glue is too wet or you overworked it. Use less adhesive, work faster, and choose slightly heavier paper (scrapbook paper is more forgiving than thin gift wrap).
Painting and sealing without warping
- Prime first when possible: A light coat of gesso or primer reduces paint soak-in and helps prevent blotchiness.
- Use thin coats: Two to three light coats of acrylic are better than one heavy coat, which can soften the paper layer and warp panels.
- Paint both sides for flat pieces: For wall art or signs, balancing moisture on both sides helps prevent curling.
- Let it dry flat under light weight: Drying flat keeps panels from bowing. Avoid trapping wet paint under heavy objects, though.
- Seal for durability: Use a water-based clear sealer in thin coats for organizers and trays (decor use). Test first to ensure it doesn’t reactivate paint.
Care note: even sealed cardboard should not be soaked. Wipe gently with a slightly damp cloth, and keep storage pieces away from humid floors or damp basements.
Frequently Asked Questions About Cardboard Crafts for Adults: 20 Clever Ideas
What can adults make out of cardboard?
Adults can make surprisingly practical items from cardboard: drawer dividers, shelf bins, magazine files, desk organizers, gift boxes, wreath bases, and even sturdy bookends when properly laminated. Home decor is also a great match, including layered wall art, geometric sculptures, and arch-style frames. The trick is picking the right cardboard thickness and reinforcing stress points so the project holds its shape with daily use.
How do you make cardboard crafts look professional?
Professional-looking results come from three things: clean cutting, squared assembly, and a deliberate finish. Use a metal ruler and several light knife passes for crisp edges. Tape or clip joints while glue dries so corners stay sharp. Finally, cover with fabric or decorative paper, or prime and paint in thin coats. Edge-painting (coloring the cut edges) is a small step that makes a huge visual difference.
What glue works best for strong cardboard projects?
PVA glue (often labeled white glue or wood glue) is the best all-around choice for strong cardboard builds because it soaks slightly into the paper fibers and cures rigid. Use it with pressure: tape, clips, or weights. Hot glue is excellent for quick positioning and small parts, but it can pop off under stress if used alone on large seams. For coverings, spray adhesive works well with fabric and paper when used in a ventilated area.
How do I stop cardboard from bending or collapsing?
Prevent bending by laminating layers and reinforcing corners. Glue two panels together with corrugation running in different directions, then press them flat while drying. For boxes and bins, add internal corner gussets and double the base. If a tall panel still flexes, add a hidden spine strip or create a folded edge (a 1/2 inch return fold) to act like a beam and increase stiffness.
Can I paint over shipping box printing and logos?
You can, but it is not always the best route. Dark printing often shows through light paint unless you prime first with gesso or a stain-blocking primer. For the cleanest look, cover printed areas with paper or fabric, or glue a fresh sheet of plain cardstock/chipboard over the face before painting. Also remove glossy packing tape completely, since paint tends to bead and peel on it.
Are cardboard crafts safe to use around heat or moisture?
Cardboard is flammable and absorbs moisture, so keep projects away from candles, stovetops, heaters, and steamy bathrooms. Even when sealed, cardboard items are best for dry indoor use. For plant-related projects like a seed packet holder, seal lightly and keep it off damp surfaces. If you need something washable or heat-safe, switch the design to wood, plastic, or metal instead of forcing cardboard beyond its limits.
Final thoughts and using cardboard scraps creatively
Cardboard Crafts for Adults work best when you combine smart structure with a clean finish. Pick one project from the list that solves a real problem, like a letter sorter, drawer dividers, or a shelf bin, then practice straight cuts, laminated layers, and reinforced corners. Once you’ve built one sturdy piece, you can batch-make matching sets from the same box for a cohesive home-office look. Your next step: break down two or three shipping boxes, sort the flattest panels for “good surfaces,” and keep a small bin of strips and offcuts for gussets and dividers. Those scraps are exactly what turn simple cardboard into something strong, useful, and good-looking.