Fat Quarter Sewing Projects: 20 Easy Ideas
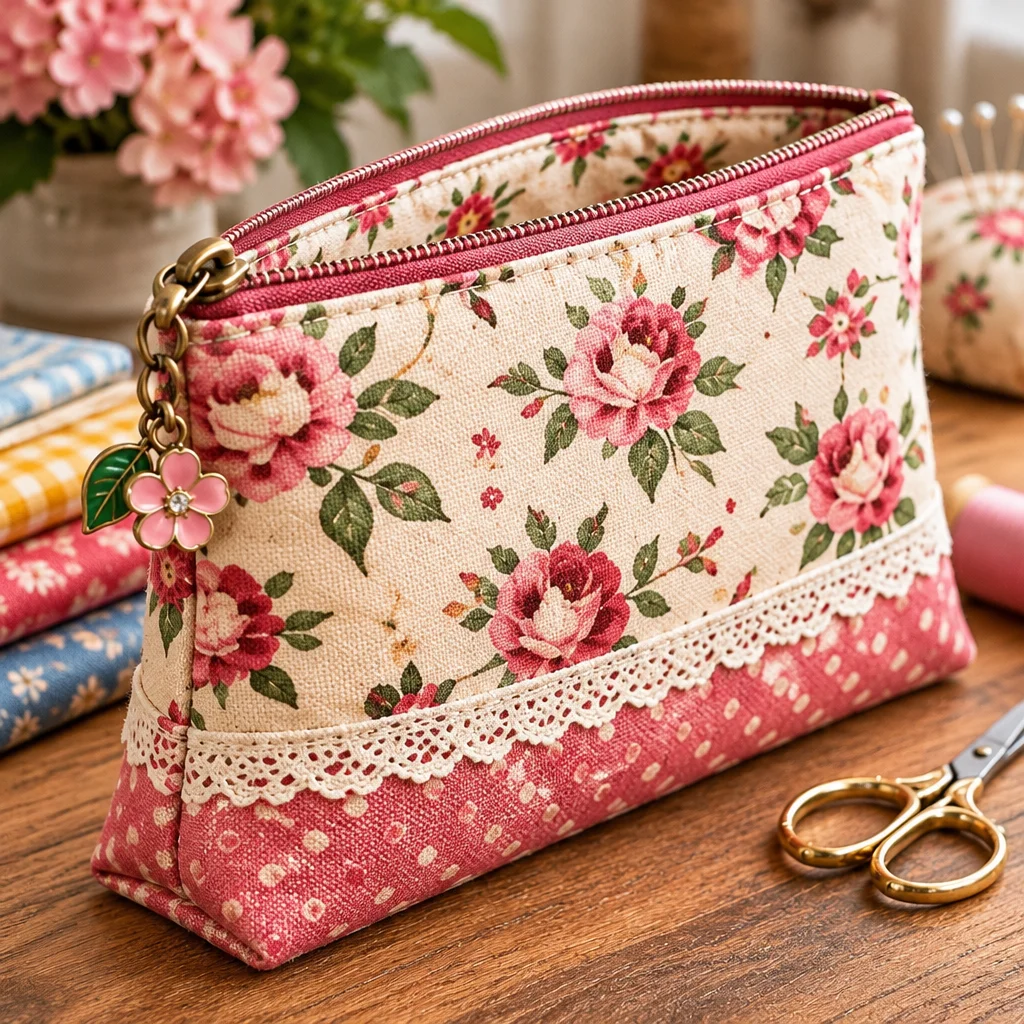
Fat quarter sewing projects are the sweet spot for quick wins and practical makes. A fat quarter is small enough to feel manageable, but large enough to create gifts, organizers, and even patchwork panels without committing to a full yard of fabric. If you have a stack of pretty quilting cotton you love too much to “waste,” this guide will help you turn it into useful items with clean finishes and beginner-friendly techniques. You will find 20 easy ideas, plus planning tips so you can cut confidently, sew accurately, and avoid the most common issues like wavy seams and stretched fabric. Whether you are sewing your first zipper pouch or using up scraps from a quilt, these projects are designed to be satisfying, budget-friendly, and actually finished.
Why This Project Is Worth Making
Fat quarter sewing projects are worth making because they deliver high impact with low pressure. Most of the ideas in this article can be completed in 20 to 90 minutes, making them perfect for weekend crafting, after-school sewing, or building skills between larger quilts. Cost stays low because you can use one fat quarter, leftover batting, and basic notions like elastic or a zipper. If you shop sales or use stash fabric, many makes come in under the cost of a store-bought equivalent.
Difficulty ranges from very beginner (coasters, scrunchies, bookmarks) to confident beginner (zipper pouches, boxed corners, simple quilting). These are also ideal for anyone learning to sew straighter seams, practice pressing, or get comfortable with topstitching. If you are teaching a teen or a friend, fat quarters are less intimidating than large yardage and mistakes feel less costly.
The reader outcome is clear: you will turn small cuts of fabric into finished items you can use daily, gift with pride, or donate. Many projects scale easily, so once you master one pouch or organizer, you can repeat it assembly-line style for holidays and birthdays.
“I used your fat quarter zipper pouch steps and finally got a zipper in without puckers. I made three in one afternoon and used the leftovers for matching coasters. The small size made it feel doable.”
Supplies, Materials, and Beginner Setup
You do not need a fancy studio for fat quarter sewing projects, but a few basics make results look polished. Quilting cotton is the most common fat quarter fabric, and it behaves well under a home machine. If your fat quarter is a looser weave (some linens or rayon blends), plan to stabilize it with interfacing for pouches or anything that needs structure.
- Sewing machine with a fresh needle: A size 80/12 universal needle works for quilting cotton. Change needles if you hear popping sounds or see skipped stitches.
- Thread: All-purpose polyester thread is strong and forgiving for beginners.
- Cutting tools: Fabric scissors work, but a rotary cutter and ruler improve accuracy for patchwork and straight edges.
- Iron and pressing surface: Pressing is not optional. It controls shrinkage, sets seams, and prevents wavy edges.
- Notions: Zippers (7 to 9 inch for small pouches), 1/4 inch to 1/2 inch elastic for scrunchies, and basic interfacing.
Budget substitutions: use an old pillowcase for lining, repurpose a tote bag strap, or use fusible fleece instead of quilt batting. Safety notes: keep fingers clear of the needle path, unplug the iron when not in use, and close rotary cutters immediately after each cut.
Standard fat quarter dimensions
A standard fat quarter is a quarter-yard cut made “fat,” usually about 18 x 22 inches (45.7 x 55.9 cm). The exact size can vary by manufacturer, pre-cuts can be slightly smaller, and hand-cut shop fat quarters can be a bit larger. This matters because pattern pieces that barely fit might not fit on every fat quarter.
Concrete examples help you plan. From an 18 x 22 inch piece of quilting cotton, you can usually cut:
- Two 9 x 10 inch pouch panels with room for small extras, or four 5 x 7 inch panels for mini pouches.
- Six to eight 5 inch squares plus smaller strips for binding or tabs.
- Two scrunchie strips (about 3.5 x 22 inches each) if you piece strips together.
Realistic constraints: you will not get a full-size apron, large tote, or standard pillowcase from one fat quarter. Directional prints also reduce usable area because you may need pieces oriented the same way. If you want matching sets, choose two coordinated fat quarters and use one for exterior and one for lining or accents.
Design variations: small-scale prints hide minor wobbles; solids show every stitch. Heavier fabrics (canvas) can still come as fat quarters, but seams become bulky, so choose slimmer notions and press carefully.
Project planning and cutting
Good planning is what turns fat quarter sewing projects from “almost finished” to truly giftable. Before cutting, decide the project function, finished size, and whether you need structure. For example, a coin pouch needs interfacing so it does not collapse, while a coaster needs batting and quilting lines to prevent shifting.
- Pre-press the fat quarter: Press out fold lines with steam if the fabric allows it. A flat fabric cuts accurately and feeds evenly.
- Square up one edge: Use a ruler and rotary cutter to straighten one long side. This gives you a reliable reference edge for all later cuts.
- Map your pieces: Sketch rectangles and label them. If you are making a pouch, include exterior, lining, interfacing, and any tabs or handles.
- Cut large pieces first: Cut pouch panels or organizer bases before small items like tabs. This avoids painting yourself into a corner.
- Mark carefully: Use a washable marker or chalk for zipper placement, boxing corners, and turning gaps.
- Bundle sets: Stack each project’s cut pieces together and clip them. It prevents mixing up similar rectangles.
Variation tip: if the fabric is directional, cut both exterior panels with the print upright. If you are short on fabric, consider a contrast bottom panel or pieced front to extend your usable area without looking like a mistake.
Pouches, scrunchies, coasters and organizers
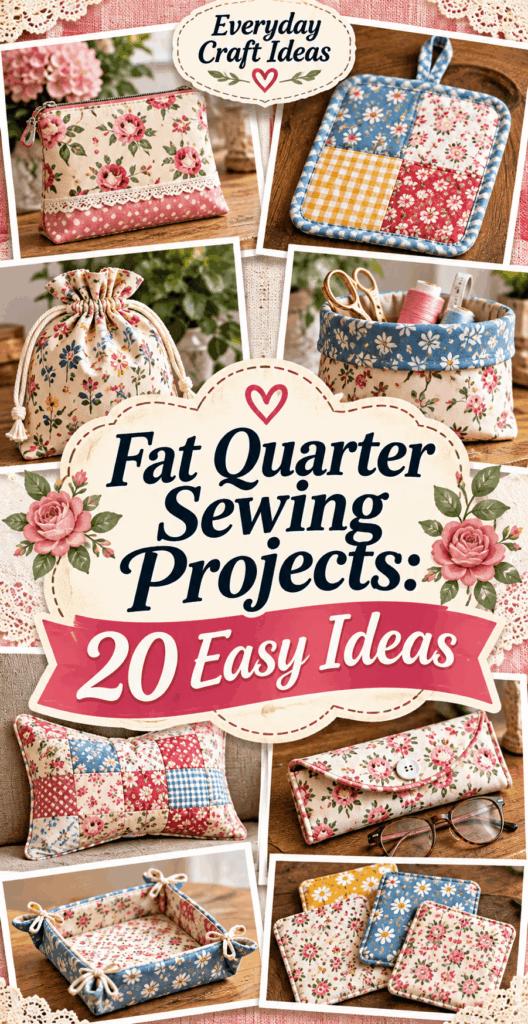
These are the most satisfying fat quarter sewing projects because they use simple shapes and teach core skills. Below are 20 easy ideas with practical notes on size, time, and skill.
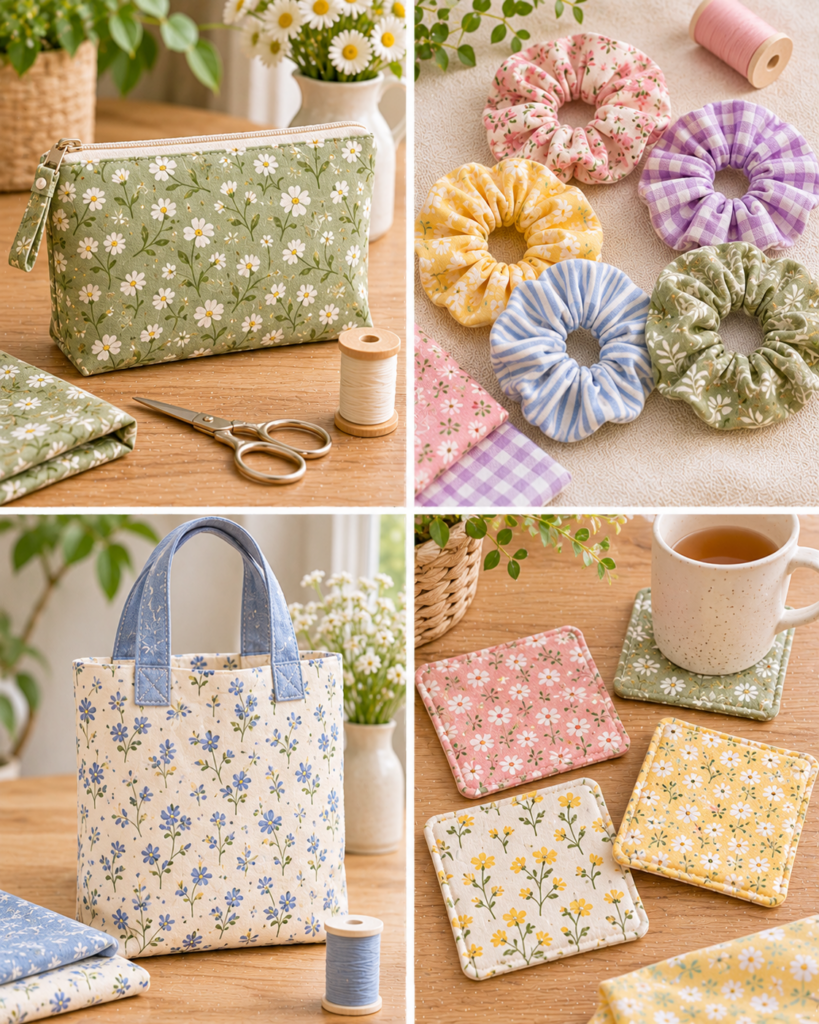
- 1) Classic zip pouch: 2 exterior panels, 2 lining panels, light interfacing. 45 to 75 minutes. Great first zipper project.
- 2) Boxy pouch (boxed corners): Adds depth for makeup or cords. Use fusible fleece for structure.
- 3) Pencil pouch: Long and slim, ideal for 7 to 9 inch zippers.
- 4) Coin pouch with key loop: Add a small ribbon loop and swivel clip.
- 5) Scrunchies: One strip about 3.5 x 22 inches plus elastic. 15 to 25 minutes.
- 6) Knotted headband (pieced): Piece strips to reach length. Interface lightly to prevent stretching.
- 7) Quilted coasters: Cotton plus batting, quilt lines 1 to 2 inches apart.
- 8) Mug rug: Slightly larger coaster, add a pocket for a tea bag.
- 9) Bowl cozy (microwave-safe): Use 100% cotton fabric, thread, and batting only. Avoid metallic prints.
- 10) Fabric basket: Add a firm interfacing for a standing bin.
- 11) Peg bag: A curved-bottom bag for clothespins, hangs on a hook.
- 12) Hanging organizer pocket: One fat quarter pieced with bias tape top edge.
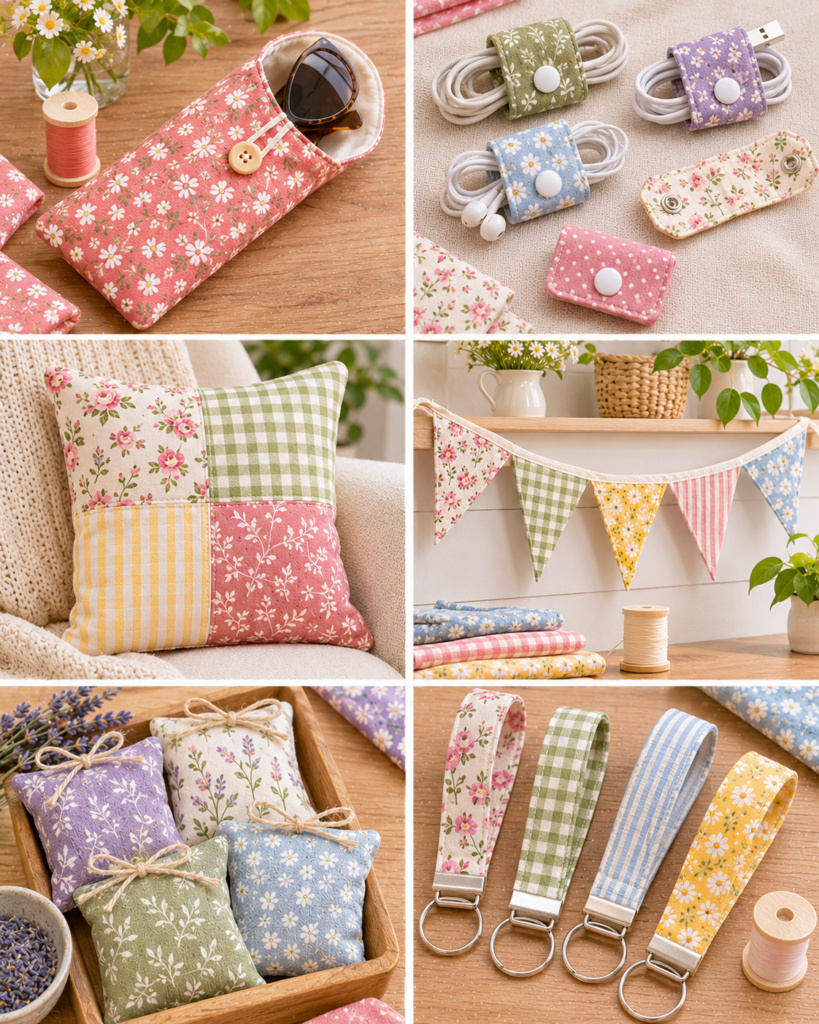
- 13) Lanyard (pieced): Use fusible web or interfacing inside for stability.
- 14) Cord keeper wraps: Small rectangles with snaps or hook-and-loop tape.
- 15) Eyeglass sleeve: Add fusible fleece and a snap tab.
- 16) Heat-safe trivet cover: Wrap around a cork or insulated core, quilt to secure layers.
- 17) Bookmarks (fabric and interfacing): Topstitch edges for durability.
- 18) Needle book: Felt pages inside, fabric outside. Great hand-sewing practice.
- 19) Travel tissue holder: Fits a pocket pack, uses small elastic loop closure.
- 20) Simple pot holder front panel: Pair with heat-resistant layers; follow safe materials guidelines.
Realistic constraint: anything requiring stiffness benefits from interfacing, but too much makes corners bulky. Grade seam allowances and clip corners for smooth turning.
Combining prints
Combining prints is how fat quarter sewing projects look intentional rather than “stash-busted.” Start with a simple formula: one main print, one blender, one accent. The main print is the hero fabric, the blender is a subtle dot or crosshatch, and the accent is a small pop for binding, tabs, or zipper ends.
Concrete combinations that work:
- Floral + stripe + solid: Use floral for exterior, stripe for lining, solid for zipper tabs.
- Novelty print + tone-on-tone: Novelty can be busy, so pair it with a near-solid for calm.
- Two small-scale prints: Keep them in the same color family and vary scale slightly.
Design variation: try “color blocking” a pouch by piecing two rectangles for the front panel. This stretches your fat quarter, adds interest, and lets you orient directional prints correctly. Realistic constraint: high-contrast prints show crooked seams more. If you are new, choose medium contrast and let topstitching be decorative rather than spotlighting tiny wobbles.
Practical tip: when in doubt, match background colors. A navy floral and a navy dot will look coordinated even if the motifs differ. Take a quick phone photo in black-and-white to check contrast before cutting.
Efficient layout and scrap use
The secret to making lots of fat quarter sewing projects is cutting with a plan and treating scraps as assets. After cutting your main panels, you will usually have strips and corners left. Those pieces are perfect for tabs, binding, patchwork pockets, and small accessories.
- Cut panels first, then strips: Reserve the largest continuous areas for pouch bodies or coaster tops.
- Turn leftover strips into bias or straight binding: Straight binding is easiest and works for coasters, mug rugs, and small mats.
- Piece scraps into “crumb” fabric: Sew tiny bits together and press seams open. Use the new fabric for a pocket panel.
- Standardize scrap sizes: Trim leftovers into 2.5 inch squares or 2.5 inch strips. They store neatly and are instantly useful for patchwork.
Concrete example: after making a zip pouch, you might have two 2 x 18 inch strips. Sew them right sides together, turn, and topstitch for a simple key fob strap. Or quilt them with batting to create a skinny glasses-cleaning cloth sleeve.
Realistic constraint: very small pieces can warp when stitched. Use a shorter stitch length (2.0 to 2.2) and press, not iron aggressively, to avoid stretching.
Giftable makes
Fat quarter sewing projects shine as gifts because you can coordinate fabric themes to the recipient. Think about how the gift will be used, then choose a fabric that fits their style and lifestyle.
- Teacher gifts: Pencil pouch plus fabric bookmarks. Add a gift tag stitched into the side seam.
- New baby gifts: Soft burp cloth top panels (pair with absorbent terry or flannel backing) and a matching diaper cream pouch.
- College or travel: Cord keeper wraps, a boxy toiletry pouch, and a lanyard.
- Hostess gifts: Set of four coasters tied with a ribbon and a matching mug rug.
Finishing advice that makes gifts look professional: press seams flat, trim threads, and topstitch consistently. For pouches, add zipper tabs so the zipper ends look neat and do not snag. For coasters and mug rugs, stitch in the ditch or quilt evenly so batting does not shift after washing.
Realistic constraint: if you are short on time, avoid projects that require perfectly matched seams on multiple layers. Choose a simple pouch, scrunchies, or coasters and focus on crisp pressing and clean corners. If gifting heat-related items like bowl cozies, follow safe materials guidelines and include a small note: “Use 100% cotton only; do not use if any layer contains polyester.”
Troubleshooting fabric distortion
Fabric distortion is the most common frustration with fat quarter sewing projects because small pieces show every ripple. The good news is that most distortion comes from a few fixable causes: stretching while pressing, pulling while sewing, or uneven interfacing.
Wavy seams: Often caused by pushing or pulling fabric through the machine. Let the feed dogs do the work. Use a walking foot when quilting layers or sewing slippery cotton blends. If a seam is wavy, unpick just that area and resew with a slightly longer stitch length.
Skewed rectangles: If your piece looks like a parallelogram, it may have been cut off-grain. Re-square before sewing. If already sewn, press the seam flat first, then press to one side without stretching. Avoid dragging the iron. Lift and press.
Puckers near zippers: This happens when fabric creeps against the zipper tape. Baste first, or use double-sided washaway tape designed for sewing to hold layers. Keep the zipper tape flat, and reduce presser foot pressure if your machine allows.
Quilting wrinkles: Spray basting or pin basting helps. Start quilting from the center outward to push fullness to the edges, then trim square again.
Variation tip: add lightweight fusible interfacing to quilting cotton before cutting. It stabilizes the fabric and reduces stretch during construction, especially for zipper pouches and organizers.
Frequently Asked Questions About Fat Quarter Sewing Projects: 20 Easy Ideas
What is a fat quarter?
A fat quarter is a quarter-yard of fabric cut differently than a long strip. Instead of roughly 9 x 44 inches, it is cut as a wider rectangle, usually about 18 x 22 inches. That “fatter” shape makes it easier to cut pouch panels, blocks, and small quilt units. When shopping, check whether the fat quarter is a pre-cut (sometimes slightly smaller) and buy an extra if a project requires tight cutting.
What can one fat quarter make?
One fat quarter can make a surprising amount: a small zipper pouch, two scrunchies, a set of four coasters, a needle book cover, an eyeglass sleeve, or a pieced headband. If your project needs a lining, one fat quarter may only cover the exterior, so plan to add a coordinating lining fabric. You can also piece leftovers for pockets, tabs, and patchwork accents to stretch it further.
Should fabric be prewashed?
Prewashing depends on the project. For items that will be washed often (burp cloths, bowl cozies, coasters), prewash and dry the fabric to remove sizing and preshrink it. For zipper pouches and decor that will be spot cleaned, many sewists skip prewashing to keep fabric crisp and easier to press. If you mix prewashed and unwashed fabrics in one item, you risk uneven shrinkage, so choose one approach consistently per project.
How do I choose the right interfacing for a pouch?
For a soft pouch, use lightweight woven or non-woven fusible interfacing. For a structured pouch that stands up, use fusible fleece or foam interfacing. Fuse with the correct heat setting, press and hold rather than sliding the iron, and let it cool flat so the glue sets. If your fabric is dark, test first to ensure the interfacing does not show through.
What stitch length should I use for small projects?
For general seams on quilting cotton, a stitch length around 2.2 to 2.5 works well. Use a shorter stitch (about 2.0) for tight curves or crumb piecing so seams stay secure. For topstitching, lengthen to 2.8 to 3.2 for a smoother line. Always test on a scrap layered like your project.
My zipper pouch corners are wonky. How do I fix them?
Wonky corners usually come from uneven seam allowances or not clipping properly. Trim seam allowances to reduce bulk, clip diagonally across corners (do not cut stitches), and use a blunt point turner to shape. If corners still twist, press the pouch flat, then topstitch around the edge to hold the shape and improve appearance.
How do I keep coaster layers from shifting while sewing?
Use basting spray, safety pins, or quilting pins to secure layers, especially if you are quilting a top fabric to batting and backing. Sew quilting lines from the center outward, then trim the coaster square again before binding. A walking foot helps feed layers evenly and prevents ripples along the edges.
Can I make these projects with fabric other than quilting cotton?
Yes, but adjust your approach. Linen blends fray more, so finish seams or use lining. Knits stretch and are trickier for beginners unless stabilized. Canvas makes sturdy organizers but creates bulky seams, so choose lighter interfacing and a stronger needle (90/14). When in doubt, practice on quilting cotton first, then branch out once your seams are consistent.
What is the best way to label handmade gifts?
Add a small fabric label or ribbon tag caught into a side seam before sewing pieces together. If you do not have labels
Common Mistakes and How to Fix Them
Small projects go fast, which means mistakes can sneak in. These are the most common issues I see with fat quarter sewing projects, plus practical fixes.
- Mistake: Cutting before pressing. Fix: Press first, then square an edge. If already cut, re-measure and trim pieces to match the smallest one so your seams align.
- Mistake: Skipping interfacing on pouches. Fix: If the pouch is already sewn and floppy, quilt through the exterior and lining with a few vertical lines to add stability, or add a foam insert as a removable base.
- Mistake: Seam allowance inconsistency. Fix: Use painter’s tape as a seam guide on your machine bed. For most small items, a consistent 1/4 inch or 3/8 inch seam allowance is key.
- Mistake: Bulky corners and lumpy edges. Fix: Grade seams (trim one layer narrower), clip corners, and use a blunt point turner, not scissors, to push corners out safely.
- Mistake: Weak stress points on straps or tabs. Fix: Backstitch and add a small box stitch or bar tack where tabs attach.
- Mistake: Not leaving a turning gap. Fix: If you forgot, carefully open a lining seam with a seam ripper, turn the project, then ladder stitch or topstitch closed.
Durability tip: topstitching is not just decorative. It keeps seam allowances flat and reduces wear, especially on items like pouches and bookmarks that get handled often.