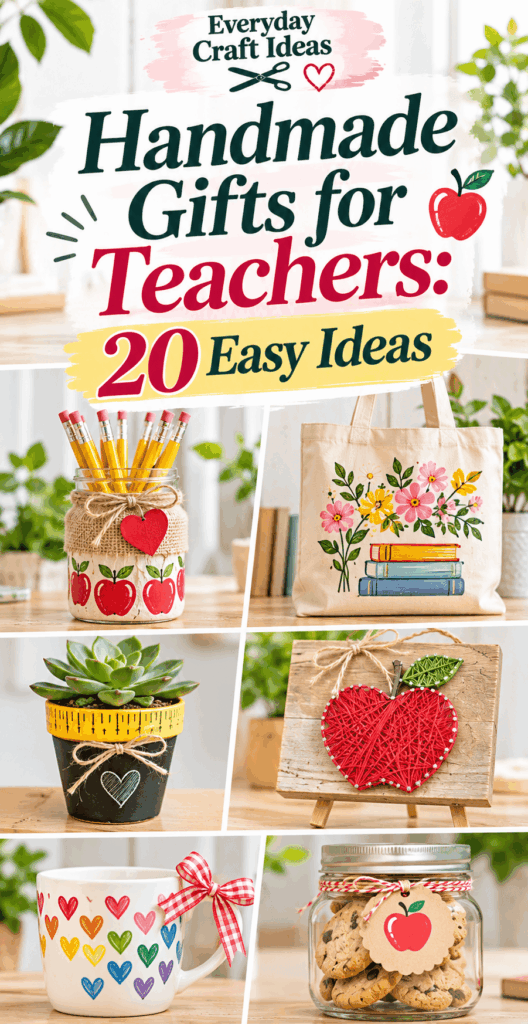
Handmade Gifts for Teachers: 20 Easy Ideas
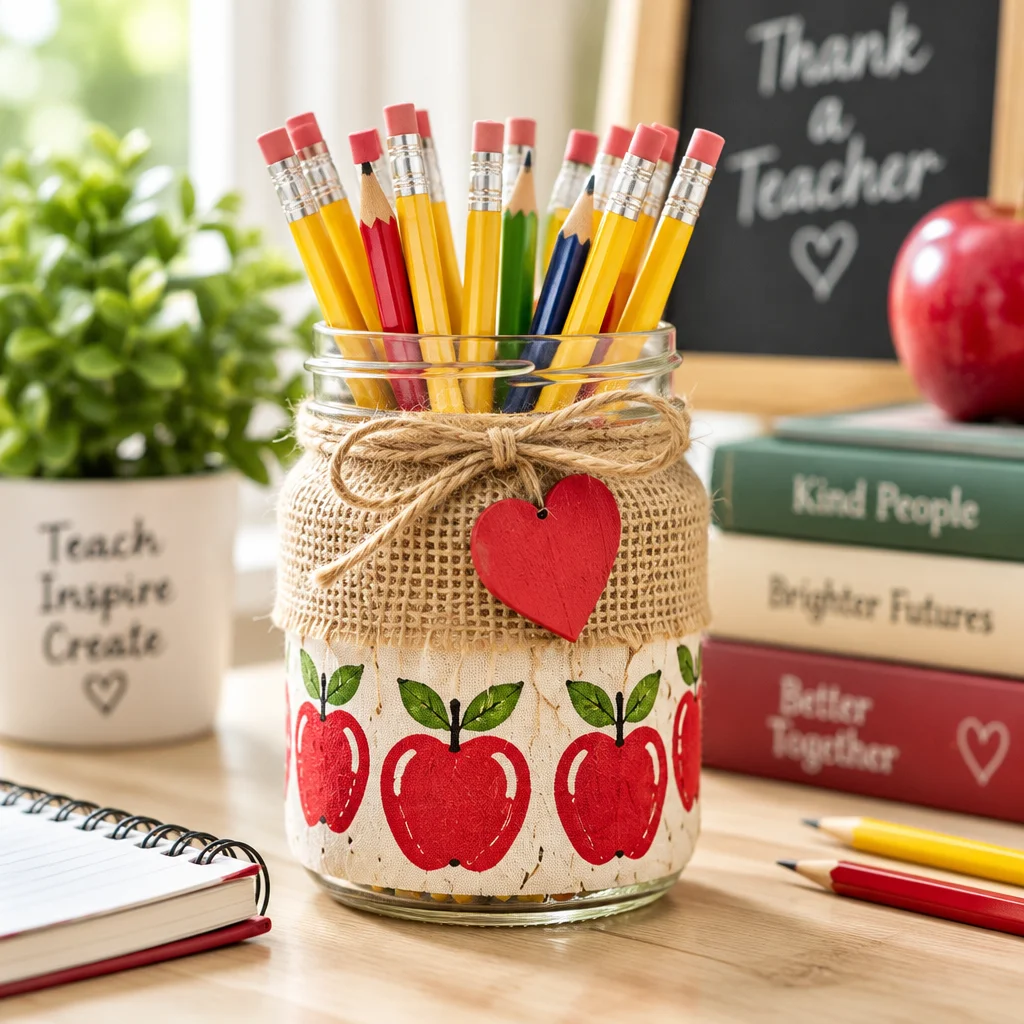
Handmade Gifts for Teachers are meaningful because they show real attention, not just a quick checkout line purchase. Whether you are a parent helping a child, a student on a tight budget, or a crafty friend who wants to say thanks, the best teacher gifts are practical, personal, and easy to finish neatly. In this guide you will find 20 beginner-friendly ideas with clear materials, steps, and finishing tips so your project looks polished and lasts through the school year. If you also enjoy making appreciation gifts for others, you may like these thoughtful DIY gifts for friends or this simple bookbinding for beginners notebook tutorial that pairs nicely with teacher stationery.
What makes a good handmade teacher gift
Great Handmade Gifts for Teachers fit into a busy school day. Teachers often juggle stacks of papers, classroom supplies, and limited desk space, so aim for items that are useful, durable, and easy to store. Think “daily helper” rather than “dust collector.” A good handmade gift also respects allergies and fragrance sensitivities, so skip heavily scented items unless you know the teacher well. Finally, presentation matters. Even a simple bookmark feels special when it is trimmed cleanly, sealed properly, and packaged with a specific thank-you note.
As you choose an idea from the list below, consider three quick questions: Will it hold up to daily handling? Can the teacher use it at school or at home without extra work? Does it reflect something you know about them, such as their subject, favorite color, or classroom theme? Small details like tidy edges, fully cured paint, and legible handwriting elevate handmade work instantly.
Budget, classroom usefulness and school gift policies
Before you start crafting, check any school or district gift guidelines. Some schools cap gift value, discourage cash equivalents, or have rules about food and scented products. Keep costs low by using supplies you already own and choosing projects that use small cuts of fabric, cardstock, or repurposed containers. Usefulness is key: desk organizers, labels, and reusable packaging are often appreciated more than fragile decor.
Also keep classroom practicality in mind. A teacher may receive multiple mugs, so a pencil cup is still fine, but make it unique by adding compartments, a name label, or a matching set of bookmarks. If you are crafting with children, select projects with safe tools, water-based products, and short drying times. When in doubt, add value with a thoughtful note and clean finishing rather than adding extra “stuff.”
20 easy handmade gifts for teachers
This section is your idea bank for Handmade Gifts for Teachers, grouped by type so you can pick what fits your time, tools, and skill level. Most of these can be completed in 30 to 90 minutes, plus drying time for paint or glue. For each category, I will include materials, the basic build, and pro tips that help beginners avoid common mistakes like warped paper, sticky finishes, or peeling labels.
General tool kit (helpful for most projects): sharp scissors, ruler, pencil, craft glue or PVA, double-sided tape, a bone folder or old gift card for crisp folds, and a permanent marker. For painted items, add a synthetic brush and a water-based sealer like Mod Podge or a clear acrylic sealer used in a well-ventilated area. Always protect your work surface with parchment paper, a craft mat, or cardboard, especially when sealing or painting.
Pencil cups, fabric pouches, bookmarks and desk organizers
- Decoupaged pencil cup (easy, 45 minutes plus drying): Use a clean tin can or wide jar. Lightly sand glossy surfaces, brush on decoupage medium, apply patterned paper or tissue, then seal with 2 thin coats. Tip: thin coats dry smoother and reduce tackiness.
- Wrapped rope pencil holder (easy, 60 minutes): Hot-glue cotton rope around a sturdy cup (paper mache or plastic). Work in short sections so glue stays hot. Keep rope tension even to avoid gaps.
- No-sew fabric pouch (easy, 30 minutes): Use iron-on hem tape to fold and seal edges, then add a ribbon tie or adhesive Velcro dot. Great for dry erase markers or stickers.
- Zippered fabric pouch (confident beginner, 90 minutes): Stitch a simple lined pouch. Press seams for a professional look and topstitch near the zipper to prevent fabric snagging.
- Laminated bookmark set (easy, 30 minutes): Layer cardstock and decorative paper, laminate, punch a hole, and add tassel yarn. Round corners before laminating so edges do not lift.
- Magnetic page marker bookmarks (easy, 20 minutes): Fold cardstock around a small magnet strip. Use strong double-sided tape so magnets stay put.
- Mini desktop file folder (easy, 60 minutes): Score cardstock into an accordion file for notes. Reinforce base with extra cardstock to prevent sagging.
- Cardboard desk organizer (easy, 90 minutes): Cover chipboard with contact paper, then glue into compartments for pens and sticky notes. Let glue cure under a heavy book to keep panels square.
Thank-you cards, memory booklets, initial art and handwritten notes
- Layered thank-you card (easy, 20 minutes): Use cardstock base, add a contrasting panel, and a focal shape (apple, pencil, book). Foam tape adds depth without complexity.
- Pop-up “thank you” card (confident beginner, 45 minutes): Cut simple box folds so the message pops when opened. Test with scrap paper first to avoid misaligned cuts.
- Class memory mini-booklet (easy, 60 to 90 minutes): Staple or bind folded pages. Each child adds a note or drawing. If you want a sturdier option, follow this simple handmade notebook guide for beginner-friendly binding.
- Teacher name acrostic page (easy, 20 minutes): Write the teacher’s name vertically, then add a positive word for each letter (Kind, Patient, etc.). Mount on cardstock for stiffness.
- Monogram initial art (easy, 45 minutes): Paint or collage the first letter of the teacher’s name on thick paper. Seal lightly so it does not wrinkle.
- Handwritten note set (easy, 30 minutes): Create 5 to 10 small notecards from cardstock and decorate corners. Add a paper band so they stay together in the desk.
Troubleshooting: if your card warps, you likely used too much wet glue. Switch to double-sided tape for paper layers, or apply glue stick thinly and press under a book for 10 minutes.
Painted plant pots, paper bouquets, desk calendars and coasters
- Painted mini plant pot (easy, 60 minutes plus curing): Use a terracotta pot, wipe off dust, paint with acrylic, then seal. Leave the rim unsealed if you plan to water a real plant so moisture can breathe.
- Chalkboard label pot (easy, 60 minutes): Paint a rectangle with chalkboard paint, then write the teacher’s name. Cure per paint directions before writing to prevent smearing.
- Paper flower bouquet (easy, 60 minutes): Cut petals from cardstock or crepe paper, wrap around a floral wire stem, and secure with floral tape. Tip: curl petals with a pencil for realism.
- Desk flip calendar (confident beginner, 90 minutes): Bind small monthly pages with binder rings. Use heavier paper so it flips cleanly and does not tear at holes.
- Stamped cork coasters (easy, 30 minutes plus dry time): Stamp with permanent ink and seal with a thin coat of water-based sealer. Do not soak cork or it can warp.
- Painted tile coasters (easy, 60 minutes plus curing): Use smooth ceramic tiles, paint a simple design, then seal. Add felt dots underneath to protect desks.
Fingerprint tree art, gratitude chains, quote jars and class posters
- Fingerprint tree class art (easy, 45 minutes): Draw a simple tree trunk, then each student adds a fingerprint leaf. Use washable ink pads or non-toxic paint and provide wipes for quick cleanup.
- “We are thankful for you” paper chain (easy, 30 to 45 minutes): Write one reason per strip, loop and glue into a chain. Teachers can hang it in the classroom.
- Quote jar (easy, 30 minutes): Fill a jar with folded paper quotes, student compliments, or classroom memories. Use a label and a ribbon for a finished look.
- Affirmation cards ring (easy, 45 minutes): Punch holes in small cards and connect with a book ring. Include encouraging phrases for tough days.
- Class poster collage (easy, 60 minutes): Use a large sheet, add photos or drawings, and include signatures. Seal with a light coat of spray sealer only with adult help and ventilation.
- “Top 10 things we learned” poster (easy, 45 minutes): List class highlights and add small icons. This works well for end-of-year gifting.
Safety note: if you use small rhinestones, magnets, or mini clips, keep them away from toddlers and label the package if the teacher has very young children at home.
Fabric gift bags, paper gift boxes, custom tags and kraft gift sleeves
- No-sew fabric gift bag (easy, 25 minutes): Cut a rectangle of cotton, fold, and seal sides with hem tape. Thread ribbon through a folded top channel or simply tie the top closed.
- Drawstring fabric bag (confident beginner, 60 minutes): Sew a channel, insert cord with a safety pin, and knot ends. Great for reusable classroom storage.
- Pillow box gift box (easy, 20 minutes): Cut from cardstock, score folds, and use double-sided tape. Score first for crisp curves and clean closure.
- Origami-style paper box (easy, 30 minutes): Use sturdy scrapbook paper. If folds crack, your paper is too thick or you did not score lightly first.
- Custom tags (easy, 15 minutes): Stamp, hand-letter, or collage small tags. Reinforce punched holes with a small circle of tape on the back.
- Kraft paper gift sleeve (easy, 15 minutes): Wrap around a notebook or set of cards like a belly band and secure with a sticker. It looks professional with minimal work.
How to personalize a teacher gift
Personalization turns simple Handmade Gifts for Teachers into keepsakes. You do not need fancy equipment. A neat name label, a classroom color palette, or a message that references a specific moment in the year can make even a basic pencil cup feel special. Start by choosing one “personal cue” to build around: the subject they teach (music notes, numbers, books), a favorite classroom phrase, or the school colors.
If you are unsure about preferences, choose neutral, calming colors and clean typography. Avoid glitter that sheds, as it can be frustrating in a classroom. When adding vinyl or stickers, burnish firmly (rub down) and seal edges if the item will be handled often. For paper gifts, use pigment ink to reduce smudging. Most importantly, put the personalization where it will not interfere with use, such as the side of a pouch rather than the zipper area.
Writing a specific thank-you message
A specific message is often the most treasured part. Use this simple structure: (1) what the teacher did, (2) how it helped, (3) a warm closing. For example: “Thank you for staying after class to help me understand fractions. I feel more confident now and I am proud of my progress.” If the gift is from a child, capture their words in your handwriting, but keep their voice. For cards, write with a waterproof pen and let it dry fully before closing the card to prevent offset ink marks.
Organizing a classroom group gift respectfully
Group gifts can be wonderful when they are organized quietly and fairly. Keep contributions optional and avoid public tracking. Offer a low-cost handmade base gift everyone can sign, like a fingerprint tree or memory booklet, plus an optional add-on such as a shared gift card if school policy allows. Assign one person to collect notes and keep the timeline clear: set a due date that leaves at least 48 hours for assembling, sealing, and drying. If you need more budget-minded group ideas, see these budget DIY gift ideas that adapt well for teacher teams.
“I made the quote jar with my second grader and we kept it simple with colored paper and a neat label. Her teacher told us she reads a note on hard days. It was inexpensive, but it felt truly personal.”
Budget-friendly supplies and presentation
You can make Handmade Gifts for Teachers look high-end without spending much. The trick is choosing a consistent palette, cutting accurately, and finishing carefully. Stock up on basics that stretch across many projects: neutral cardstock, kraft paper, a couple of acrylic paint colors, and reliable adhesive. Fabric scraps from old pillowcases or shirts make excellent pouches and drawstring bags, especially when washed and pressed first.
Presentation is half the gift. A clean wrap, a sturdy tag, and a short note instantly communicate care. Build in drying time. Paint, decoupage, and sealers often feel dry to the touch quickly but need longer to cure fully. If you package too soon, tissue paper can stick to tacky finishes and ruin your hard work. When transporting, use a small box or paper bag to prevent crushed corners and snapped paper flowers.
Using cardstock, fabric scraps and repurposed containers
Cardstock is the workhorse material for bookmarks, tags, boxes, and mini booklets. Choose 65 lb to 110 lb weight depending on the project. Lighter paper folds easily; heavier paper stands up as a box or organizer. Fabric scraps should be pressed flat so seams align and hemming tape adheres evenly. Repurposed jars and tins must be washed thoroughly and dried to prevent rust or lingering odors. Lightly sanding glossy surfaces helps paint and glue grip.
Wrapping delicate crafts and allowing finishes to dry
For delicate paper flowers or coasters, wrap in tissue, then place in a rigid box. For painted pots, wrap with kraft paper and avoid plastic bags until the sealer is fully cured, since plastic can trap moisture and cause tackiness. If you used hot glue, check for glue strings and remove them with a quick pass of warm air from a hair dryer, held at a safe distance. Always follow label directions for sealers, and use sprays outdoors or in strong ventilation with adult supervision.
Frequently Asked Questions About Handmade Gifts for Teachers: 20 Easy Ideas
What handmade gifts do teachers actually appreciate?
Teachers tend to appreciate gifts that are usable, uncluttered, and easy to store, such as a sturdy pencil cup, a set of laminated bookmarks, coasters with felt backs, or a small notecard set. Sentimental gifts shine when they are organized and not overly bulky, like a class memory booklet or quote jar. When in doubt, combine a simple practical item with a specific thank-you note for the most reliable result.
What can kids make for teachers cheaply?
Kids can make fingerprint tree art, a paper gratitude chain, a handmade card, or a simple bookmark using cardstock and markers. These are low-cost and genuinely meaningful. Keep it successful by limiting steps: pre-cut shapes for younger children, use washable inks, and help them write one clear sentence about what they liked in class. Neat trimming and mounting artwork on a clean backing makes it look finished.
Are homemade teacher gifts appropriate for every school?
Usually yes, but it depends on school policy and allergies. Some schools restrict food gifts, scented items, or high-value gifts. Homemade crafts are generally safe choices, especially paper goods, classroom organizers, and student art. Avoid anything that could be a hazard in a classroom, like loose glitter, strong fragrances, or items that require flames. If you are unsure, choose a card and class art piece, which are almost always appropriate.
How far in advance should I start making Handmade Gifts for Teachers?
Start one to two weeks ahead if your project includes paint, decoupage, or sealing. This gives you buffer time for drying and curing, plus time to redo anything that smudges or warps. For paper-only projects like cards and bookmarks, a few evenings is enough, but it still helps to finish at least two days early so ink fully dries and you can package everything neatly.
How do I keep paper crafts from peeling or falling apart?
Use the right adhesive for the job. Double-sided tape is excellent for flat paper layers because it avoids warping. PVA glue works well when applied thinly, then pressed under weight while it dries. For items handled often, like bookmarks, laminate them or seal with a thin, even coat of decoupage medium. Rounded corners and reinforced holes also prevent tearing over time.
What are safe finishing options for gifts used in classrooms?
Choose water-based acrylic paints and non-toxic sealers, and let them cure fully before gifting. Avoid heavy glitter and anything that sheds, since it spreads quickly in classrooms. If you use spray sealers, apply outdoors or in strong ventilation with adults handling the spraying. Add felt pads under coasters or organizers to protect desk surfaces and reduce noise when items are moved.
Final thoughts and thoughtful teacher appreciation
Handmade Gifts for Teachers work best when they are practical, neatly finished, and paired with a message that names something specific the teacher did. Pick one idea from the list that matches your time and tools, then focus on clean cuts, strong adhesive, and proper drying or curing. If you want an easy next step, choose either a laminated bookmark set or a simple class memory booklet, then package it in a reusable fabric bag with a custom tag. For more inspiration for other recipients, browse these meaningful handmade gift ideas for grandparents and adapt the same techniques to any celebration.