How to Sew a Button
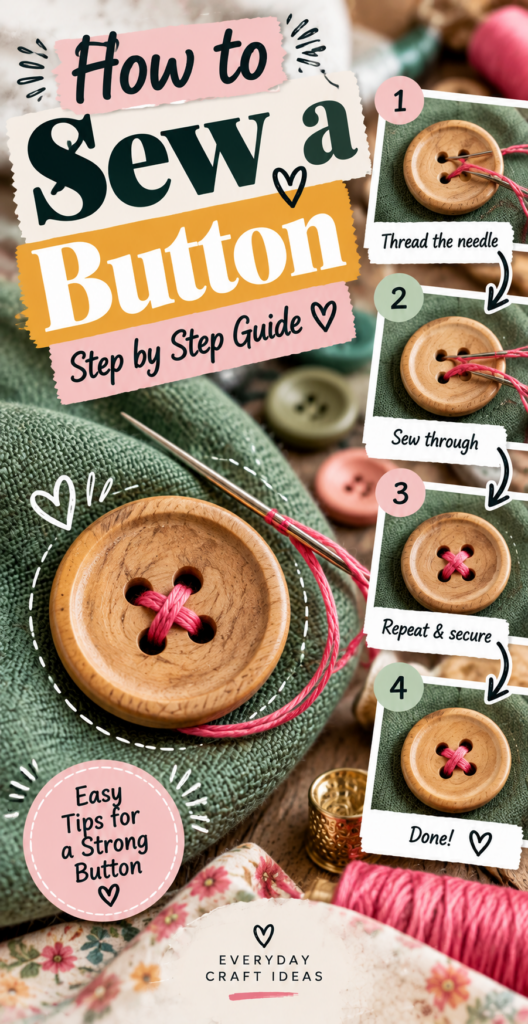
If you are searching for how to sew a button, you are in the right place. A missing or loose button is one of those small clothing problems that can make a favorite shirt unwearable, but the fix is quick, inexpensive, and very beginner-friendly. In this guide, I will walk you through sewing on the three most common button types: two-hole, four-hole, and shank buttons. You will learn what tools matter, how to choose the right needle and thread, how tight the stitches should be, and how to finish the thread so the button stays put through real-life wear and washing. Once you practice on one button, you will be able to repair garments, replace decorative buttons, and even reinforce buttons before they fail.
What You Need
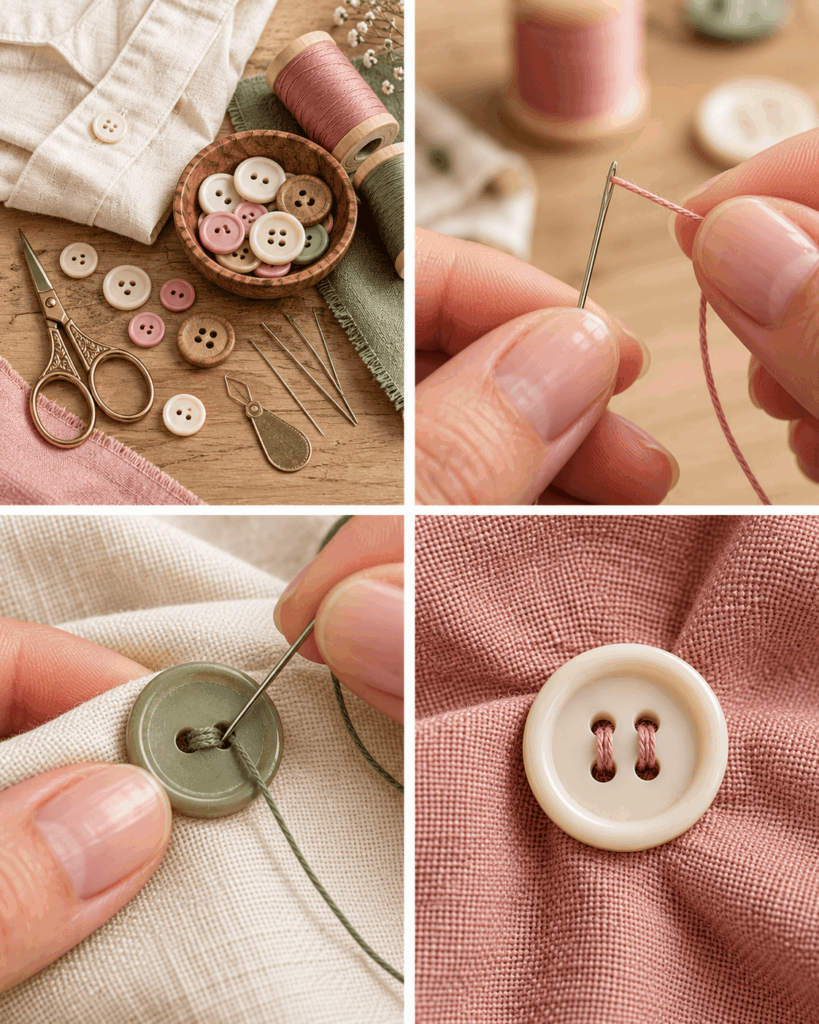
Learning how to sew a button starts with a few basic supplies. You likely have most of them already, and each one has a purpose that makes the job cleaner and stronger.
- Button: Match size and style to the garment. If you are replacing a lost button, check inside the garment for a spare, or take a remaining button to the store for a close match.
- Thread: All-purpose polyester thread works for most clothing because it is strong and resists shrinking. For heavy coats, consider button and carpet thread or double-stranding regular thread.
- Hand-sewing needle: A sharp hand needle in sizes 7 to 9 is a solid all-around choice. Use a sturdier needle for thick fabrics like denim or wool.
- Scissors: Small, sharp scissors or thread snips let you cut neatly without fraying.
- Thimble (optional but helpful): Protects your finger when pushing through thick layers.
- Pin or toothpick (optional): Used as a spacer to create the right looseness, especially for flat buttons on thick fabric.
Work in good light and lay the garment flat on a table so you can align the button placement accurately.
How to Choose Thread and a Needle
The right needle and thread make how to sew a button much easier, especially on tricky fabrics. Start with thread: polyester all-purpose thread is the most versatile for everyday garments. It has a little give, handles washing well, and is strong enough for shirts, pants, and light jackets. Cotton thread can work, but it is generally weaker and may wear faster on high-stress closures.
Color matching matters less than you think if the thread is mostly hidden, but it matters a lot on decorative stitching or when sewing from the outside of a coat. If you cannot match exactly, choose a slightly darker shade rather than lighter, since it tends to blend better.
For the needle, pick a size that passes through the button holes easily without forcing. A needle that is too thick can get stuck and bend. A needle that is too thin may flex too much on heavy fabric. For most shirts, a sharp size 8 is a comfortable default. For denim, canvas, or wool coats, choose a stronger needle and consider using a thimble to push it through layers safely.
One more detail: if your thread keeps slipping out of the needle, you can lightly moisten the thread end, pinch it flat, and trim the end cleanly before threading.
How to Sew a Two-Hole Button
Two-hole buttons are common on casual shirts, pants, and many children’s garments. The goal in how to sew a button is to anchor the button securely while leaving enough space for the button to pass through the buttonhole without strain.
- Thread the needle and knot the end: Cut about 18 to 24 inches of thread. Double it if you want extra strength, then knot the end (or knot both tails together if doubled).
- Mark placement: If the old button fell off, look for the stitch outline or small holes. If placing new, align with the buttonhole by closing the garment and marking lightly.
- Anchor from the underside: Start from the inside of the garment so the knot stays hidden. Take a small stitch in place to secure the knot.
- Stitch through the holes: Bring the needle up through one hole, down through the other, and repeat. Keep the button centered over the mark.
- Create space if needed: For thicker fabric, place a pin or toothpick across the top of the button under the thread as you stitch. This prevents sewing too tightly.
- Reinforce and finish: After enough passes, prepare to create a thread shank if appropriate (covered later) and then secure the thread on the inside.
This method is simple, but the difference between a button that lasts and one that pops off is even tension and enough repeats.
How to Sew a Four-Hole Button
Four-hole buttons offer flexibility: you can sew them in a “parallel” pattern (two vertical stitches) or a “cross” pattern (an X). Either is fine for how to sew a button, but parallel stitching can look a bit cleaner on dress shirts, while a cross can add a decorative touch and distribute stress slightly differently.
- Prepare the thread: Cut 18 to 24 inches. For coats or high-stress buttons, use doubled thread. Knot securely.
- Position the button: Use the original stitch marks when replacing. If there are no marks, align carefully with the buttonhole and ensure the placket edges meet evenly.
- Start from the inside: Bring the needle up at the button location and through one hole. Pull until the knot rests on the inside.
- Sew the first pair of holes: Go down through the opposite hole in your chosen pair, then back up through the first hole. Keep stitches straight and consistent.
- Sew the second pair of holes: Move to the remaining two holes and repeat the same number of passes. Try to keep tension consistent so the button lies flat.
- Add spacing: For thicker fabric, use a pin or toothpick spacer under the thread on top of the button. This keeps the button from being sewn too tight.
- Finish securely: Before knotting off, consider wrapping a thread shank for easier buttoning, especially on medium or thick fabric.
If the button is purely decorative, you can skip extra spacing. If it will be used daily, spacing is your friend.
How to Sew a Shank Button
A shank button has a loop on the back instead of holes on the front. You often see these on coats, blazers, and decorative garments. The technique for how to sew a button with a shank is slightly different because you are anchoring through the loop.
- Thread and knot: Use a strong thread choice. For coats, doubled all-purpose thread or heavier button thread is a good idea.
- Mark placement and align: Close the garment and mark where the button should sit so it matches the buttonhole position cleanly.
- Start from the inside: Come up through the fabric at the mark, then pass the needle through the shank loop.
- Stitch down and up repeatedly: Go back down close to where you came up, then come up again in nearly the same spot. This builds a tight anchor directly under the shank.
- Stabilize for heavy use: If the fabric is loosely woven, take one small anchoring stitch through the fabric layers between passes to prevent shifting.
- Finish on the inside: End with the needle on the underside so you can knot and bury the thread tail.
With shank buttons, avoid pulling so hard that the fabric puckers. The shank already provides spacing, so the button should sit comfortably without strangling the fabric.
How Do You Knot Thread for Sewing a Button?
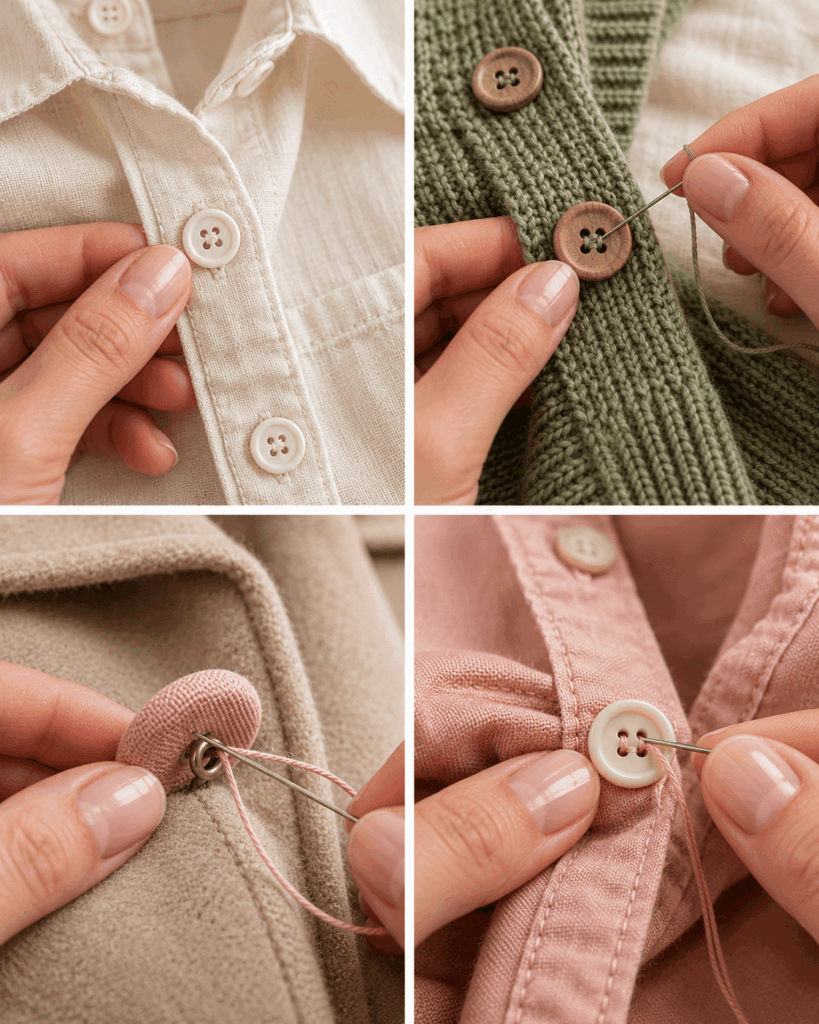
A good knot is small, secure, and placed where it will not rub or show. When learning how to sew a button, knots can feel like the hardest part, but a consistent method helps.
For single thread: Thread your needle, leaving a 3 to 4 inch tail. Bring the long end down to meet the tail, then tie a simple overhand knot at the very end. For extra security, tie a second overhand knot right on top of the first. Trim the tail close, but do not cut so close that it slips through the fabric.
For doubled thread: Fold the thread so both ends meet, then thread the needle with the folded end or with the cut ends depending on what is easiest. Many beginners prefer threading the needle with the cut ends and tying the two ends together into one knot, leaving the folded loop at the needle end. This gives you two strands for strength and a single knot to anchor.
Alternative start for slippery fabric: If knots tend to pull through delicate fabric, start with two tiny backstitches in the button area (on the inside), then begin sewing through the button. This anchors without relying on a bulky knot.
How Many Times Should You Sew Through a Button?
The number of passes matters for durability. In how to sew a button, you are balancing speed with strength. As a general guideline, aim for 6 to 10 passes through the holes for everyday shirts, and 10 to 14 passes for coats or high-tension areas like waistbands. One “pass” means going down and back up once through a hole pair.
Instead of counting obsessively, also watch what the stitches look like. You want a neat bundle of thread that fills the hole area without becoming a bulky knot nest. If the holes are large and your thread is thin, you may need extra passes. If the thread is thick or doubled and the holes are small, fewer passes can be plenty.
Also consider how the garment is used. A decorative button on a sweater that is rarely buttoned does not need as much reinforcement as a trouser button that takes daily strain. For children’s clothing, add a couple more passes because buttons get tugged harder.
If you are unsure, err slightly on the side of more passes. A few extra stitches now is easier than resewing the button later when you are in a hurry.
How Tight Should a Button Be?
One of the most important details in how to sew a button is tension. A button sewn too tightly is hard to button, strains the fabric, and can cause puckering. A button sewn too loosely wobbles, catches on things, and can snap threads faster.
A good test: Once sewn, you should be able to slide a fingernail under the thread bridges on a flat button. For a shirt on lightweight fabric, minimal space is fine. For thicker fabric or layered plackets, you need more space so the button can sit on top of the thickness when fastened.
Use a spacer for consistent tension: Place a pin, needle, or toothpick on top of the button and sew over it. After you finish stitching, remove the spacer. This leaves a small, even gap. If you are sewing a coat button, use something slightly thicker as a spacer to create a larger gap.
Watch the fabric: If the fabric around the button draws inward or ripples, you are sewing too tight. If the button flops and tilts dramatically, you are too loose or not sewing through the fabric in the same spot each time.
How Do You Sew a Button So It Does Not Fall Off?
Durability comes from a few habits that turn basic how to sew a button into a button that survives washing, wearing, and tugging.
- Use strong thread and enough passes: Under-stitching is the most common reason buttons fall off. Add stitches and choose polyester for everyday wear.
- Sew through the same entry points: Aim your needle through the same small area of fabric each time. This forms a tight anchor instead of spreading stitches across a wider weak zone.
- Reinforce the fabric if it is weak: If the fabric is torn or thin where the button sits, sew a small patch of lightweight fabric on the inside first, or use a small interfacing square. Then sew the button through all layers.
- Create a thread shank when needed: Wrapping the thread under the button reduces stress on the stitches and makes buttoning smoother.
- Finish with secure knots and buried tails: A strong finish prevents unraveling over time.
Reader testimonial: “I always lost buttons after a few washes. Using a pin as a spacer and wrapping a thread shank made a huge difference. The button on my work shirt has stayed tight for months.”
What Is a Thread Shank and When Do You Need One?
A thread shank is a small wrapped “stem” of thread under a flat button that creates space between the button and the fabric. In how to sew a button, this is the trick that makes buttons easier to fasten and helps prevent thread breakage.
When you need a thread shank:
- Thick fabrics or layered areas: Coats, blazers, denim jackets, and shirt plackets often need extra room.
- Functional buttons: If the button goes through a buttonhole and will be used frequently, a shank reduces strain.
- When the fabric puckers: If the button pulls the fabric into a dimple, a shank can relieve that tension.
How to make it: After you finish the main stitches, bring the needle up between the button and fabric (not through a hole). Gently lift the button. Then wrap the thread tightly around the stitch bundle under the button 4 to 8 times. These wraps form the shank. Finally, push the needle back to the underside to knot off.
If you are sewing a shank button, you usually do not add a thread shank because the button already has one built in.
How to Finish and Secure the Thread
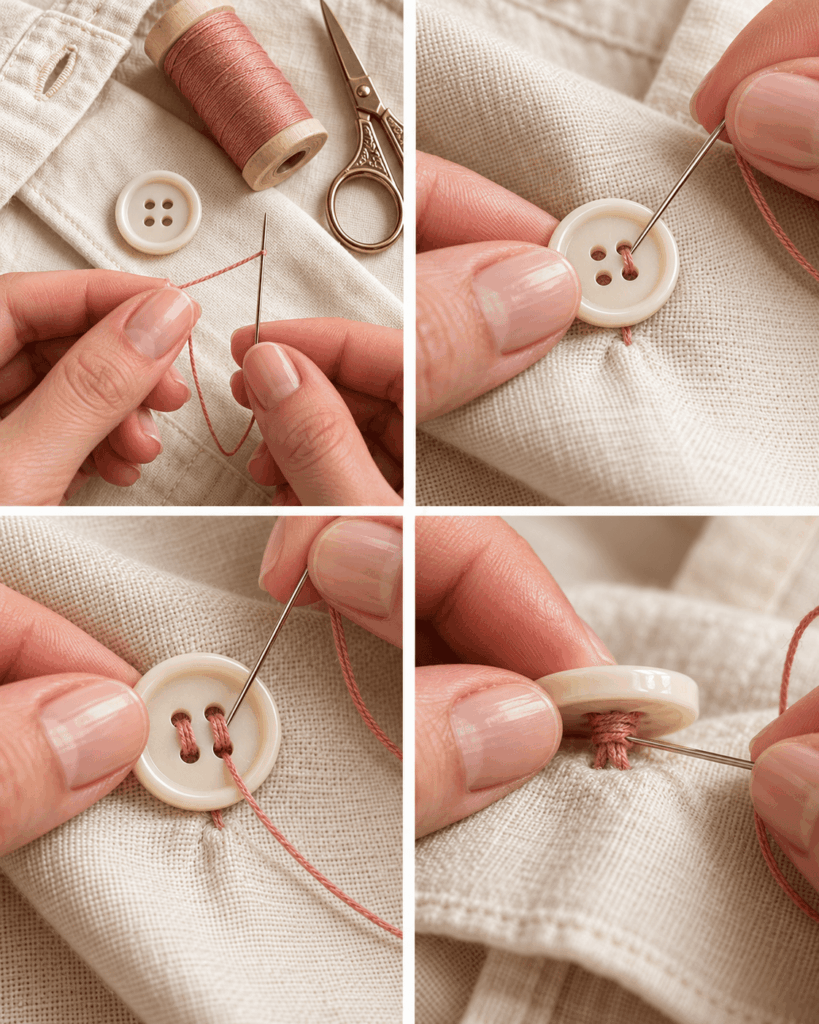
Finishing is where many beginners lose durability. If you want how to sew a button results that last, do not skip proper securing on the underside.
- Bring the needle to the inside: After your last stitch, make sure the needle exits on the underside of the fabric, not the top.
- Make a locking stitch: Take a tiny stitch through the fabric near the button stitches and pull until a small loop forms. Pass the needle through that loop and pull snug. This creates a knot that sits flat.
- Repeat for security: Make a second locking stitch the same way. Two knots are usually enough for shirts. For coats, do three.
- Bury the thread tail: Run the needle through the fabric for about 1 inch on the inside and bring it out, then snip the thread close. The tail retracts slightly into the fabric, reducing the chance of unraveling.
- Final check: Tug the button gently. It should feel stable without pulling the fabric into a pucker.
If you used doubled thread, treat it the same way: secure with locking stitches and bury the tail. Avoid big bulky knots that can rub uncomfortably against your skin.
Common Button-Sewing Mistakes
Even when you understand how to sew a button, a few common mistakes can lead to frustrating results. Here are the issues I see most often, plus practical fixes.
- Sewing too tight: This makes buttoning difficult and can tear fabric. Fix it by using a spacer and adding a thread shank for thicker areas.
- Not enough stitches: A button might feel fine at first but pop off later. Add more passes, especially for coats, pants, and kids’ clothing.
- Stitches spread out: If your needle goes through different spots each time, the fabric weakens. Aim for the same entry points for a tight anchor.
- Thread tangling and knotting: Thread that is too long twists. Use 18 to 24 inches, let the needle dangle occasionally to untwist, and keep tension steady.
- Wrong needle size: Forcing a thick needle through small button holes can bend the needle or fray thread. Switch to a finer needle or use slightly thinner thread.
- Skipping fabric reinforcement: Sewing onto torn fabric will not hold. Add a small patch or interfacing on the inside first, then sew the button through the strengthened area.
A little patience at the start saves you from resewing later, and button sewing gets noticeably easier after just a couple of repairs.
Frequently Asked Questions About How to Sew a Button
How do I find the exact spot to sew the button back on?
Look for the old stitch marks first. You may see tiny holes, a faint circle, or a slightly worn spot where the button sat. If there is no mark, close the garment and align the buttonhole over the placket. Use a pin through the buttonhole to mark the fabric underneath, then sew the button at that mark. Double-check alignment before stitching heavily.
Can I sew a button with dental floss or fishing line?
In a pinch, dental floss can work for a temporary fix because it is strong, but it can be bulky and may cut into delicate fabric over time. Fishing line is slippery and difficult to knot securely, and it can also damage fabric. For best results, use polyester all-purpose thread or button thread. If you must improvise, reinforce gently and plan to redo it properly.
Should I double the thread for every button?
Not always. Doubling thread adds strength and speeds up stitching, but it can be too bulky for small button holes or fine fabrics. Use single thread for delicate blouses or tiny buttons, and doubled thread for coats, waistbands, uniform shirts, or anything that gets tugged. If you double, keep your knots neat and avoid overfilling the button holes.
What if the fabric is ripped where the button goes?
If the fabric is torn, sewing the button right back on will usually fail quickly. Reinforce the area first from the inside with a small patch of similar fabric or a square of fusible interfacing. Stitch around the patch edges to stabilize if needed. Then sew the button through the reinforced layers. This spreads the stress and prevents the tear from growing.
How do I keep the button from spinning while I sew?
Hold the button firmly with your non-dominant hand as you take the first few stitches. Once you have 2 to 3 passes through the holes, it will stop shifting. You can also anchor the button temporarily with a straight pin through one hole into the fabric, removing it once the button is stabilized. Work on a flat surface to keep everything aligned.
Why does my thread keep knotting while I sew?
Thread knots often happen when the thread is too long, twisted, or pulled too quickly. Try shortening your working thread to 18 to 24 inches, and let the needle hang occasionally so it can untwist naturally. Keep your stitches smooth and controlled rather than yanking tight. If the thread starts to kink, stop and straighten it before continuing.
Conclusion
Knowing how to sew a button is one of the most useful clothing repair skills you can learn, and it pays off immediately. With a needle, matching thread, and a few minutes of focused work, you can restore shirts, pants, coats, and bags that would otherwise end up in a donation pile or the trash. Remember the essentials: choose a suitable needle and strong thread, stitch through the same points consistently, add enough passes, and leave the right amount of space or add a thread shank when needed. Your next step is simple: pick one garment with a loose button, practice the steps in this guide, and you will feel confident tackling the rest of your wardrobe.