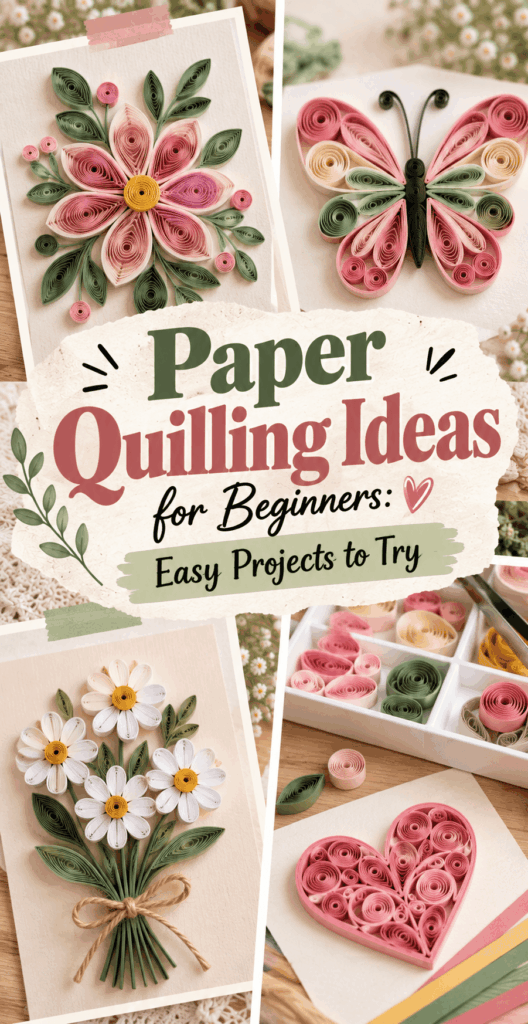
Paper Quilling Ideas for Beginners: Easy Projects to Try
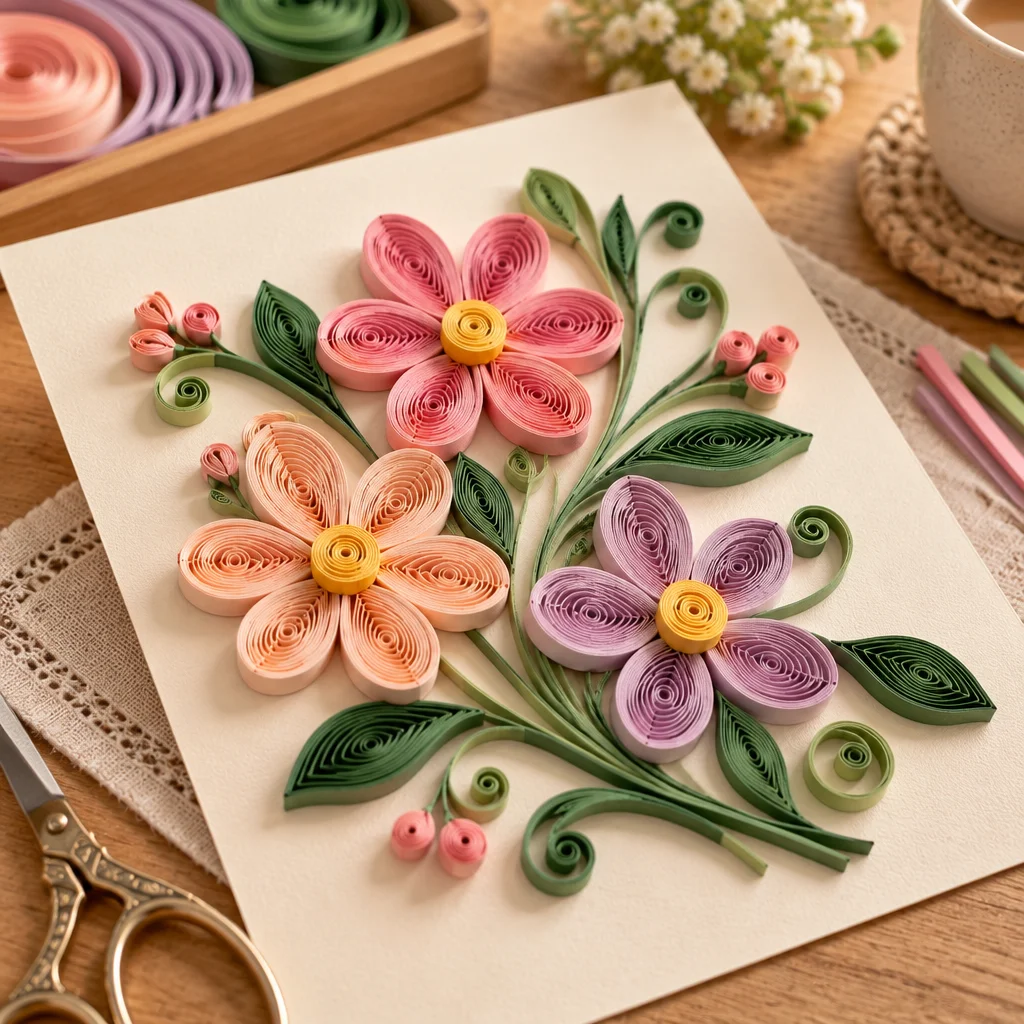
If you have been searching for paper quilling ideas that are genuinely beginner-friendly, you are in the right place. Quilling is one of those crafts that looks intricate, but it is built from a few simple coils and shapes that you can learn in one sitting. In this guide, you will learn what to buy (and what you can skip), how to roll tight and loose coils without frustration, and how to turn those shapes into easy finished projects like a gift tag, greeting card, mini wall art, or a simple monogram.
Want a seasonal goal to practice toward? You can pair your first quilled card with other easy paper projects from these Christmas paper crafts to make, or use those ideas to create a themed set of handmade tags and cards once you have a few basic shapes down.
What You Need to Know Before Starting
Paper quilling is the art of rolling narrow paper strips into coils and shaping them into teardrops, marquises, and other forms. For beginners, the biggest “secret” is that clean results come from consistency, not speed. Plan to practice coils for 10 to 15 minutes before you start building your first project.
Difficulty level: Beginner. You can complete your first finished piece in about 30 to 60 minutes, depending on the design and how much glue drying time you allow.
Typical project size and use: Quilling is perfect for greeting cards (5 x 7 inches), gift tags, bookmarks, small framed art (4 x 6 or 8 x 10 inches), and decorative toppers for boxes or journals. It is not ideal for items that must be waterproof or heavily handled unless you seal and protect them.
How quilling “works” structurally: A quilled design is basically a mosaic of paper shapes glued edge-to-edge. The strength comes from good glue control, clean strip edges, and letting pieces dry flat before lifting or framing.
Safety and comfort: Use small scissors carefully, cap your glue, and take breaks if your hands cramp. Paper cuts are real, especially with tight strips, so handle edges gently and consider a finger pad if you roll for long sessions.
Supplies, Tools, and Material Choices
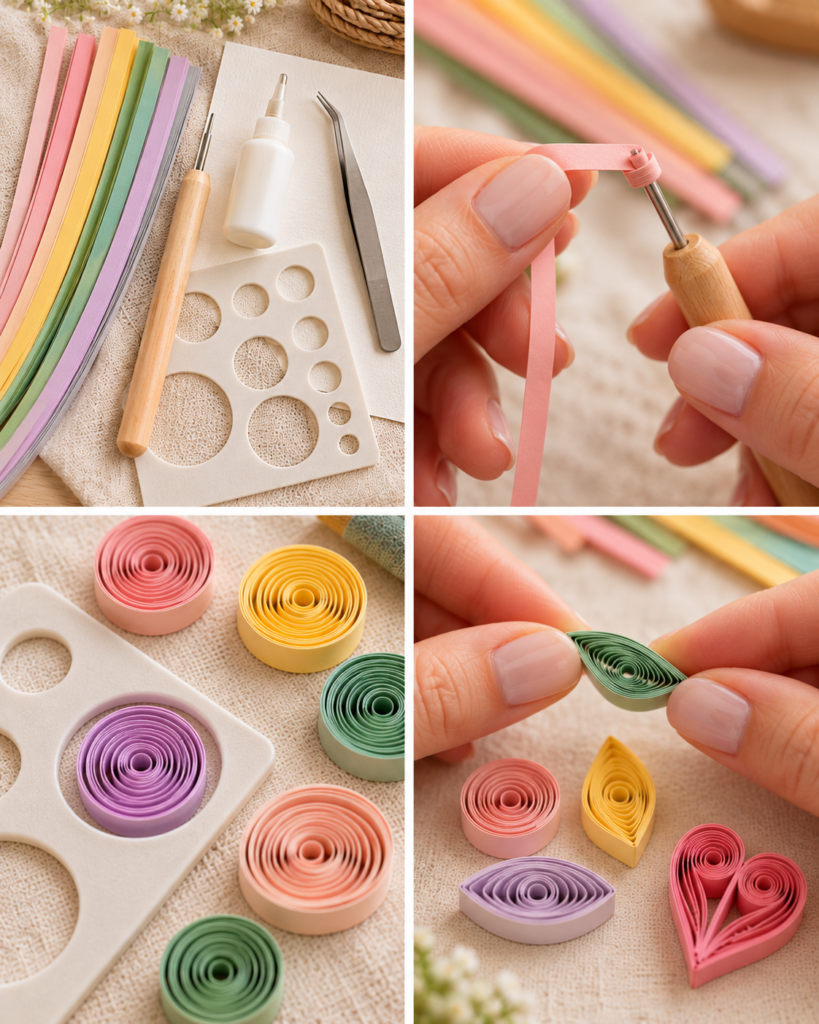
You do not need an expensive kit to start, but the right basics make your first attempts much smoother. Here is a practical setup that covers nearly all beginner paper quilling ideas without clutter.
- Quilling paper strips (3 mm or 5 mm width): 3 mm strips give delicate detail, while 5 mm is easier to handle and great for beginners. Look for evenly cut strips so your coils stay smooth.
- Quilling tool (slotted tool or needle tool): A slotted tool grips the paper end and is easiest for beginners. A needle tool makes a cleaner center coil but takes more practice.
- Glue with a fine tip: Use tacky PVA or craft glue that dries clear. A precision tip or a glue bottle with a needle tip helps you apply tiny dots instead of puddles.
- Tweezers: Straight tweezers help place small coils neatly and keep fingers out of glue.
- Circle sizing board (optional but helpful): This tool makes loose coils consistent. You can also use a printed template or draw circles on scrap paper.
- Scissors and ruler: For trimming and measuring strip lengths, especially for petals and leaves that should match.
- Base surfaces: Cardstock for cards, watercolor paper for sturdier framed art, or a pre-cut gift tag. Choose a base that will not warp easily.
If you want inspiration for paper projects that pair well with quilled elements, browse these Christmas paper crafts to make and think of quilled accents as a way to add texture to tags, cards, and ornaments.
How to Make or Use It (Clear Beginner-Friendly Tutorial)
This step-by-step tutorial walks you through a simple beginner project: a quilled flower cluster on a greeting card. Once you learn this, you can remix the same steps into dozens of paper quilling ideas like gift toppers, framed mini art, and monograms.
- Choose a simple pattern and lightly mark placement. On cardstock, lightly pencil a small bouquet area or draw a simple circle where the flower cluster will sit. This prevents crowding and helps you keep your design balanced.
- Make tight coils (flower centers). Insert the strip into a slotted tool, roll with steady tension, then glue the end down. Tight coils give structure and look clean as centers.
- Make loose coils (petals and leaves). Roll a strip, let it relax, then place it in a circle size hole (or on a drawn circle) to standardize the diameter. Glue the end. Consistent loose coils are the key to petals that match.
- Shape petals into teardrops. Pinch one side of the loose coil to form a teardrop. Make 5 to 7 matching petals for one flower. Pinch with gentle pressure so you do not crease or flatten the coil.
- Assemble each flower off the card first. On a scrap surface, glue petals around a center coil. Let the cluster set for a minute. Pre-assembling keeps your card cleaner and reduces glue smears.
- Glue the flower cluster onto the card. Apply tiny dots of glue to the edges that touch the cardstock. Press lightly with tweezers or a clean fingertip. Too much glue is the most common beginner issue, so aim for “barely enough.”
- Add simple leaves and scrolls. Shape a few marquises (pinch both ends of a loose coil) for leaves and add a couple of open scrolls for movement. Vary sizes to avoid a stiff, “stamp-like” look.
- Let dry flat, then finish. Dry at least 20 to 30 minutes before closing the card or framing. If desired, add a simple sentiment stamp or hand lettering after the quilled elements are fully set.
Tip: If your cardstock warps, you are using too much glue or a too-thin base. Switch to heavier cardstock or apply glue more sparingly.
Helpful Tips for Better Results
Quilling is a small-details craft, so tiny improvements in technique make a big difference. Use these tips to get cleaner coils and more polished beginner paper quilling ideas without needing advanced tools.
- Keep tension consistent while rolling. If your coils look bumpy, slow down and roll with even pressure. Your fingers learn quickly with repetition.
- Standardize strip lengths for matching pieces. Cut several strips to the same length before rolling petals. Matching length plus a circle sizing guide gives you uniform shapes.
- Use micro-dots of glue. Place glue on a scrap, then pick it up with a toothpick or pin. You want just enough to tack the paper, not soak it.
- Work from the largest elements to the smallest. Place big flowers or focal shapes first, then fill gaps with leaves, scrolls, or tiny tight coils.
- Let pieces set before moving them. Fresh glue makes coils slip open or shift. A short pause between steps prevents frustration and messy edges.
“I tried quilling once and gave up because my coils kept springing open. Using a circle guide and pre-assembling the flowers on scrap paper made everything click. My first finished card actually looked gift-worthy.”
For more paper crafting inspiration that combines well with quilling, you can also explore holiday-themed paper craft ideas here and add quilled details as dimensional accents.
Creative Variations and Project Ideas
Once you can make tight coils, loose coils, teardrops, and marquises, you can branch into many beginner-friendly paper quilling ideas. The trick is to keep the design simple and repeat shapes rather than trying to invent complex imagery right away.
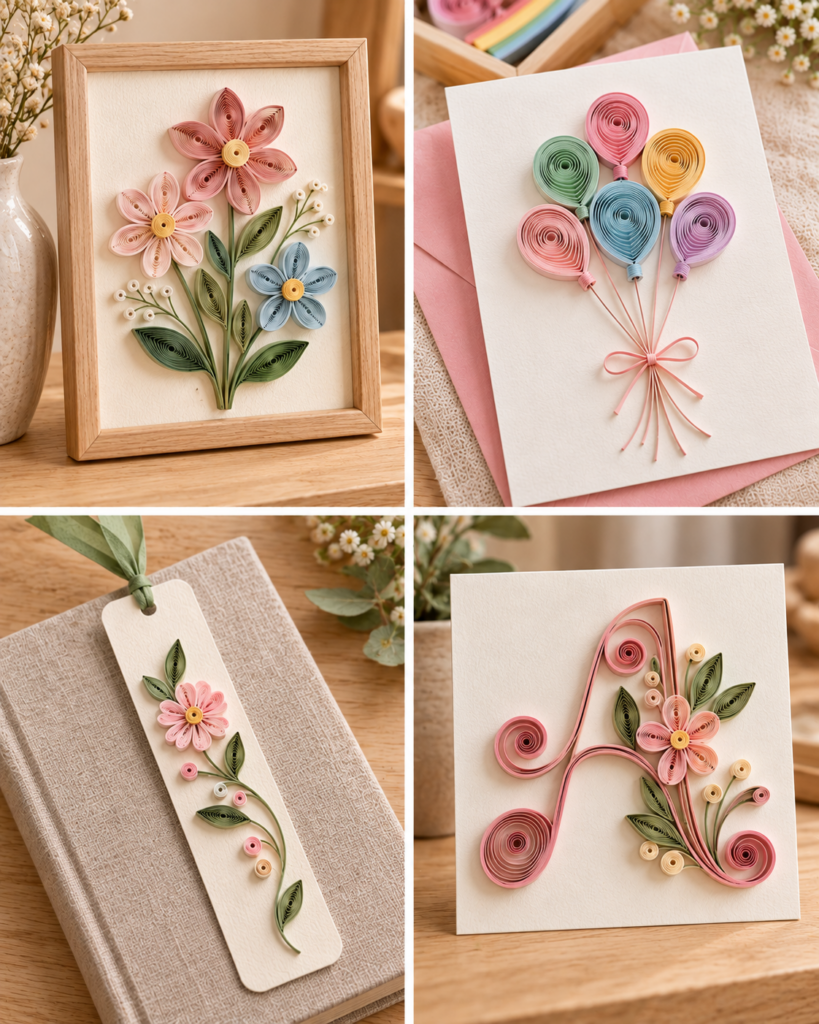
- Monogram letter art: Outline a large initial (like “A” or “M”) on cardstock and fill it with loose coils in one color family. This looks impressive but is basically repetition.
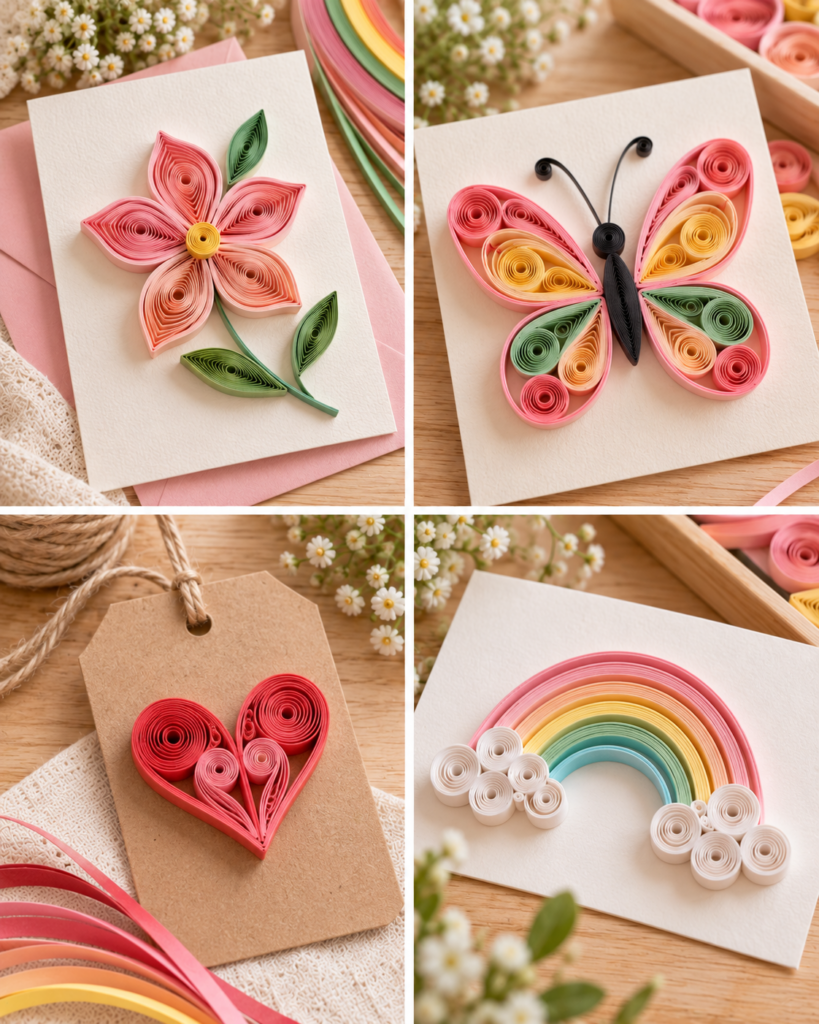
- Easy heart card: Fill a heart outline with red and pink tight coils. Use a few larger loose coils to create visual rhythm.
- Bookmark with a quilled topper: Glue a small flower or butterfly at the top of a sturdy cardstock strip. Keep the quilling only at the top so it does not get crushed in a book.
- Framed mini wall art: Create a small cluster (florals or abstract swirls) and frame it in a shadow box frame for protection.
- Gift tags: Add a single quilled flower with two leaves. This is fast and helps you practice making matching shapes.
- Ornaments and holiday accents: Quilling pairs beautifully with seasonal paper crafts. For more themed ideas to build on, see these Christmas paper crafts to make and adapt a snowflake, tree, or wreath concept using quilled coils and scrolls.
When choosing color palettes, start with two to three colors plus a neutral. Beginners often use too many colors at once, and the design loses clarity.
Common Mistakes and How to Avoid Them
Most beginner problems have simple fixes. If your first attempts do not look like the photos you have in mind, it is usually one of these issues, not a lack of talent. Here is how to troubleshoot your paper quilling ideas before you scrap the project.
- Coils unravel after gluing: You may be gluing too late or not pressing the end down long enough. Hold the glued end for a few seconds and use a slightly thicker tacky glue if needed.
- Shapes do not match: Inconsistent strip length is the culprit. Pre-cut equal lengths and use a sizing guide for loose coils.
- Glue blobs and shiny spots: Apply glue with a toothpick and use less than you think. If glue squeezes out, lightly dab immediately with the corner of a paper towel.
- Flattened or creased coils: Too much pressure when pinching or placing. Use tweezers and pinch gently, focusing pressure only where you want the point.
- Warped cardstock: This comes from excess moisture. Use heavier cardstock, reduce glue, and let the piece dry under a book with wax paper on top (after the glue has grabbed, so you do not shift your shapes).
- Design looks messy or crowded: Leave negative space. A few well-placed coils look more intentional than filling every gap.
Frequently Asked Questions About Paper Quilling Ideas for Beginners: Easy Projects to Try
What is paper quilling?
Paper quilling is a paper craft where you roll narrow strips into coils, then pinch or shape them and glue them together to form designs. The finished work can be flat (glued to cardstock) or slightly dimensional (built up in layers). It is popular for cards, framed art, ornaments, and decorative embellishments because it uses simple materials but creates a detailed, textured look.
What supplies do you need to start quilling?
At minimum, you need quilling strips (or evenly cut paper strips), a quilling tool (a slotted tool is easiest), glue that dries clear, and a base like cardstock. Tweezers and a circle sizing guide make things easier but are optional. If you are testing the craft before buying supplies, you can cut your own strips and use a toothpick as a rolling tool, though results are usually less consistent.
How do you roll paper quilling strips?
Secure the end of the strip in a slotted quilling tool, then roll with steady tension while guiding the strip so it stays aligned. For a tight coil, glue the end immediately and keep it compressed. For a loose coil, let it relax after rolling, then glue the end once it opens to the size you want. Consistency comes from even tension and using the same strip width and length.
What are the easiest quilling shapes?
The easiest shapes are tight coils, loose coils, teardrops (pinch one side of a loose coil), marquises or “eyes” (pinch both ends), and simple scrolls (roll one or both ends without gluing into a coil). With just these shapes, you can make flowers, leaves, hearts, butterflies, and abstract patterns. Beginners do best by repeating a few shapes instead of attempting complex figures right away.
What glue works best for quilling?
A PVA craft glue or tacky glue that dries clear is ideal because it bonds paper well without becoming brittle. The most important feature is controlled application. Choose a fine-tip bottle or apply glue with a toothpick so you use tiny dots. Avoid glue sticks for structural joins, as they often do not hold small edge-to-edge pieces securely over time.
How do you display finished quilling art?
For cards and tags, let the piece dry fully, then store it flat so coils do not get crushed. For keepsake art, use a shadow box frame or a frame with spacer depth so the glass does not press the quilling. If you are gifting a quilled card, consider handing it over in a box-style envelope. Keeping quilling dry and protected from friction helps it last.
Final Thoughts
Quilling is one of the most satisfying ways to turn simple paper into something that looks detailed and handcrafted, and these beginner paper quilling ideas are designed to help you succeed quickly. Start with one small goal, like a single flower cluster on a card, and practice consistent coils and glue control. Then repeat the same shapes in a new format, such as a monogram or gift tag, so your hands build confidence. For more inspiration and fresh patterns, browse The Papery Craftery – Quilling and Other Fun Paper Things, and consider pairing your finished quilled cards with other seasonal makes from this Christmas paper crafts collection. Your next step: pick a color palette, roll 20 coils, and make your first card today.