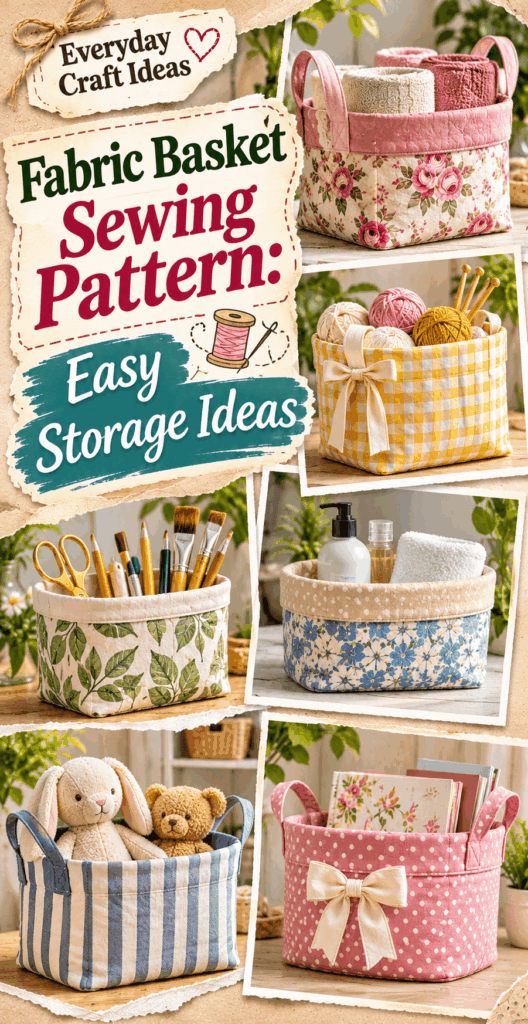
Fabric Basket Sewing Pattern: Easy Storage Ideas
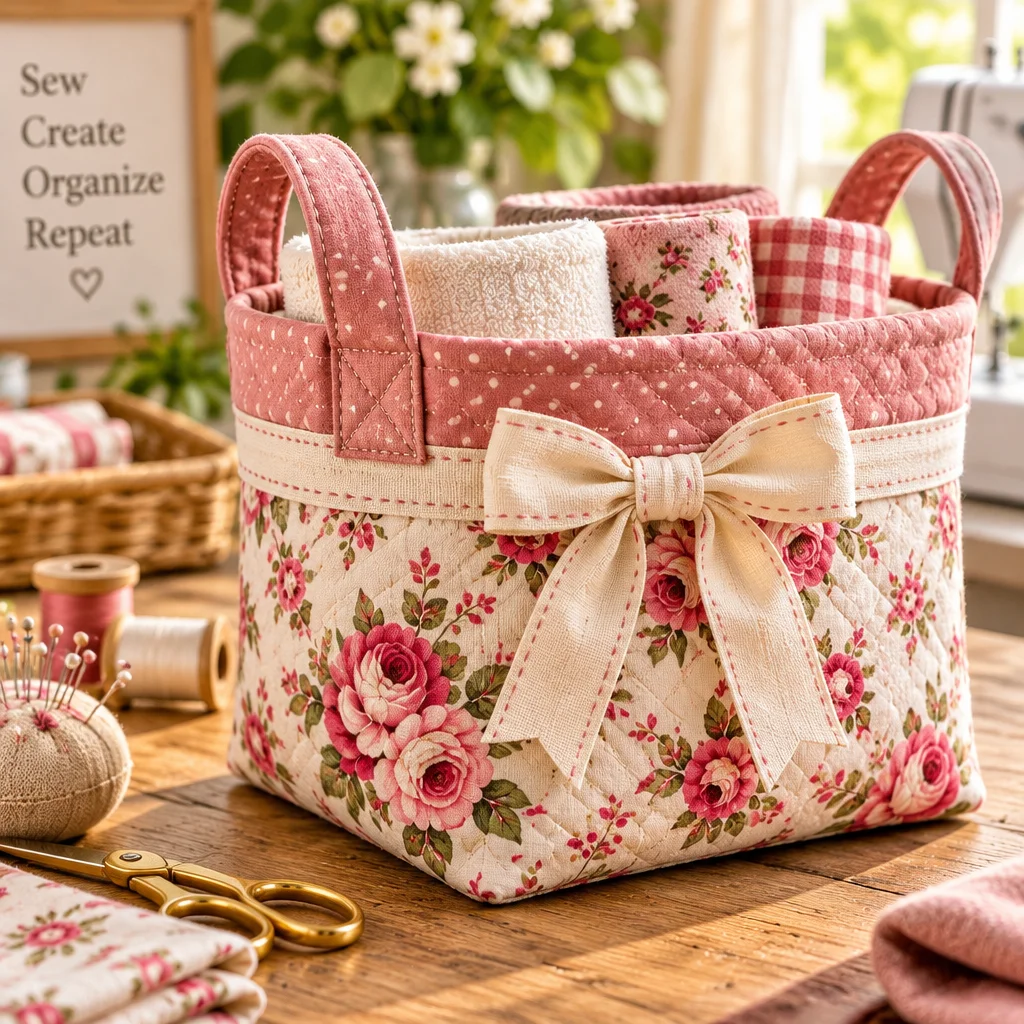
Fabric Basket Sewing Pattern searches usually come from one simple need: you want attractive storage that is fast to sew, sturdy enough to use every day, and easy to customize to your space. Fabric baskets are perfect for corralling sewing notions, kids’ toys, bathroom supplies, or pantry items, and they are a wonderful way to use favorite prints without committing to a large quilt. If you are newer to sewing, this project builds confidence because it uses straight seams, simple boxing corners, and basic topstitching. If you also enjoy quick home-sewing wins, you might like this easy pillowcase sewing pattern for practicing neat hems, or these scrap fabric sewing projects for using up small cuts alongside your baskets.
Choosing the right fabric basket style
The best Fabric Basket Sewing Pattern for you depends on where the basket will live and what it will hold. A basket for a shelf can be taller and more structured, while one for open counters often looks best with a folded cuff and a softer drape. Think about how often you will pick it up, too. If it will move from room to room, add handles and choose a fabric that can take stress at the seams.
Most fabric baskets fall into a few “families”: square or rectangle with boxed corners, round with a curved base, and soft bins with a cuff. For beginners, a rectangle or square is the most forgiving because everything is straight cuts and you can measure corners easily. Round baskets look polished, but they require careful easing around curves and precise clipping to prevent puckers.
Before you commit, decide whether you want a lining. Lined baskets hide seam allowances and can be reversible if both fabrics are attractive. If you want quick gifting ideas, the same skills translate to reusable fabric gift bags, which are also great practice for neat top edges and drawstring channels.
Basket size, fabric weight and interfacing
Size affects everything: stability, turning, and what interfacing you need. A small 4 inch to 6 inch basket can stand with medium-weight cotton and fusible fleece, but a tall 12 inch basket often needs firmer interfacing or even a stabilizer that supports the sidewalls. As a rule, the taller the basket, the more structure you need.
Fabric weight matters because quilting cotton alone tends to collapse. Canvas, denim, and upholstery-weight cotton are naturally sturdier, but still benefit from interfacing for crisp corners. If your fabric is thick, reduce bulk by pressing seams open where possible and trimming seam allowances at corners. For delicate quilting cottons, pair them with a woven fusible interfacing plus fusible fleece to get a “soft but standing” finish.
Interfacing choice is also about washability. If you plan to toss the basket in the wash, avoid very stiff craft-only stabilizers that may crease permanently. A fusible fleece plus a medium fusible woven interfacing usually survives laundering better while still helping the basket keep its shape.
Fabric basket patterns and useful variations
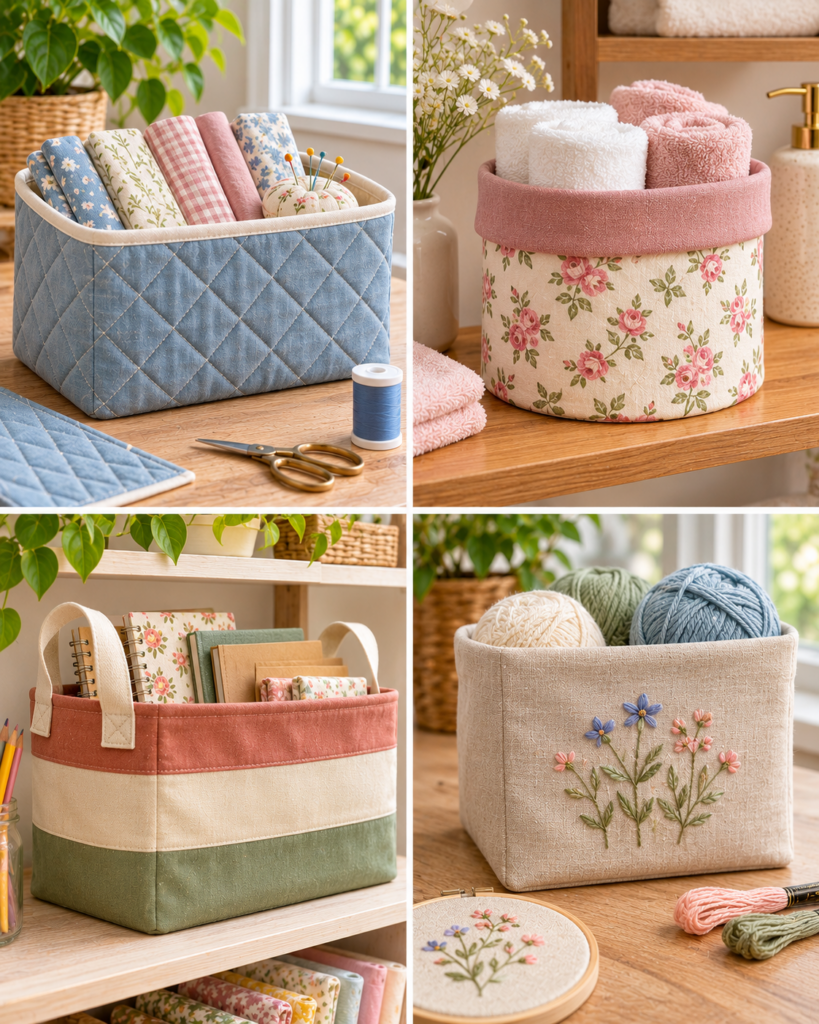
Once you understand the basic structure, you can adapt almost any Fabric Basket Sewing Pattern into variations that fit your home. The key elements are: an outer piece, a lining piece, and a stabilizer layer. Change the proportions and details, and you get a completely different look. For example, a wide shallow bin is ideal for keys and mail, while a narrow deep bin keeps pantry packets upright.
Plan a few functional details before cutting. Do you want a folded cuff to hide the topstitching? Do you need label tabs for organizing? Are handles essential, or will they be decorative only? Make those decisions early, because handles and label tabs are easiest to sew into side seams before the basket is assembled.
Here are practical, popular variations to consider. Even if you start with the simplest basket first, reading through the options will help you choose fabrics and interfacing that match your end use.
Small fabric baskets for sewing supplies
Small baskets are perfect for clips, bobbins, seam rippers, and thread snips. Keep the base square or slightly rectangular so items do not disappear into corners. A 5 inch by 5 inch base with a 4 inch height is a handy “beside the machine” size. Add a contrasting lining so you can see dark items inside quickly. If you like to batch sew gifts, make a set of three and stack them inside each other for storage.
Deep baskets for shelves and closets
Deep baskets work well for rolled socks, craft paint bottles, or cleaning cloths. For shelf baskets, aim for a base that matches your shelf depth and a height that still lets you reach the bottom. Add a label tab on the front so you can identify contents at a glance. For extra durability, topstitch the side seams and consider a firm interfacing that supports the full height.
Reversible fabric storage baskets
Reversible baskets are great when you want two looks in one. Use two coordinating quilting cottons, and avoid bulky handles that make reversing awkward. Sew the lining and outer the same height, then turn and press carefully so the top edge is crisp. A reversible basket is also a smart way to “hide” a seasonal print until you fold it over.
Baskets with handles or folded cuffs
Handles can be fabric loops, webbing, or even leather tabs, but keep safety in mind: if the basket will hold heavy items, stitched fabric loops should be reinforced with a box-and-x stitch and inserted into seams with extra stitching. A folded cuff is simpler and adds polish. It also gives the rim extra thickness, helping the top edge stay level.
Baskets with contrasting lining and label tabs
A contrasting lining adds a boutique finish, especially when paired with a small label tab. Tabs can be made from ribbon, twill tape, or a folded fabric strip. Insert the tab into the outer side seam before you sew the lining to the outer. If you plan to label with vinyl or iron-on letters, test on scraps first so heat does not warp the material.
How to sew a basic fabric basket
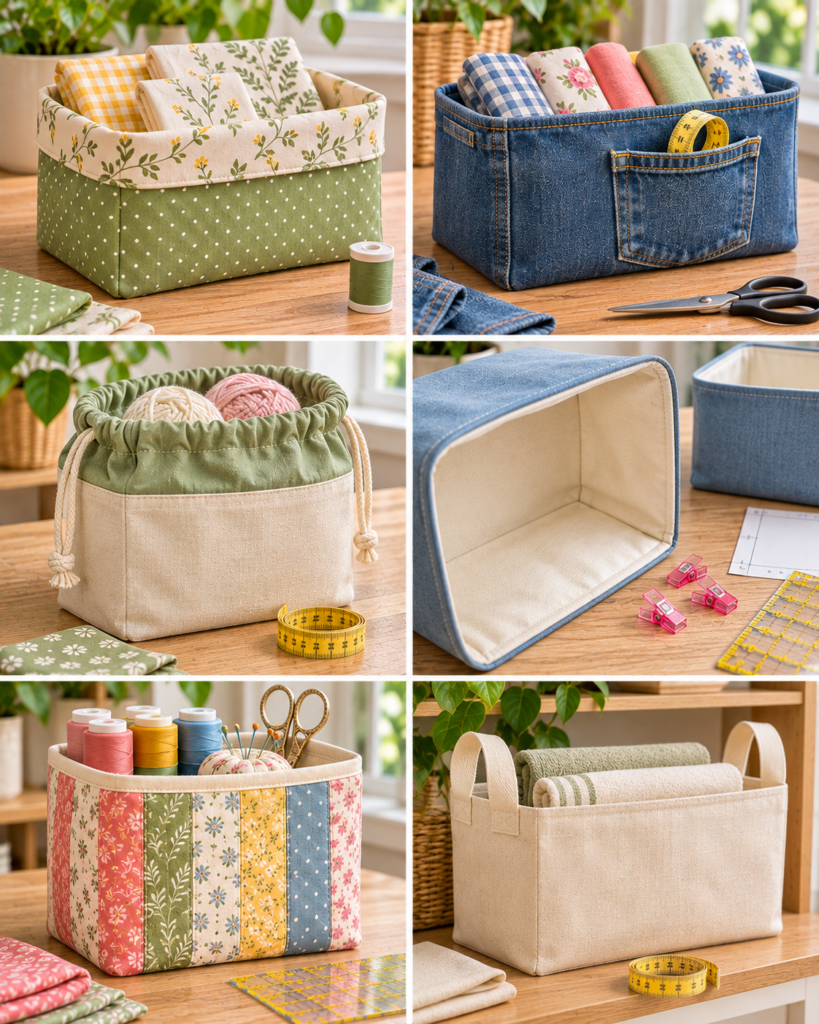
This section walks you through a reliable, beginner-friendly Fabric Basket Sewing Pattern method using a boxed-corner rectangle. The steps below assume a finished basket around 8 inches wide, 4 inches deep, and 6 inches tall, but you can scale it by changing your rectangle size and corner box measurement. Use a 3/8 inch to 1/2 inch seam allowance and stay consistent throughout. Consistency matters more than the exact number, because it keeps the lining and outer the same size.
Difficulty level: Confident beginner. Estimated time: 60 to 90 minutes including pressing. Best uses: open storage on shelves, desks, and counters.
- Prepare and fuse stabilizer. Cut interfacing or fleece to match your outer fabric pieces (or slightly smaller to reduce bulk in seams). Fuse following the manufacturer’s heat and steam recommendations. Let the pieces cool flat so the glue sets well.
- Sew outer side seams. Fold the outer fabric right sides together, align edges, and sew both side seams. Backstitch at the beginning and end. Press seams open or to one side, then repeat for the lining pieces.
- Box the corners. With the outer still wrong side out, pinch one bottom corner so the side seam aligns with the bottom fold, forming a triangle. Measure a line perpendicular to the seam (for example 2 inches across for a 4 inch depth), mark it, then stitch on the line. Repeat all corners for outer and lining. Trim the triangle leaving 1/4 inch seam allowance.
- Join lining to outer. Turn the outer right side out. Keep the lining wrong side out. Insert the outer into the lining so right sides face each other and raw top edges align. Pin or clip around the top, matching side seams.
- Sew around the top edge. Stitch all the way around, leaving a 3 inch to 4 inch turning gap in the lining side (not on a corner). This gap is easier to close neatly because it is on a straight section.
- Turn and shape. Pull the basket right side out through the turning gap. Push out corners gently with a blunt tool (a chopstick or point turner), avoiding sharp objects that can poke through fabric.
- Close the gap and topstitch. Press the turning gap seam allowances inward and stitch it closed close to the edge. Tuck the lining into the basket, roll the top edge between your fingers so the seam sits exactly at the rim, press, then topstitch 1/8 inch to 1/4 inch from the top edge to stabilize the rim.
Measuring and cutting outer fabric and lining
For the example size, cut two outer rectangles and two lining rectangles at 9 inches by 11 inches. This allows seam allowance and a 2 inch boxed corner. If you want a taller basket, add height to the long direction. If you want a wider base, add width to the short direction, but keep in mind that very wide baskets may bow outward unless interfacing is firm.
Cut interfacing to match the outer rectangles. If using thick stabilizer, trim 1/4 inch off all sides to keep seams from becoming bulky. Always square up your pieces. Even small cutting errors can make the top edge ripple or the lining twist inside.
Sewing the sides and boxed corners
When sewing side seams, guide the fabric without pulling. Pulling can stretch one layer more than the other and cause mismatched corners later. For boxed corners, accurate marking is the difference between a basket that sits flat and one that wobbles. Measure from the tip of the corner, not from the seam allowance edge. Stitch slowly across the marked line and backstitch at both ends for strength.
Joining the lining, turning and topstitching
Clips are often easier than pins around thick layers because they do not distort the edge. After turning, spend time shaping the rim before topstitching. If the seam wants to roll to one side, press and use a few clips to hold the edge in place as it cools. Topstitching is not just decorative. It keeps the lining from creeping up and adds firmness to the opening so the basket holds a clean shape.
How to make a fabric basket sturdy
A Fabric Basket Sewing Pattern can look cute but still flop over if structure is not planned. Sturdiness comes from the right stabilizer, controlled bulk, and careful pressing. If you want a basket that truly stands up, focus on the sidewalls and rim, not just the base. The rim is where baskets collapse first, especially if the basket is lifted often.
Think about what “sturdy” means for your use. A basket for light craft supplies can be softly structured, while a basket that holds bottles, remotes, or cords benefits from a firmer feel. You can also combine methods: use fusible fleece for body plus a strip of firm interfacing around the top edge to create a stable band.
Choosing fusible fleece versus firm interfacing
Fusible fleece gives a padded, quilted look and is beginner-friendly because it presses smoothly. It is ideal for baskets that need gentle structure and a soft hand. Firm interfacing creates crisp sides and sharper corners. It is better for tall baskets, handle baskets, and shelf bins that should keep a rectangular profile. If you use very firm interfacing, consider a slightly longer stitch length (around 3.0 mm) to prevent puckering and reduce stress on your machine.
Getting even corners and a level top edge
Uneven corners usually come from inconsistent seam allowance or inaccurate boxing lines. Use a seam guide or painter’s tape on your machine bed to keep seams consistent. Mark corner boxing lines with a ruler and fabric pen, then stitch directly on the line. A wavy top edge often happens when lining and outer pieces are slightly different sizes. If that happens, you can “favor” the lining slightly to the inside by rolling the seam just a hair inward before topstitching. Pressing in stages helps: press the seam flat first, then press it open, then press the final shape.
“I tried this Fabric Basket Sewing Pattern method with quilting cotton and fusible fleece, and my first basket actually stood up. The tip about pressing the rim before topstitching made a huge difference, and now I want to sew a set for my linen closet.”
Frequently Asked Questions About Fabric Basket Sewing Pattern: Easy Storage Ideas
What fabric is best for a fabric basket?
Quilting cotton works well when paired with interfacing or fusible fleece, making it a great choice for beginners because it is easy to cut and press. For naturally sturdy baskets, canvas, denim, and home decor cotton hold shape better, but they can be bulky at corners. If you use thicker fabric, choose a denim needle and reduce layers by trimming seam allowances and interfacing away from seam lines.
How do you make a fabric basket stand up?
Use stabilizer that matches your basket height and intended load. Fusible fleece adds body, while firm interfacing adds structure. Another trick is to add extra top reinforcement: fuse a 2 inch wide strip of firm interfacing around the top edge area of the outer fabric. Crisp boxed corners also matter. If corners are uneven, the basket will wobble and look slouchy even with good interfacing.
Can beginners sew fabric baskets without a pattern?
Yes, because a basic basket is essentially two rectangles and boxed corners. That said, beginners do best with a simple “formula” and a test basket in inexpensive fabric first. Decide your finished base size and height, then add seam allowance and corner boxing depth consistently for outer and lining. If you want a reliable first project, follow a proven Fabric Basket Sewing Pattern once, then start modifying sizes and details.
My lining is taller than my outer. How do I fix it?
This usually comes from small cutting differences or a slightly wider seam allowance on one layer. First, try re-pressing the top seam and rolling it so the lining sits inside the rim. If it is still too tall, turn the basket inside out, sew a slightly deeper seam around the top edge (an extra 1/8 inch can help), then turn and topstitch again. For future baskets, stack-cut your rectangles so they match perfectly.
My corners look pointy or uneven after boxing. What went wrong?
Pointy corners happen when the boxed corner line is not perpendicular to the seam, or when the seam allowance varies. Align the side seam directly on top of the bottom fold and finger-press the triangle before measuring. Use a ruler to draw the stitching line. Sew slowly across the line and keep the fabric flat. Trimming the corner triangle evenly also helps the corner sit neatly once turned.
Can I quilt the outer fabric for extra structure?
Yes. Quilting the outer fabric to fusible fleece or batting adds texture and helps the basket keep its shape. Use a walking foot if you have one, and keep quilting lines simple like straight grids or gentle diagonals. After quilting, re-square your pieces before sewing, because quilting can shrink or distort fabric slightly. Then proceed with the same Fabric Basket Sewing Pattern assembly steps.
What needle and thread should I use?
For quilting cotton with fleece, a universal 80/12 needle and all-purpose polyester thread are a safe default. For canvas or denim, switch to a 90/14 needle or a denim needle to avoid skipped stitches. If your machine struggles over thick seams, lengthen the stitch slightly and hand-walk the needle over bulky spots using the handwheel for control.
How do I add handles that will not rip out?
Use sturdy handle material like cotton webbing, belting, or double-layered fabric straps with interfacing. Insert handle ends into the side seams between outer and lining, and stitch over them multiple times. After turning, topstitch around the rim, and add a second line of topstitching lower down for reinforcement. If the basket will hold heavy items, add small squares of interfacing where the handle ends sit.
How do I wash and care for fabric baskets?
If you used washable fabrics and fusible products labeled washable, most baskets can be machine washed cold on gentle and air dried. To maintain shape, reshape the basket while damp and let it dry fully. Very firm stabilizers may crease, so spot cleaning can be a better option for those baskets. Always test your interfacing and fabric combination on a scrap if you are unsure.
Final thoughts and practical ways to use your basket
A Fabric Basket Sewing Pattern is one of those skills that keeps paying off. Once you sew one basket successfully, you can adjust the size for drawers, shelves, and countertops, and you can personalize the look with cuffs, labels, or handles. For your next step, pick one spot in your home that needs a tidy upgrade, measure the space, and sew a basket sized specifically for it. Keep notes on what interfacing you used and how it behaved, because that becomes your personal “pattern library.” If you enjoyed this type of practical home sewing, consider trying an easy apron sewing pattern next for more practice with durable seams and everyday fabrics.