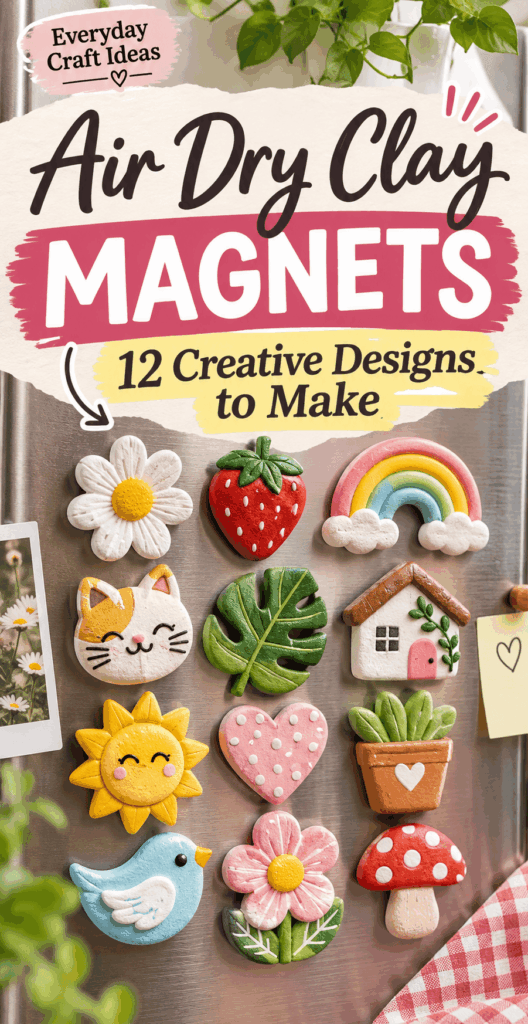
Air Dry Clay Magnets: 12 Creative Designs to Make
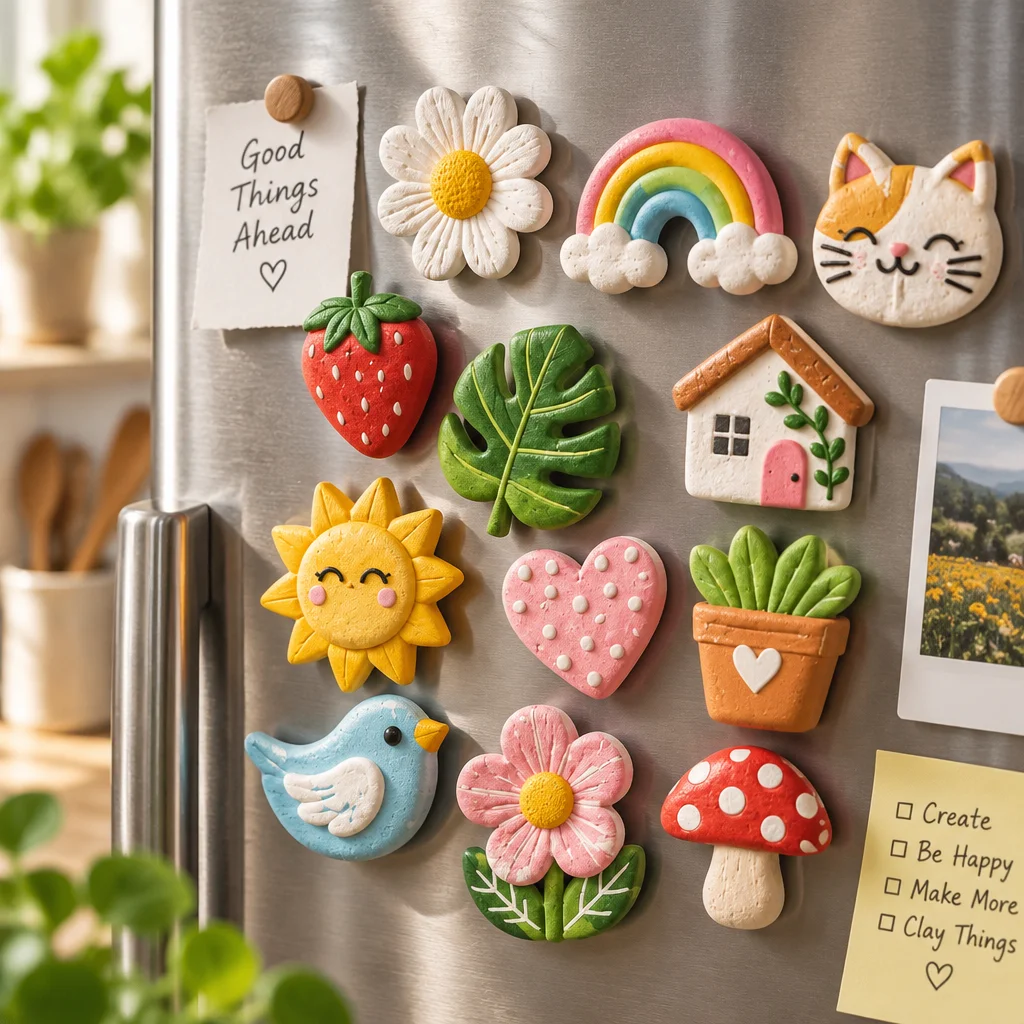
Air Dry Clay Magnets are one of those crafts that feel instantly rewarding: you can make something cute, functional, and giftable in a single afternoon, even if you have never worked with clay before. The finished magnets brighten a fridge, locker, or magnetic board, and they are small enough to experiment without wasting materials. If you have tried polymer clay before, you will find the shaping process familiar, but air-dry clay skips the oven step and is easy to paint once dry. If you want more magnet inspiration in another medium, see these easy polymer clay magnet ideas. And if you plan to make sets to sell or gift, these craft fair display ideas can help you present them neatly.
Air Dry Clay Magnets suit beginners, busy crafters, and anyone who wants a low-mess project with a practical result. The appeal is that you can keep the designs simple or go detailed, and you can personalize colors, words, and themes for seasons, holidays, or room decor. Most designs in this guide are small, lightweight, and intentionally flat so they hold well on a vertical surface without sliding.
Difficulty is generally beginner to confident beginner. Expect about 45 to 90 minutes of hands-on time for shaping and texturing a small batch, plus 24 to 48 hours drying time (varies by clay brand, thickness, and humidity). Painting and sealing usually add another 30 to 60 minutes. You can make a cohesive set of 6 to 12 magnets in one sitting if you roll and cut in batches.
The key to success is controlling thickness, letting pieces dry fully, and attaching magnets with the right adhesive. This article walks you through what to buy, how thick to roll your clay, 12 reliable design ideas, and the finishing steps that make Air Dry Clay Magnets last.
What You Need to Make Air-Dry Clay Magnets
Air-dry clay, rolling pin, cutters and shaping tools
Choose an air-dry clay that dries hard and can be sanded. Many paper-based or fiber-reinforced clays are great for magnets because they are lightweight and less brittle than ultra-smooth “porcelain-style” clays. You will also want a dedicated rolling pin (acrylic or wood), plus spacers or craft sticks to keep your slab an even thickness.
Cutters can be metal cookie cutters, mini fondant cutters, or even cardboard templates traced with a craft knife. For shaping and texture, simple tools are enough: a butter knife or clay knife, toothpicks, a dotting tool, and a soft paintbrush for smoothing. Keep a small dish of water nearby for smoothing seams, but use it sparingly because too much water can weaken the clay surface.
Strong magnets, suitable adhesive and protective finish
For Air Dry Clay Magnets, use small but strong magnets. Neodymium disc magnets (rare earth) give excellent hold for their size. Ceramic magnets work too, but you may need larger pieces, which can look bulky.
Adhesive matters because air-dry clay is porous. Thick gel cyanoacrylate (super glue gel) bonds quickly, while two-part epoxy is the most durable for long-term use. Hot glue is usually not ideal because it can pop off smooth magnets and may fail with temperature changes.
To protect your work, use an acrylic sealer or varnish (matte, satin, or gloss). If you paint, sealing reduces scuffs and makes the surface wipeable. Avoid water-based sealers on clay that is not fully dry, since trapped moisture can cause cloudiness or soft spots.
How to choose a practical thickness for lightweight magnets
A reliable thickness for most Air Dry Clay Magnets is about 1/8 inch to 3/16 inch (3 to 5 mm). Thinner pieces can warp and crack more easily, while thicker pieces get heavy and may not hold well unless you use stronger magnets or multiple magnets. If you plan to add raised details (like tiny stems or facial features), keep the base on the thinner end and add details carefully so the final piece stays light.
Tip: test one magnet early. Make a single sample, let it dry, seal it, and attach a magnet. If it slides down your fridge door under its own weight, reduce thickness, use a stronger magnet, or add a second magnet.
12 Air-Dry Clay Magnet Designs
Mini botanical leaf magnets
Roll clay and cut small ovals or teardrops. Press a real leaf gently onto the surface to transfer veins, or draw veins with a toothpick. Add a tiny stem with a clay coil and blend the join with a damp brush. Paint in layered greens, or try fall tones with ochre and rust. Seal with matte varnish for a realistic look. These are great as a set of 6 to 10 in mixed shapes.
Pressed-texture flower magnets
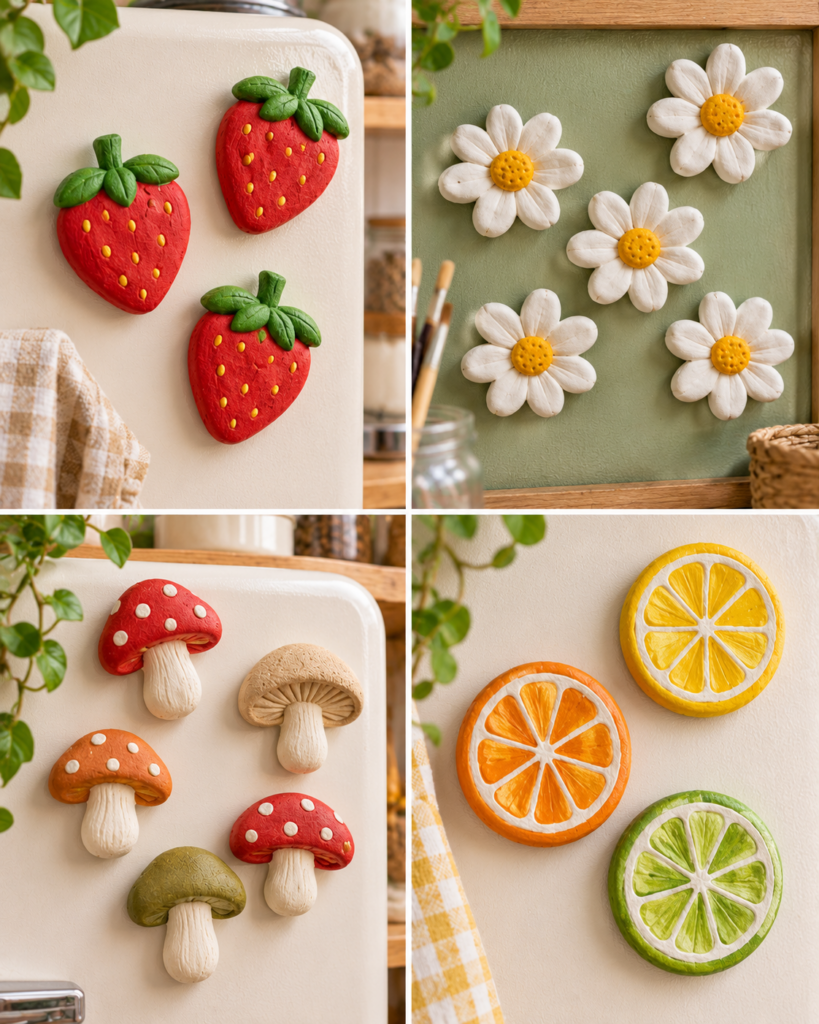
Cut circles for flower bases, then press texture using lace, crochet trim, or a textured rolling pin. For petals, pinch the edges slightly to give a soft ruffle. Once dry, dry-brush a lighter color over raised texture to highlight details. Add a painted dot center or a tiny glued bead after sealing (beads should be glued onto sealed paint for better adhesion).
Speckled terrazzo-style circles
Terrazzo looks complex but is beginner-friendly. Make a base color slab, then sprinkle tiny colored clay “confetti” pieces on top and lightly roll to embed them. Keep the confetti very thin so it does not pop off during sanding. After drying, sand the surface lightly to reveal crisp speckles, then seal with gloss for that polished terrazzo effect.
Tiny fruit-slice magnets
Fruit slices work best as simple graphic designs on flat rounds. Cut circles, then add wedge lines for citrus, dots for kiwi seeds, or a two-tone ring for watermelon. Paint is your friend here: shape the basic round, then paint details once dry. For extra durability, seal, then add a second thin topcoat around the edges where hands grab the magnet most.
Mini mushroom magnets
Make a small stem as a short cylinder and a cap as a flattened dome. Score and slip (scratch both surfaces and add a tiny bit of water) before joining, then blend the seam. Keep them squat so they do not snag. Paint classic red-and-white toadstools, or try neutral cottagecore tones. If you want spots, dot them on after the base coat dries to prevent bleeding.
Stamped alphabet magnets
Roll a slab and cut squares, circles, or rounded rectangles. Press letter stamps (or the end of a pencil for dots) into the clay while it is still soft. Make sure to press straight down to avoid skewed letters. After drying, paint the whole tile, then rub a slightly darker wash into the stamped letters and wipe the top surface to make the letters stand out.
Pastel heart magnets
Cut hearts with a cutter or freehand with a template. For a clean edge, smooth with a damp brush and rotate the piece as you refine the outline. Pastels look best with a matte or satin topcoat. Try adding subtle texture by pressing a sponge lightly onto the surface before drying, which gives a soft “ceramic” look once painted.
Abstract arch magnets
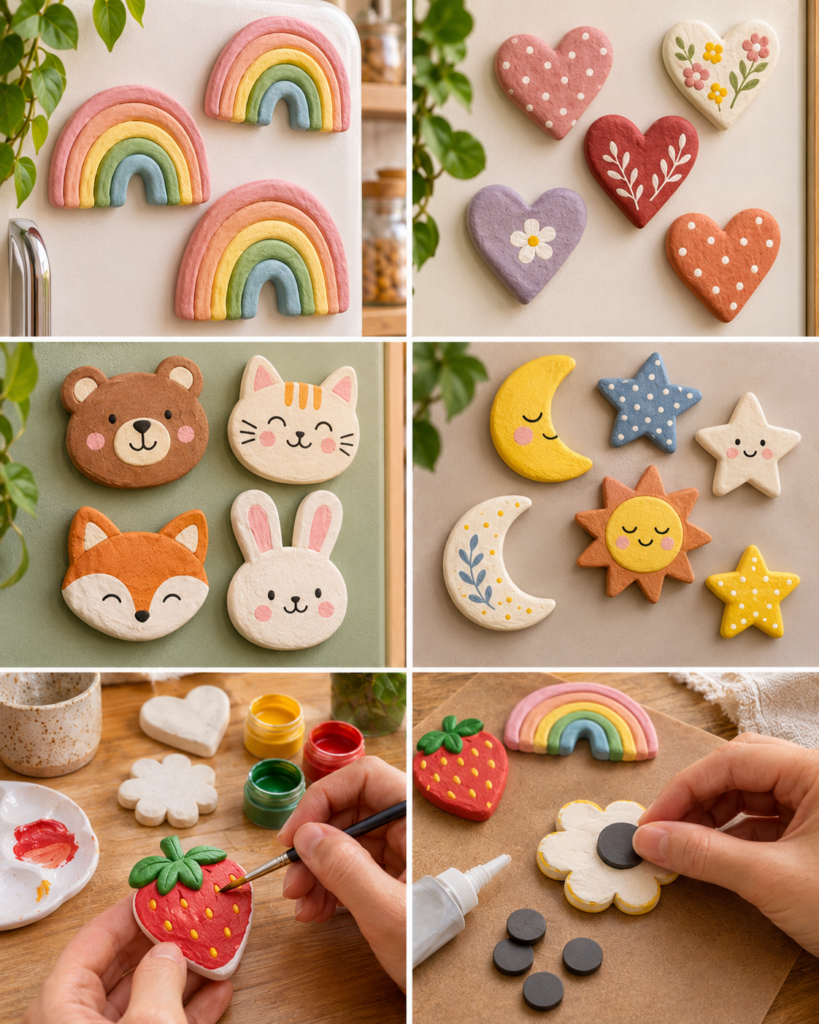
Cut arches using a small cutter or by cutting a rectangle and rounding the top. Paint in color-block sections: two or three bands look modern and are forgiving if your cut is not perfect. Use painter’s tape only after the clay is sealed, because tape can lift paint from unsealed clay. A thin black line around the perimeter can make a simple arch look intentional and graphic.
Sun and moon magnets
For a sun, cut a circle and add short triangle rays around the edge, blending joins carefully. For a crescent moon, cut a circle and remove an offset inner curve. Metallic paint looks great here, but apply in thin coats to avoid tackiness. Seal with gloss if you want a “shiny celestial” vibe or matte for a soft boho finish.
Mini animal-face magnets
Keep these simple: a round face with tiny ear bumps, plus painted features. Cats, bears, frogs, and bunnies are easiest because the silhouettes read clearly. Use a dotting tool or the end of a bobby pin to place symmetrical eyes. If you are nervous about painting faces, sketch lightly with a pencil first on sealed paint, then paint over the sketch.
Marbled clay magnets
Marbling is easiest with two or three colors. Twist thin snakes of clay together, fold, and twist again, then roll into a slab. Stop before colors blend into one muddy tone. After drying, sanding gently can bring out the marble pattern even more. Seal with gloss for a stone-like look, or satin for a more modern finish.
Simple geometric tile magnets
Squares, hexagons, and triangles are perfect for batch-making. Use one cutter shape and vary surface design with stamped texture, painted stripes, or tiny dot patterns. These also make great “message board” sets: one color for shopping lists, another for kids’ artwork. If you love clean geometric projects, you may also enjoy making matching desk accessories like easy clay coasters to coordinate with your magnets.
How to Shape and Finish Your Magnets
Roll evenly and smooth cracked edges
- Condition and knead the clay: Work it in your hands for a minute or two so it rolls without crumbling. If it is very stiff, let it rest in a sealed bag with a barely damp paper towel nearby (not touching the clay) for 10 to 15 minutes.
- Roll with thickness guides: Place two craft sticks or spacers on either side of the clay and roll your pin across them. Even thickness reduces warping and helps magnets sit flush.
- Cut shapes cleanly: Press cutters straight down and lift straight up. If edges tear, the clay is too wet or you are wiggling the cutter.
- Smooth edges now, not later: Use a damp paintbrush to gently stroke cracks and rough edges. This is easier than sanding deep chips after drying.
- Dry on a flat, nonstick surface: A ceramic tile, parchment paper, or a silicone mat works well. Flip pieces after several hours (when firm) so both sides dry evenly.
Let clay dry completely before painting
Air-dry clay can feel dry on top while still damp inside. If you paint too early, moisture can get trapped and cause peeling paint, soft spots, or mildew over time. Let pieces dry 24 to 48 hours, longer for thicker items or humid climates. A good test is temperature: fully dry clay feels room temperature, while damp clay often feels cool to the touch.
Attach magnets securely and test holding strength
- Sand the back lightly: A quick pass with fine-grit sandpaper helps the magnet sit flat. Wipe dust away.
- Seal before gluing (recommended): A thin sealer coat on the back reduces glue soak-in and improves bond strength on porous clay.
- Use gel super glue or epoxy: Apply a small amount, press the magnet in place, and hold steady. For epoxy, follow the mix ratio and cure time exactly.
- Let adhesive cure fully: Even if it “sets” quickly, give it the full cure time before testing on a fridge.
- Test with real use: Try holding a photo or a couple of paper sheets. If it slips, switch to a stronger magnet or use two magnets spaced apart for better grip.
How to Customize a Matching Magnet Set
Choose a cohesive palette and repeated shapes
A set looks intentional when you repeat one or two elements across all pieces. Pick a palette of 3 to 5 colors and use them in different combinations. For example, make arches, circles, and hearts but paint them all with the same pastel trio. Or choose one shape, like hexagons, and vary only the surface pattern: stripes, dots, and color blocks.
Another easy strategy is a “theme” set: botanical leaves plus mushrooms in earthy tones, or suns and moons in creams and metallic gold. If you are selling, cohesive sets are easier for shoppers to understand quickly. For more ideas on presenting small items as collections, you can adapt these smart craft fair display setups for magnets, too.
Package sets for gifting without scratching finishes
Even sealed Air Dry Clay Magnets can scratch if they rub together. Package them so each piece is protected. Put each magnet in a small paper pouch, or separate them with parchment squares inside a gift box. If you want to display them, stick them onto a thin metal sheet or a magnetic gift box lid so they do not bang into one another.
Include a small care card: “Avoid soaking in water. Wipe clean with a damp cloth. Do not let small magnets near children or pets.” This is especially important if you used neodymium magnets.
“I made the terrazzo circles and the stamped alphabet tiles with my 10-year-old. Letting them dry an extra day was the best tip. Nothing cracked, and the magnets are strong enough to hold school papers on the fridge.”
Frequently Asked Questions About Air Dry Clay Magnets: 12 Creative Designs to Make
What magnets work best with air-dry clay?
Neodymium disc magnets are usually the best choice because they are strong for their small size, which helps keep Air Dry Clay Magnets lightweight and less likely to slide. Look for discs around 8 to 12 mm wide and 1 to 3 mm thick for small designs. If your clay piece is larger than 2 inches, consider using two smaller magnets spaced apart to improve grip and prevent spinning.
How do I stop air-dry clay magnets from cracking?
Cracking usually comes from clay that is too dry while you work, uneven thickness, or drying too fast. Keep unused clay wrapped tightly, roll with thickness guides, and smooth edges with a damp brush right after cutting. Dry pieces on a flat surface away from direct sun or heaters, and flip them partway through drying. If small cracks appear, fill them with a tiny amount of fresh clay and smooth before fully dry.
Do air-dry clay magnets need sealing?
Sealing is strongly recommended. Air-dry clay stays slightly porous even when fully dry, so a sealer helps protect against fingerprints, kitchen splashes, and scuffs. If you painted your magnets, a varnish also prevents color transfer and makes cleaning easier. Use thin coats and let each coat dry completely. Matte sealers hide small imperfections, while gloss brings out marbling and terrazzo effects.
Can I paint air-dry clay magnets with acrylic paint?
Yes, acrylic paint is one of the best options for Air Dry Clay Magnets. Paint in thin layers so you do not obscure texture details. If your clay is very absorbent, you can apply a thin base coat of white acrylic as a primer, or seal first, then paint for crisper lines. Let paint dry fully before sealing, especially with dark colors that can smear under varnish if rushed.
Why are my magnets warping or curling?
Warping happens when one side dries faster than the other, or when the piece is too thin in spots. Roll evenly, avoid over-wetting the surface, and dry on a rigid flat board or tile. Flip pieces when they are leather-hard (firm but not fully dry). If a piece already warped, you can sometimes gently press it flat while it is still slightly damp, then weight it lightly between parchment sheets.
Is it safe to use super glue or epoxy for magnets?
Used correctly, yes. Work in a well-ventilated area, avoid skin contact, and keep adhesives away from children. Gel super glue sets fast, so dry-fit first and mark placement. Two-part epoxy is very strong but needs accurate mixing and full cure time. Never use adhesives on items meant for food contact. Also note that small magnets are a swallowing hazard, so keep finished Air Dry Clay Magnets out of reach of young kids and pets.
Final Thoughts
If you are making Air Dry Clay Magnets for the first time, start with geometric tiles or terrazzo circles. They are forgiving, dry flat, and look polished even with simple tools. Once you have a feel for thickness, drying time, and sealing, move on to mushrooms, botanicals, or animal faces. Your sensible next step is to make one small test magnet today: roll it evenly, let it dry fully, seal it, and glue on a neodymium disc. That single sample will tell you exactly how strong a magnet you need and how your clay behaves in your home’s humidity. From there, batch-make your favorite design into a matching set.