Craft Fair Display Ideas: 20 Smart Setups
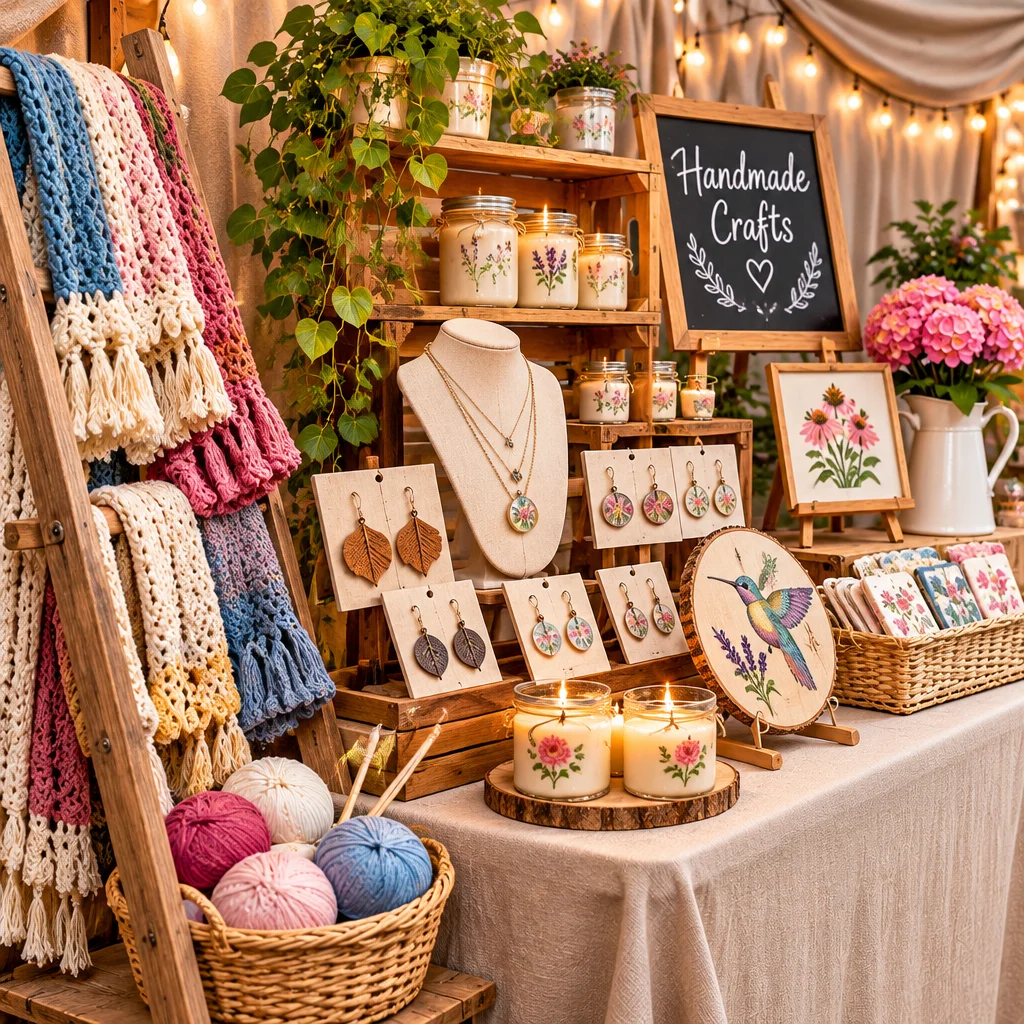
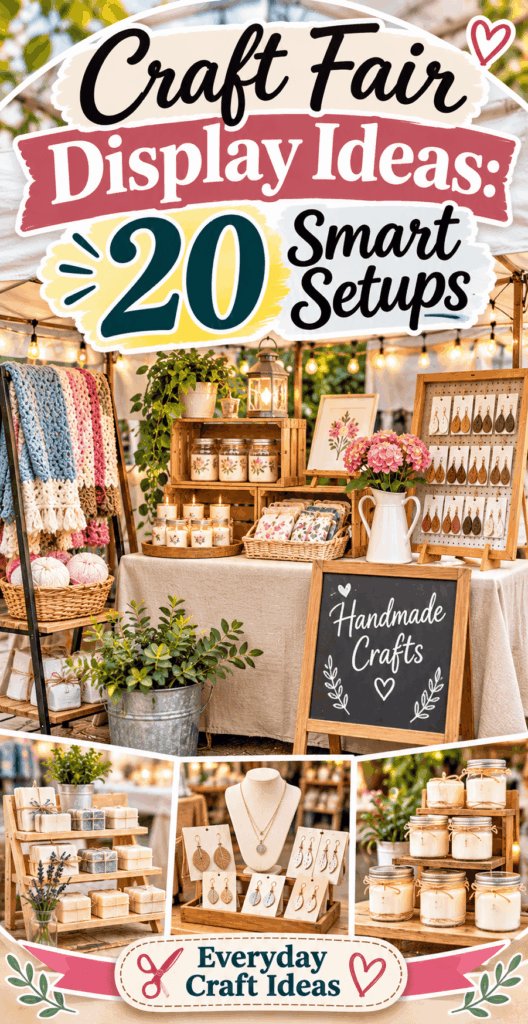
If you are searching for craft fair display ideas, you are probably trying to solve the same problem every maker faces: how to fit a lot of handmade goodness into a small space, make it easy to shop, and still look polished. The good news is you do not need expensive fixtures to create a professional booth. You need a clear plan, a few reliable display basics, and one or two “hero” elements that make your table memorable.
Start by gathering a simple display kit you can reuse for years. These items are versatile, packable, and beginner-friendly:
- Table covering and back-up cloth: A fitted tablecloth or clipped linen hides storage bins under the table and instantly looks tidy. Bring a spare for rain, spills, or wind.
- Risers and vertical pieces: Small wooden crates, stackable shelves, or a foldable grid wall create levels so shoppers can see more than one row of products.
- Signage tools: A chalk marker board or foam board sign helps customers understand pricing and product benefits at a glance.
- Fasteners: Binder clips, zip ties, removable hooks, and museum putty keep displays stable and safer in crowds.
- Lighting: Battery LEDs or clip-on lights are a game changer for indoor venues and gloomy weather days.
Planning a craft booth layout
Before you build anything, sketch your space. Measure your table length and depth, and note any rules about tent weights, wall height, and hanging items. Decide your main goal: easy browsing, a premium boutique vibe, or maximum product capacity. Most sellers do best with a simple “triangle” layout: tall items at the back, medium in the middle, short at the front. That creates clear sightlines and makes your booth feel fuller without feeling cluttered.
If you also make seasonal items, map a small section for them so you can swap stock quickly. For inspiration on what to bring seasonally, see these Christmas crafts to sell. If you are prepping and packing at home, organizing your staging area matters too, and these craft room organization ideas for small spaces can help you keep display pieces, bins, and inventory easy to grab.
20 ideas and projects to try
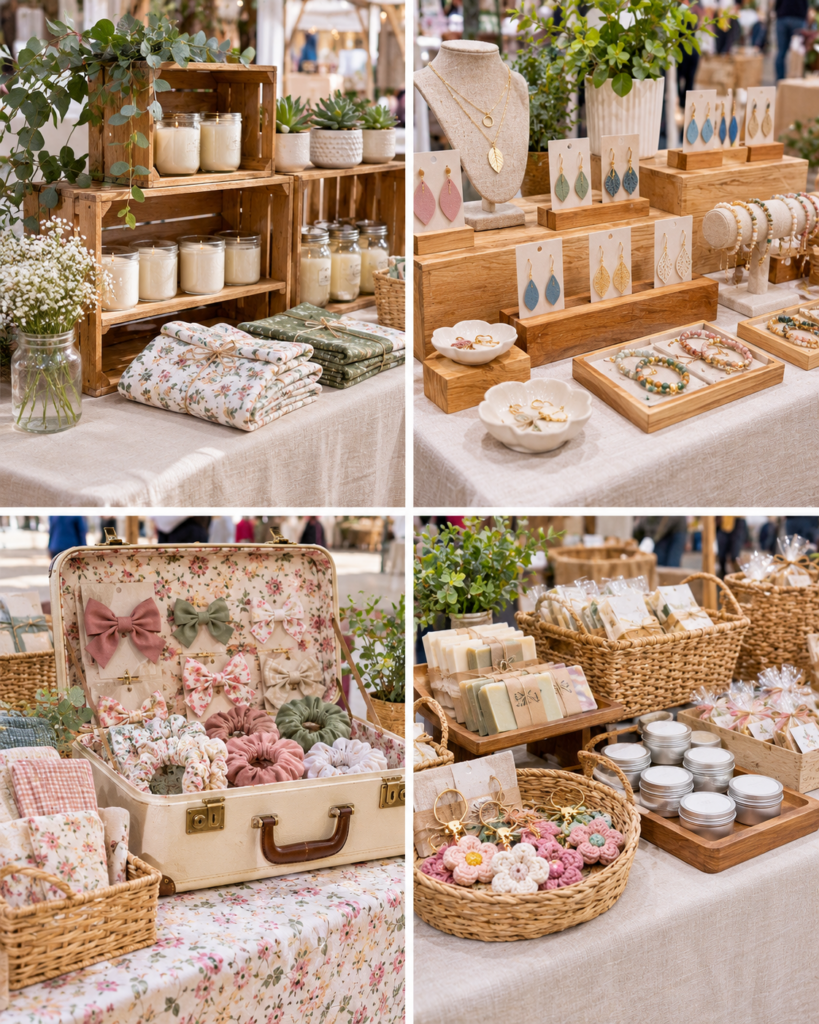
The best craft fair display ideas mix function and style: customers can touch and test, products are visible from the aisle, and you can restock fast. Use the list below as a “menu.” Pick 5 to 8 that match your product type, then repeat the same display language across the booth for a cohesive look.
Tiered shelves, pegboards, baskets, tabletop risers, vertical displays and signage
- 1) Three-tier cupcake stand for small items: Perfect for earrings, keychains, mini soaps, and lip balm. Add non-slip shelf liner circles so products stay put.
- 2) Wooden crate tower: Stack 2 to 4 crates on their sides for cubbies. Screw or zip tie crates together so they cannot shift when shoppers browse.
- 3) Folding bookshelf as a riser: A narrow folding shelf behind your table doubles your vertical space without blocking you completely.
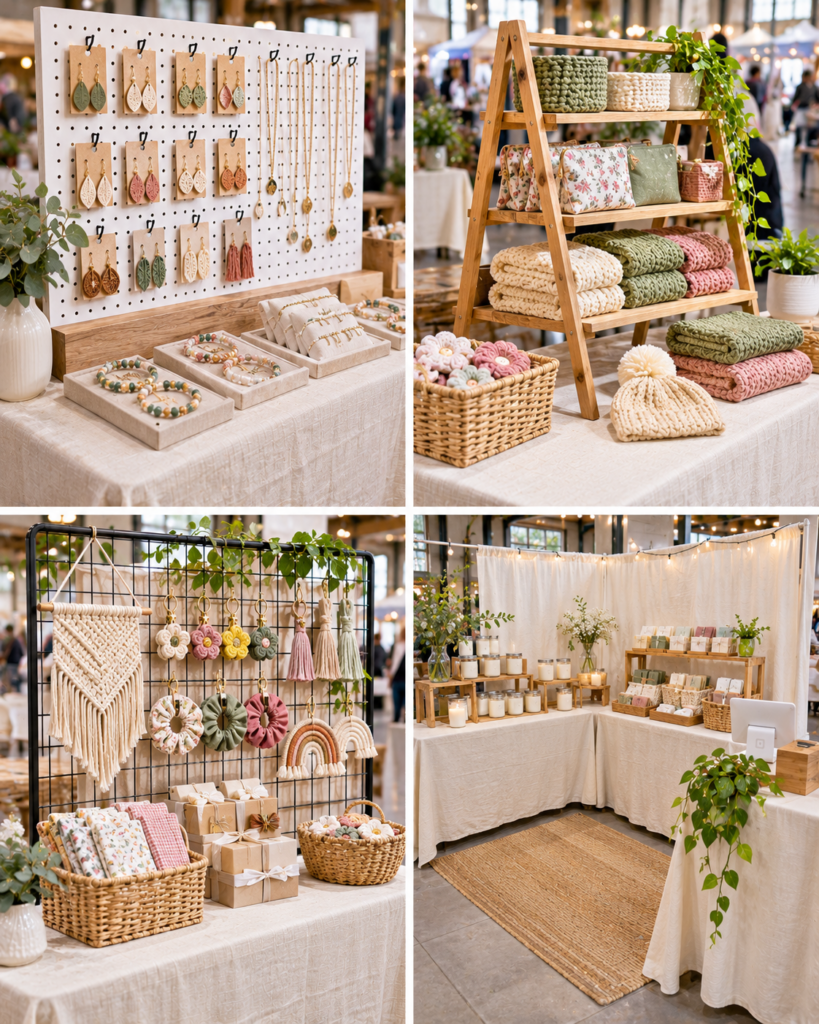
- 4) Pegboard back wall: Hang blister packs, cards, or tools used to demonstrate. Use pegboard cups for business cards and freebies.
- 5) Grid wall panels with S-hooks: Lightweight, modular, and great for hanging macrame, bags, or art prints in sleeves.
- 6) Slatwood or ladder display: A small leaning ladder shows textiles and scarves. Always secure the top with straps or ties to a tent leg or wall.
- 7) Tabletop acrylic sign holders: Slip in mini signs: “Choose your scent,” “Mix and match,” or “Custom orders welcome.”
- 8) Basket corral for impulse items: A shallow basket at the front corner invites quick browsing. Label it clearly so it does not become a messy bin.
- 9) Lazy Susan sampler station: Great for small jars, balm tins, or mini bundles. Customers can spin to see options without picking up everything.
- 10) Clip strip for add-ons: Hang small packaged items down the side of a shelf: sticker packs, ribbon spools, mini charms.
- 11) “Try me” demo tray: For lotions, scrubs, or wax melts, keep testers separate and sanitary with single-use sticks and a waste cup.
- 12) Floating shelf look with stacked risers: Use two identical risers to create a “bridge” shelf for a clean boutique style.
- 13) Photo menu board: If items are customizable (colors, monograms), show finished examples in a grid and list lead times.
- 14) Binder flip book: Protect a mini catalog in sheet protectors. Helps when products sell out but you can still take orders.
- 15) Gift-ready section: A small cluster of pre-wrapped sets increases average order size. If you sell jar-based items, pull ideas from these mason jar craft ideas for gifts and home decor and display them as bundles.
- 16) Color-blocked display: Group products by color family for visual impact. This works especially well for yarn goods and paper crafts.
- 17) Story card stand: Add a small frame: “Made locally,” “Hand stamped,” “Natural wax,” or your process in 3 steps. Shoppers love context.
- 18) Clear bin drawers under the table: Store backstock where you can reach it fast. Use labels facing you so customers do not see clutter.
- 19) Hanging price tags on twine: A simple twine line with mini clothespins can hold price cards, care instructions, or “new” tags.
- 20) Height with foam blocks under fabric: For a quick riser, wrap upholstery foam blocks in matching fabric and pin underneath. Lightweight and budget-friendly.
Pick a consistent material palette (wood, white, kraft, black metal) so the booth reads as one brand. If you do spring seasonal items, rotate a themed section using ideas from these Easter crafts for adults so repeat customers see something fresh.
How to make and customize the projects
Many craft fair display ideas are easy weekend DIYs. The trick is building for stability and transport, not just looks. Below is a practical process for making three core pieces that work for most product types: a riser set, a pegboard backer, and a signage system.
- Measure your table and choose your “max height”: Indoors, 24 to 36 inches above the tabletop is usually safe and visible. Outdoors, keep tall items anchored so wind cannot tip them.
- Build two nesting risers: Use 1×4 lumber or sturdy plywood. Aim for one riser around 4 to 6 inches tall and another 8 to 10 inches tall. Nesting saves space in your car and creates instant tiers.
- Sand and round edges: Smooth corners protect your tablecloth and prevent splinters. Beginners often skip sanding, then snag fabric or scratch products.
- Prime and paint or stain: Satin or matte finishes photograph well. Let finishes cure fully so they do not stick to packaging. If you must paint last-minute, choose a fast-drying water-based paint and allow extra airflow time.
- Create a portable pegboard panel: Cut a pegboard to fit your table width or half-width. Mount it to a simple wood frame (like a picture frame) so it stays rigid. Clamp it to the table or zip tie it to grid panels.
- Make signs readable from 6 feet away: Use large fonts, high contrast, and short wording: “Earrings $12,” “3 for $30,” “Custom names.” Put detailed info in smaller cards near the products.
- Add anti-slip protection: Shelf liner, museum putty, or small dots of removable grip gel reduce accidents when people bump the table.
- Pack with a “booth map”: Tape a simple layout diagram inside your tote. When you are tired at setup time, it prevents decision fatigue.
Safety note: If you use battery lights, keep spare batteries in a separate bag so terminals cannot touch metal tools. For tents and grid walls, always add weights appropriate to the venue rules, and never rely on product bins as weights.
“I used your tiered riser approach with two nesting boxes and a simple pegboard backer. Setup went from stressful to smooth, and customers actually noticed my smaller items instead of skipping past them.”
If you are making spring stock for fairs, plan your booth colors around it and browse these Easter craft ideas for adults to make at home for product inspiration that looks great on clean, bright risers.
Supplies, cost, time and skill level
Most craft fair display ideas fall into three categories: no-build styling, light DIY builds, and modular systems. Choose based on your schedule and whether you do one fair a year or many.
- No-build styling (Beginner): Baskets, fabric bins, book stands, and photo frames. Budget: $20 to $80 depending on what you already own. Time: 1 to 3 hours to test layouts at home.
- Light DIY builds (Confident beginner): Wooden risers, crate stacks, simple pegboard frames, tabletop sign holders. Budget: $40 to $150. Time: 3 to 8 hours plus drying time for paint or stain.
- Modular systems (Intermediate): Grid walls, collapsible shelves, lighting rigs, branded banners. Budget: $120 to $400. Time: 1 to 2 weekends to assemble, customize, and practice packing.
Beginner mistakes and troubleshooting
Mistake: Everything is flat on the table. Fix it by adding just two heights. Even a small riser at the back makes products visible. If your table looks cluttered, remove 20 percent of items and add a “restock” bin under the table.
Mistake: Price tags are hard to find. Add one large pricing sign plus small tags on each product group. If you sell many variations, use a menu board: “Necklaces $18, add initials +$4.”
Mistake: Displays tip or wobble. Use wider bases, add non-slip liner, and avoid stacking more than two light crates high unless they are secured. Outdoors, assume wind and curious kids will test your setup.
Mistake: Booth feels dark. Bring battery lights even for daytime indoor events. Aim light at the products, not in shoppers’ eyes.
Mistake: Packaging slides around. Add shallow trays or lip-edged shelves, and group items in small batches instead of single rows that topple easily.
Frequently Asked Questions About Craft Fair Display Ideas: 20 Smart Setups
How do I display crafts at a fair?
Start with a simple layout that shows your best sellers first. Use height at the back, medium items in the middle, and small items at the front so nothing gets hidden. Group products by type or theme, and add clear signage for pricing and quick benefits. Keep a “touch and try” area if your products allow it, but separate testers from sellable inventory so things stay clean and organized.
How do I set up a small craft table?
For a small table, vertical space is your best friend. Add a narrow shelf or crate riser at the back and one basket or tray at the front for easy browsing. Limit your categories so the table feels curated, not crowded. Store refills under the table in lidded bins and restock often. A single bold sign with your brand name and price range helps people decide to stop quickly.
What attracts buyers?
Buyers stop when they can instantly understand what you sell and what it costs. Clear product grouping, consistent colors, and one standout feature (like a hanging banner, a hero product display, or a “gift sets” section) helps. Good lighting and neat packaging communicate quality. Offer simple choices: “Pick your scent,” “Choose your color,” or “Build a bundle,” and make your checkout process smooth so lines do not scare people away.
How can I display jewelry without it tangling?
Use necklace busts or T-bars for featured pieces, and keep the rest on individual cards or in small compartments. For earrings, a pegboard with hooks or a mesh frame works well and stays visible from the aisle. Transport jewelry in a case with separated sections, then move it onto your display. Bring a small microfiber cloth for quick polishing, and avoid placing jewelry on fabric that sheds lint.
What is the easiest DIY display to build?
The easiest build is a set of nesting wooden risers. You can make them from basic boards or plywood, and the cuts do not need to be fancy. Sand edges, paint or stain, and add non-slip shelf liner on top. Risers work for candles, soaps, art prints in stands, and packaged crafts. They also pack efficiently because the smaller riser fits inside the larger one.
How do I keep my display safe in wind or crowds?
Assume someone will bump your table. Use non-slip liner under trays and risers, secure stacked crates with screws or zip ties, and keep heavy items low. Outdoors, always use proper tent weights and avoid lightweight sign stands that can tip. If you hang items on grid walls, spread weight evenly and add stabilizing feet. Keep breakables away from the table edge and use lipped trays to prevent sliding.
Final tips and next projects
The most successful craft fair display ideas are the ones you can set up quickly, keep stable all day, and repack without frustration. Practice your layout at home once, time your setup, and take a photo of the finished booth so you can recreate it at future events. Start simple: two risers, one vertical element (pegboard or grid panel), and clear pricing signage. Then upgrade one piece at a time as you learn what shoppers respond to.
For your next prep session, choose a seasonal collection to highlight, refresh your gift bundles, and consider adding a small “custom order” catalog binder. If you need more product inspiration to match your new booth setup, revisit the seasonal ideas linked above and build a display plan around your best sellers. Your goal is a booth that feels welcoming, easy to shop, and unmistakably yours.