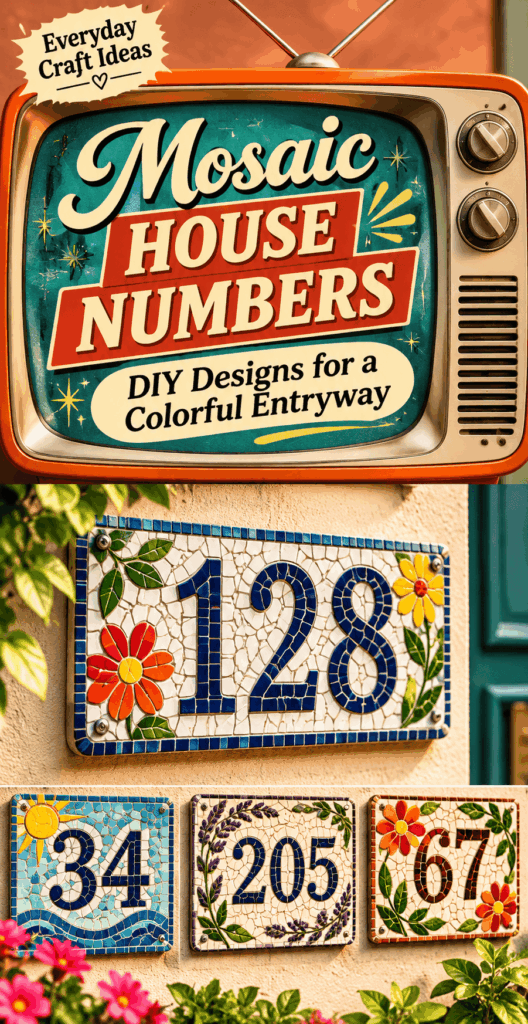
Mosaic House Numbers: DIY Designs for a Colorful Entryway
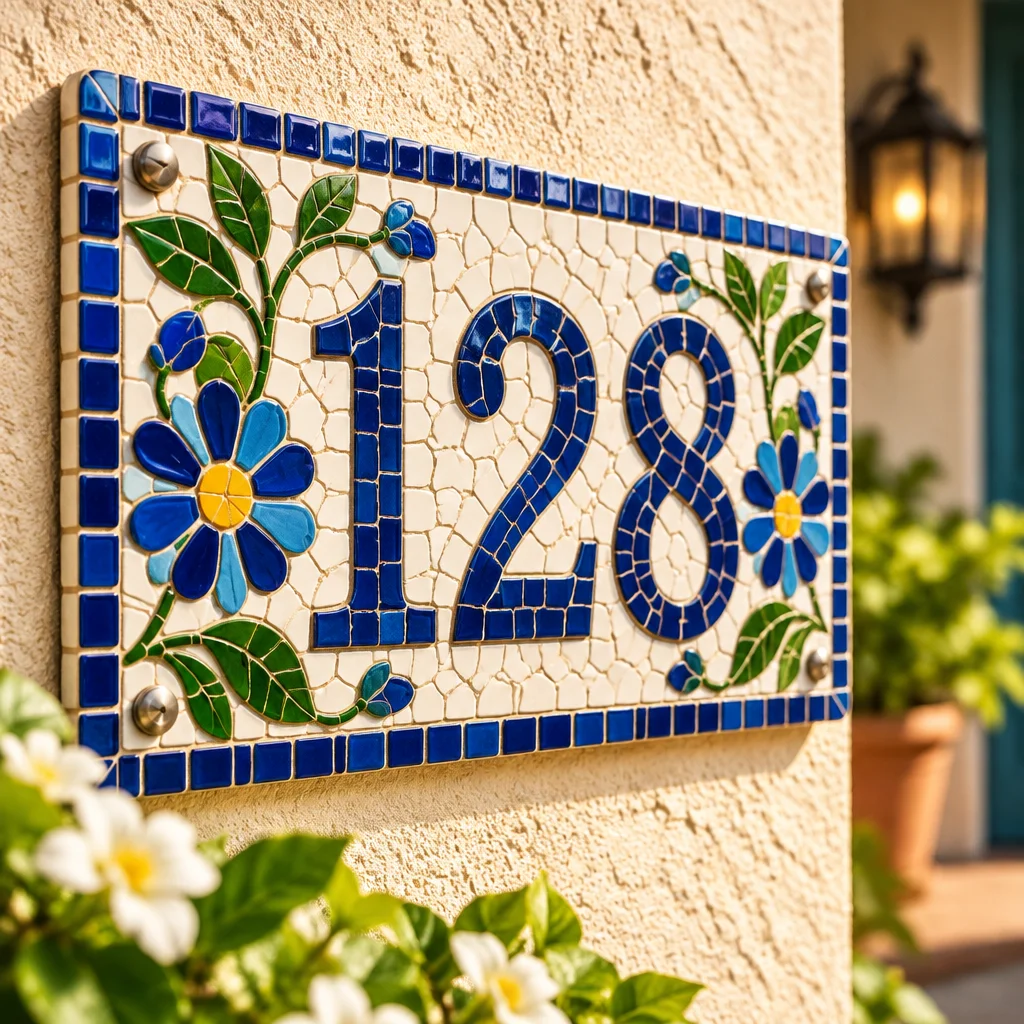
Mosaic House Numbers are one of those DIY upgrades that instantly make an entryway feel welcoming, personal, and easy to find from the street. You get the charm of handmade tilework plus the practicality of a clear address marker, which is especially helpful for deliveries and guests. This project suits beginners who enjoy working carefully with small pieces and don’t mind a bit of mess during grouting. You can finish a simple plaque in a weekend, then let it cure before mounting outdoors.
If you love colorful, seasonal making, this fits right in with other warm-weather projects like these summer crafts for adults. And since mosaics involve lots of little supplies, it helps to organize your tile bits and tools in something structured, like a fabric bin from this easy fabric basket sewing pattern.
In this guide, you’ll learn how to plan readable numbers, choose outdoor-safe materials, assemble your mosaic cleanly, and avoid common issues like cracked grout and water damage.
Plan a Readable Mosaic Address Sign
Great Mosaic House Numbers start with planning for visibility and weather. Outdoors, “pretty” is not enough, your numbers need to read quickly from the curb, at dusk, and in rain. Before you buy tile, decide where the sign will live: on a mailbox post, near the door, on brick, or on siding. That location affects size, mounting method, and which adhesives and sealers will last.
Difficulty level is beginner-to-intermediate. The main skills are: cutting tile safely, leaving consistent spacing, and grouting without burying detail. A typical plaque size is 5×12 inches to 8×16 inches, depending on your house number length. Plan for at least two sessions: one for layout and bonding, another for grouting and cleanup. Add curing time before exposing it to weather.
As a rule, choose fewer materials than you think you need. Too many textures and colors can make the numbers visually “noisy.” A simple background with strong contrast is the easiest path to a professional-looking result. Consider also how you’ll store leftover tile, grout, and safety gear between sessions. Keeping supplies clean and dry makes the next crafting day go smoothly.
Choose number size and contrast for street visibility
For curb readability, aim for numbers at least 3 to 5 inches tall on a plaque that gives each digit breathing room. If your home sits far back, go larger. Contrast matters more than color choice: light numbers on a dark background or dark numbers on a light background reads best. Avoid mid-tone on mid-tone combinations like pale gray numbers on tan grout.
Use simple fonts. Blocky digits with clear openings (like a “6” that doesn’t close up) are easier to mosaic. If you love curvy styles, keep curves wide and avoid tiny inner corners that are hard to tile cleanly.
Select weather-resistant backing and outdoor adhesive
Your backing must be stable outdoors. Good options include cement backer board, exterior-grade plywood sealed on all sides, or a pre-made stone or concrete plaque. Avoid MDF and particleboard, which swell with moisture. If using wood, seal every edge and the back before tiling to slow water intrusion.
For adhesive, look for a thinset mortar rated for exterior use or an outdoor-rated construction adhesive that bonds tile and is water-resistant. Many crafters use mosaic-specific thinset because it handles temperature swings better than basic craft glue. Check labels for “exterior,” “waterproof,” or “weather resistant.”
Tile pieces, nippers, grout and safety equipment
- Tile or glass: Ceramic tile, vitreous glass tile, or outdoor-rated mosaic glass. Choose consistent thickness when possible so grouting is easier.
- Tile nippers: Essential for shaping curves and trimming small bits. A wheeled glass nipper is helpful for thicker glass.
- Grout: Sanded grout for wider gaps, unsanded for very fine gaps. For outdoor signs, many makers prefer sanded for strength, but match to your spacing and tile surface.
- Safety gear: Safety glasses are non-negotiable when cutting tile. Wear gloves when handling sharp shards and a dust mask when mixing dry grout.
Mosaic House Number Design Ideas
The fun part of Mosaic House Numbers is choosing a style that fits your home’s personality. If your exterior is busy (patterned brick, bold paint, lots of plants), pick a calmer mosaic. If your entryway is neutral, you can go bright and playful. Whatever you choose, keep the digit edges crisp so the numbers remain readable. A helpful approach is to choose one “hero” element: either dramatic numbers on a simple background, or simple numbers with a decorative border.
Before committing, place your tile colors outdoors in the intended location. Colors look different in full sun versus shade, and glossy glass can reflect light in a way that reduces readability at certain angles. If you craft with family, a mosaic sign can be a meaningful collaboration, similar in spirit to group keepsakes like these Father’s Day crafts for kids, but built to last outside.
Mediterranean blue-and-white numbers
Create white or cream digits on a field of mixed blues. Add a thin navy outline around the numbers to sharpen contrast. This style looks especially good on stucco, coastal homes, or white-painted trim.
Colorful broken-tile digits
Use solid-color background tile, then fill the numbers with bright broken pieces like confetti. Keep grout lines tight and colors saturated so the digits read as a single shape rather than scattered fragments.
Modern monochrome number plaque
Try charcoal numbers on a light gray background, or white numbers on matte black. Use square tiles for a clean, architectural look. This pairs well with modern lighting and simple landscaping.
Floral border around bold numbers
Make the digits chunky and plain, then add a floral or vine border around the plaque edges. This gives you decoration without risking legibility. Floral borders also hide slightly uneven plaque edges.
Terracotta and cream house numbers
Use warm terracotta tones for the background with cream digits and tan grout. This style complements brick, desert landscapes, and Mediterranean-style landscaping.
Coastal sea-glass-look number design
Use sea-glass-colored tiles (aqua, frosted white, pale green) and pair them with a sandy grout color. For the “sea-glass look” without real sea glass, choose tumbled glass tiles with softened edges.
Geometric patchwork address sign
Create a patchwork background of triangles or squares in two to four colors, then place solid-colored digits on top. Keep background contrast lower than the numbers so the digits remain the focal point.
Individual mosaic number tiles
Instead of one long plaque, make a separate tile for each digit. This works well for narrow spaces like door frames. Keep all tiles the same size, and align them with a level during mounting.
How to Lay Out and Assemble Mosaic Numbers
This section is where beginners succeed or struggle. The key is to slow down and treat layout, bonding, and grouting as separate phases. Rushing from one to the next usually leads to crooked digits, uneven gaps, or smeared grout haze. Plan for a protected workspace, ideally outdoors or in a garage with good ventilation, especially when mixing grout and using construction adhesive.
Estimated time: 2 to 4 hours for layout and bonding (depending on complexity), then 1 to 2 hours for grouting and cleanup, plus curing time. If you enjoy setting up a tidy craft station, you may also like protective sewing-area projects like this sewing machine cover pattern, which is a great reminder that keeping tools dust-free extends their life.
Sketch the digits and leave consistent gaps
- Measure your plaque location: Confirm width and height where the sign will mount so you don’t build something that looks cramped.
- Draw center lines: Mark a horizontal baseline and a vertical center line on the backing. These help keep numbers level and visually balanced.
- Trace or stencil digits: Use a stencil or print numbers at the exact size, then trace them. Simple, bold digits are easiest to mosaic cleanly.
- Plan spacing: Leave consistent spacing between digits (often 1/2 inch to 1 inch depending on sign size). Consistency makes the sign look professional.
- Dry-lay tiles: Place tile pieces without adhesive to test your look. Adjust now, not after the glue is set.
Cut and position tiles safely
- Wear eye protection: Tile shards can pop off unexpectedly when nipping. Keep fingers clear of the cutting edge.
- Score and snap larger cuts: For straight cuts in ceramic, a tile cutter can reduce jagged edges. Nippers are best for shaping and fine adjustments.
- Cut curves with small “bites”: For rounded digits like 2, 3, 6, 8, and 9, remove tiny bits gradually. Taking too much at once can shatter the piece.
- Spread adhesive evenly: Use a small trowel, craft stick, or notched spreader. Uneven adhesive creates high and low tiles that catch dirt outdoors.
- Press tiles gently: Push pieces into the adhesive with light pressure so they’re seated but not drowning. Maintain your planned grout gaps.
Grout and clean the mosaic surface
- Let adhesive cure: Follow product instructions. Grouting too soon can shift tiles and blur number edges.
- Mix grout to peanut-butter consistency: Too wet weakens grout and increases shrinking cracks; too dry won’t pack into gaps.
- Work grout into joints: Use a rubber grout float or gloved hand to press grout firmly into all gaps, especially around digit edges.
- Initial wipe: After grout begins to set (often 10 to 20 minutes), wipe gently with a barely damp sponge. Rinse often to avoid smearing haze.
- Final buff: Once dry haze appears, buff with a soft cloth. This step brings back shine and improves contrast.
Seal and mount the finished sign correctly
- Cure first: Grout needs curing time (often 24 to 72 hours). Sealing too early can trap moisture and cause whitening.
- Seal grout: Use a penetrating sealer suitable for exterior grout. Apply carefully to grout lines, wipe excess off tile faces.
- Choose mounting hardware: For heavy plaques, use masonry screws and anchors into brick or concrete, or exterior-rated screws into studs for wood siding.
- Leave drainage space: If mounting against a flat wall, consider small spacers or washers so water can drain and air can circulate.
- Level it: Use a level. A slightly crooked sign is surprisingly noticeable.
Reader testimonial: “I made Mosaic House Numbers on a cement backer board for our porch, and the biggest difference was dry-laying the tiles first. I changed my colors twice before gluing anything down, and I’m so glad I did. After sealing the grout, it’s held up through rain and sprinklers with no issues.”
Avoiding Common Outdoor Mosaic Problems
Outdoor mosaics fail for predictable reasons: water gets behind the tiles, grout cracks from freeze-thaw cycles, or the numbers become hard to read because grout lines and busy patterns blur the shape. The good news is that most problems are preventable with the right base, the right adhesive, and a little restraint in your design.
Also remember that outdoor placement is harsh. Direct sun can heat a dark plaque, while night air cools it quickly, causing expansion and contraction. If your sign is near sprinklers, it will be constantly wet. Plan for the environment you actually have, not the ideal one.
If you enjoy outdoor ambiance, pairing a new sign with gentle lighting makes it even more functional at night. For another outdoor-friendly craft that complements an entryway, consider these DIY paper lantern designs for covered porches or party nights, while keeping your mosaic sign permanently weather-rated.
Prevent water damage and freeze-thaw issues
Start with a stable backing like cement board or sealed exterior wood, and use an exterior-rated thinset or adhesive. Seal grout after full cure, and re-seal periodically if your climate is wet or freezing. If you live where temperatures drop below freezing, avoid placing the plaque where water can pool behind it. Spacing the plaque slightly off the wall helps it dry faster after storms.
Keep grout lines from obscuring the numbers
Use tile sizes appropriate for the digit thickness. If your numbers are only two tiles wide, grout can visually dominate. For crisp digits, outline numbers with a single-color border tile or a narrow line of darker pieces. Keep grout color in mind: high-contrast grout can make a busy “cracked” look; low-contrast grout can blur edges. When wiping grout, use light pressure so you don’t pull grout low in some gaps and high in others, which can distort the digit outline.
Frequently Asked Questions About Mosaic House Numbers: DIY Designs for a Colorful Entryway
What base is best for outdoor mosaic house numbers?
Cement backer board is one of the most reliable bases for outdoor Mosaic House Numbers because it is dimensionally stable and moisture-resistant. You can frame it with exterior trim for a finished look, but the board itself holds up well when sealed and mounted properly. Concrete pavers and stone plaques also work great. If you use exterior plywood, seal all sides and edges thoroughly and keep it spaced slightly off the wall for drying.
Can I use broken dishes for a mosaic address plaque?
Yes, as long as you choose sturdy dishware and prepare the edges safely. Avoid very thin porcelain that creates razor-sharp shards. Wear gloves and eye protection while breaking and nipping pieces, and consider sanding sharp points with a rubbing stone. Keep in mind that dish fragments can vary in thickness, so plan your design so thicker pieces don’t sit higher than others, which can catch dirt and make grouting harder.
How do I make mosaic house numbers weather-resistant?
Use an exterior-rated base, an exterior thinset or adhesive, and grout suited for outdoor use. After the grout cures fully, apply a penetrating sealer to grout lines to reduce water absorption and staining. Mount the plaque so water cannot pool behind it and so air can circulate. In freeze-thaw climates, good drainage and a stable base matter as much as sealing. Re-seal grout when water stops beading on the surface.
What grout color should I use for the best readability?
Pick grout that supports legibility, not just style. If your numbers are light, darker grout around the number edges can sharpen the outline, but it can also make the whole sign look “grid-like” if used everywhere. Many beginners get the cleanest look by choosing a grout color close to the background tile, then outlining the digits with a contrasting tile line. Always test a small area first, since grout dries lighter.
How do I keep the numbers straight and evenly spaced?
Use a baseline and center line on your backing, then dry-lay your digits before gluing. Spacers, toothpicks, or small cardboard strips can help keep consistent gaps between tiles while you work. Step back often and check alignment from a distance, because small tilts are easier to see from across the room than up close. Photographing the layout with your phone can also reveal spacing problems quickly.
Can I mount Mosaic House Numbers without drilling into brick?
You can sometimes use heavy-duty exterior mounting tape or construction adhesive, but it depends on the plaque weight, brick texture, and weather exposure. Many mosaics are heavier than they look, and heat, moisture, and time can weaken adhesive-only mounting. If drilling is not an option, consider mounting onto a treated wood board that is secured elsewhere, like to a post or existing hardware. When in doubt, use mechanical fasteners for safety.
Final Thoughts
If you want a first project that turns out well, start with Mosaic House Numbers on a cement backer board plaque, using bold block digits and a simple two-color scheme with strong contrast. Keep tile sizes medium, avoid overly intricate curves, and give yourself permission to dry-lay and adjust before anything is glued down. That one habit prevents most beginner frustration.
Your next step is simple: measure the spot where the sign will live, then print or stencil your numbers at the exact size you need. Once you can see the scale in real life, choosing tile colors and a border style becomes much easier. Set up a small organizer for cut pieces, and you’ll be ready to build a colorful, readable entryway marker that lasts.