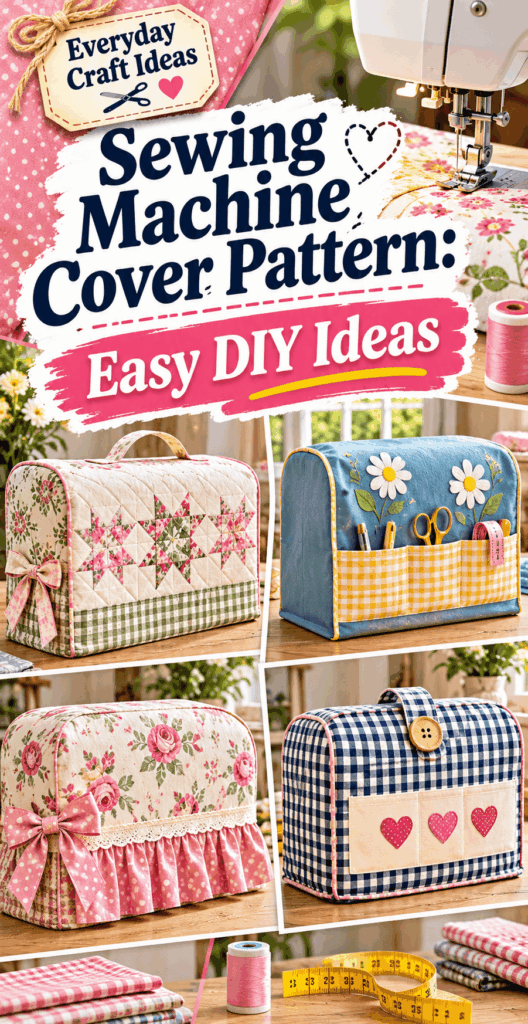
Sewing Machine Cover Pattern: Easy DIY Ideas
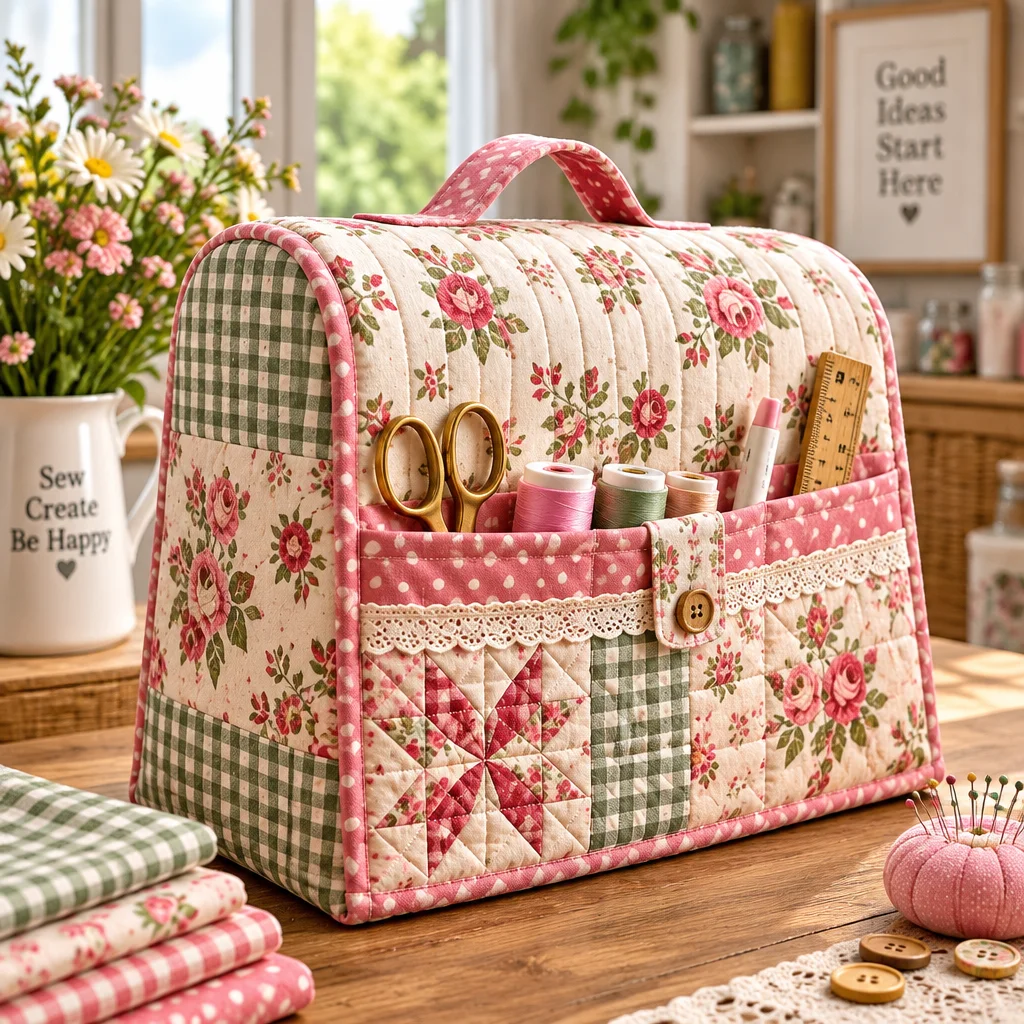
A well-made Sewing Machine Cover Pattern is one of those practical sewing projects that pays off every single day. It keeps lint and dust off your machine, protects it from sun fading, and makes your sewing corner look tidy even when you are mid-project. The best part is that you do not need advanced skills or expensive supplies to make a cover that fits beautifully.
In this guide, you will learn how to measure your machine, choose a fabric that lasts, and sew several beginner-friendly styles, from a quick rectangular dust cover to a padded quilted version with pockets. If you are building confidence, you may also enjoy these beginner sewing projects for adults or try an easy, satisfying fabric project like this easy pillowcase sewing pattern.
Before you sew a sewing machine cover
Before cutting fabric, decide what you want your cover to do. Some sewists only need a dust shield for a machine that stays on a table. Others store their machine in a closet and want padding and pockets for the foot pedal, power cord, and presser feet case. Your goals affect fabric choice, whether you line it, and how precise the fit should be.
Plan your “extras” now: pockets, a handle opening, a label, or decorative stitching. These additions are easiest to sew before the cover is assembled. Also consider your storage setup: if your machine sits under shelves, a snug cover prevents snagging; if you carry it to classes, a cover with a handle slit and sturdy top panel helps.
Finally, do a quick machine check. Remove bulky accessories like extension tables or wide quilting feet before measuring. If you use a hard case sometimes, make sure your fabric cover will not be so tight that it catches when you take it on and off. A good Sewing Machine Cover Pattern is slightly roomy, not stretched.
How to measure your machine and choose fabric
Measure the machine body itself, not the cardboard box size and not the maximum footprint with an extension table attached. You will need three measurements: width (left to right), depth (front to back), and height (table surface to the highest point, often the spool pin area). If your spool pin flips up, measure with it down unless you always store it up.
Fabric choice matters because the cover gets handled constantly. Medium-weight cotton canvas, denim, twill, or home decor cotton holds its shape and resists wear. Quilting cotton works well too, especially if lined or lightly interfaced. Avoid stretchy knits because they sag and collect dust. If you want a softer drape, consider linen blends but stabilize them with interfacing.
- Main fabric: Choose something you like seeing every day, and that presses well for crisp seams.
- Lining (optional): Helps the cover slide on easily and hides seam allowances for a professional finish.
- Stabilizer (optional): Fusible interfacing or batting adds structure and protection.
- Thread: All-purpose polyester thread is strong and low-lint.
Sewing machine cover styles to consider
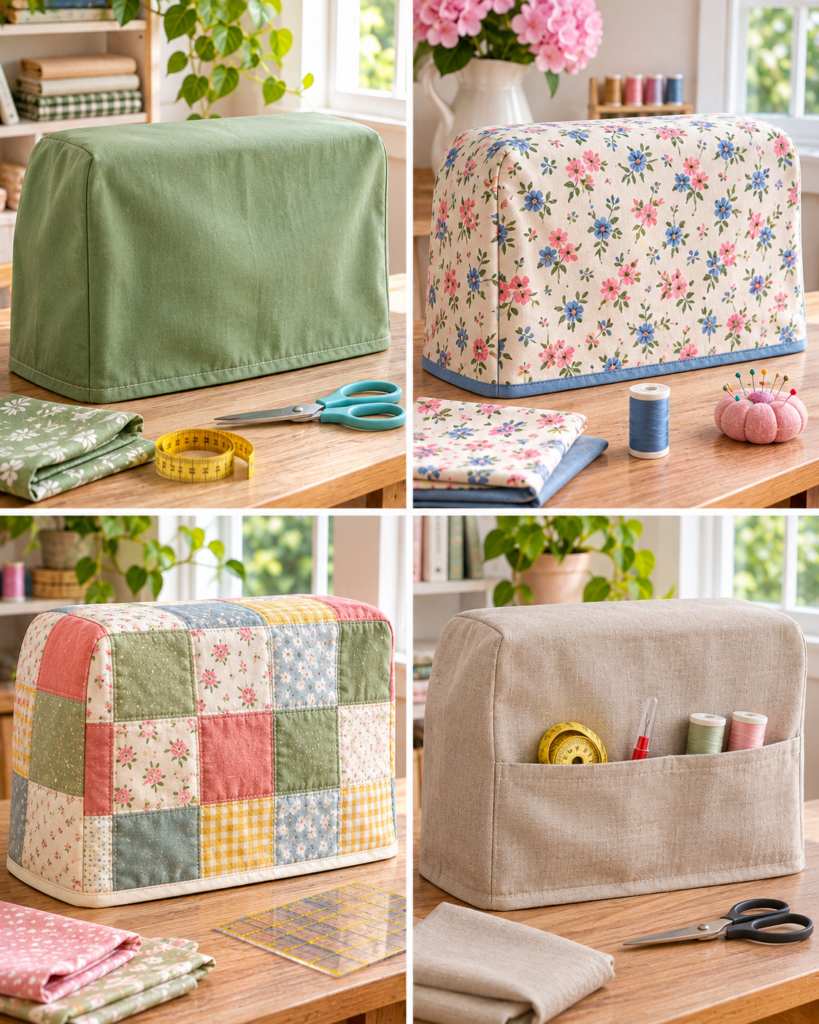
There is no single “best” Sewing Machine Cover Pattern, because the best one depends on how you use your machine. Below are popular styles that scale easily for different models and skill levels. If you are new, start with a simple shape and focus on accurate measuring and straight seams. Once you are comfortable, add lining, pockets, and quilting.
Think about how often you take the cover on and off. A loose slipcover is quick and forgiving, while a fitted cover looks polished but requires more careful sewing. Also think about cleaning. A washable fabric cover is ideal in a craft room where lint and pet hair are part of life.
If you enjoy embellishment, a cover is a great canvas for decorative stitching, labels, or a small stitched motif. Hand embroidery works beautifully on solid cotton or linen. If that interests you, you might like these beginner embroidery patterns for small, simple designs that sit nicely on a front panel.
Simple rectangular dust cover
This is the fastest option: one large piece (or a few joined pieces) draped like a tent over the machine, finished with a hem. It is forgiving if you are unsure about boxed corners. You can add ties at the sides or an elastic hem, but even a plain rectangle keeps dust off effectively. It is also a great way to use a favorite fabric remnant.
Fitted box-shaped sewing machine cover
A fitted box cover uses a top panel and side panels (or one long side strip) so the cover keeps its shape and looks tailored. It is still beginner-friendly because it is mostly straight seams plus boxed corners. This style is ideal if you want pockets, because the sides stay flatter and do not collapse.
Lined and reversible fabric covers
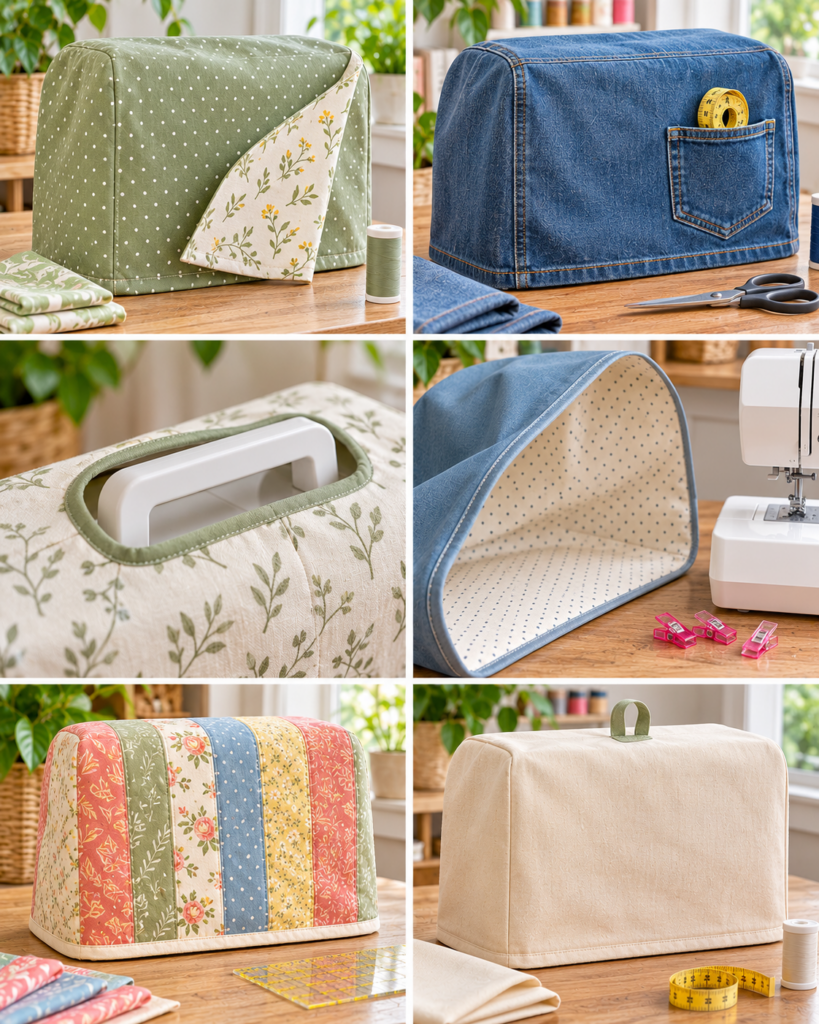
A lined cover has a clean interior and more body. Make it reversible by using two featured fabrics, then finishing the bottom with a “bagged” method (turning through an opening) or binding. Reversible covers are great if you want a seasonal look without sewing two different covers.
Quilted covers with a padded finish
Quilted covers use batting between layers for gentle padding. They protect against light bumps and give the cover a structured, cozy look. Straight-line quilting is easiest for beginners and helps prevent shifting and puckering. Use a walking foot if you have one to feed layers evenly.
Covers with side pockets or a handle opening
Pockets hold small tools like snips, a seam gauge, spare bobbins, and cleaning brushes. A handle opening is useful if you lift your machine often, but it must be reinforced so it does not tear. If your machine has a built-in handle, measure its position carefully and add a flap or zipper-free slit to keep dust out while still allowing access.
How to sew a basic fitted machine cover
A fitted cover is the sweet spot for many sewists: neat-looking, customizable, and still approachable. This Sewing Machine Cover Pattern method does not require printed templates, just accurate measurements and careful pressing. Expect about 1.5 to 3 hours depending on whether you add pockets, lining, or quilting.
Before starting, press your fabric, square up the cut edges, and choose a seam allowance you can sew consistently, typically 3/8 inch (1 cm) or 1/2 inch. Consistency matters more than the exact number. If your fabric frays easily, plan to finish raw edges with a zigzag stitch, pinking shears, or a serger.
- Draft your pieces on paper (optional but helpful): Even a rough sketch prevents cutting mistakes and helps you remember which edges get seam allowances.
- Decide on ease: Add a little extra room so the cover slides on. Too tight covers strain seams and wear faster.
- Plan pocket placement: Sew pockets to side panels before assembling the “box.”
Measuring height, width and depth with seam allowances
Measure width (W), depth (D), and height (H). Add ease of 1/2 inch to 1 inch to width and depth if you want it to slip on easily. Then add seam allowances to all edges that will be sewn.
- Top panel: Cut (W + ease + 2 seam allowances) by (D + ease + 2 seam allowances).
- Side strip method (one long piece): Cut a strip length equal to (2W + 2D + a little extra for joining) and height equal to (H + hem allowance + top seam allowance).
- Separate side panels method: Cut two panels for front/back and two panels for sides, each with seam allowances added.
If your machine has knobs that stick out, measure the widest point, not just the base. When in doubt, add a bit more ease. You can always take in side seams later, but you cannot easily add fabric back.
Cutting and joining the main fabric panels
For beginners, separate panels are easier to manage than a single long strip. Cut one top panel, two side panels (depth x height), and two front/back panels (width x height). Mark the top center of each panel with a small notch (a tiny snip within the seam allowance) or a removable fabric marker. These marks help you match pieces accurately and avoid twisting.
Pin or clip the top panel to a side panel, right sides together, aligning corners and centers. Sew with your chosen seam allowance. Repeat for the other side, then attach the front and back panels. Press seams toward the side panels for a crisp shape. If your fabric is bulky, press seams open to reduce thickness.
Finish seam allowances now if you want a clean interior without lining. A wide zigzag along the raw edge works well, especially on quilting cotton.
Sewing boxed corners and finishing the lower hem
With panels joined, you will have a box shape that is open at the bottom. Stitch down the vertical corner seams (where side meets front/back), matching seam intersections carefully. Go slowly over seam junctions to keep corners sharp.
Try the cover on your machine before hemming. This is your chance to adjust fit. If it is too loose, take in side seams evenly. If it is too tight, reduce seam allowance slightly where possible.
To hem, press the bottom edge up 1/4 inch, then up again 3/4 inch to 1 inch (depending on the look you want), and stitch all the way around. A deeper hem adds weight so the cover hangs nicely. For slippery fabrics, use more pins and press in short sections for accuracy.
Getting a neat fit and durable finish
A Sewing Machine Cover Pattern looks “store-bought” when it has structure, clean edges, and stress points that are reinforced. The good news is that these details are simple. They are mostly about preparation and pressing, not fancy techniques.
Pressing is the secret weapon. Press seams after every step, not just at the end. Use steam if your fabric can take it, and use a pressing cloth for delicate or dark fabrics to prevent shine. If your cover will be handled often, reinforce the upper corners and any handle opening with backstitching or a small extra row of stitching.
Also think about longevity: pockets get tugged, hems get brushed, and the top panel can fade if it sits in sunlight. A lining reduces wear and makes the cover easier to slide on and off without catching on knobs. If you want a coordinated sewing space, choose fabrics that match other quick makes like an easy apron sewing pattern for crafting sessions.
Choosing interfacing or batting for structure
Interfacing gives a crisp look without much bulk. A medium-weight fusible interfacing on the top panel (and sometimes upper side edges) helps the cover stand up. Follow the manufacturer’s instructions: use the right heat setting, press rather than iron back and forth, and allow it to cool flat so the bond sets.
Batting adds padding and a quilted look. If you quilt, keep lines evenly spaced to prevent sagging. A walking foot helps layers feed evenly. Use a slightly longer stitch length (around 3.0 mm) for quilting through thickness.
Allowing space for the handwheel and accessories
The handwheel side often needs a touch more ease, especially on machines with a prominent wheel or power switch. If you notice pulling when you test fit, you can add a narrow side gusset panel, or simply reduce seam allowance slightly on that side. For machines stored with the cord wrapped around, add extra depth so the cover does not snag.
If you want pockets, keep them clear of moving parts and vents. Do not cover ventilation openings permanently with thick padding if your machine is used immediately after removing the cover. Always remove the cover fully before operating the machine.
Reader testimonial: “I used your fitted cover steps with a canvas outer and a cotton lining. Measuring and test fitting before hemming made all the difference. My cover slides on easily, and the side pocket finally keeps my snips from disappearing under piles of fabric.”
Frequently Asked Questions About Sewing Machine Cover Pattern: Easy DIY Ideas
How much fabric do I need for a sewing machine cover?
Most standard home machines can be covered with 1 to 1.5 yards of 44-inch wide fabric for an unlined fitted cover, depending on machine size and whether you add pockets. If you are lining it, plan on the same amount for lining fabric. If you are using directional prints, buy a little extra so motifs are upright on the front and top.
Can I sew a machine cover without a printed pattern?
Yes. A Sewing Machine Cover Pattern can be drafted from measurements with simple rectangles. The key is adding consistent seam allowances and a bit of ease. Sketch your pieces, label each panel, and mark centers so you do not accidentally rotate a piece. Testing the fit before hemming lets you adjust without stress.
Should a sewing machine cover be lined?
Lining is optional, but it improves durability and gives a cleaner inside finish. It also helps the cover slide over knobs without catching. If you are using lightweight quilting cotton, lining or interfacing helps the cover hold its shape. If you are using canvas or denim, you may skip lining and just finish raw seams neatly.
What is the easiest fabric for beginners to sew for a machine cover?
Quilting cotton is easiest to cut, press, and stitch accurately, which is why many beginners start there. If you want a sturdier cover, choose cotton canvas or denim, but expect a bit more bulk at corners and hems. Whatever you choose, prewash and press it so shrinkage does not distort your finished cover.
How do I keep my cover from looking crooked or twisting?
Most twisting comes from mismatched panel lengths or stretching while sewing. Measure twice, cut with the grain, and mark panel centers. Use plenty of pins or clips, and sew with the fabric supported on the table so it does not pull. Press seams as you go, and test fit before hemming to catch problems early.
My corners are bulky. How can I reduce thickness?
Trim seam allowances and grade layers, meaning trim one seam allowance narrower than the other so the bulk is staggered. For very thick fabric, press seams open instead of to one side. A hump jumper or a folded scrap of fabric behind the presser foot can help your machine stitch evenly over thick intersections.
How do I add pockets without them sagging?
Use a pocket fabric with some body, or interface the pocket pieces. Stitch pocket edges securely with backstitching at the top corners where stress is highest. Consider dividing a large pocket into smaller sections with vertical stitch lines; smaller compartments hold tools upright and reduce pulling.
Is it safe to store my machine with the cover on all the time?
Yes, as long as the machine is turned off, unplugged if appropriate for your space, and completely cool and dry. Do not cover the machine while it is running or immediately after heavy use if it feels warm. A fabric cover is meant for storage and dust protection, not for use during operation.
Can I wash my sewing machine cover?
Usually, yes. Washability depends on your fabric and any interfacing or batting used. Prewashing fabric helps prevent future shrinkage. If you used fusible interfacing, follow its care guidelines and avoid very high heat in the dryer. Air drying helps covers keep their shape longer, especially quilted ones.
Final thoughts and ways to customize your cover
A Sewing Machine Cover Pattern is a perfect project for building skills you will use in many other makes: measuring, adding seam allowances, sewing neat corners, and finishing edges cleanly. Start simple with a fitted box cover, then level up with lining, pockets, or quilting when you are ready. If you want to personalize it, add a stitched name tag, contrast binding at the hem, or a small embroidered motif on the front panel.
Your next step is straightforward: measure your machine today and sketch your panel sizes on paper. Choose a fabric that makes you happy to sit down and sew, and do a quick test fit before committing to the hem. Once you have one cover you like, you can make a second as a gift or to match your sewing room, and the process will be even faster the next time.