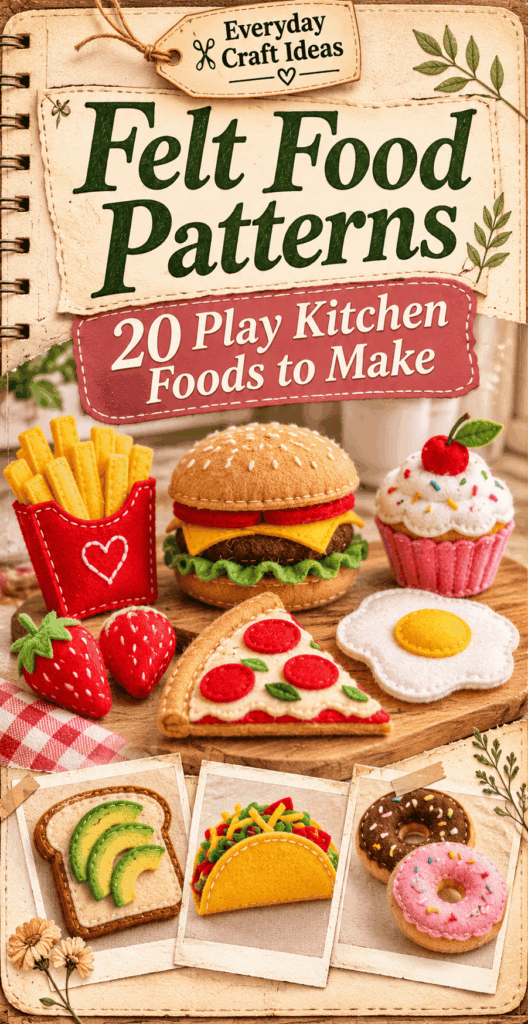
Felt Food Patterns: 20 Play Kitchen Foods to Make
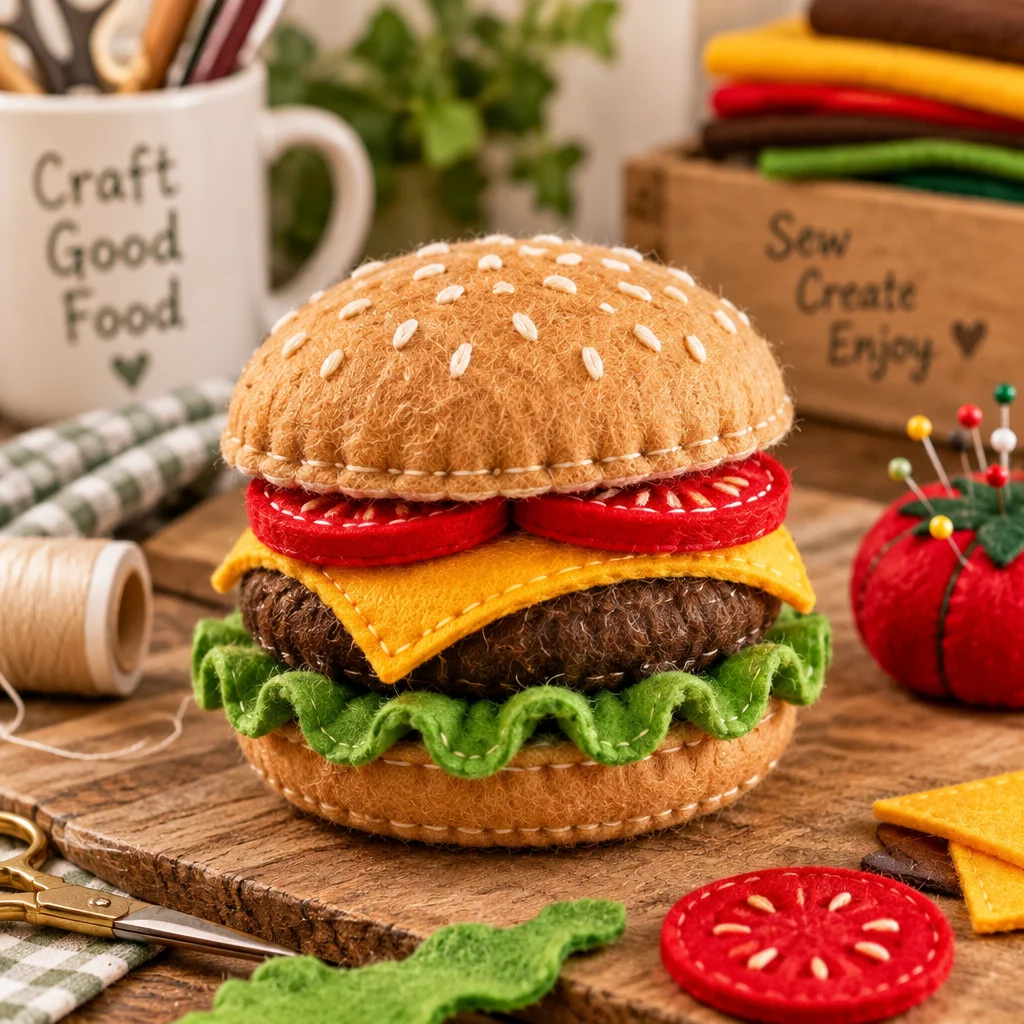
Felt Food Patterns are one of the most satisfying ways to stock a play kitchen because the finished pieces are soft, durable, and endlessly reusable. If you are a beginner, this is a forgiving project: felt does not fray, hand sewing is totally acceptable, and you can build skills one food at a time. In this guide you will learn how to choose materials that hold up to real play, how to trace and cut patterns accurately, and how to sew and stuff shapes so they look “real” without being fussy. You can also use simple embroidery details to add seeds, grill marks, or frosting swirls. If you want to practice basic stitches first, these beginner embroidery patterns and easy designs are a great warm-up before you embroider tiny food details.
What The Finished craft offers
The finished craft offers a complete pretend-play pantry: lightweight foods that are quiet, washable with care, and safe to handle for most ages when built with smart construction. Felt play food suits parents and grandparents who want handmade toys, teachers stocking a dramatic play center, and crafters looking for portable projects that can be completed in short sessions. The main appeal of Felt Food Patterns is how customizable they are. You can match a child’s favorite meals, choose allergy-friendly “foods,” and scale pieces up for toddlers or down for dollhouses.
Difficulty level is beginner to confident beginner. Most items use simple cutting, running stitch or blanket stitch, and light stuffing. Plan on 20 to 60 minutes per piece depending on complexity and embroidery. A full set of 20 foods can be made gradually over a few weekends. If you enjoy other small handmade items for play and gifting, you might also like these cute crochet keychain patterns as quick add-ons for backpacks or toy baskets.
Reader testimonial: “I started with the toast and fried egg, and I was surprised how sturdy they felt after I switched to blanket stitch and added just a little stuffing. My toddler carries them everywhere, and nothing has popped off yet. The step-by-step shaping tips made the fruit much easier than I expected.”
Choose Materials for Durable Felt Play Food
Felt, polyester filling and embroidery floss
For durable play food, choose high-quality craft felt or wool blend felt in 1 mm to 1.5 mm thickness. Wool blend costs more but pills less and holds crisp edges, which is helpful for foods like pizza slices and wedges. Polyester craft felt is fine for most items if you use tight stitches and avoid over-stretching while sewing.
Use polyester fiberfill for stuffing because it is washable, springy, and non-allergenic for many households. For flat foods like toast, a thin layer of felt scraps can also work as padding, but fiberfill creates softer edges and a more toy-like feel. Embroidery floss (cotton) is excellent for facial features and food details. For seams, you can either use matching embroidery floss (3 strands) or a strong all-purpose sewing thread doubled.
Patterns, seam allowances and simple shaping
You can draw your own Felt Food Patterns on paper or print templates, then trace onto felt with a washable marker or tailor’s chalk. Add seam allowance if the pattern is an outline only. A practical beginner seam allowance for felt is 1/8 inch to 3/16 inch because felt seams get bulky when wider. Keep shapes simple: two mirrored pieces for flat items, or multiple panels for 3D fruit. When a pattern includes curves, cut slowly and rotate the felt, not the scissors, for smoother edges.
Safety considerations for small detachable pieces
If the toy is for children under three, avoid small detachable parts entirely. That means no loose felt seeds, no separate “blueberries,” and no glued-on beads. Embroider details instead of attaching tiny shapes, and choose stitched-on toppings that cannot be pulled free. If you add Velcro for sandwich layers, use sew-on Velcro and stitch all around the edges, then reinforce with an X across the center. Avoid hot glue as a primary attachment for play items since it can peel and become a choking hazard. For older kids, you can include removable elements, but still sew securely and check items regularly for wear.
20 Felt Food Projects for a Play Kitchen
Below are 20 reliable Felt Food Patterns you can make with basic shapes. For each food, cut pieces first, then assemble with either blanket stitch (strong, visible) or whip stitch (fast, slightly less durable). Stuff lightly as you sew so pieces stay plump without becoming lumpy.
Strawberry
Cut 6 teardrop panels in red and 1 small green star for the top. Sew panels together along long edges to form a 3D berry, leaving a gap for stuffing. Embroider yellow seeds before assembly for easiest handling.
Apple slice
Cut two apple-slice shapes in red and two in pale cream for the inner flesh (slightly smaller). Layer and stitch the cream onto the red, then sew the two finished sides together. Add a brown seed with embroidery and a tiny felt “peel” line.
Banana
Cut two crescent shapes in yellow plus two smaller inner pieces in pale yellow. Stitch inner pieces to the outer ones, then sew the banana closed. Add a tiny brown tip with embroidery floss rather than a separate piece for safety.
Orange wedge
Make an orange wedge using two outer wedge pieces and two inner “segment” pieces. Embroider segment lines with backstitch. Slight stuffing makes it look juicy without distorting the triangle.
Carrot
Cut two orange carrot shapes and one green leafy top. Sandwich the green top between the orange layers at the wide end and stitch around. Add shallow embroidered lines across the carrot to suggest texture.
Broccoli floret
Cut a trunk in light green and two rounded “crown” shapes in dark green. Sew the crown into a puffy cloud and attach to the trunk with tight whip stitches. Add tiny French knots for texture only if the toy is for older children.
Tomato
Use 6 rounded panels in red to form a ball. Add a small green star top. For quick tomatoes, use two circles and a strip as a side band, like a simple plush.
Fried egg
Cut two wavy white egg shapes and one yolk circle in yellow. Stitch the yolk onto one white piece, then sew the two whites together with minimal stuffing. Lightly embroider shading with pale gray for realism.
Toast slice
Cut two rounded square pieces in tan and two smaller inner pieces in light tan. Layer to create crust and center. Add a thin layer of stuffing so it does not curl.
Pancake
Cut two circles in golden tan. Sew together and stuff lightly. Add a darker ring around the edge with embroidery floss to mimic browned sides.
Waffle
Cut two squares with rounded corners. Embroider a grid before sewing. For extra texture, add a thin layer of quilt batting inside instead of fiberfill so the waffle stays flatter.
Pizza slice
Cut two triangles for crust and two slightly smaller triangles for sauce. Stitch sauce on, then add cheese squiggles with embroidery. Sew the slice together with a little stuffing. Optional: sew-on felt pepperoni circles for older kids.
Hamburger
Make two buns as stuffed half-ovals, then add a flat patty circle and felt lettuce frill. For a stack that separates, sew small Velcro dots inside each layer. For toddlers, stitch the stack permanently.
Sandwich
Use two toast slices plus fillings like felt cheese, lettuce, and deli meat. For sturdy play, sew fillings onto one bread slice and attach the top slice at one “hinge” edge so it opens without losing parts.
Cheese wedge
Cut two triangles and a side band strip. Sew band to one triangle, then close with the second triangle. Embroider holes with small circles and a few straight stitches for depth.
Cupcake
Make a cupcake base with a pleated wrapper effect by embroidering vertical lines. Add a frosting dome on top, stuffed slightly, and embroider sprinkles. Avoid glued beads; use short straight stitches instead.
Donut
Cut two donut rings in tan. Sew and stuff lightly. Add a frosting ring in pink or chocolate and stitch it down. Embroider sprinkles and a small shine line for a cute finish.
Cookie
Cut two circles in light brown. Add “chips” with embroidery or small darker felt shapes stitched flat. Keep stuffing minimal so it stays cookie-like rather than pillow-like.
Pasta bow
Cut two small rectangles with tapered ends. Pinch the center and wrap with a narrow strip to form a bow shape, stitching tightly. Make a few in different shades for a fun pasta bowl.
Ice cream cone
Make a cone from a quarter-circle piece rolled and stitched into shape. Add a stuffed scoop ball on top, stitched firmly around the rim. Embroider crosshatch lines on the cone for texture.
Techniques for Realistic Felt Food
Create dimensional fruits with shaped panels
Panels are the secret to 3D fruit that does not look like a flat ornament. When you sew 5 to 7 panels together, the shape naturally rounds out. Keep panel edges consistent by stacking felt layers and cutting two at a time. Mark small alignment dots near the top and bottom of each panel so curves match as you sew. Stuff gradually and use a chopstick or blunt turning tool to push filling into points, but do not over-pack or seams will gap.
Use blanket stitch and invisible seams
Blanket stitch is strong and decorative. Keep stitches evenly spaced and snug, especially at corners. For a cleaner look on items like pancakes, use an invisible ladder stitch to close the final opening after stuffing. If you are new to hand stitching, practicing on simple lines helps. These easy embroidery designs for beginners are a low-pressure way to build stitch control before you tackle tiny food details.
Layer toppings and embroider details securely
Layering creates realism: sauce under cheese, crust around bread, frosting on donuts. Stitch layers down around the edges and add a few anchoring stitches in the middle so layers cannot lift during play. When embroidering, knot securely and bury thread tails inside the item. For high-wear foods, avoid long floats of floss on the back since they can snag. Use short, reinforced stitches instead, especially for sprinkles, seeds, and grill marks.
Build Coordinated Pretend-Play Sets
Breakfast basket
Combine toast, fried egg, pancake, waffle, and a donut into a breakfast set. Add a small felt butter pat or syrup “cup” only if the child is old enough for small props. Store items in a fabric basket so they do not get crushed. If you want a handmade coaster for the play table, a quick yarn project pairs nicely with felt food. These easy crochet coaster designs can be made in cotton yarn and washed often.
Farmers market produce set
Make a produce mix with strawberry, apple slice, banana, orange wedge, carrot, broccoli, and tomato. Use consistent sizing: for example, keep most items 3 to 5 inches long so they fit little hands and toy baskets. Add simple “bundles” like three carrots tied with stitched-on felt ribbon. You can also label a play market stand with embroidered signs. If you like practical cotton makes for the kitchen area, these crochet dishcloth patterns are great for real cleanup after crafting sessions.
Bakery and pizza shop sets
A bakery set (cupcake, cookie, donut) is fast and satisfying because pieces are mostly rounds and domes. A pizza shop set (pizza slice, cheese wedge, tomato) introduces layering and triangle construction. For pretend “to-go” fun, stitch a simple felt envelope pouch for slices or make a small paperboard pizza box. Keep removable toppings limited unless the child is older, and reinforce every attachment point since these sets get heavy use during imaginative play.
Frequently Asked Questions About Felt Food Patterns: 20 Play Kitchen Foods to Make
What felt is best for pretend play food?
Wool blend felt is the most durable and keeps its shape well, especially for items that are handled daily. High-quality acrylic craft felt also works if you choose thicker sheets and stitch firmly. Avoid very thin, floppy felt because it stretches, pills quickly, and can tear at seams. If you are mixing felt brands, test how they behave with stuffing and stitches so your set looks consistent.
Can I make felt food without a sewing machine?
Yes. Most Felt Food Patterns are designed for hand sewing. Blanket stitch is ideal for edges because it is strong and helps prevent stretching. Whip stitch is faster for hidden seams, but keep it tight and close together. A sewing machine can speed up straight seams, yet many items are small and easier to control by hand. If you do machine sew, shorten the stitch length for strength.
How do I wash handmade felt play food?
Spot clean whenever possible: use a damp cloth with mild soap, then air dry. If you need a deeper clean, hand wash gently in cool water, squeeze out water without twisting, and reshape while damp. Avoid hot water and vigorous agitation, which can distort shapes. Never put glued embellishments in the wash. If items are frequently mouthed, consider making simpler pieces with fully stitched details for safer cleaning.
How do I keep my felt pieces from looking wobbly or uneven?
Wobbliness usually comes from rushed cutting or inconsistent seam allowance. Trace patterns with a sharp pencil or chalk, cut slowly, and keep scissors perpendicular to the felt. While sewing, align edges with clips or pins and stitch at a steady distance from the edge. For rounded fruit, add small alignment marks so panels match. Light, even stuffing helps too. Overstuffing exaggerates any uneven seam.
What is the best stitch for beginners making play food?
Blanket stitch is beginner-friendly because it is repetitive and naturally reinforces the edge. It also looks neat even if your spacing is not perfect. Whip stitch is simpler but can pull edges together unevenly if tension varies. If you want hidden closures, learn ladder stitch for the final opening after stuffing. A little practice sampler is worthwhile before starting a full set.
How do I attach Velcro without it tearing off the felt?
Use sew-on Velcro, not adhesive-backed. Stitch around the perimeter with a strong thread, then add a few passes across the center in an X shape. Place Velcro on reinforced areas, such as an extra small felt patch behind it, especially on thin felt. Keep Velcro pieces large enough to grip but not so large that kids yank hard to separate layers.
Can I scale Felt Food Patterns for toddlers or classroom use?
Yes, scaling is smart. For toddlers, enlarge patterns by 125% to 150% so pieces are easier to grasp and less likely to become choking hazards. For classrooms, make duplicates of popular foods and keep designs simple so they survive group play. Use sturdier felt, fewer removable parts, and heavier stitching. Consider stitching faces or seeds instead of adding separate felt dots.
What should I do if stuffing shows through the seam?
Stuffing peeking out usually means the stitches are too far apart or too close to the edge. Use smaller, tighter stitches and keep them about 1/8 inch from the edge. If the felt is thin, double the thread or switch to embroidery floss with fewer strands for control. You can also add a thin inner layer of felt or reduce stuffing slightly so the seam is not under constant strain.
How can I add cute details without using beads or buttons?
Embroidery is your best option. Use satin stitch for tiny highlights, backstitch for outlines, and short straight stitches for sprinkles or seeds. Small felt appliques are also safe when stitched down completely. If you enjoy small decorative crafts, you might like these easy beaded bracelet patterns for beginners for adult accessories, but keep beads off children’s felt toys for safety.
Final Thoughts
If you are choosing a first project from these Felt Food Patterns, start with the toast slice or fried egg. Both teach clean cutting, simple layering, and even stitching without complex curves. Once you feel comfortable, move on to a panel fruit like the strawberry, then try a layered favorite like pizza. Your sensible next step is to pick a theme and make just five coordinated items, then test them in real play for a week. You will quickly learn whether you prefer firmer or softer stuffing and which details hold up best. Build from there, one sturdy, charming food at a time.