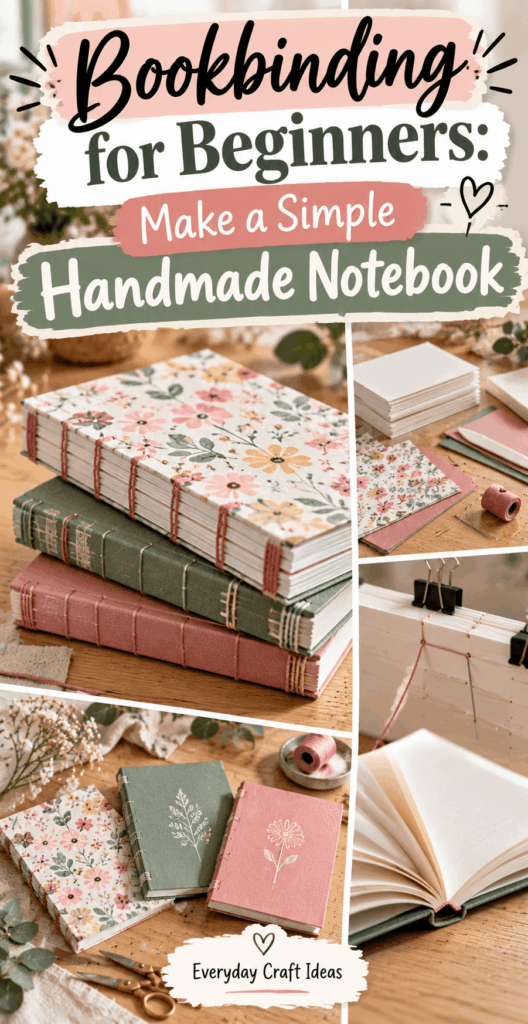
Bookbinding for Beginners: Make a Simple Handmade Notebook
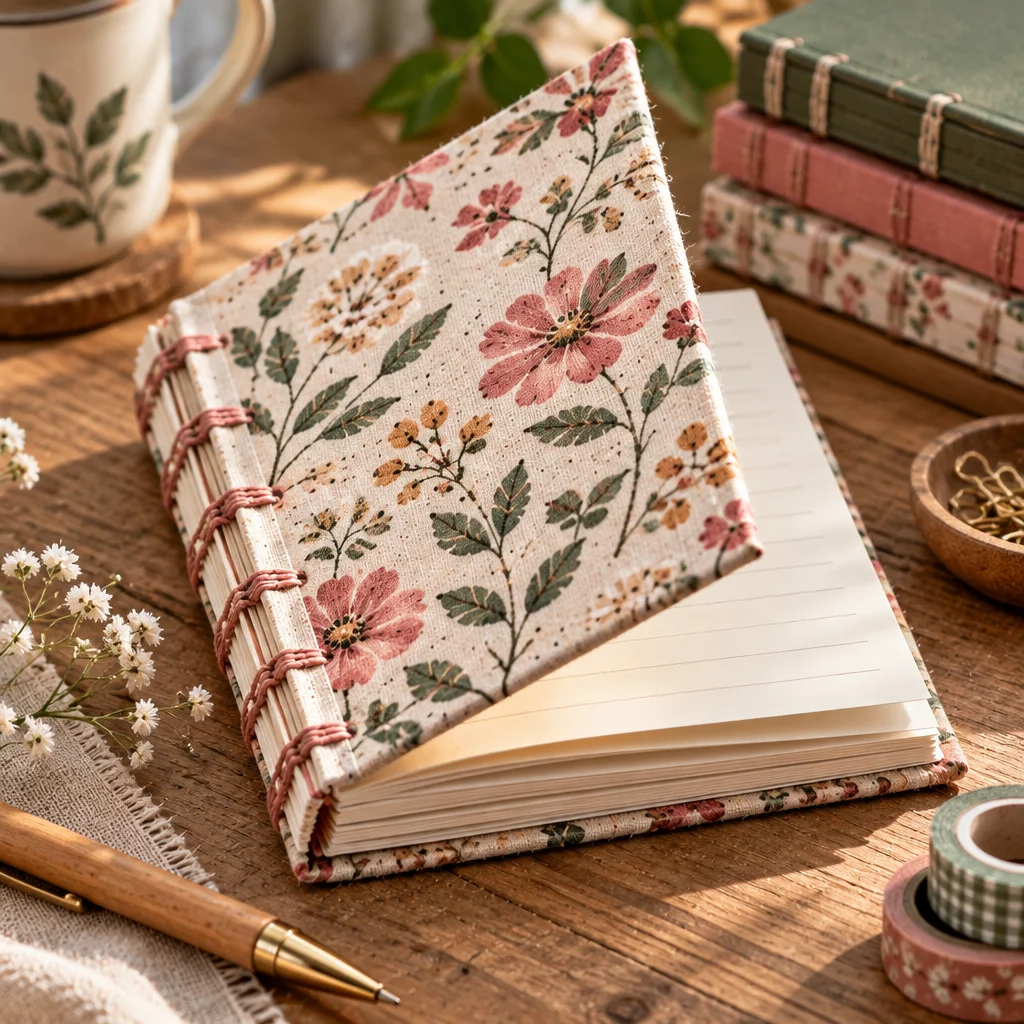
If you have ever wanted to turn a small stack of paper into a real notebook you can toss in your bag and actually use, this guide to bookbinding for beginners is for you. We are going to make a simple handmade notebook using a basic sewn binding that is sturdy, flexible, and forgiving. By the end, you will have a notebook with a neat fold, secure stitches, and a cover that can be plain, painted, or wrapped in decorative paper.
This is a satisfying “weekend craft” that does not require expensive equipment, and it pairs nicely with other paper projects. If you like crafting with family, you can also explore simple paper-based activities like printable crafts for kids or seasonal projects like winter crafts for adults to use up scraps and decorate covers.
What You Need to Know Before Starting
For bookbinding for beginners, the biggest success factor is accuracy, not strength. You are creating a “text block” (the inside pages) and attaching it to a cover. In this tutorial, we will use a simple pamphlet-style sewn binding (often called a “saddle stitch” in crafting circles, though this version is hand-sewn rather than stapled). It is ideal for a thin notebook: think 20 to 40 pages of writing paper (10 to 20 sheets folded in half), plus a cover.
Difficulty level: Beginner. If you can measure, fold carefully, and sew through holes with a blunt needle, you can do this.
Estimated time: 45 to 90 minutes, depending on how many pages you use and how much time you spend decorating.
Best finished size: Start with standard printer paper or A4 and fold it to create a small notebook. Half-letter (5.5 x 8.5 inches) is a great everyday size.
What makes a notebook durable: clean folds, evenly spaced holes, and thread that is pulled snug (not tight enough to tear paper). A quick press under heavy books helps the notebook sit flatter and look more professional.
Safety note: You will use a craft knife or scissors and possibly an awl (or pushpin). Always punch holes on a cutting mat or thick cardboard, and keep fingers clear of blades and sharp points.
Supplies, Tools, and Material Choices
You can do bookbinding for beginners with simple supplies from a craft drawer. The goal is to use materials that fold cleanly and hold stitches without ripping.
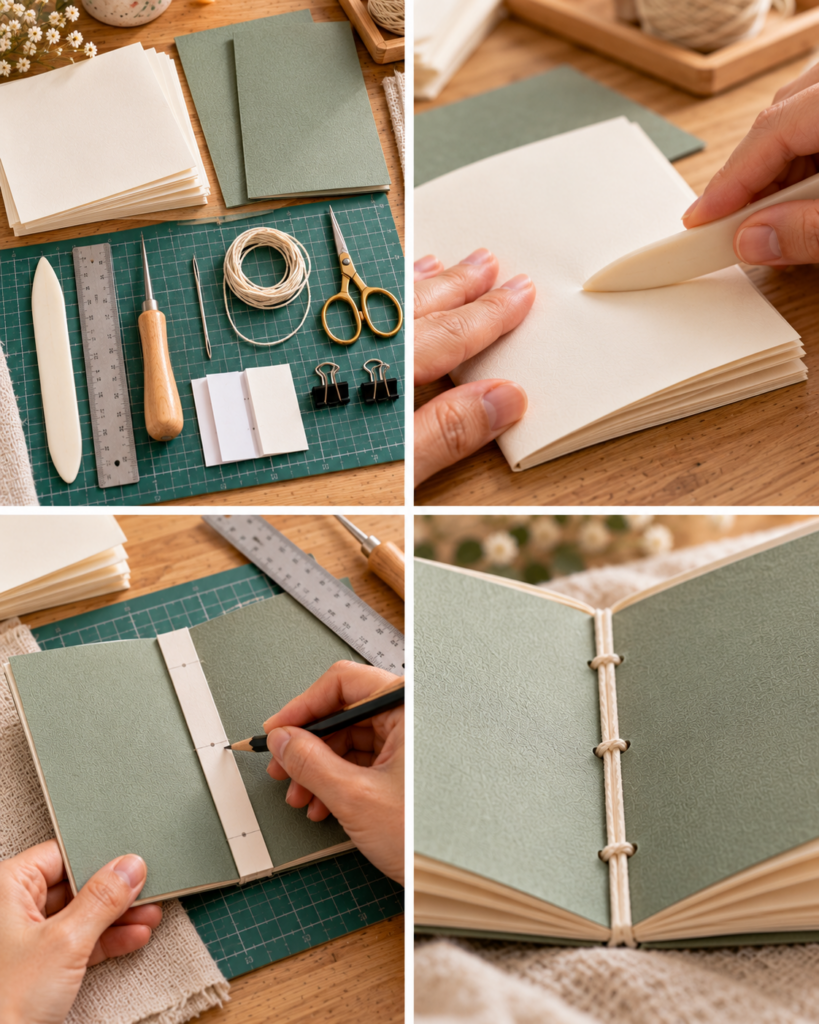
- Paper for pages: Standard 20 lb printer paper is fine for a first notebook. For a nicer feel, try 24 lb or a smooth writing paper. If you want to sketch, choose heavier paper (like 70 to 100 lb text), but keep the notebook thinner so it folds well.
- Cover material: Cardstock (65 to 110 lb) is easiest. Thin chipboard makes a sturdier cover but is harder to punch through. You can also wrap the cover with decorative paper for a clean look.
- Thread: Waxed linen thread is ideal. If you do not have it, use embroidery floss (all strands together) or strong cotton thread. Wax (beeswax or a candle) reduces tangling and helps the knot stay put.
- Needle: A bookbinding needle is great, but a blunt tapestry needle works well and is less likely to split paper fibers.
- Hole-making tool: An awl is traditional. A pushpin or thumbtack works for thin stacks. Punch on cardboard to protect your table.
- Ruler and pencil: For marking hole positions accurately.
- Bone folder (optional): Makes crisp folds. Substitute: the back of a spoon or a clean ruler edge.
- Clips (optional): Binder clips help keep the stack aligned while punching and sewing.
Decorating tip: Save patterned paper from seasonal crafts. If you enjoy holiday crafting, you might like pulling patterns from Thanksgiving crafts for adults or kid-friendly paper ideas in Christmas crafts for kids to inspire cover designs.
How to Make or Use It (Clear Beginner-Friendly Tutorial)
This step-by-step project is designed for bookbinding for beginners. Read through once, then start. Keeping edges aligned is the secret to a notebook that looks “store-bought” even when it is handmade.
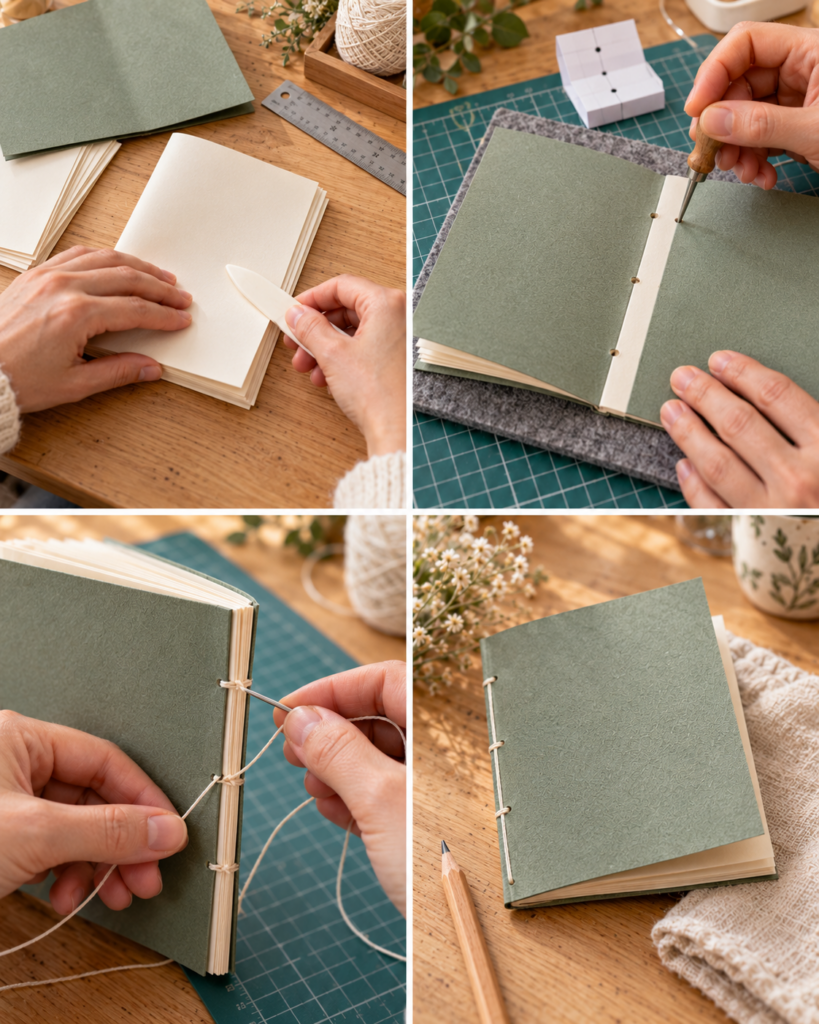
- Choose your size and cut if needed. Start with 8.5 x 11 inch paper (or A4). Fold in half for a half-size notebook. If you want a smaller notebook, cut sheets first, then fold. Cutting after folding can cause slight slippage and uneven edges.
- Create your stack (one signature). For a first notebook, use 10 to 15 sheets of paper. Add one cardstock cover sheet on the outside. Nest everything together like a booklet. Too many sheets makes punching harder and causes “creep” (inner pages sticking out farther).
- Fold sharply. Align corners carefully, then press the fold from the center outward. Use a bone folder, spoon, or ruler edge to make a crisp crease. A crisp fold helps the book close neatly.
- Clamp and mark hole positions. Clip the folded stack closed with binder clips near the outer edges. On the spine fold, mark three points: one in the center, and two about 1.5 inches (4 cm) from the top and bottom. Keep marks equal distance from the ends so tension is balanced.
- Punch holes. Place the fold on a piece of thick cardboard. Punch straight down through the marks. Wiggle slightly to widen just enough for the needle and thread. If your tool bends, reduce the number of pages or punch in two passes.
- Thread the needle. Cut thread about 2.5 times the height of the notebook (for three holes). Wax it if possible, then thread your needle. Do not knot the end yet.
- Sew the binding (three-hole pamphlet stitch). Start from the inside at the center hole and go out. Leave a 3 inch tail inside. Go into the top hole from the outside to the inside, then travel inside down to the bottom hole and go out, then return through the center hole from the outside to the inside. You will have two thread ends inside at the center.
- Tie off securely. Tie a square knot (right over left, then left over right) around the center stitch. Keep it snug, not tight enough to pucker the paper. Trim thread tails to about 1 inch or tuck them under the center stitch.
- Press and tidy edges. Close the notebook and press it under heavy books for 10 to 20 minutes. If pages are slightly uneven, you can trim the open edge carefully with a ruler and craft knife, but this is optional for beginners.
- Use and enjoy. This notebook is perfect for lists, journaling, gift notes, language practice, or as a small travel notebook. Add a label on the front or a pocket inside the cover if you want it to be more functional.
Helpful Tips for Better Results
The difference between “homemade” and “handmade” often comes down to small habits. These tips are especially useful in bookbinding for beginners projects because they prevent common frustration points like crooked folds and loose stitches.
- Use fewer sheets than you think. A thin notebook lies flatter and is easier to sew. If you want more pages, make two thin notebooks or learn multi-signature binding later.
- Prevent page creep. Inner pages naturally protrude. For a clean edge, keep the notebook thin and press firmly. Trimming is optional, but pressing is not.
- Keep holes consistent. Uneven hole spacing leads to a lopsided spine. A quick paper “template” strip with marks can help you repeat the same pattern for future notebooks.
- Mind thread tension. Pull thread snug after each pass, but stop as soon as paper starts to pucker. Paper tears usually come from over-tightening, not from normal use.
- Wax your thread if it tangles. Even rubbing thread on a plain candle reduces knots and fraying. Less tangling makes your stitches look cleaner.
- Test your needle path. If the needle resists, do not force it. Re-open the hole with the awl or pushpin to avoid ripping the fold.
“I tried bookbinding once before and gave up because my pages kept slipping. This time I used binder clips and punched holes on cardboard like you suggested, and it finally clicked. My first notebook is a little imperfect, but it closes nicely and the stitching feels solid.”
Creative Variations and Project Ideas
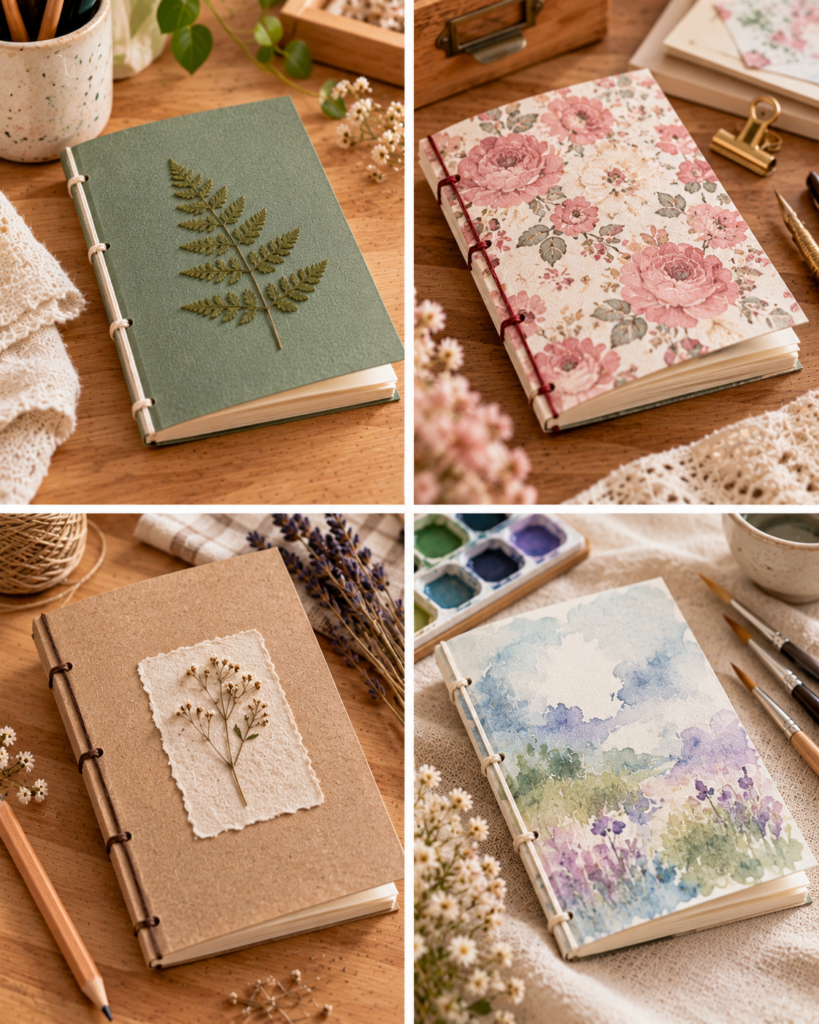
Once you have the basic stitch down, bookbinding for beginners can become a whole family of useful projects. The structure stays the same, but you can change papers, covers, and add-ons to suit how you will use the notebook.
- Decorative wrapped cover: Wrap cardstock in patterned paper like a gift. Glue the paper neatly to the inside of the cover, trimming corners at an angle so it folds cleanly.
- Kraft paper or recycled pages: Brown kraft paper makes a rustic notebook. You can also mix in reclaimed paper, but keep thickness consistent so the fold stays even.
- Dot-grid or lined inserts: Print your own dot-grid or lined pages for journaling or planning. This is a great companion idea if you already enjoy printable crafts for kids and want to adapt printables for personal organization.
- Softcover travel journal: Use a flexible cardstock cover and add an elastic band by punching two small holes near the back cover edge and knotting elastic inside.
- Giftable mini notebooks: Cut paper to make palm-sized notebooks for party favors. Seasonal designs pair well with ideas from winter crafts for adults when you want cozy colors and textures.
- Memory or gratitude notebook: Add a title page and a pocket inside the back cover for notes or mementos. This makes a thoughtful handmade gift, especially around gatherings and holiday seasons.
Common Mistakes and How to Avoid Them
Most problems in bookbinding for beginners come from misalignment, rushed punching, or thread tension. Here is how to diagnose and fix issues before they ruin your notebook.
- Problem: The pages stick out unevenly. Cause: page creep from too many sheets or a loose fold. Fix: use fewer sheets, press longer, and fold more carefully. If you must trim, clamp the notebook and cut slowly with a sharp blade and ruler.
- Problem: Holes do not line up and sewing is difficult. Cause: punching without clips or punching at an angle. Fix: clip the stack, punch on a flat surface, and keep the awl vertical. Consider punching halfway through, then flipping and finishing for thick stacks.
- Problem: The spine looks loose or gappy. Cause: thread not snugged after each stitch. Fix: after every pass, gently pull thread until it sits against the fold. Do not yank.
- Problem: Paper tears at the holes. Cause: holes too small, needle forced, or thread pulled too tight. Fix: widen holes slightly and reduce tension. Heavier paper at the fold (or fewer sheets) also helps.
- Problem: Knots come undone. Cause: slippery thread and a weak knot. Fix: wax the thread and tie a proper square knot around the center stitch. Leave longer tails if you are worried, then trim later.
If you are crafting with kids nearby, treat the hole-punching and cutting steps like “tool time” and keep sharp tools off the table when you are not actively using them. For more family-friendly craft planning, browse simple projects like Christmas crafts for kids to build a safe crafting routine.
Frequently Asked Questions About Bookbinding for Beginners: Make a Simple Handmade Notebook
What is the easiest bookbinding method?
The easiest method for most people is a three-hole pamphlet stitch on a single folded stack of pages. It uses minimal supplies, works with common paper sizes, and teaches core skills like folding, punching, and sewing in a straight line. It is best for thinner notebooks. Once you feel confident, you can move to multi-signature stitching, tape bindings, or adding a glued spine for thicker books.
What supplies do you need for bookbinding?
At minimum you need paper, a cover sheet (cardstock), a needle, thread, a ruler, and something to make holes like an awl or pushpin. Optional tools like a bone folder and binder clips improve accuracy and make the process smoother. For bookbinding for beginners, prioritize a good folding tool substitute and a thread that will not snap. Fancy tools can come later once you know you enjoy the craft.
Can you bind a notebook without special tools?
Yes. You can fold paper with the back of a spoon, punch holes with a pushpin, and sew with a blunt tapestry needle. Clip the stack using clothespins or binder clips to keep pages aligned. The one place not to compromise is safety: always punch on a protective surface and cut away from your hands. If your holes feel too tight, widen them gently rather than forcing the needle through.
How do you fold paper into signatures?
A “signature” is a group of folded sheets nested together. For this project, you will make one signature by stacking 10 to 15 sheets, tapping edges to align, then folding them all together. Align corners carefully before creasing, and press the fold from the center outward to avoid wrinkles. If you want a thicker notebook later, you will make multiple smaller signatures instead of one thick one because smaller signatures fold cleaner.
How do you sew a simple notebook binding?
For a simple three-hole sewn binding: punch three holes along the fold, then sew from the center hole out, into the top hole, down inside to the bottom hole, out, and back through the center hole. Tie the two thread ends together inside around the center stitch with a square knot. Keep stitches snug so the pages do not shift, but avoid pulling so tight that the paper puckers or tears.
What paper is best for handmade notebooks?
For writing, 24 lb to 28 lb smooth paper feels nicer than basic printer paper and reduces ink bleed. For sketching, choose heavier paper, but keep page count lower so the fold stays crisp. If you plan to use fountain pens or markers, test a sheet first for feathering and bleed-through. In bookbinding for beginners, consistent paper thickness across the stack makes sewing and folding much easier.
Final Thoughts
Learning bookbinding for beginners does not have to mean complicated equipment or intimidating techniques. A simple folded signature and a clean three-hole stitch can produce a notebook that looks charming, functions well, and makes you proud every time you open it. Your next step is to make one practice notebook with inexpensive paper, then make a second using nicer paper and a decorated cover once your hands remember the sewing path. Keep your first attempt as a reference, because it will show you exactly how quickly you improve with just a little repetition.