Easy Macrame Feather Pattern for Beginners
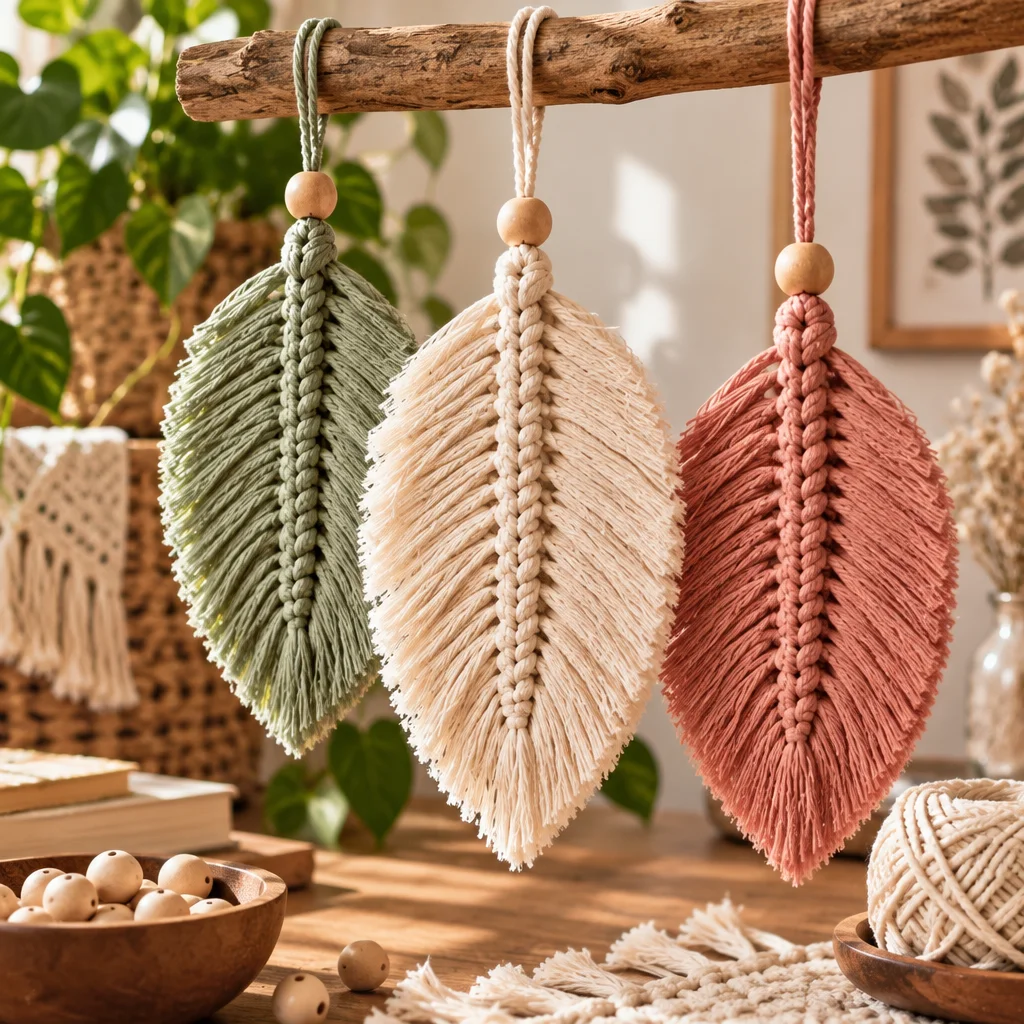
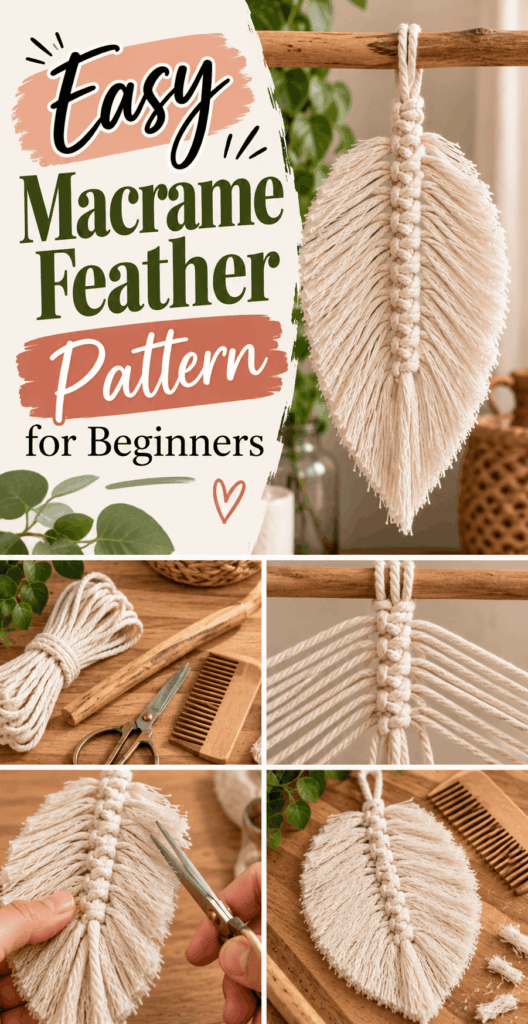
If you have been searching for a macrame feather pattern that is truly beginner-friendly, you are in the right place. A macrame feather is a small, satisfying project that looks polished even when your knots are not perfect yet. The finished feather can become a keychain, a gift tag topper, a wall hanging accent, or a cute boho charm for a bag. You will learn how to build the center “spine,” add symmetrical fringe, and brush it out for that soft feathered look. If you enjoy quick crafts, you might also like this easy crochet bookmark pattern for another fast, portable project, or this easy crochet flower pattern for embellishments you can pair with macrame.
What You Need to Know Before Starting
This macrame feather pattern is best described as beginner level, but it teaches core macrame habits: consistent tension, mirrored placement, and clean finishing. You will mainly use lark’s head knots to attach fringe cords to a center cord (the spine). Then you shape and brush the fringe to create the feather silhouette. If you can measure and make a basic knot, you can make a feather.
Estimated time: plan for 30 to 60 minutes for your first feather, depending on how long you spend brushing and trimming. Finished size: a common beginner feather is about 5 to 7 inches long, not counting a hanging loop, but you can scale it up or down by changing cord lengths and fringe count.
Before you cut anything, decide how you will use the feather. A keychain needs a shorter, denser feather and a sturdier hanging loop. A wall hanging accent can be longer, softer, and paired in multiples.
Also note: brushing creates lint and loose fibers. Work over a trash bin or paper to make cleanup easy, and keep small fibers away from pets and small children.
Supplies, Tools, and Material Choices
You do not need a huge toolkit to follow this macrame feather pattern, but choosing the right cord makes the biggest difference in how your feather brushes out and holds its shape.
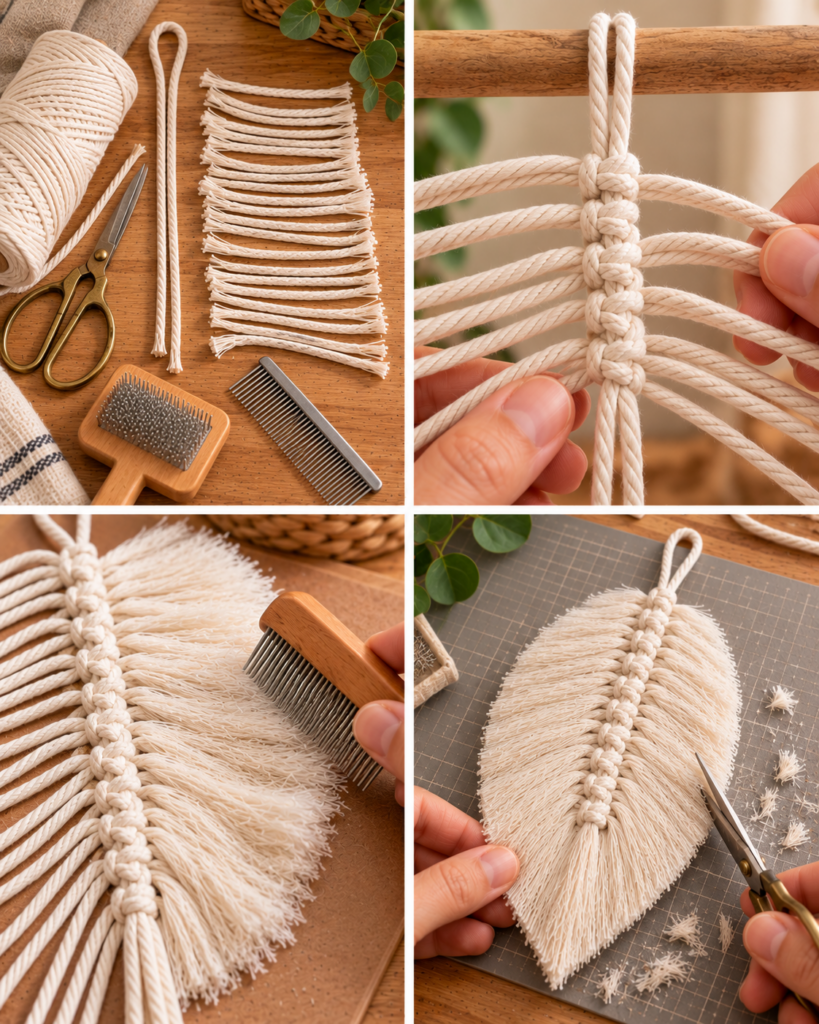
- Macrame cord (3 mm is ideal for beginners): Single-twist cotton cord brushes out beautifully and creates fluffy “barbs.” Three-ply cord also works but takes more effort to comb. Avoid slick synthetic cord for your first feather because it can be hard to fluff.
- Sharp scissors: Clean cuts matter, especially when trimming the feather outline. Craft scissors are fine, but fabric shears give the crispest edge.
- Fine-tooth comb or pet slicker brush: A comb works well; a slicker brush is faster. Use gentle strokes to avoid breaking fibers.
- Measuring tape or ruler: Symmetry is easier when your fringe cords are consistent lengths.
- Optional stiffener: Fabric stiffener, diluted white glue, or spray starch can help the feather keep a crisp silhouette.
- Workspace support: A clipboard, safety pin on a cushion, or a macrame board helps keep the spine cord stable while you knot.
If you like mixing crafts, consider making a practical handmade gift bundle with a macrame charm plus a useful item like this easy crochet dishcloth pattern. They pair nicely for housewarming gifts.
How to Make or Use It (Clear Beginner-Friendly Tutorial)
This step-by-step macrame feather pattern creates one classic feather with a center spine and brushed fringe. The measurements below produce a medium feather. Once you have made one, you can adjust lengths confidently.
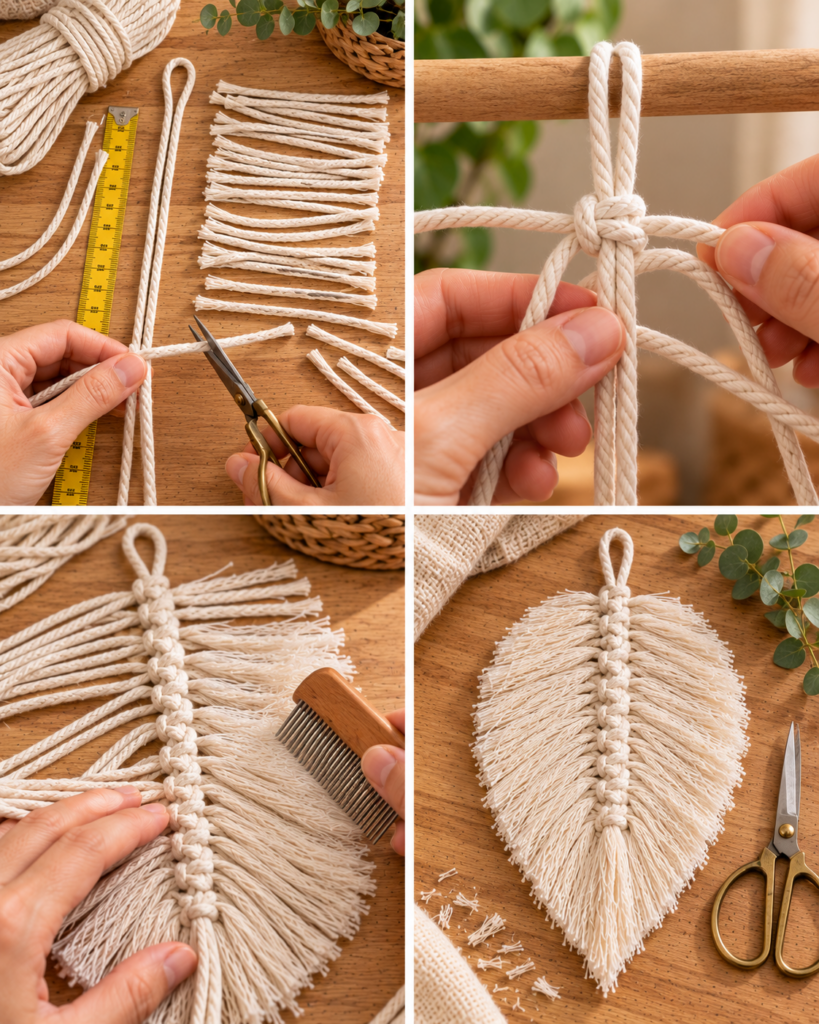
- Cut your cords. Cut 1 spine cord about 14 inches long. Cut 10 to 16 fringe cords, each about 10 inches long. More fringe cords equals a fuller feather. Longer fringe cords make a longer feather, but remember you will trim later, so give yourself extra length.
- Secure the spine cord. Fold the spine cord in half and pin the fold to your board or clip it to a clipboard. The folded top can become your hanging loop, so keep it neat.
- Attach the first fringe cord with a lark’s head knot. Fold one fringe cord in half. Place the folded loop under the spine cord, bring the two tails up and through the loop, then pull snug. Slide it close to the top of the spine. This knot forms the first “barbs” of the feather.
- Keep adding fringe cords down the spine. Repeat lark’s head knots, stacking them neatly. For a balanced feather, attach the same number of fringe cords on each side of the spine by alternating placement: after tightening each knot, spread one tail to the left and one to the right. This creates symmetry without extra steps.
- Lock the bottom. When your fringe section is as long as you want, tie a small overhand knot in the spine cord below the last fringe knot. This prevents fringe cords from sliding off during brushing and trimming.
- Brush out the fringe slowly. Starting near the tips of the fringe, comb downward and outward. Work in small sections, then move closer to the spine. This prevents tangles and breakage. Keep the spine cord taut while brushing.
- Trim the feather shape. Use sharp scissors to cut a gentle curve from the top sides down to a point at the bottom. Trim a little at a time, step back, and compare both sides. If you cut too aggressively, you cannot add length back, so sneak up on the final shape.
- Optional: stiffen for a crisp silhouette. Lay the feather flat. Lightly apply fabric stiffener or a thin mix of white glue and water (about 1:3). Comb again to align fibers, then let dry completely before moving.
- Add hardware or hang it. Use the top loop to tie onto a dowel, ring, or gift. For keychains, add a jump ring or lobster clasp through the loop.
Helpful Tips for Better Results
Small details make this macrame feather pattern look professional. First, focus on consistent tension. When you tighten each lark’s head knot, pull with the same firmness so the “spine” stays straight instead of curving. If you notice the spine bending, loosen the last knot and retighten while holding the spine cord taut.
Second, treat brushing like shaping hair: start at the ends and work inward. If you begin brushing near the spine, you will create a tight snarl that is harder to fix. A slicker brush can speed things up, but use a light hand. Too much force frays fibers into fuzz instead of clean feather barbs.
Third, trimming is easier with a guide. Fold a piece of paper into a long teardrop shape as a loose template, or lightly pinch the feather down the center to check symmetry before cutting. If you want a very crisp outline, stiffen first, let it dry, then do a final trim.
Finally, if your feather will be handled a lot, consider a slightly thicker cord (4 mm) or apply a light stiffener. For home decor feathers, softer cord and minimal stiffening creates a beautiful drape.
“I made two feathers for my daughter’s backpack charm using this macrame feather pattern. The first one was a little uneven, but after brushing from the ends and trimming slowly, the second one looked so much better. The tips about locking the bottom knot saved me from the fringe sliding off while I combed.”
Creative Variations and Project Ideas
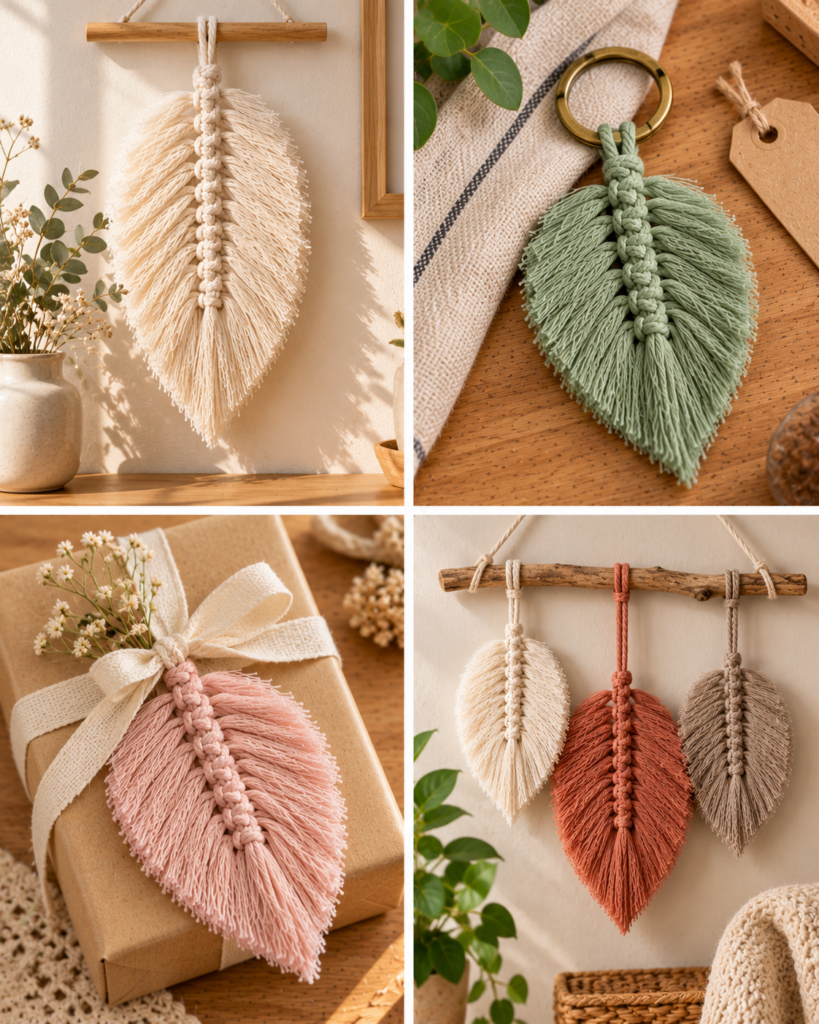
Once you have made the basic macrame feather pattern, you can change the look dramatically with small tweaks. For a two-tone feather, use one color for the spine and a different color for the fringe cords. The spine color will peek through and define the center line. You can also alternate fringe colors every other knot for a striped effect.
Try changing the silhouette. A long, narrow feather looks modern and minimal, while a short, wide feather feels playful and boho. To make a wider feather, add more fringe cords and trim a fuller curve. To make a sleeker feather, use fewer fringe cords and trim tighter to the spine.
Project ideas are endless. Make a trio of feathers in graduating sizes and hang them from a driftwood branch. Add one feather to a wrapped gift as a reusable topper. Create earrings by making mini feathers and stiffening them well, then attaching earring hooks (keep them light by using thinner cord). You can also pair macrame feathers with other handmade items, like sewing a simple apron and adding a feather charm to the gift wrap using this easy apron sewing pattern as inspiration for a coordinated handmade present.
For seasonal decor, dye the fringe with fabric dye before brushing, or paint the tips lightly with diluted acrylic after stiffening for an ombré look.
Common Mistakes and How to Avoid Them
The most common issue with a beginner macrame feather pattern is uneven sides. This usually comes from inconsistent fringe lengths or trimming too quickly. Fix it by cutting all fringe cords to the same length, then trimming in small passes. If one side ends up shorter, reshape the whole feather to match rather than trying to “stretch” fibers.
Another frequent problem is fringe slipping off the bottom. That happens when the spine is not secured. Always tie a bottom stopper knot in the spine cord. If you plan to brush aggressively, you can also add a tiny dab of glue to the bottom knot, but let it dry fully before brushing nearby.
If your feather looks fuzzy instead of feathery, you may be over-brushing or using the wrong cord type. Single-twist cotton separates into smooth strands, while some recycled cords or very soft cords can pill. Switch to a slightly firmer cotton cord, brush more gently, and consider light stiffener to hold the strands aligned.
Finally, watch for a twisted spine. If you attach knots while the spine is slack, it can rotate. Keep the spine under light tension and occasionally straighten it with your fingers before adding the next fringe cord.
Frequently Asked Questions About Easy Macrame Feather Pattern for Beginners
How do you make a macrame feather?
To make a macrame feather, you create a center spine cord and attach multiple shorter cords to it using lark’s head knots. After knotting, you brush out the fringe cords to separate the strands and form a feather texture, then trim the sides into a feather shape. A bottom stopper knot keeps the fringe from sliding off while you comb and shape.
What cord is best for a macrame feather?
Single-twist cotton cord is usually the best choice for a macrame feather pattern because it brushes out quickly into smooth strands. A 3 mm single-twist cord is beginner-friendly: it is thick enough to handle easily but not so bulky that trimming becomes awkward. Three-ply cotton works too, but it takes more time to untwist and comb evenly.
How do you brush out macrame cord?
Brush the cord gradually, starting at the outer ends of the fringe and moving inward toward the spine. Hold the spine firmly so it does not twist, and use light strokes to avoid breaking fibers. If you hit a snag, stop and gently pick it apart with your fingers before brushing again. A fine-tooth comb gives control; a slicker brush speeds up large feathers.
How do you stiffen a macrame feather?
You can stiffen a macrame feather with fabric stiffener, spray starch, or a diluted white glue mixture. Lay the feather flat on a protected surface, apply a light coat, then comb the strands into alignment so they dry neatly. Let it dry completely before moving it. If you need extra structure for jewelry or keychains, apply a second light coat after the first dries.
Can you make macrame feathers without a comb?
Yes, you can make macrame feathers without a comb, but it takes longer. You can separate strands using a pin, a tapestry needle, or even your fingernails, working from the ends inward. A fork can also work in a pinch for wider cords. The key is patience: pulling too hard without a comb can break fibers and create fuzz rather than clean feather strands.
How do you hang macrame feather decorations?
The simplest way is to use the folded top loop of the spine cord and attach it to a dowel, driftwood branch, curtain ring, or wall hook. For keychains and bag charms, add a jump ring or lobster clasp through the loop. If your feather does not have a loop, you can tie a separate hanging cord around the top of the spine with a secure knot and trim the ends neatly.
Final Thoughts
A beginner macrame feather pattern is one of those projects that teaches you a lot while still feeling relaxing and achievable. Once you understand the rhythm of attaching fringe cords and shaping with a brush and scissors, you can make feathers in any size, color, or style. Your next step is simple: make one practice feather, then immediately make a second using the same measurements so you can see how quickly your tension and trimming improve. If you want to build a small handmade gift set, pair your feather charm with another quick craft like a crochet dishcloth or bookmark from the links above, and you will have a thoughtful, coordinated bundle.