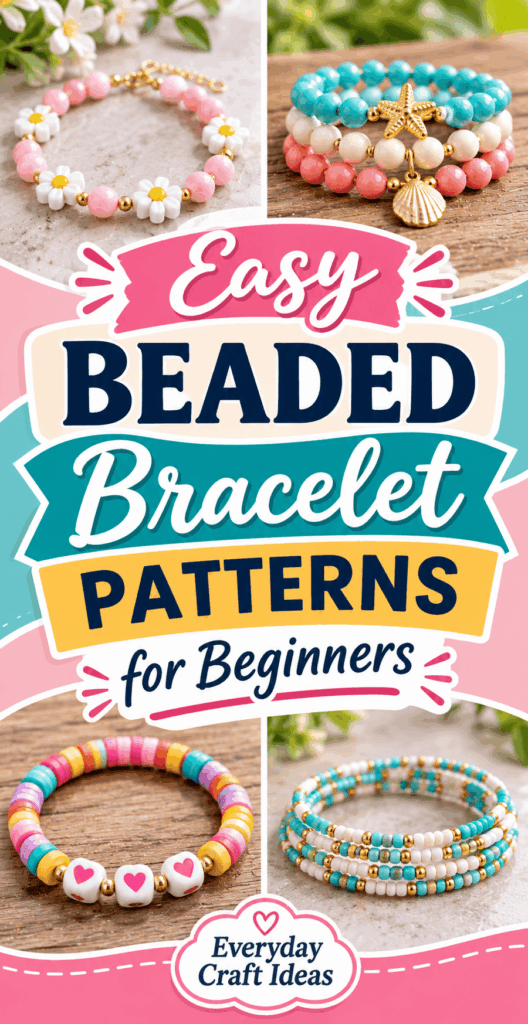
Easy Beaded Bracelet Patterns for Beginners
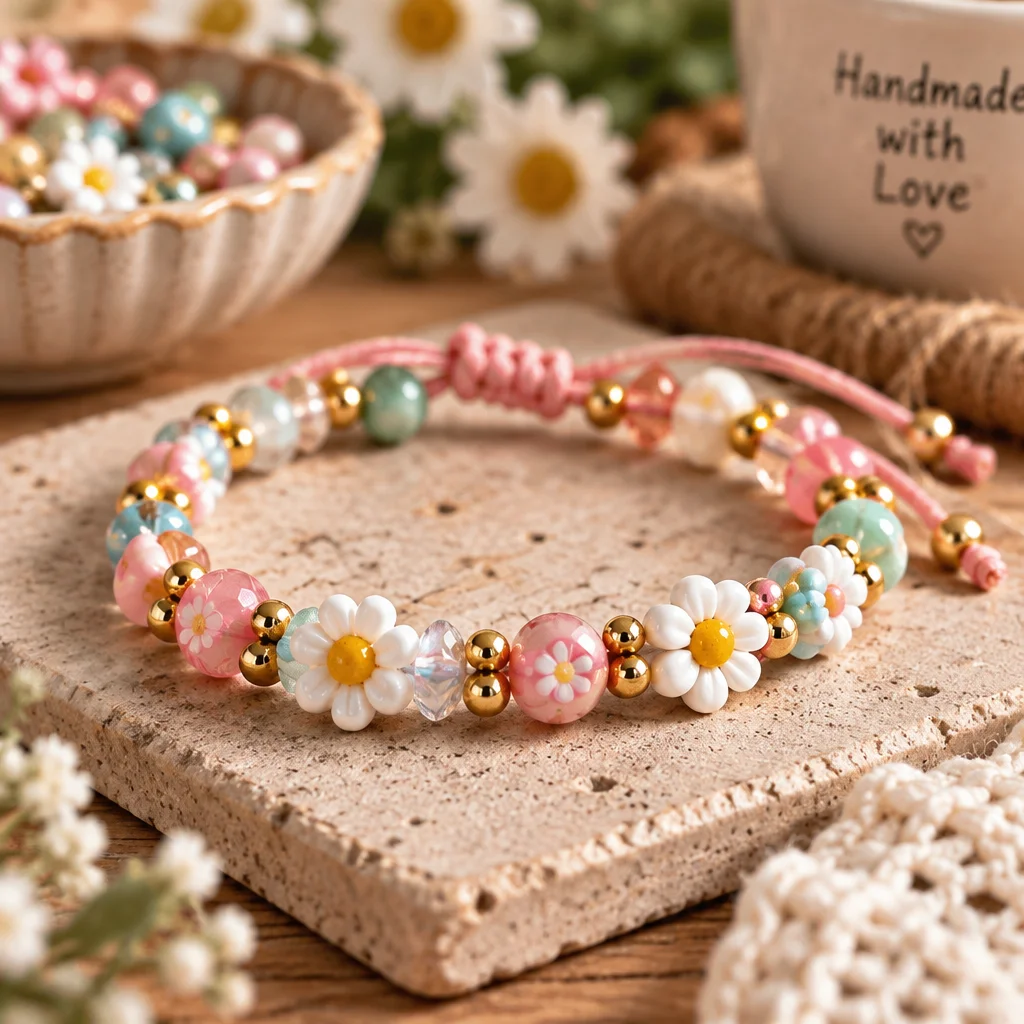
If you are searching for beaded bracelet patterns that are genuinely beginner-friendly, you are in the right place. In this guide, you will learn a few simple pattern styles, how to choose beads and cord that behave well, and how to finish a bracelet so it stays secure through everyday wear. The finished result can be as simple as a stretchy “stacking” bracelet or as polished as a giftable piece with a clasp. If you are crafting with kids or planning a holiday craft day, you might also enjoy these quick, low-mess ideas alongside bracelet making: printable crafts for kids and Christmas crafts for kids. Let’s start with the basics that will prevent the most common beginner frustrations.
What You Need to Know Before Starting
Most beginner beaded bracelet patterns fall into three construction types: elastic stretch, stringing wire with a clasp, or knotted cord designs. Elastic is the easiest to start because you only need beads and a strong stretch cord. Beading wire and a clasp look more “jewelry-like,” but you will also need crimp beads and pliers. Knotted cord designs are great for adjustable bracelets, but they require consistent tension and patient knot tying.
Plan your first bracelet around a bead size that is comfortable to hold. Many beginners do best with 6 mm to 10 mm beads or pony beads because they thread quickly and show patterns clearly. Very tiny seed beads are beautiful, but they require finer needles, better lighting, and more practice with tension.
Before you string anything, decide your goal: a quick bracelet to practice pattern repeats, a set of stackable bracelets, or a sturdier bracelet you will wear daily. Your goal determines your materials. A daily-wear bracelet needs stronger cord and better finishing than a one-day party favor.
Lastly, beading is easier when you work in a tray or on a towel. Beads roll. A soft surface keeps them in place and protects finishes from scratches.
Supplies, Tools, and Material Choices
Having the right supplies makes beaded bracelet patterns feel easy instead of fiddly. You do not need a full studio, but you do need materials that match your bead size and the bracelet style you want.
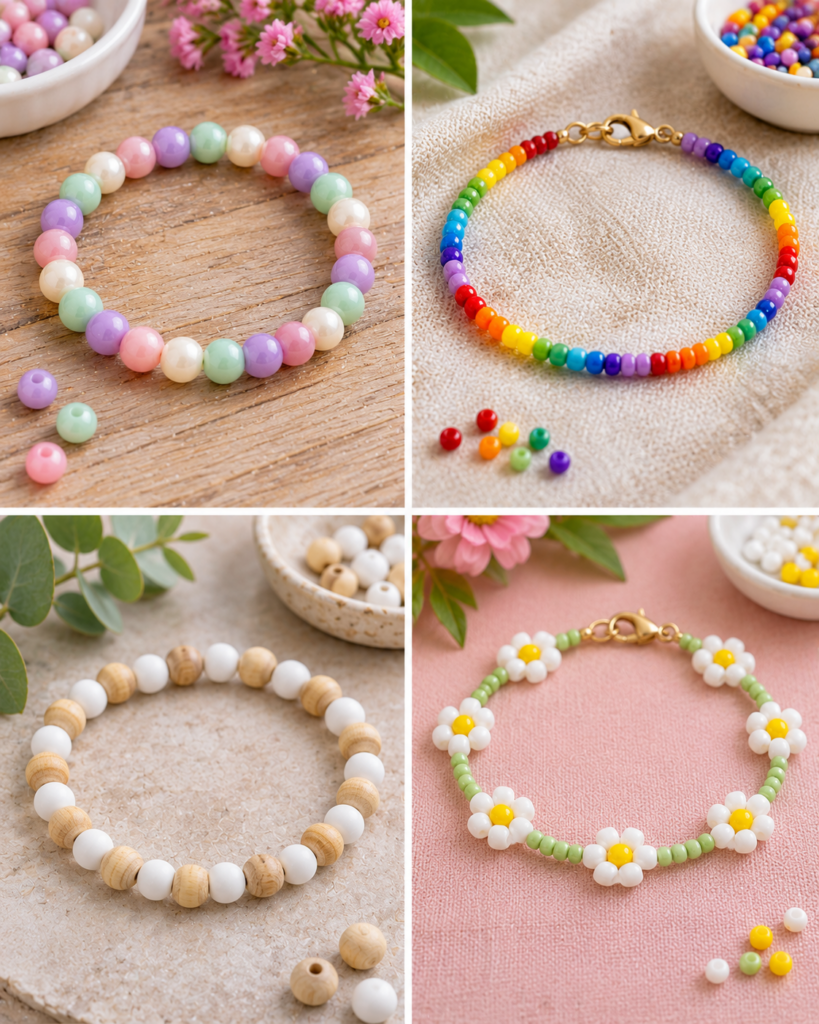
- Beads: Start with round beads (glass, acrylic, wood) in one or two sizes. Mixed sizes are fun, but the more sizes you add, the more important it is to plan your pattern so it does not look accidental.
- Cord or stringing material: Choose elastic cord for stretch bracelets, or beading wire (7-strand or 19-strand) for clasp bracelets. For adjustable cord bracelets, use nylon cord (like 0.8 mm to 1 mm) or waxed polyester cord.
- Findings (optional): Lobster clasp, jump rings, crimp beads, and crimp covers if you are making a clasp bracelet. These are not needed for basic elastic bracelets.
- Tools: Scissors, tape, a bead reamer (optional for tight holes), and chain-nose pliers if using crimps and clasps.
- Helpful extras: Beading needle (especially for small-hole beads), bead stoppers or binder clips, and a bead mat or towel.
Material tip: match the hole size to the cord thickness. If the cord barely fits, it will fray and fight you. If the hole is huge compared to the cord, the bracelet may look loose and the pattern can drift.
Safety note: if kids are involved, use age-appropriate bead sizes to reduce choking risk and supervise closely.
How to Make or Use It (Clear Beginner-Friendly Tutorial)
This tutorial teaches a reliable starter method that works for many beaded bracelet patterns: a stretch bracelet with a repeating pattern. You will learn pattern planning, clean stringing, and a secure knot finish.
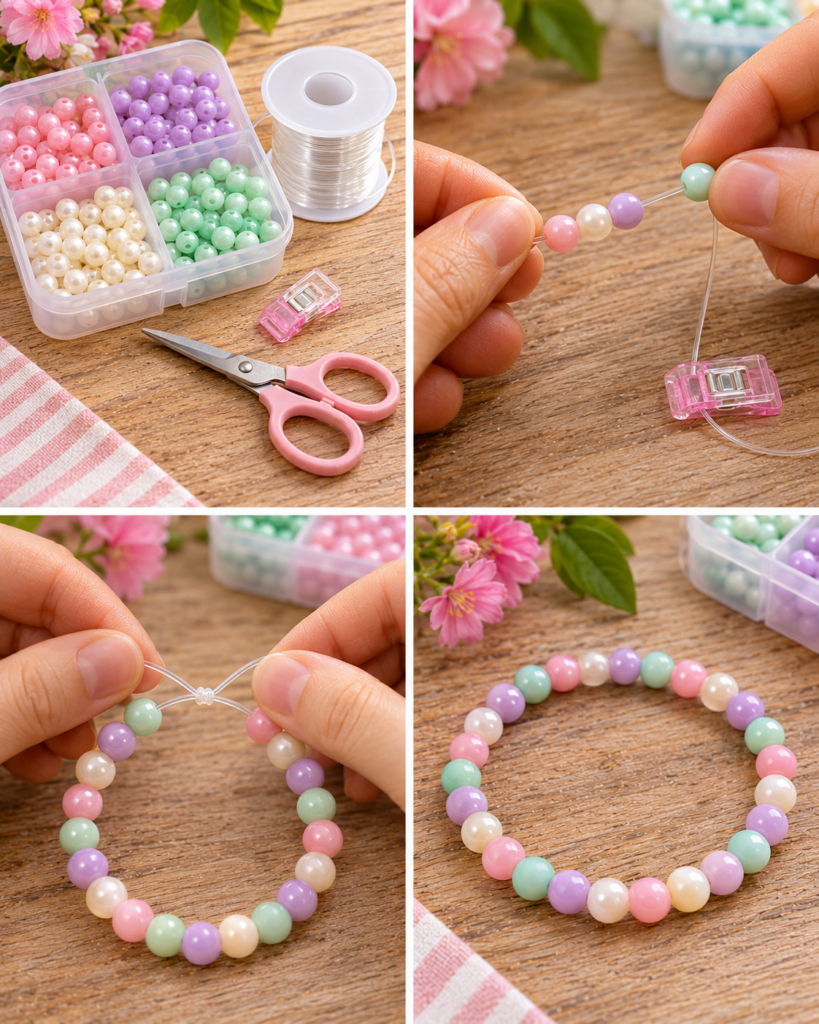
- Measure your wrist and decide your fit. Wrap a soft measuring tape around your wrist where you will wear the bracelet. Add 1/4 inch (snug fit) to 3/4 inch (comfortable fit). This extra space accounts for beads and movement, and it helps the bracelet slide over your hand.
- Cut elastic cord with extra length. Cut about 10 to 12 inches of elastic. More length gives you room to tie secure knots without beads sliding off the ends.
- Pre-stretch the elastic. Gently pull the elastic a few times. This reduces future stretching and helps the bracelet keep its size longer.
- Plan your repeat on the table first. Lay out a short sequence such as “A A B A A B” or “A B C B.” For example, use two blue beads and one white bead as the repeat. Planning prevents mid-stringing changes that make patterns look uneven.
- Tape one end and start stringing. Tape one end of the cord to the table or clip it with a binder clip. String beads in your planned order. Check your length around your wrist before you commit to the final few beads.
- Test the fit before knotting. Hold the ends together and slide the bracelet over your hand. If it is too tight, add a bead or two. If it is too loose, remove a bead and re-check.
- Tie a surgeon’s knot for security. Cross the ends and tie a basic overhand knot, but wrap the cord through twice on the first pass (this is the “surgeon’s” part). Pull slowly and evenly so the knot seats neatly.
- Add a second knot and hide it. Tie a second overhand knot on top of the first. If your beads allow, apply a tiny dab of jewelry glue on the knot (optional), let it get tacky, then slide the knot into a bead hole. Trim tails after the glue sets.
If you prefer a clasp finish, the same pattern planning applies, but you will string onto beading wire and secure each end with crimps before attaching the clasp.
Helpful Tips for Better Results
Once you start exploring more beaded bracelet patterns, small technique improvements make a big difference in comfort and durability. First, keep your tension consistent. With elastic, do not string while pulling the cord tight. The bracelet will end up smaller than planned and will strain the knot. Instead, string with the cord relaxed, then gently snug the bracelet only while knotting.
Second, keep patterns readable by choosing either color contrast or shape contrast. If your beads are all shiny and similar in color, a repeat can disappear visually. A simple trick is to use one “anchor” bead (like a metallic spacer) every repeat to make the pattern obvious.
Third, use bead stoppers. A small binder clip or a dedicated bead stopper at the far end saves you from spilled beads and keeps your sequence intact while you double-check the design.
Fourth, make a quick “pattern key” on paper: A = blue, B = white, C = gold spacer. This is especially helpful when making a second bracelet to match the first.
Reader note (Jenna, hobby crafter): “I always thought my bracelets looked messy, but planning a short AAB repeat on the table first changed everything. The pattern stayed consistent, and using a surgeon’s knot finally stopped my elastic from slipping.”
If you are crafting seasonally, you can also coordinate bead colors with paper crafts for gift tags and packaging. These ideas pair nicely with Christmas paper crafts to make.
Creative Variations and Project Ideas
The fun part of beaded bracelet patterns is that one basic method can create dozens of looks. Here are beginner-safe variations that do not require advanced weaving or specialty looms.
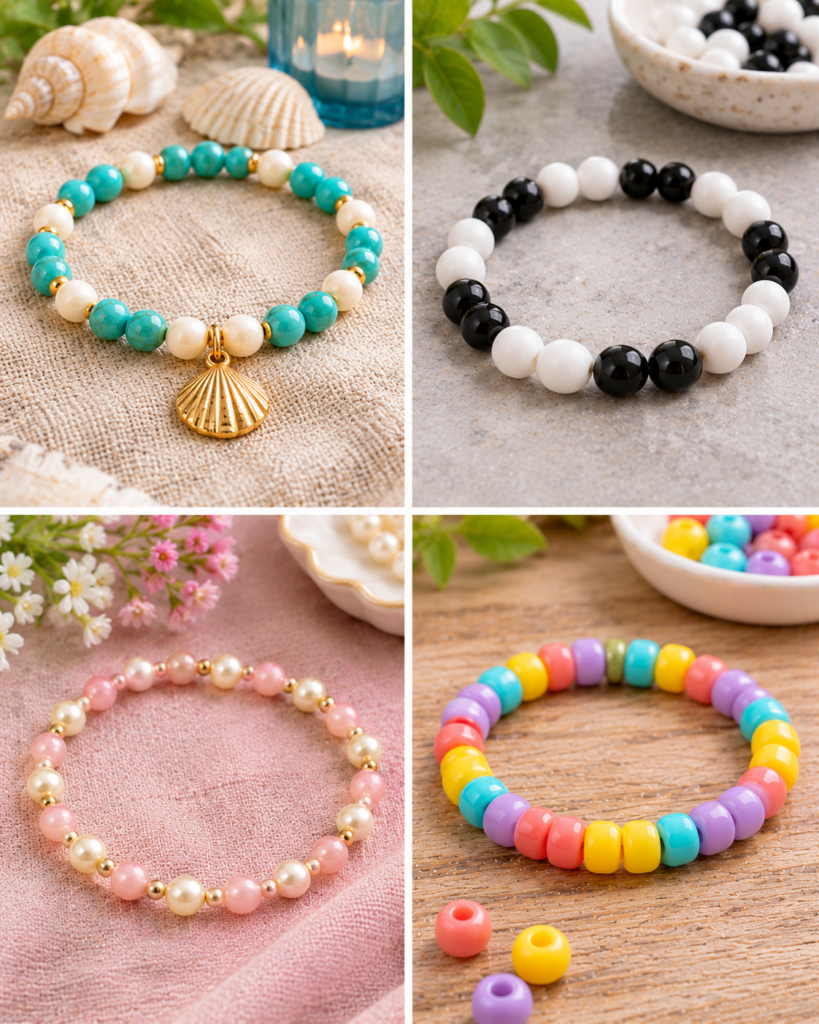
- Spacer-based pattern: Use a simple repeat like “gemstone bead, spacer, gemstone bead, spacer.” Spacers add shine and help hide slight inconsistencies in bead size.
- Color-block bracelet: Instead of a tiny repeat, do sections: 10 beads of one color, then 10 of another. This looks modern and is easy to count.
- Name or word bracelet: Add letter beads as the focal point, then mirror the same bead colors on both sides for balance. Keep letters centered by building outward: string half the side beads, then letters, then the mirrored half.
- Charm center bracelet: String beads up to the midpoint, add a large-hole charm bead, then repeat the same bead order to the end. Symmetry makes the bracelet look intentional.
- Stacking set: Make three coordinating bracelets: one all solid color, one with spacers, one with a simple repeating pattern. Together they look styled, even if each bracelet is simple.
Gift idea: pair a bracelet-making session with printable activity pages for a craft day. If you like holiday gifting, browse free Christmas craft printables for tags and small packaging details that make handmade bracelets feel extra special.
Common Mistakes and How to Avoid Them
Beginners often think they need “better” beaded bracelet patterns, but most issues come down to fit, cord choice, and finishing. Here are the most common problems and fixes.
- Bracelet snaps after a few wears: Elastic was too thin, old, or nicked by sharp bead edges. Use quality stretch cord sized appropriately (often 0.7 mm to 1 mm for medium beads), and avoid beads with rough holes unless you ream them smooth.
- Knot slips or comes undone: Use a surgeon’s knot plus a second knot. Pull slowly and evenly so the knot seats flat. If you use glue, use a tiny amount and let it cure before trimming tails.
- Bracelet is scratchy or uncomfortable: The knot is not hidden, or the beads have sharp edges. Hide the knot inside a bead, and choose smooth round beads for bracelets meant for long wear.
- Pattern looks random: Bead sizes vary more than expected, or the repeat is too subtle. Add a spacer bead as a clear “separator” or reduce the number of colors so the repeat reads from a distance.
- Bracelet is too tight to get on: Wrist measurement did not include ease. Measure around the widest part of your hand too, or add 1/2 inch and test before tying.
If you want a kid-friendly craft station, pre-sort beads into small cups and pre-cut cords to safe, manageable lengths. This prevents tangles and keeps the focus on creating consistent patterns.
Frequently Asked Questions About Easy Beaded Bracelet Patterns for Beginners
How do you make a beaded bracelet?
Choose a simple construction first, usually elastic for beginners. Measure your wrist, cut elastic with extra length, pre-stretch it, then string beads in your chosen design until the bracelet fits comfortably. Tie a surgeon’s knot, then a second knot for safety. If possible, slide the knot into a bead to hide and protect it. Trim tails only after the knot feels secure and any optional glue is fully set.
What beads are best for beginners?
Round 6 mm to 10 mm beads are the easiest to handle because they are quick to thread and large enough to show a repeating design. Acrylic beads are lightweight and budget-friendly, glass beads feel more polished, and wood beads are comfortable for everyday wear. Avoid very tiny seed beads at first unless you have good lighting and a fine needle, because tension and thread choice become more critical.
What cord should you use for a beaded bracelet?
For stretch bracelets, use strong stretch cord made for jewelry, not office elastic. Sizes around 0.7 mm to 1 mm work well for many medium beads. For clasp bracelets, use beading wire (7-strand or higher) because it drapes nicely and resists kinking. For adjustable knot bracelets, nylon or waxed polyester cord is a good choice because knots grip well and the cord resists fraying.
How do you measure bracelet size?
Measure your wrist where the bracelet will sit, then add “ease” for comfort. Add about 1/4 inch for a snug fit, 1/2 inch for a standard fit, and up to 3/4 inch if you like a looser bracelet. If you are making a stretch bracelet, also consider the widest part of the hand, since the bracelet must pass over it. Always test the fit before tying the final knot.
How do you tie a secure bracelet knot?
A surgeon’s knot is one of the most reliable for elastic. It is like an overhand knot, but you wrap the cord through twice on the first pass before tightening. This extra wrap adds friction so the knot is less likely to slip. Tie a second knot on top for added security. If desired, use a tiny dab of jewelry glue on the finished knot, let it cure, then trim the ends.
How do you create repeating bead patterns?
Start with a short repeat you can remember, such as AAB or ABCB. Lay the sequence on the table first, then repeat it as you string. To keep the repeat consistent, use a “pattern marker” bead, like a metallic spacer, at the start of each repeat. If you are making matching bracelets, write a quick key (A = blue, B = white) and count beads per repeat so the pattern is identical.
Final Thoughts
Learning beaded bracelet patterns is one of the fastest ways to build confidence with jewelry crafts because you can finish a wearable project in under an hour and improve with every bracelet you make. Start with a simple repeating pattern on elastic, focus on consistent sizing and a secure knot, then experiment with spacers, color-block sections, and centered word designs. Your next step is to pick two colors you love, lay out a repeat on the table, and make one “practice bracelet” before moving on to a gift-worthy set. Keep your bead leftovers sorted, because they are perfect for future stacking bracelets and quick craft days.