Printable Gift Box Templates: Easy DIY Boxes
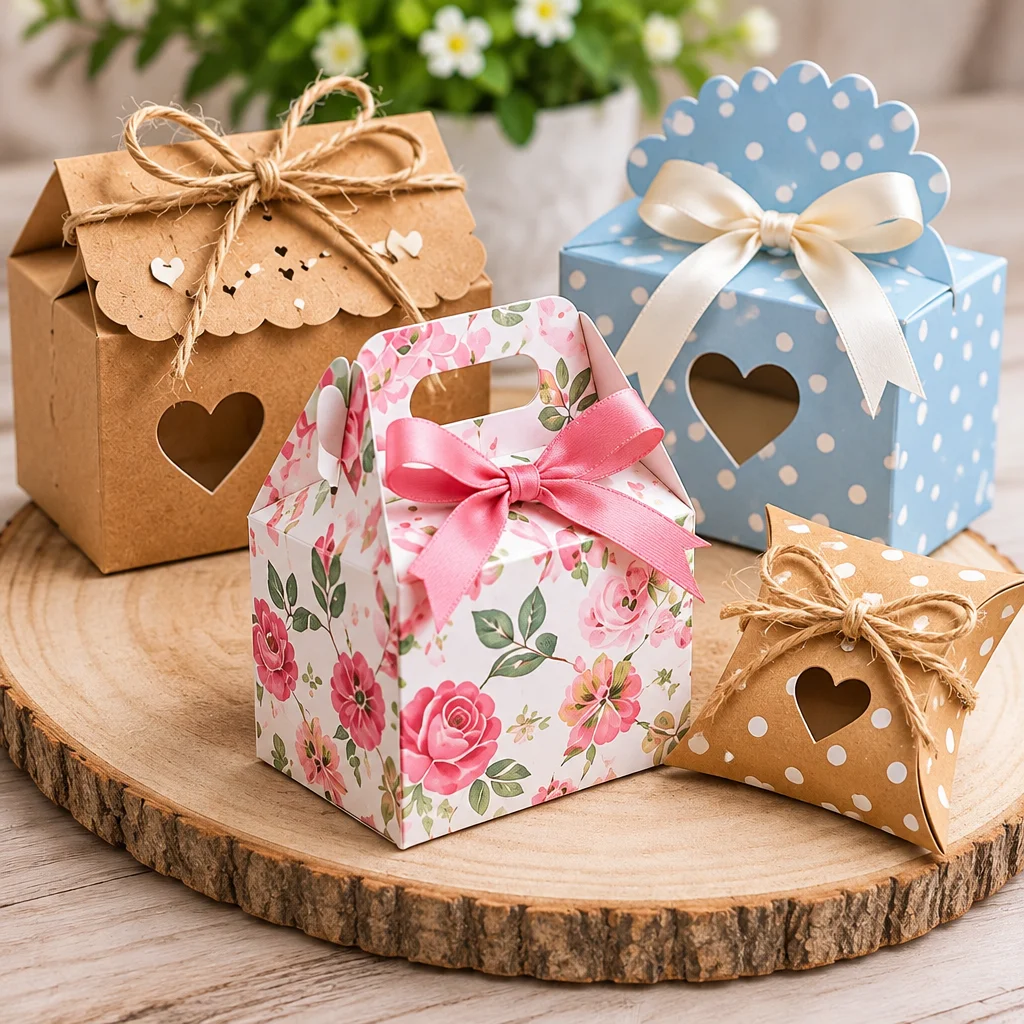
Printable gift box templates are one of the fastest ways to create polished packaging at home, even if you are a total beginner. Instead of measuring every panel from scratch, you print a pattern, cut it out, fold along the lines, and end up with a sturdy little box that looks store bought (but far more personal). These templates are perfect for party favors, small handmade gifts, jewelry, gift cards, and edible treats that need a neat presentation.
If you love the look of coordinated gifting, pair your boxes with simple labels and tags. I often use seasonal tags from these printable Christmas gift tag designs or theme a whole set of packaging for February using printable Valentine’s crafts and templates. In this guide, you will learn which paper works best, how to print accurately, and how to assemble and customize several box styles without frustration.
What you need to get started
Before you print any printable gift box templates, it helps to set up a small “box making station.” The goal is clean cuts, crisp folds, and glue that grabs quickly. You do not need fancy tools, but the right basics make the difference between a box that pops open and one that clicks together neatly.
- Printer: Any inkjet or laser printer works. Inkjet prints can smudge if you use heavy glue immediately, so let sheets dry for a minute or two before handling.
- Paper choice: Cardstock makes sturdier boxes. Lighter paper works for favor boxes that are not holding weight. (More detail on thickness later.)
- Adhesive: Double sided tape is beginner-friendly and instant. Liquid glue is strong but can warp paper if applied too heavily.
- Scoring tool: A bone folder is ideal, but the back of a butter knife or an empty ballpoint pen works for scoring if you are careful.
- Cutting surface: A self-healing mat helps if you use a craft knife. Otherwise, scissors and a clear table are fine.
Keep a few clothespins or paper clips nearby. They act like tiny clamps while glue sets, especially on small tabs.
Paper, printer settings and cutting tools
For printable gift box templates to come out the right size, printer settings matter. Set your print dialog to Actual Size or 100%. Avoid “Fit to Page” unless the template designer specifically says it is safe, because it can shrink the pattern and cause lids not to fit.
For cutting, use whichever tool gives you the most control:
- Scissors: Great for curved edges (like pillow boxes). Take your time on corners.
- Craft knife + ruler: Best for straight lines on cube boxes and folding cartons. Use light repeated passes instead of one heavy cut.
- Paper trimmer: Fast for straight outer edges, but it cannot cut interior shapes or small notches.
If you are cutting with a knife, work on a cutting mat and keep fingers clear of the ruler edge. Sharp blades are safer than dull ones because they require less force.
ideas and projects to try
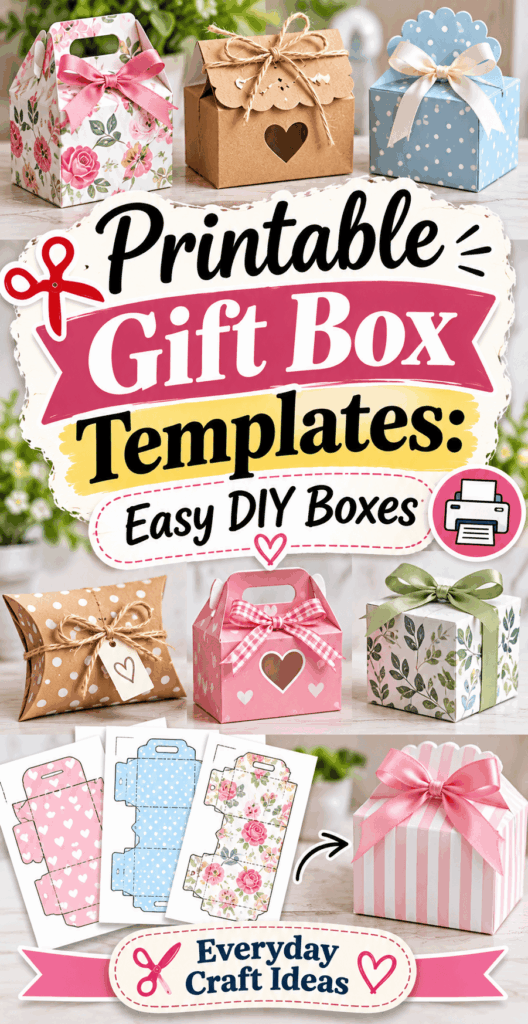
One reason I love printable gift box templates is the variety: you can make a box that ties with a ribbon, a crisp cube with a lid, or a tiny treat box for a single truffle. Choosing the right style depends on what you are gifting and how you want it to open.
Pillow boxes, cube boxes, favor boxes, mini treat boxes and folding cartons
- Pillow boxes: These have curved sides that tuck in. They are quick, forgiving, and great for lightweight items like hair clips, stickers, or a small bracelet. Add a ribbon through punched holes for a boutique look.
- Cube boxes: Best when you want a strong shape for soaps, candles, ornaments, or stacked cookies. A cube box also photographs well for gifting and selling.
- Favor boxes: Often have a handle or a gable top. They are ideal for parties, weddings, and classroom treats. Use them for wrapped candy, small toys, or thank-you gifts.
- Mini treat boxes: Tiny boxes are perfect for one or two chocolates, earrings, or a gift card folded into a note. They use less paper and are a good “practice project.”
- Folding cartons: These look like small retail packaging. They are excellent for homemade gifts like bath salts (in a sealed bag), tea sachets, or craft supplies. They also offer lots of flat area for labeling.
If you want to coordinate the box with the present, browse these creative gift wrapping ideas for handmade presents and apply the same color palette to your box bands, tags, and tissue.
How to make and customize the projects
This is the heart of working with printable gift box templates: clean assembly. The best looking boxes come from two habits: scoring before folding, and doing a “dry fit” before you commit with glue. Even if the template is simple, taking an extra minute here prevents misaligned edges and bulky corners.
Assembly steps: print, score, cut, fold and glue
- Print at 100% scale: Select “Actual size” and print one test sheet first. If your template includes a 1-inch or 5 cm test square, measure it with a ruler to confirm accuracy.
- Let ink dry: Especially on glossy cardstock. Smudges happen when your hands drag across fresh ink during scoring.
- Score all fold lines before cutting out: Scoring while the sheet is still rectangular is easier and more precise. Use a ruler for straight folds and apply consistent pressure so the paper creases instead of cracking.
- Cut on solid lines: Cut slowly at corners. For inside corners or slots, a craft knife gives better control than scissors.
- Pre-fold and “train” the creases: Fold along scored lines, then run a bone folder over the fold. This helps the box hold its shape and makes tabs align.
- Dry fit the box: Assemble without glue to confirm tabs match and the lid closes. If something looks off, it is easier to fix now than after gluing.
- Glue tabs sparingly: Use a thin line of glue or strong double-sided tape. Too much liquid glue causes warping. Hold each seam for 10 to 20 seconds or clip it while drying.
- Square it up: Before the adhesive sets, gently push corners into alignment so the box sits flat and the lid fits.
Scaling, paper thickness and gifting uses
Resizing printable gift box templates can be a game-changer, but it affects fit. If you scale a box up or down, keep every piece at the same percentage, including the lid. For boxes with a separate lid, consider leaving the lid at 100% and scaling the base slightly smaller only if the template was designed with a tight fit. Otherwise, scale both equally to preserve proportions.
Paper thickness matters just as much as size. A template that fits perfectly on 65 lb cardstock might be too tight on 110 lb cardstock because the folds take up more space. If your lid is snug, gently widen the lid side panels by reprinting just the lid at 101% to 103%, or remake the lid using slightly lighter cardstock.
Match the box to the gift: heavy items need a reinforced base (double layer cardstock or an inner liner), while delicate items benefit from tissue, crinkle paper, or a foam pad inside.
Supplies, cost, time and skill level
Most printable gift box templates are budget-friendly because the main “material” is paper. If you already have a printer, scissors, and glue, you can make gift boxes for pennies each. Specialty cardstock, vellum overlays, or metallic paper will raise the cost, but you can still keep it far below store-bought packaging, especially when making sets for parties or holidays.
- Estimated time: 10 to 20 minutes for a simple pillow box, 20 to 40 minutes for a cube with a lid (especially the first time).
- Difficulty: Beginner to intermediate. Beginners should start with a pillow box or mini treat box and work up to folding cartons with multiple tabs.
- Typical cost: Often $0.20 to $1.00 per box depending on cardstock and embellishments. Double-sided tape costs more up front but saves time.
- Best uses: Party favors, small gifts, gift cards, jewelry, small handmade items, and presentation for baked goods that are already wrapped.
Safety note: If you are packaging food, avoid direct contact between food and printed surfaces. Use a food-safe inner bag or wrap, then place it in the box. Printed inks and many craft glues are not intended for food contact.
Beginner mistakes and troubleshooting
If your first box looks a little lopsided, you are not alone. Here are the most common issues and fixes:
- Problem: The box will not close neatly. Fix: Check that you scored on the fold lines, not beside them. Even a 1 mm shift can make tabs fight each other.
- Problem: Tabs pop open. Fix: Switch to stronger adhesive or increase contact area. Burnish tape firmly. With glue, hold longer or use clips while drying.
- Problem: Cardstock cracks on folds. Fix: Score deeper, fold slowly, and consider cardstock with a smoother finish. Cracking often happens with very thick or textured paper.
- Problem: The printed design is off-center after cutting. Fix: Your printer may be scaling or shifting margins. Recheck “Actual size,” and if necessary, use your PDF viewer’s print settings rather than a browser print dialog.
“I tried printable gift box templates for my book club favors and the scoring tip made all the difference. My first box was messy, but by the third one the folds were crisp and the lids actually fit. I used double-sided tape and it went so much faster than glue.”
Frequently Asked Questions About Printable Gift Box Templates: Easy DIY Boxes
How do I print a gift box template?
Download the file and open it in a PDF viewer (often more reliable than printing from a web browser). In the print menu, choose Actual Size or 100% and select the correct paper size (Letter or A4). Print one test page first, especially if the template includes a measurement guide. Once printed, let the ink dry, score the fold lines, then cut and assemble.
What cardstock is best?
For most printable gift box templates, 65 lb to 80 lb cardstock is the sweet spot: sturdy but still easy to fold cleanly. Use 100 lb to 110 lb cardstock for heavier gifts, but expect tighter folds and potentially snug lids. If your printer struggles with thick cardstock, use a lighter weight and reinforce the box with an inner liner or a double layer on the base.
How do I resize a printable box?
Resize by printing at a different percentage, such as 90% for a smaller box or 110% for a larger one. Keep every part at the same scale so tabs align. After resizing, expect to tweak the lid fit because thicker cardstock changes how folds behave. A good method is to print a draft on plain paper first, assemble quickly with tape, and confirm the size before using cardstock.
Why are my fold lines cracking or looking rough?
Cracking usually means the paper fibers are breaking rather than bending. Score first using a ruler and a smooth scoring tool, then fold slowly and press with a bone folder. Very thick, heavily textured, or low-quality cardstock is more prone to cracking. If you must use thick paper, score slightly deeper and fold in stages rather than trying to crease sharply in one motion.
What glue or tape works best for clean seams?
For beginners, strong double-sided tape gives the cleanest, fastest seams with no warping. For heavier cardstock or stress points, tack with tape and reinforce with a tiny dot of liquid glue. If you use liquid glue alone, apply a thin layer and spread it with a scrap of paper to avoid lumps. Always keep glue away from fold lines so panels close flat.
How can I make printed boxes look more “professional”?
Focus on crisp edges and small details. Use a bone folder to burnish folds, trim any tiny white edges with matching marker, and add a simple belly band or label. Coordinated tags instantly upgrade the look, especially for holidays or group gifting. If you are making sets, batch the process: score all sheets, then cut all, then fold all, then glue all for consistency.
Final tips and next projects
Printable gift box templates make DIY gifting feel doable because the structure is already planned for you. Start with one simple design, print at 100%, and practice the core skills: score first, cut cleanly, pre-fold, then glue with a light hand. Once you have one box you love, make a batch in matching cardstock and personalize with tags, ribbon, or a belly band.
If you are looking for ideas to put inside your boxes, browse these thoughtful DIY gifts for friends or plan ahead for December with DIY Christmas gifts people actually want. Your next step: choose one box style, print a test, and keep notes on paper weight and scaling so the next round is even easier.