Printable Paper Dolls: Cute Cut-Out Ideas
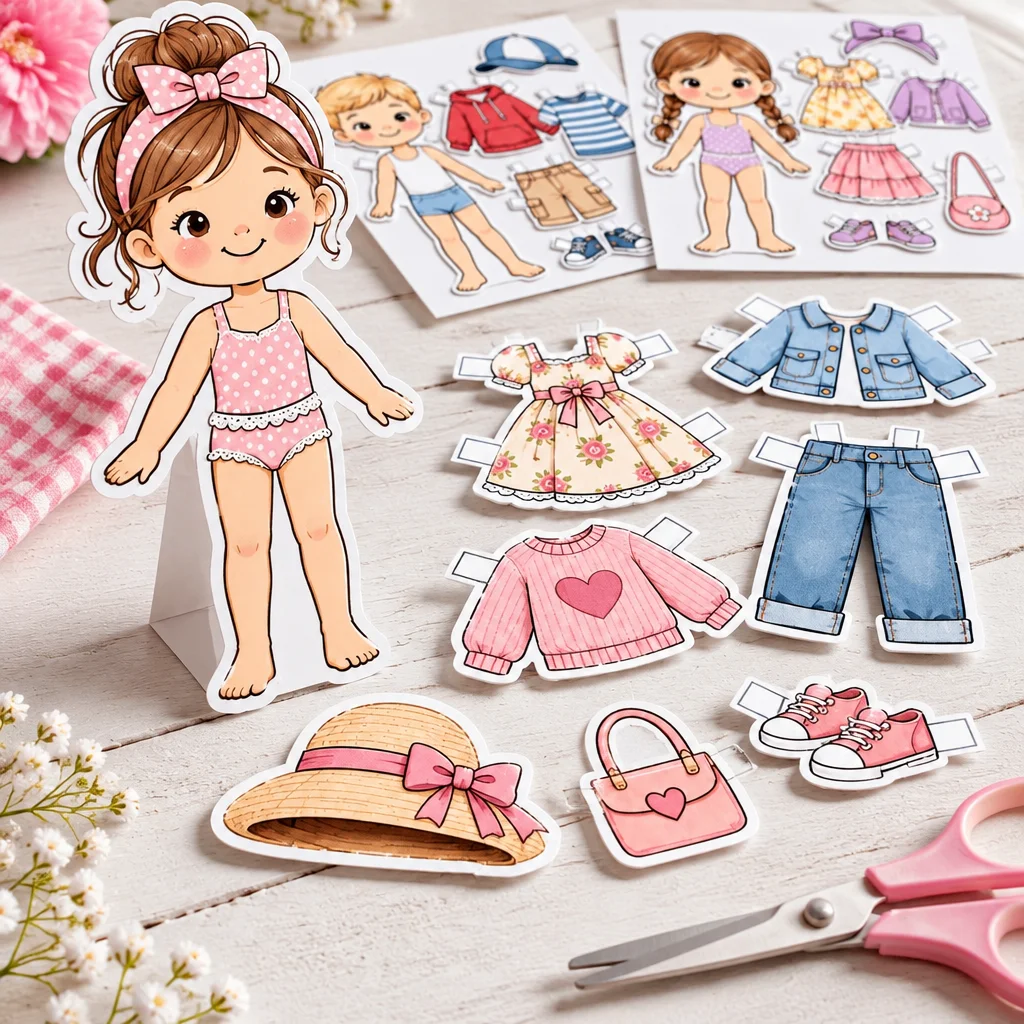
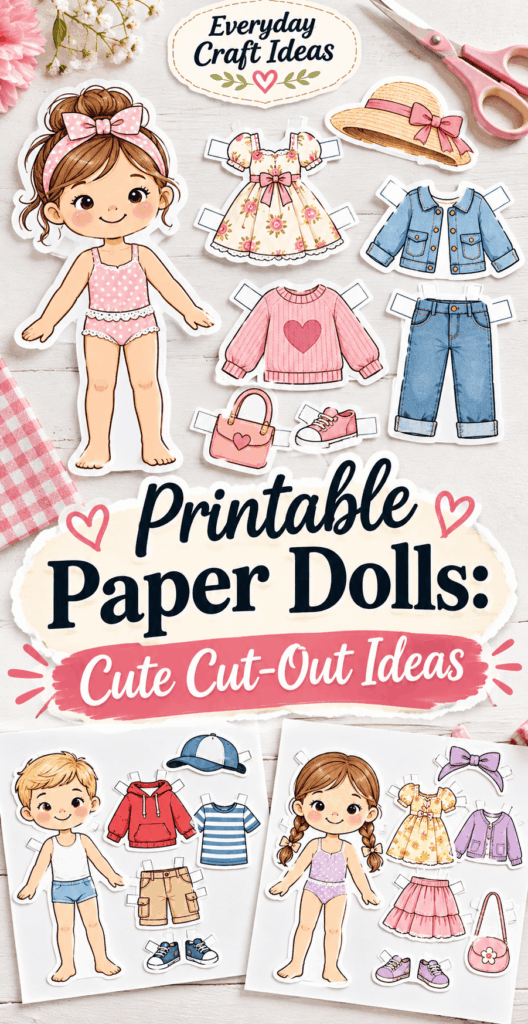
Printable paper dolls are one of the simplest, cutest ways to turn a printer and a few craft supplies into hours of creative play. If you have ever wanted a low-mess, low-cost project that still feels like “real crafting,” paper dolls are it. In this guide, I will walk you through choosing styles that match your child’s age, printing on the right paper, cutting cleanly (including those tiny tabs), and storing everything so pieces do not disappear after day one. You will also get practical dress-up themes, learning activities, and troubleshooting for the most common issues like flimsy dolls, mis-sized outfits, and clothes that will not stay on.
Why This Project Is Worth Making
Making printable paper dolls is a satisfying project because the results are immediate: print, cut, play. Most sets take about 30 to 90 minutes depending on how many outfits you include and how detailed the cutting is. Cost is usually minimal: a few sheets of cardstock, printer ink, and basic tools. Difficulty is beginner-friendly, with “medium” moments when cutting small curves or tabs. If you can cut along a line, you can do this.
This project suits several situations: rainy day activities, quiet-time play, travel kits, classroom centers, birthday party crafts, or even a nostalgia craft night for adults. Paper dolls also scale well. You can make a simple one-doll, four-outfit set for a toddler (with help), or an elaborate wardrobe with accessories for older kids who enjoy detailed cutting.
The reader outcome you should expect is a durable, reusable set you can store neatly and refresh anytime by printing new outfits. It is also a great confidence builder for beginner crafters because the steps are clear and there is room to personalize without needing advanced drawing skills.
Supplies, Materials, and Beginner Setup
You can make printable paper dolls with basic supplies, but choosing the right materials makes the set last longer and feel more “finished.” If you are crafting with kids, set up a clear work area, good lighting, and a scrap bin for paper bits. Keep drinks away from printed pages to prevent ink smears.
- Paper: White cardstock (65 to 110 lb cover) is ideal for sturdiness. In a pinch, use regular printer paper and reinforce with glue stick on a cereal box panel before cutting.
- Printer: Inkjet or laser both work. Inkjet colors can smudge if handled immediately, so allow drying time.
- Scissors: Small craft scissors give better control on curves. Safety scissors are fine for preschoolers with thick, simple shapes.
- Craft knife (optional): Helpful for tight corners, but only for adults on a cutting mat.
- Adhesive (optional): Glue stick or double-sided tape if you want to laminate DIY-style or mount to backing.
- Finishing: Clear tape, self-adhesive laminating sheets, or a home laminator for durability.
Safety note: Paper cuts are real. Teach kids to pass scissors handle-first and keep fingers away from blades. If you use a craft knife, cut away from your body and store blades out of reach.
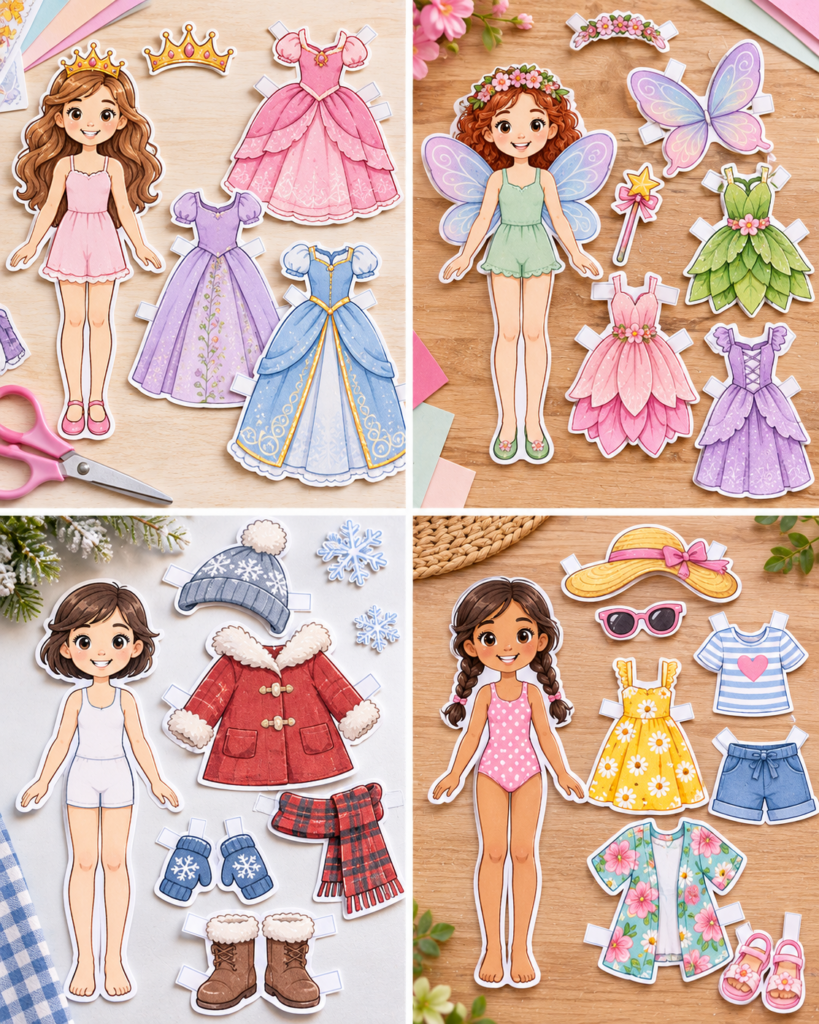
Paper doll styles and age suitability
Not all printable paper dolls are equally easy to use, so matching the style to the age group prevents frustration. For preschoolers (ages 3 to 5), choose dolls with chunky outlines, minimal accessories, and large clothing pieces with wide tabs. A “peg doll” shape, a simple child figure, or an animal character with big flat sides works well because outfits slide on easily and pieces are harder to bend.
For early elementary (ages 6 to 8), you can introduce more realistic body shapes, layered outfits, and a few small accessories like hats or bags. This age can usually cut more precisely, especially with child-safe craft scissors. Keep the number of tabs manageable. Too many tabs makes dressing fiddly and leads to tearing.
For ages 9 and up (and adults), detailed fashion-doll proportions, themed costumes, tiny shoes, and hair accessories become fun rather than annoying. This group can also handle optional upgrades like lamination and making storage envelopes.
Realistic constraints matter: very narrow ankles, thin wrists, or super tiny tabs look cute but tear quickly. If you are designing your own, thicken delicate areas and simplify silhouettes. If you are downloading a set, preview the shapes before printing and choose designs with bold outlines and sensible tab placement.
Printable character and clothing ideas
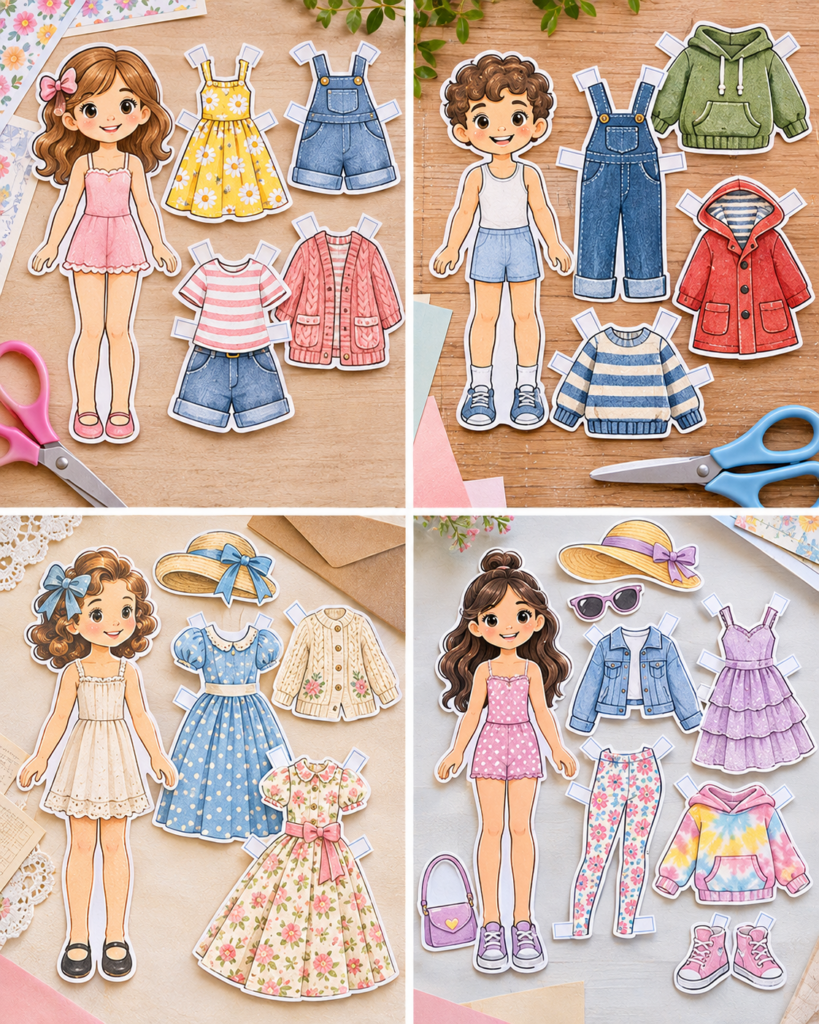
The fastest way to keep printable paper dolls exciting is to build themed mini-wardrobes. Instead of printing 20 random outfits, try 6 to 10 pieces that mix and match. A “capsule wardrobe” approach makes play smoother because tops coordinate with bottoms and layers fit without bulky overlaps.
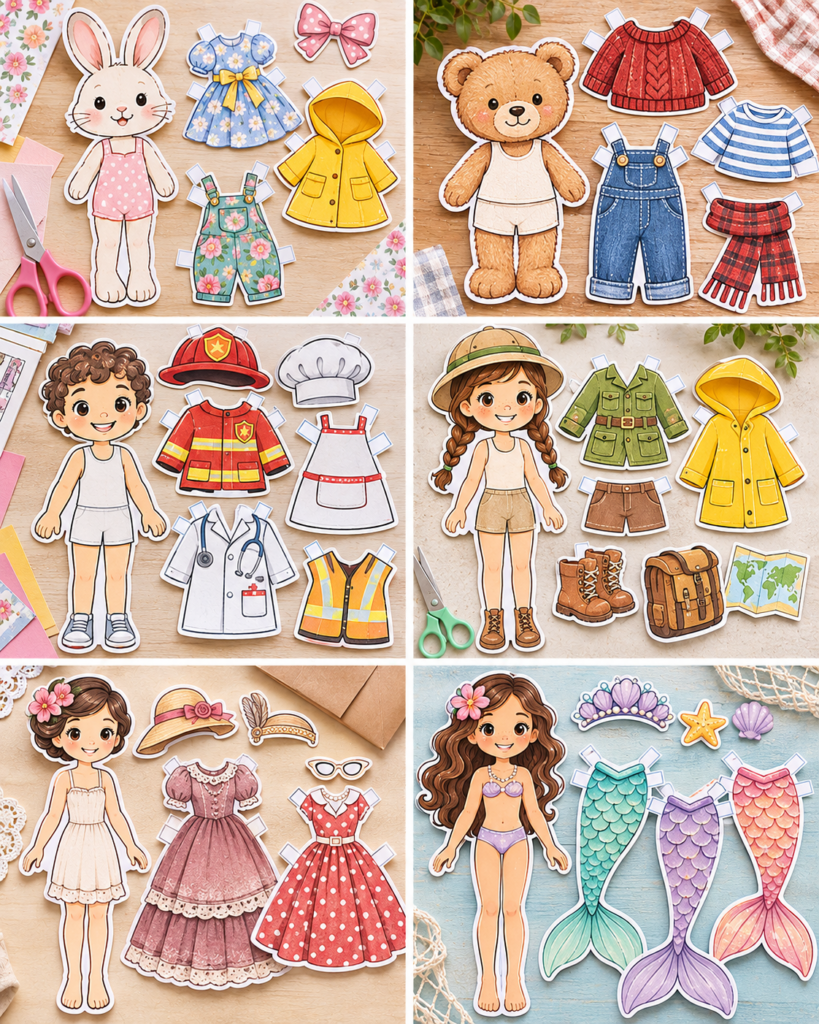
Here are practical character and outfit ideas that print well and cut cleanly:
- Everyday kid character: T-shirt, hoodie, jeans, shorts, raincoat, boots, sneakers.
- Seasonal set: Winter coat and scarf, spring dress and cardigan, summer swimwear and cover-up, fall sweater and beanie.
- Community helpers: Doctor coat, firefighter jacket, chef hat and apron, construction vest. These are great for pretend play and classroom themes.
- Fantasy light: Fairy wings, simple crown, cloak, wizard hat. Keep wings as one solid shape to reduce tearing.
- Animal dolls: Bear, bunny, or cat base with cute shirts and costumes. Animal shapes are sturdy and toddler-friendly.
Constraints to watch: very dark solid fills can use lots of ink and may curl cardstock. If ink coverage is heavy, choose “draft” printing or slightly lighter colors when possible. Also, very intricate hairstyles and lace-like edges look beautiful but are slow to cut. Save those for older kids or adult crafters.
Printing and cardstock settings
Printing is where most paper-doll problems start, so it is worth slowing down here. For printable paper dolls, you want consistent scale, crisp lines, and paper that does not buckle. First, confirm the intended page size (Letter vs A4). If the file is designed for Letter and you print on A4 (or vice versa), outfits may not fit the doll.
In your print dialog, look for these settings:
- Scale: Choose “Actual size” or 100%. Avoid “Fit to page” unless the designer specifically recommends it. Fit-to-page often shrinks the doll slightly, then the clothes no longer align.
- Paper type: Select “Cardstock” or “Heavyweight” if available. This adjusts how the printer feeds and how much ink is laid down.
- Quality: “Normal” is usually perfect. “Best photo” can over-saturate and cause curling on heavy ink areas.
- Borderless printing: Leave this off unless the file is built for it. Borderless can crop edges and cut off tabs.
If you only have regular printer paper, print the dolls and outfits, then mount them to thin chipboard (like a cereal box) using a glue stick for an even coat. Press under a book for 10 minutes to reduce warping before cutting.
Cutting and tabs
Clean cutting is what makes printable paper dolls feel “store bought.” The goal is smooth edges and tabs that fold without tearing. If you are crafting with kids, you can pre-cut the doll and let them cut the larger outfits.
- Rough cut first: Cut around each doll or outfit leaving a small margin. This makes detailed cutting easier because you are not wrestling a full sheet.
- Cut slowly on curves: Rotate the paper, not your hand. Small craft scissors help you steer without jagged edges.
- Keep tabs wide: If tabs are drawn very thin, intentionally cut them slightly wider than the line. A tiny extra millimeter adds strength.
- Score folds gently: For crisp tabs, lightly score the fold line with a blunt butter knife or the back of scissors (adult step). Do not cut through.
- Fold tabs the right direction: Tabs typically fold to the back of the doll. Pre-folding makes dressing easier and reduces repeated bending later.
- Reinforce stress points: Add a small piece of clear tape to the back of fragile areas like wrists or narrow waists before play.
If an outfit has many tabs, you can simplify: keep shoulder tabs and one side tab, and trim away extra tabs that do not contribute much to holding power.
Storage envelopes
Storage is the difference between a one-day craft and a reusable set. The simplest solution is a labeled envelope per character. Use letter-size envelopes for flat sets, or make DIY pockets from cardstock if you want something sturdier.
Easy storage options that work well:
- Envelope system: One envelope for the doll and base shoes, one envelope for outfits, one for accessories. Label clearly so kids can help clean up.
- Mini binder: Hole-punch outfits (only in a blank margin area) and store in a small binder with sheet protectors. This works best for older kids because hole-punching can damage delicate pieces.
- Snack bags in a pencil case: Sort by category in small bags, then keep all bags together. Great for travel and restaurants.
For DIY envelopes, fold an 8.5 x 11 inch cardstock sheet into a large pocket, tape the sides, and add a flap. If you are storing laminated pieces, make the pocket slightly larger because laminated sets are thicker and stiffer.
Reader testimonial: “I made a small printable paper dolls travel kit for my 6-year-old using cardstock and a pencil pouch. The envelope sorting tip saved us. We actually found the shoes again, and she played quietly on a two-hour flight.”
Dress-up play and learning activities
Printable paper dolls are not just dress-up. They are sneaky-good for skill building because kids practice fine motor control, sequencing, storytelling, and even basic math. The key is giving a small prompt so play has direction, especially for kids who get overwhelmed by too many options.
- Weather wardrobe challenge: Ask, “It is raining and cold. What should your doll wear?” Discuss layers and appropriate shoes.
- Pattern and sorting: Sort outfits by color, season, or type (tops, bottoms, accessories). This is great for preschool and kindergarten.
- Story cards: Write prompts on slips of paper: “Birthday party,” “First day of school,” “Camping trip,” “Job interview.” Kids dress the doll and tell a story.
- Time and routine: Make a morning, afternoon, evening outfit sequence. This helps with daily schedule conversations.
- Design thinking: Older kids can sketch a new outfit on blank paper and compare which shapes need tabs and which do not.
Constraint to remember: very young children may chew on pieces. If that is a concern, keep paper dolls as a supervised activity and store out of reach when done.
Printable resource checklist
If you are gathering printable paper dolls from online sources, keep a simple checklist so you do not print something that will not work for your printer or your child’s age. This also helps if you are building a themed set over time.
- File type and clarity: PDF is easiest for consistent sizing. High-resolution images print cleaner lines for cutting.
- Page size: Confirm Letter or A4 before printing. Mismatched page sizes often cause outfit fit issues.
- Intended scale: Look for notes like “print at 100%.” If a test square is included, measure it with a ruler.
- Tab style: Some sets use traditional fold tabs, others use slot-and-tab or no tabs (magnetic/Velcro systems). Choose what matches your tools and patience level.
- Color vs black-and-white: Black-and-white sets are budget-friendly and let kids color their own outfits with crayons or colored pencils.
- Usage rights: For classroom use or party favors, check whether the printable allows personal vs educational use.
If you prefer to make your own designs, start by tracing a simple doll silhouette, then draw clothing shapes that overlap the body slightly at shoulders and waist. Test print one page and assemble before committing to a full wardrobe.
Common Mistakes and How to Fix Them
Clothes do not fit the doll: This is usually a scaling problem. Reprint with “Actual size” at 100% and ensure the correct paper size. If you must mix sources, stick to one designer’s set per doll base.
Cardstock keeps jamming: Feed one sheet at a time through the manual tray if you have it. Choose a lighter cardstock (65 to 80 lb) and select “Heavyweight” in printer settings.
Edges look jagged: Switch to smaller scissors and cut more slowly. For tight corners, cut in small “bites” rather than trying to turn the scissors sharply.
Tabs tear off quickly: Cut tabs slightly wider, score gently before folding, and reinforce the back of the tab with a small piece of clear tape. You can also laminate before cutting, but note that laminated tabs can be slippery, so make them wider.
Pieces curl: Heavy ink coverage can warp paper. Print on “Normal,” let pages dry fully, then press under a book. Mounting to chipboard also helps.
Laminated pieces separate at the edge: Leave a small laminate border around the shape when cutting so the seal stays intact. Cutting exactly on the paper edge can cause peeling.
Frequently Asked Questions About Printable Paper Dolls: Cute Cut-Out Ideas
What paper works best?
For most printable paper dolls, use white cardstock in the 65 to 110 lb cover range. If you want easy cutting for kids, choose 65 to 80 lb. If you want maximum durability, choose 90 to 110 lb and use sharp scissors. Regular printer paper works, but it tears faster. If using regular paper, mount it to thin chipboard with a glue stick, press it flat, and then cut.
How do clothes stay on?
Traditional paper doll clothes stay on with fold-over tabs that wrap to the back of the doll at shoulders, waist, or ankles. For best hold, pre-fold tabs, keep them wide, and avoid bending them back and forth repeatedly. If tabs are frustrating, you can upgrade: glue a thin magnet sheet behind the doll and add tiny magnets behind outfits (adult-supervised), or use small dots of removable poster putty for older kids.
Are paper dolls suitable for preschoolers?
Yes, with the right style and supervision. Choose dolls with thick outlines and simple clothing shapes, and avoid tiny shoes and tiny accessories that can become choking hazards. Use safety scissors and pre-cut the most detailed pieces for them. Preschoolers often do better with “slip-on” outfits (large openings) and fewer tabs. Store pieces immediately after play so nothing ends up on the floor.
Should I laminate before or after cutting?
Laminate before cutting if you want the best durability and wipe-clean surfaces. Then cut with a small laminate border so it stays sealed. Laminate after cutting only if you are using self-adhesive laminating sheets and do not mind carefully trimming each piece twice. For beginners, lamination before cutting is usually simpler.
How do I keep ink from smearing?
After printing, let sheets dry flat for at least 10 to 15 minutes, longer for heavy color. Avoid stacking freshly printed pages. If your inkjet smears easily, switch to “Normal” quality (not “Best photo”) and consider a slightly heavier cardstock that absorbs ink better. Handle pieces by the edges until fully dry.
My child keeps ripping the doll. How can I make it sturdier?
Print on cardstock, then reinforce the doll body with clear tape on the back, especially at ankles and neck. Lamination is the strongest option. You can also mount the doll to chipboard before cutting. If ripping continues, choose a wider doll silhouette and avoid skinny arms or legs.
Can I make black-and-white sets for coloring?
Absolutely. Black-and-white printable paper dolls are great for budget printing and creativity. Use colored pencils for smoother coloring on cardstock; crayons can leave wax buildup on tabs. After coloring, press the sheet under a book for a few minutes to flatten it, then cut. Expect more wear if you do not laminate.
How many outfits should I print to start?
Start with one doll and 6 to 10 clothing pieces: two tops, two bottoms, one dress or outfit, one jacket, and a few accessories. This is enough variety without overwhelming cutting time or creating a storage mess. Once you know your child loves it, add themed sets in small batches.
Do I need special software to make my own designs?
No. You can draw by hand, scan or photograph, and print, or use simple tools like Google Slides, Canva, or any basic drawing app to layer shapes. Keep lines bold for cutting, test print at 100%, and do one “trial outfit” page first to check fit before designing a whole wardrobe.
Final Thoughts
Printable paper dolls are a classic craft for a reason: they are quick to make, easy to personalize, and endlessly replayable when you store them well. Focus on a sturdy base (cardstock or mounted paper), clean cutting with wide tabs, and consistent printing scale, and you will avoid most beginner headaches. Start small with a simple character and a mini capsule wardrobe, then expand into seasonal themes, community helper costumes, or coloring sets as your confidence grows. If you want a natural next craft after paper dolls, try making a matching DIY “closet” folder from cardstock with pockets and hangers, or create a paper doll theater backdrop for storytelling play.