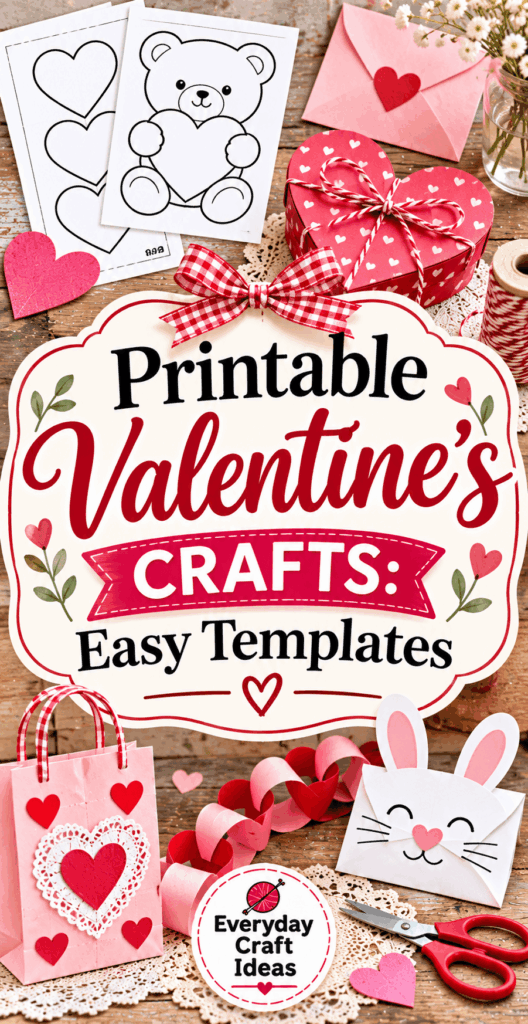
Printable Valentine’s Crafts: Easy Templates

Printable valentines crafts are my favorite way to make something heartfelt without needing fancy tools or advanced skills. With a few easy templates, you can create cards, gift tags, garlands, treat wrappers, and even tiny paper boxes that look polished and personal. This guide is built for beginners who want clear steps, the right materials, and simple ways to customize designs for kids, classrooms, or last minute gifts. If you’re crafting with children, you may also like these printable crafts for kids for more simple cut and glue projects. And if you enjoy soft, no printer projects too, bookmark these felt crafts for beginners for another cozy weekend craft option.
What you need to get started
Most printable valentines crafts use the same core supplies, so once you set up a small “printing station,” you can knock out several projects quickly. Start by choosing templates that match your time and audience: folded cards and gift tags are the fastest, while paper boxes and treat wrappers take a little more careful folding.
Before you print, decide how the finished pieces will be used. Classroom valentines should be sturdy and easy to assemble in batches. A valentine garland needs lightweight paper that hangs nicely. Treat wrappers should be printed clearly and folded crisply, but they do not need heavy cardstock unless you want extra durability.
Here is a practical baseline supply kit and why each item matters:
- Paper or cardstock: Use 65 to 80 lb cardstock for cards and tags, and 24 to 32 lb bright white paper for coloring sheets and wrappers.
- Scissors and/or a paper trimmer: Scissors handle curves; a trimmer speeds up straight cuts and keeps edges neat.
- Glue stick and tape: Glue sticks avoid warping; tape is faster for treat wrappers and quick seams.
- Ruler and bone folder (or a butter knife): Scoring and crisp folds make templates look professional.
- Optional embellishments: Markers, crayons, stickers, washi tape, mini pom poms, and small ribbon scraps for tying tags.
Printable formats, supplies and printer settings
Look for templates in PDF whenever possible because PDFs preserve scale and margins better than many image files. PNG and JPG templates can work well for single images or clip art, but they are easier to accidentally resize.
For printer settings, choose “Best” or “High Quality” for crisp lines, especially for small text on gift tags. Use “Normal” for coloring sheets to save ink. If your template includes cutting lines and fold lines, print in grayscale when you want lighter lines that are easier to hide, or print in color when the lines are part of the design.
A few quick printing tips that prevent frustration:
- Turn off “Fit to page” when you need accurate sizing for boxes and wrappers.
- Use borderless printing only if the file is designed for it; otherwise, important edges may get trimmed.
- Do a one page test print before printing multiples, especially for classroom sets.
ideas and projects to try
The beauty of printable valentines crafts is that you can pick projects based on your schedule. If you have 15 minutes, make gift tags or mini cards. If you have an hour, add a garland or a set of treat wrappers. If you are crafting with a group, choose designs with simple straight cuts and minimal gluing.
For kid friendly crafting, choose big shapes, wide cutting margins, and projects that still look cute even if the folding is not perfect. For adults, you can elevate any template with heavier cardstock, a clean score line, and a simple embellishment like twine or a metallic marker.
If you want more seasonal paper inspiration for later in the year, these Christmas paper crafts to make use many of the same skills: cutting, folding, and clean assembly.
Folded cards, coloring sheets, heart garlands, gift tags, paper boxes and treat wrappers
Here are beginner friendly project ideas, plus exactly what to look for in a good template:
- Folded cards: Choose “fold on center” designs with a clearly marked fold line. Add a blank inside or a lined message area.
- Coloring sheets: Look for bold outlines and large spaces for crayons. Great for classroom parties because they double as an activity.
- Heart garlands: Pick repeating hearts, scalloped hearts, or banner flags. Garlands are forgiving and look great even with mixed patterns.
- Gift tags: Templates should include a hole punch marker. Tags are perfect for quick teacher gifts or treat bags.
- Paper boxes: Use templates with clear fold lines and glue tabs. Small pillow boxes or cube boxes work well for candy.
- Treat wrappers: Choose wrappers sized for common candy bars or snack packs, with a clear “front” and “back” label.
Simple “real templates” you can recreate right now: If you do not have a download handy, you can make your own templates by drawing these shapes on a document and printing:
- Gift tag: A 2 in x 3.5 in rounded rectangle, with a 0.25 in hole marker centered 0.35 in from the top.
- Heart banner flag: A 5 in wide heart with a flat top edge, plus two small 0.25 in circles near the top corners for stringing.
- Pillow box: A 7 in x 4 in rectangle with 0.5 in glue tabs on the short sides and two curved end flaps (half oval shapes) on each end for the pillow closure.
How to make and customize the projects
Once you have your templates printed, the difference between “homemade” and “handmade” is careful cutting and clean folds. Work assembly line style: cut everything first, then fold everything, then glue or tape. This keeps your pieces consistent and reduces mistakes.
Customization is where printable valentines crafts really shine. You can match a classroom theme, personalize names, or add small 3D elements without making the project harder. Think of the printable as the base layer, then add one upgrade: a ribbon, a foam sticker, a glitter heart, or a handwritten note.
Cutting, folding and assembly instructions
- Print a test sheet first. Check color, alignment, and size. This matters most for treat wrappers and boxes where edges must meet cleanly.
- Trim with a border, then precision cut. Rough cut around each piece, then do final trimming. It keeps small items from shifting while you cut.
- Score fold lines before folding. Place a ruler on the fold line and run a bone folder along it. Scoring prevents cracked ink and messy folds, especially on cardstock.
- Pre fold all tabs and corners. For boxes, fold every tab first without glue. Dry fitting helps you understand which side overlaps and prevents upside down assembly.
- Glue sparingly and press firmly. Use a glue stick for broad areas and double sided tape for seams. Press for 10 to 20 seconds so edges do not pop open.
- Add embellishments last. Place stickers, ribbon, and layered hearts after the base is secure. This avoids bumps that prevent pieces from lying flat.
Easy customization ideas: Add names with a black marker for a bold look. Use metallic gel pen dots around hearts for quick “stitching.” Layer a second cutout heart behind a tag to create a shadow border. For garlands, alternate patterns every other heart to make it feel intentional.
Home versus classroom printing
At home, you can print on heavier cardstock and take your time with quality settings. In a classroom, speed and simplicity matter more. If you’re prepping for a class party, choose templates that print multiple per page and use standard copy paper for anything kids will color.
For classroom success, set up stations: one table for coloring, one for cutting (with safety scissors), and one for assembly with glue sticks. Pre cut tricky shapes for younger kids, and consider printing a few extras for mistakes. If the project includes stringing garlands, pre cut yarn lengths and wrap a small piece of tape around each end so it threads through holes like a needle.
Reader testimonial: “I printed heart garland templates for my daughter’s class and followed your scoring tip for the folded cards. The cards looked so much neater, and even the kids who rushed still ended up with cute results. The assembly line idea saved us a ton of time.”
Supplies, cost, time and skill level
Most printable valentines crafts are low cost because the “pattern” is the template itself. Your main expense is paper and ink, plus a few basic tools you probably already own. For a small batch of 20 to 30 classroom valentines, plan to use 10 to 15 sheets of cardstock or 20 to 25 sheets of copy paper, depending on how many designs fit per page.
Typical time estimates: Gift tags take about 2 to 5 minutes each including cutting and punching. Folded cards take 5 to 8 minutes each if you add a message. Treat wrappers are often 3 to 6 minutes each once you get into a rhythm. Paper boxes take 8 to 12 minutes each because folding and gluing tabs requires drying time and accuracy.
Skill level: Most projects are beginner friendly, especially coloring sheets, garlands, and tags. Boxes are still doable for beginners, but they require patience and careful alignment. If you enjoy crafting for gifting or selling later, you can apply the same clean finishing skills to other seasons too. For example, these Christmas crafts to sell often use the same “print, cut, assemble” workflow, just with different themes.
Beginner mistakes and troubleshooting
- Problem: My printable looks blurry. Switch printer quality to “High,” and make sure you are printing the original PDF, not a screenshot.
- Problem: The template prints too small or too big. Turn off “Fit” and set scaling to 100% or “Actual size.”
- Problem: Cardstock cracks on the fold. Score the fold line first, and fold slowly using a bone folder to press.
- Problem: Treat wrappers do not line up. Trim carefully on straight lines with a paper trimmer, and tape the seam from the back first before wrapping around the candy.
- Problem: Glue makes paper wrinkly. Use a glue stick or double sided tape instead of liquid glue.
- Problem: Boxes pop open. Use strong tape for tabs or hold glued tabs closed longer. Some cardstock needs extra pressure time to bond.
Frequently Asked Questions About Printable Valentine’s Crafts: Easy Templates
Where can I find free Valentine printables?
Start with craft blogs, school resource sites, and printable libraries that offer PDFs. Look for downloads labeled “personal use” or “classroom use,” and save the original file rather than copying images from a webpage. If you want more kid friendly cutouts and simple templates beyond Valentine’s Day, this collection of printable crafts for kids is a helpful place to browse for similar projects and skill levels.
What paper should I print on?
Use 65 to 80 lb cardstock for folded cards, sturdy gift tags, and boxes because it holds its shape and looks more finished. Use regular 24 to 32 lb printer paper for coloring sheets, treat wrappers, and any piece you plan to glue onto another backing. If kids will color the printables, slightly heavier paper reduces bleed through from markers and makes the page easier to handle.
How do I print at actual size?
Open the PDF in a viewer like Adobe Acrobat and select “Actual size” or set scaling to 100%. Avoid “Fit to page” because it changes dimensions, which can make boxes impossible to assemble correctly. If your template includes a 1 inch test square, measure it with a ruler after printing. If it is off, recheck scaling and make sure your printer is not adding automatic margins or resizing.
How can I make printable valentines crafts look less “flat”?
Add one layer of dimension without overcomplicating things. Glue a second heart behind a tag as a shadow layer, add foam tape under a small element on a card front, or tie a short piece of twine through a punched hole. Even simple details like outlining text with a colored marker or adding tiny dot accents around a border can make a printable look designed and intentional.
Are these crafts safe for young kids?
They can be, with smart tool choices and supervision. Offer blunt tip safety scissors, non toxic glue sticks, and pre cut small pieces for preschoolers to reduce frustration. Avoid tiny loose embellishments like mini buttons for children who still mouth objects. If you use staplers, hole punches, or paper trimmers, keep those at an adult station. Remind kids to carry scissors point down and to keep fingers clear while punching holes.
Can I prep these ahead for a class or party?
Yes, and it helps a lot. Print and cut templates one to two days before, then store them flat in labeled envelopes or folders. Pre punch holes for tags and garlands, and pre fold box lines so kids only have to add tape or a sticker. For treat wrappers, you can pre wrap them around empty bars to check fit, then stack them flat until party time.
Final tips and next projects
Printable valentines crafts are all about getting a beautiful result with simple tools. Focus on three things: accurate printing (actual size when needed), clean cuts (use a trimmer for straight edges), and crisp folds (score first). Then choose one easy upgrade like twine, a layered heart, or a handwritten message to make the project feel personal. If you are crafting with kids, keep steps short and set up stations so everyone stays successful.
For your next projects, try expanding the same template skills to other seasons. If you enjoyed paper crafting, browse these Christmas crafts for kids for easy classroom style templates, or revisit paper based ideas in this Christmas paper crafts guide. Pick one printable to make today, print a test page, and you will be crafting confidently in under an hour.