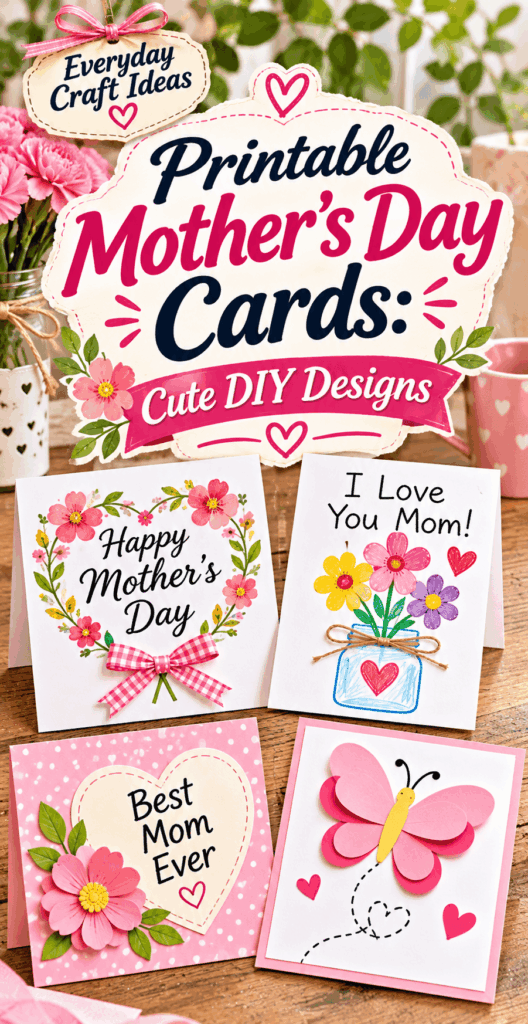
Printable Mother’s Day Cards: Cute DIY Designs
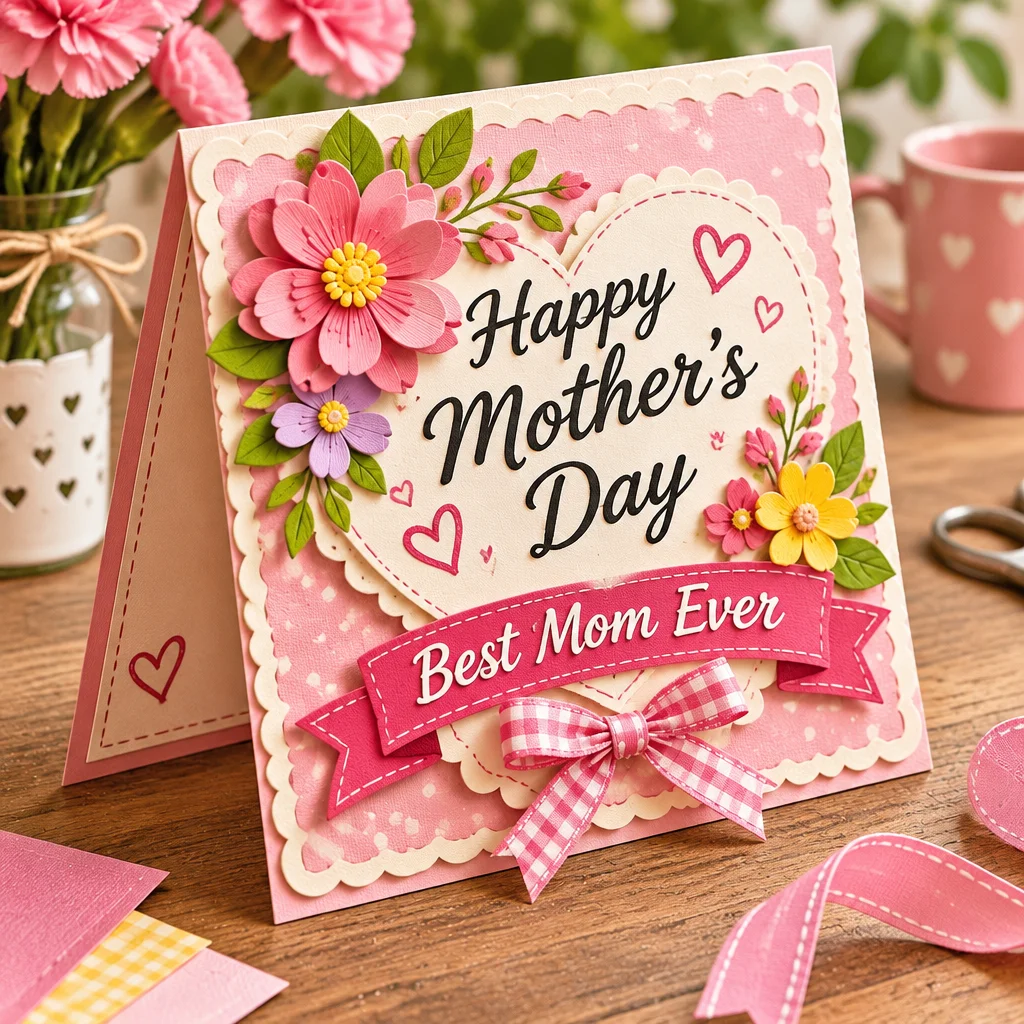
Printable mother’s day cards are one of the fastest ways to make something heartfelt that still looks polished, even if you are a total beginner. With a printer, a sheet of cardstock, and a few basic craft tools, you can create a card that feels personal without spending a lot of money or running to the store. In this guide, I will walk you through practical DIY options: from simple folded cards to photo-front designs, color-in pages for kids, and minimalist black-and-white styles for last-minute makers. You will also learn how to choose paper, set up print settings that actually fit the page, trim cleanly, and write a message that sounds like you. By the end, you will have a finished card ready to give, plus a few design ideas to reuse all year.
Why This Project Is Worth Making
Making printable mother’s day cards at home gives you two big wins: speed and customization. You can finish a lovely card in about 15 to 45 minutes depending on the design, and most of that time is enjoyable hands-on work like coloring, cutting, or adding a small embellishment. Cost is low: often under a couple of dollars per card when you use cardstock and ink you already have.
Difficulty is beginner-friendly. If you can load paper into a printer and fold on a line, you can make a great result. It also scales up for more advanced crafters: add layered mats, hand lettering, ribbon closures, or a simple pop-up element. This project suits:
- Kids and classrooms because color-in designs encourage creativity and keep supplies simple.
- Busy adults who want a polished look without a complicated craft.
- Long-distance families who want to print, sign, and mail a card quickly.
- People on a budget because you can make multiple cards from one pack of cardstock.
The reader outcome is clear: you will know exactly how to print, cut, fold, and finish a card that looks intentional and holds up to gifting or mailing.
Supplies, Materials, and Beginner Setup
You do not need a craft room to make printable mother’s day cards, but a tidy setup prevents crooked cuts and ink smears. Work on a flat table with good lighting and give yourself a “drying zone” where freshly printed sheets can sit for a few minutes.
- Printer: Inkjet or laser both work. Inkjet prints often need extra drying time, especially on coated cardstock.
- Cardstock: 65 lb to 110 lb cover is ideal for folded cards. If you only have printer paper, you can still print and then glue the sheet onto a folded base.
- Paper trimmer or scissors: A guillotine or sliding trimmer gives the cleanest edge. Sharp scissors are fine if you cut slowly.
- Adhesive: Tape runner or glue stick for clean, wrinkle-free mounting. Liquid glue can warp paper unless used sparingly.
- Scoring tool: A bone folder is best, but the back of a butter knife or an old ballpoint pen (no ink) can score folds.
- Coloring supplies: Colored pencils are the safest for cardstock. Markers work but can bleed through; test first.
Safety note: If children are crafting, supervise scissors and keep small embellishments (like mini gems) away from toddlers. If using a craft knife, always cut on a self-healing mat and move fingers out of the blade path.
Card formats and designs
Before you print, choose a format. The format affects how you set up the file, where the fold goes, and what size envelope you will need. Here are practical options that work well for printable mother’s day cards:
- A2 folded card (4.25 x 5.5 inches): The most common handmade size. It feels “store bought” and fits A2 envelopes. Great for florals, lettering, and photo fronts.
- A7 folded card (5 x 7 inches): Bigger for longer messages or kid art. Uses more ink and cardstock but gives a premium look.
- Flat postcard style: One-sided or two-sided flat print. Fastest to cut, great for mailing with a message on the back, but less private unless mailed in an envelope.
- Gatefold: Two flaps meet in the middle. It looks fancy, but alignment is more demanding and works best with heavier cardstock.
Design ideas that print well at home include: floral borders with a blank center for your message, a “reasons I love you” checklist, a simple heart wreath, or a photo panel with “Happy Mother’s Day” in clean type. Realistic constraints matter: very dark backgrounds can look streaky on home inkjets, and tiny thin lettering can look fuzzy if your printer is low on ink. When in doubt, choose high-contrast designs with slightly thicker lines.
Color-in and minimalist styles
Color-in and minimalist designs are the easiest way to get beautiful printable Mother’s Day cards with basic supplies. They also hide minor printer imperfections, because the finished look depends more on your coloring or clean white space than on perfect photo-quality printing.
Color-in styles work best with line art: flowers, mandalas, a “Best Mom” badge, or a simple scene like a vase of tulips. For kids, choose larger shapes and thicker outlines so coloring feels successful. For teens and adults, more detailed botanical line drawings look elegant when shaded with colored pencils.
Minimalist styles use lots of white space and simple typography. Think: a tiny heart, a single daisy, or a short phrase like “Love you, Mom” centered on the front. Minimalist cards look especially crisp on textured cardstock, and they print faster with less ink. They are also more forgiving if your printer struggles with gradients or heavy color fills.
Useful variations:
- Two-tone printing: Print in black plus one accent color if your printer allows color control, or print black only and add a watercolor wash by hand after the ink dries.
- Interactive coloring: Add a border for kids to color and keep the center message clean.
- Monogram focus: A large “M” with small flowers around it feels custom without advanced skills.
Print settings and cardstock
Print quality is where most DIY card projects either shine or disappoint. For printable mother’s day cards, the goal is correct sizing, crisp lines, and ink that does not smear when folded.
Start by checking what your printable file is designed for: US Letter (8.5 x 11 inches) or A4. In the print dialog, set the paper size to match what is physically in your printer. Next, look for scaling controls. For most card files, you want 100% or “Actual Size”. Avoid “Fit to Page” unless the instructions specifically say so, because it can shrink your design and shift fold marks.
Choose a cardstock weight your printer can handle. Many home printers feed 80 lb cover reliably; some can handle 100 lb or 110 lb, but you may need to use the rear feed slot (if your printer has one) to prevent jams. In printer settings, select a thicker paper type such as “Cardstock,” “Heavyweight,” or “Matte Presentation Paper” if available. That setting slows the print and lays down ink more carefully.
Let inkjet prints dry flat for 5 to 15 minutes before you touch them, and longer if the design is ink-heavy. If you plan to color, print in draft or standard mode for line art to avoid overly wet ink that can smear under your hand.
Folding and trimming
Clean trimming and sharp folds are what make printable mother’s day cards look professional. Rushing here is the most common reason a card ends up slightly crooked.
- Confirm cut lines before trimming: If your file includes crop marks, use them. If not, measure with a ruler and lightly mark pencil dots on the back of the sheet.
- Trim first, then fold: Cutting the card to its final rectangle before folding usually keeps edges aligned. Use a paper trimmer for straight edges.
- Score the fold line: Place a ruler where the fold will be and run a bone folder (or the back of a butter knife) along the line with gentle pressure. Scoring prevents cracking, especially on heavier cardstock.
- Fold slowly and press: Align corners, pinch the fold at the center, then press outward to the edges. Burnish with a bone folder for a crisp crease.
- Square it up: If the front overhangs slightly, trim a hairline off the edge after folding to make it perfect. This is a normal finishing step.
If your design is a full-page print that folds into a card, keep the printed side facing out so the fold is clean. If you see white cracking along the fold on dark prints, that cardstock coating is splitting. Use a lighter print, score more deeply, or choose uncoated cardstock.
Personal messages
The message is what turns printable mother’s day cards into keepsakes. A beautiful front is nice, but a specific message is what she will reread later. If writing does not come easily, use a simple structure: appreciation, a memory, and a wish.
- Appreciation: “Thank you for always showing up for me, even in small ways.”
- Memory: “I still remember you staying up late to help with my school project.”
- Wish: “I hope you get a quiet morning and a day that feels like a hug.”
Practical tips: write your message before you add bulky embellishments that make the card hard to lay flat. Test your pen on a scrap of the same cardstock to ensure it does not feather or smear. Gel pens look pretty but can take longer to dry. A fine-tip permanent pen or a smooth ballpoint is usually safest.
Design variations that help if you do not know what to say:
- Prompt cards: Print a front with “My favorite thing about you is…” and fill it in.
- Coupon cards: Add small “coupons” like “one dishwashing night” or “coffee date together.” Keep them realistic and easy to redeem.
- Group message: Leave space for siblings or kids to sign around a central note.
Envelope sizing
Envelope fit matters for both presentation and mailing. The good news is that most printable mother’s day cards are based on standard sizes. For an A2 card (4.25 x 5.5), use an A2 envelope (approximately 4.375 x 5.75). For a 5 x 7 card, use an A7 envelope (approximately 5.25 x 7.25). These give a little wiggle room so the card slides in without bending corners.
If you do not have the right envelope, you have options:
- Make an envelope from scrapbook paper: Use a template sized for your card, and glue the side flaps with a glue stick for a smooth seam.
- Use a larger envelope and add a liner: A simple patterned-paper liner makes it feel intentional even if the envelope is a bit roomy.
- Hand-deliver with a belly band: Wrap a strip of paper around the card and seal with a sticker. This is great for thicker, embellished cards that do not mail well.
Mailing note: bulky decorations, wax seals, or dimensional pop-ups may require additional postage. If you plan to mail the card, keep embellishments flat and avoid glitter that can shed in postal sorting.
Download and usage instructions
This tutorial focuses on how to use printable mother’s day cards you already have, whether they are purchased from a designer, downloaded from a reputable craft site, or created in a program like Canva, Google Docs, or Adobe Express. Because I am not providing a download in this article, use the steps below with the specific file you choose and always follow the creator’s license.
- Save the file to your device: Use a stable format like PDF for consistent sizing. JPG or PNG is fine for single images but can be easier to accidentally scale.
- Open with a reliable viewer: PDFs print most accurately from Adobe Acrobat Reader or your system preview app. Printing from a browser can sometimes auto-scale.
- Check the license: Many designs allow personal use only, meaning you can print for your household but not sell copies or post the file publicly.
- Print a test page: Use plain printer paper first to confirm alignment, margins, and fold placement. This saves cardstock and frustration.
- Print final on cardstock: Select the correct paper type and “Actual Size.” Allow ink to dry fully.
- Assemble and personalize: Trim, score, fold, then add your message and any decorations.
If you are creating your own design, set your document to the final paper size (Letter or A4), keep important artwork at least 0.25 inches away from edges, and avoid ultra-thin fonts that can break up on home printers.
Common Mistakes and How to Fix Them
Most problems with printable mother’s day cards are easy to fix once you know the cause. Here are the issues I see most often, plus practical solutions.
- Card prints too small or too large: In print settings, switch scaling to “Actual Size” or 100%. Make sure your paper size matches the file (Letter vs A4). Avoid “Fit to Page” unless the design instructs it.
- Ink smears when folding: Let ink dry longer, especially on coated cardstock. Consider printing in standard mode rather than high quality for heavy ink coverage, or switch to uncoated cardstock.
- Cracking along the fold: Score before folding and use a bone folder to crease. If the print is very dark at the fold, redesign so the fold area is lighter, or use cardstock with less coating.
- Edges look jagged: Replace dull blades on your paper trimmer or cut more slowly with sharp scissors. For scissors, use long continuous cuts instead of short snips.
- Card won’t stay closed: Heavier cardstock sometimes “springs” open. Burnish the fold firmly, then place the card under a heavy book for 10 minutes.
- Colors look dull: Choose brighter cardstock (white instead of cream), run a nozzle check on inkjets, and use “Best” quality only when needed. Some printers also have a “vivid” setting.
“I printed an A2 floral outline card on 80 lb cardstock and had my kids color it with pencils. Scoring the fold first made it look so neat, and it slid perfectly into an A2 envelope. My mom kept it on her desk all week.”
Frequently Asked Questions About Printable Mother’s Day Cards: Cute DIY Designs
What paper should I print on?
For most printable mother's day cards, print on 80 lb to 100 lb cover cardstock for a sturdy, giftable feel. If your printer struggles with thick paper, try 65 lb cardstock or print on regular paper and mount it onto a folded cardstock base with a glue stick. Uncoated cardstock is easiest for writing and coloring. If you use glossy or coated paper, expect longer drying time and test pens for smearing.
Can children color them?
Yes. Choose a line-art design with thicker outlines and larger spaces, then print on uncoated cardstock or heavyweight matte paper. Colored pencils are the most forgiving and will not bleed through. If using markers, place a scrap sheet under the page and test first, because many markers soak through and can stain the table. For younger kids, pre-fold and pre-trim the card so they can focus on coloring and signing.
How do I print at home?
Download or save the file, open it in a PDF viewer, and print one test page on plain paper. In the print dialog, set paper size to Letter or A4 to match what is in your printer, and set scaling to 100% or Actual Size. Then print on cardstock using the “heavy” or “cardstock” paper setting if available. Let the sheet dry flat before trimming, scoring, and folding to prevent smudges.
My printer leaves a white border. Can I still make it look nice?
Yes. Many home printers cannot print full bleed. Choose designs with built-in margins or frames so the white edge looks intentional. If your design goes to the edge, trim it smaller and mount it onto a slightly larger folded base in a coordinating color. This “mat” layer looks professional and hides uneven borders.
How do I make a card feel more handmade if it is printed?
Add one tactile detail: a hand-tied twine bow, a small paper heart, a strip of washi tape, or a simple hand-drawn doodle around the message. Even just rounding the corners with scissors or a corner punch changes the feel. Keep additions flat if you plan to mail it.
What if I only have black ink?
Black-and-white printable mother's day cards can look elegant. Pick minimalist typography or line art, then add color with pencils, crayons, or watercolor after the ink is fully dry. You can also print on colored cardstock and keep the design simple. High contrast and thicker lines help black ink look crisp.
How do I keep the card from bending in the mail?
Use 80 lb to 100 lb cardstock, keep embellishments flat, and place the card in a correctly sized envelope so it does not slide around. For extra protection, insert a second piece of cardstock behind the card as a stiffener. If your card is bulky, consider a padded mailer or hand delivery to avoid damage.
Can I resize an A2 design to 5 x 7?
You can, but expect layout changes. Resizing may make text too small or shift margins. If the file is a PDF designed for A2, keep it at 100% for best results. To create a 5 x 7 version, edit the design in a layout tool (like Canva) using a 5 x 7 canvas, then reposition elements rather than simply scaling everything up.
How far in advance should I make the cards?
For hand-delivered cards, you can make printable mother's day cards the same day. If you are mailing, aim to finish 3 to 7 days early, depending on postal timing where you live. Also build in drying time if you are painting or using gel pens. Making a quick test print the day before helps you avoid last-minute printer surprises.
Final Thoughts
Printable mother’s day cards are a sweet spot between convenience and handmade meaning. Choose an A2 or 5 x 7 format, print at Actual Size, and take an extra few minutes to score, fold, and trim carefully. If you want something kid-friendly, go with color-in line art on uncoated cardstock. If you want fast and sophisticated, pick a minimalist design and add a thoughtful message inside. Your next easy paper craft step could be making matching gift tags from leftover cardstock or creating a simple envelope liner from patterned paper. Pick one small upgrade, keep it manageable, and you will end up with a card that feels truly personal.