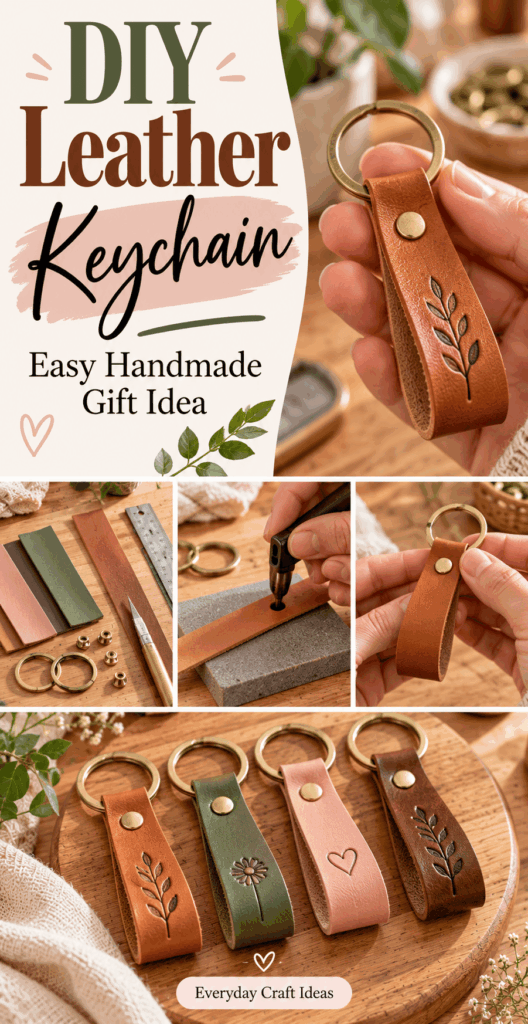
DIY Leather Keychain: Easy Handmade Gift Idea
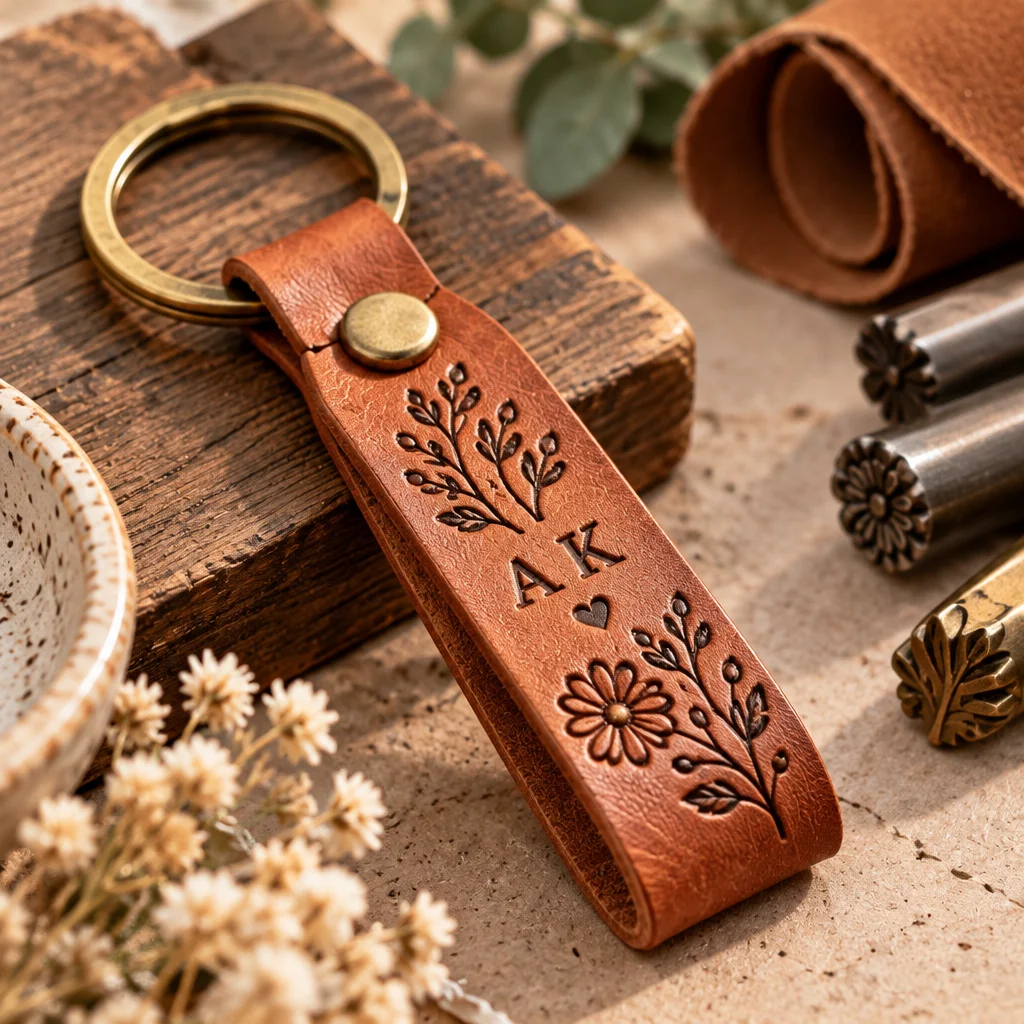
If you’re searching for a diy leather keychain that looks polished but is still beginner-friendly, this project is a perfect place to start. A small strip of leather, a key ring, and a few basic tools can become a sturdy, giftable accessory in under an hour. The finished keychain feels personal and “store-bought” in the best way, especially when you add stamped initials, a rivet, or a simple braid.
This tutorial is designed for first-timers: you’ll learn what leather to choose, how to cut cleanly, and how to attach hardware so it stays secure. Leather keychains also make great batch gifts for coworkers and family. If you’re planning a handmade holiday, you can pair this with other practical crafts from these DIY Christmas gifts people actually want for a cohesive set, or use the same personalization ideas across multiple presents from this handmade gift guide.
What You Need to Know Before Starting
A leather keychain is small, but it teaches core leatherworking skills: measuring, cutting, punching holes, and setting hardware. The good news is that your tolerances are forgiving. If a cut edge isn’t perfect, you can sand and burnish it. If a hole is slightly off, you can often hide it under a rivet cap. Expect your first diy leather keychain to take 30 to 60 minutes, then 10 to 20 minutes for each additional one once you get your rhythm.
Difficulty level: Beginner. You do not need a sewing machine, and you can make a no-sew version with rivets or Chicago screws.
Best project size: A strap keychain is typically 3/4 inch to 1 inch wide and about 4.5 to 6 inches long before folding. This size feels good in the hand and leaves room for personalization.
Safety notes: Leather cutting tools are very sharp. Always cut away from your body on a cutting mat, and keep fingers clear of the blade path. When setting rivets, wear eye protection because small metal pieces can chip if struck incorrectly. If you use dyes or finishes, work with ventilation and protect your surface with scrap paper or cardboard.
Finally, remember that leather is a natural material. Scars, wrinkles, and tone variations are normal and can look beautiful, especially on a handmade gift.
Supplies, Tools, and Material Choices
You can make a diy leather keychain with a small kit or with basics you may already own. The biggest decision is leather type and thickness, because it affects how easy it is to fold and how cleanly it punches.
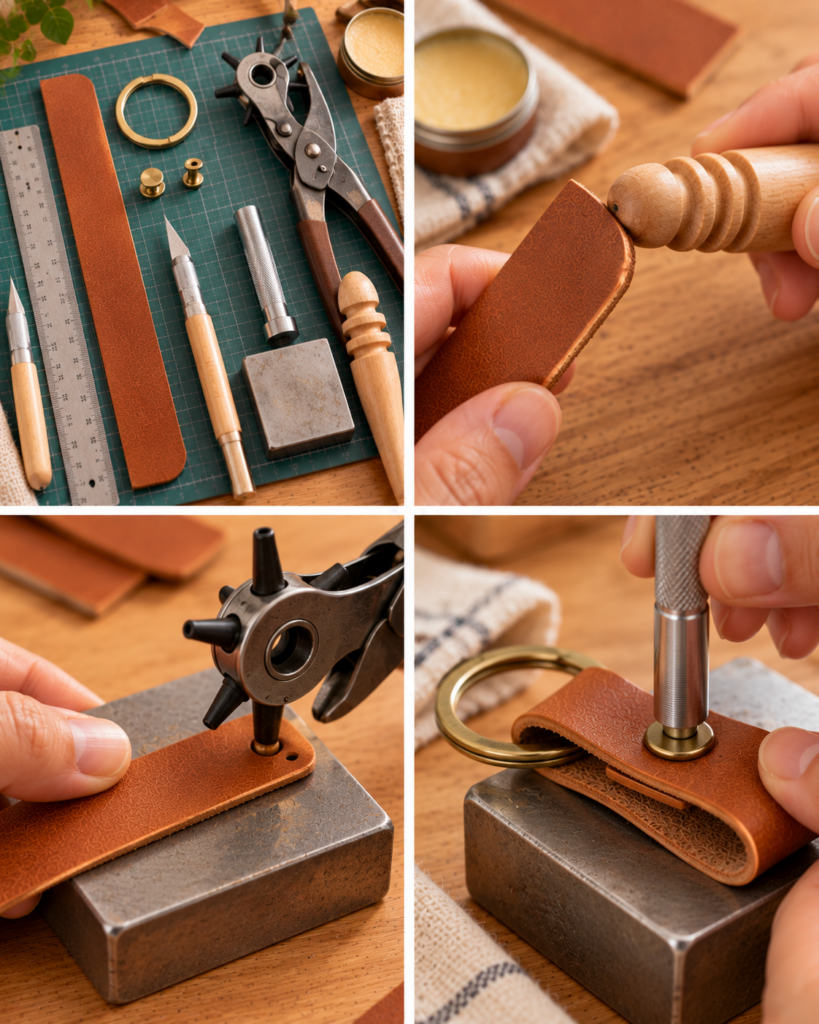
- Leather (vegetable-tanned or chrome-tanned): For beginners, 4 to 6 oz (about 1.6 to 2.4 mm) is ideal. It’s thick enough to feel premium but still folds with hand pressure. Veg-tan is best for stamping initials and burnishing edges. Chrome-tan is softer and easier to bend but doesn’t stamp as crisply.
- Key ring or swivel clasp: A 1 inch key ring is classic. A swivel clasp is great if you want to clip it to a bag.
- Rivets or Chicago screws: Double-cap rivets look finished on both sides. Chicago screws allow you to replace the ring later. Either option creates a strong no-sew construction.
- Cutting tools: A sharp utility knife or craft knife plus a metal ruler. A rotary cutter also works well.
- Hole punch: A rotary punch is beginner-friendly. A drive punch set also works if you have a mallet and a solid surface.
- Edge finishing: Sandpaper (320 to 600 grit), burnishing gum (or water), and a slicker or canvas cloth.
- Optional personalization: Letter stamps, dye, leather paint, or a simple alphabet embossing set.
If you want to build a coordinated handmade set, you can match leather colors with other practical gift projects mentioned in this roundup of DIY Christmas gifts people actually want.
How to Make or Use It (Clear Beginner-Friendly Tutorial)
This tutorial makes a classic folded strap keychain. It’s a dependable format and a great base for variations like tassels, braids, or stamped tags. Measure twice, cut once, and do a “dry fit” around your key ring before you punch holes.
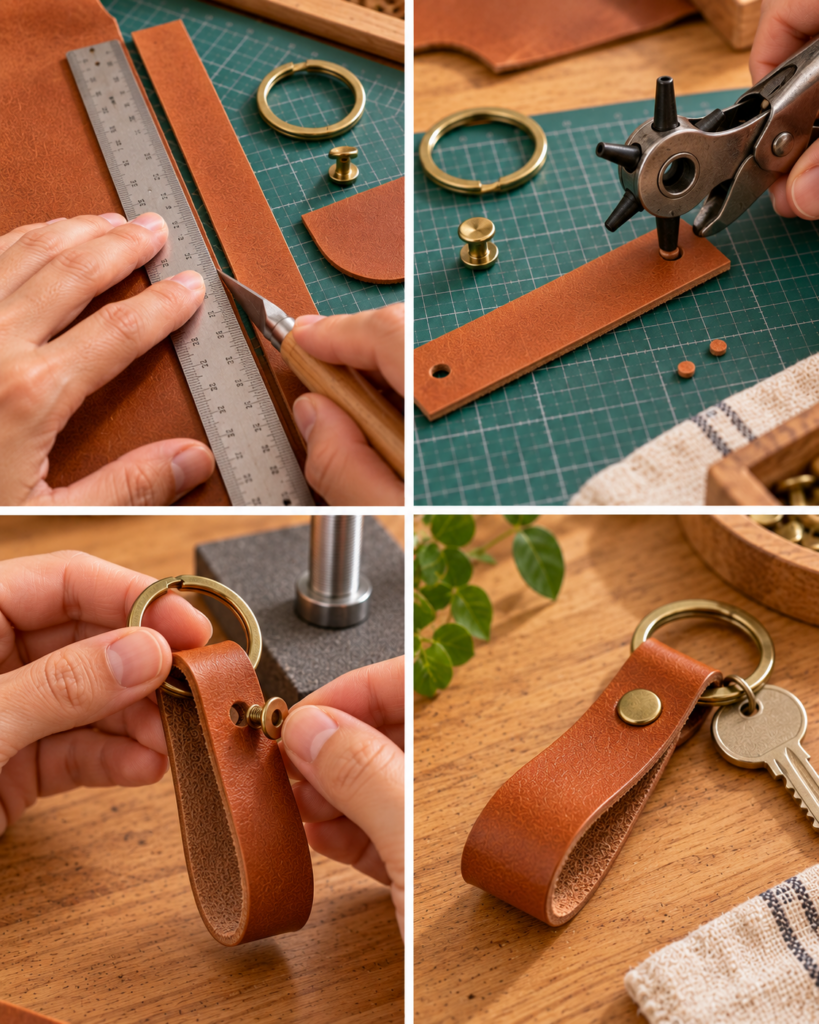
- Plan your dimensions. Cut a strip about 1 inch wide by 5.5 inches long. If you want a chunkier grip, go 1.25 inches wide. The extra length accounts for the fold around the ring and space for hardware.
- Cut the leather strip cleanly. Place leather grain-side up on a cutting mat. Use a metal ruler and a sharp blade for straight, confident passes. Multiple light passes are safer and cleaner than forcing one heavy cut.
- Round or bevel the corners. Rounded ends feel professional and reduce corner wear. You can trace a coin and cut the curve, or use a corner punch if you have one.
- Mark the fold and hole placement. Slide the ring onto the strip, fold the leather so ends meet, and adjust until it hangs evenly. Mark where the layers overlap. Then mark two holes: one about 3/8 inch from the end, and a second about 3/4 inch above it for a double-rivet hold.
- Punch holes through both layers. Clamp the folded strap with binder clips, or hold firmly on a pounding surface. Punch straight down so holes align. Clean holes reduce tearing and help hardware sit flat.
- Set rivets (or install Chicago screws). Insert rivet posts from one side and caps on the other. Use the correct setter and strike with a mallet on a firm surface. Test the connection by pulling firmly. If using Chicago screws, add a tiny drop of removable threadlocker to resist loosening.
- Finish the edges. Lightly sand edges smooth, then apply burnishing gum or a little water. Rub briskly with a slicker or canvas until the edge darkens and becomes glossy. This step is what makes a simple diy leather keychain look truly finished.
- Add optional finish and personalization. Apply leather conditioner or a thin topcoat. If stamping initials, do it before topcoat: slightly dampen veg-tan, position stamps, and strike once firmly for a crisp impression.
To use it, simply add keys to the ring. If you made a swivel clasp version, clip it onto a bag handle or belt loop for quick access.
Helpful Tips for Better Results
Small details make a big difference in how your diy leather keychain holds up to daily wear. First, prioritize a sharp blade. Dull blades drag leather fibers and create fuzzy edges that are harder to burnish. If you notice tearing instead of slicing, replace the blade.
Second, take time to align the fold. An uneven fold makes the keychain hang crooked and can stress one rivet more than the other. A simple trick is to insert the ring, fold the strap, then tug gently on both sides until the ring sits centered before marking holes.
Third, test hardware on scrap leather if possible. Rivets come in different post lengths. If the post is too long, the rivet may “mushroom” without clamping tightly, leading to a wobbly connection. If it’s too short, it may not catch at all. Match the post length to the combined thickness of your folded leather.
Edge work is the fastest upgrade. Even if you skip dye, a burnished edge looks intentional and feels smooth in the pocket. If you don’t have burnishing gum, water works on veg-tan, but use a light touch. Too much water can swell fibers and create a rough edge until it dries.
“I made three leather keychains for my siblings using rivets and stamped initials. My first one was a little crooked, but by the third I had cleaner cuts and the edges looked shiny after burnishing. They felt way more ‘gift-worthy’ than I expected from such a small project.”
For more giftable craft ideas that pair well with leather accessories, browse this list of DIY Christmas gifts people actually want and consider building a small handmade bundle.
Creative Variations and Project Ideas
Once you’ve made one diy leather keychain, it’s easy to remix the pattern for different recipients and styles. The base construction stays the same, but you can change shape, hardware, and surface design.
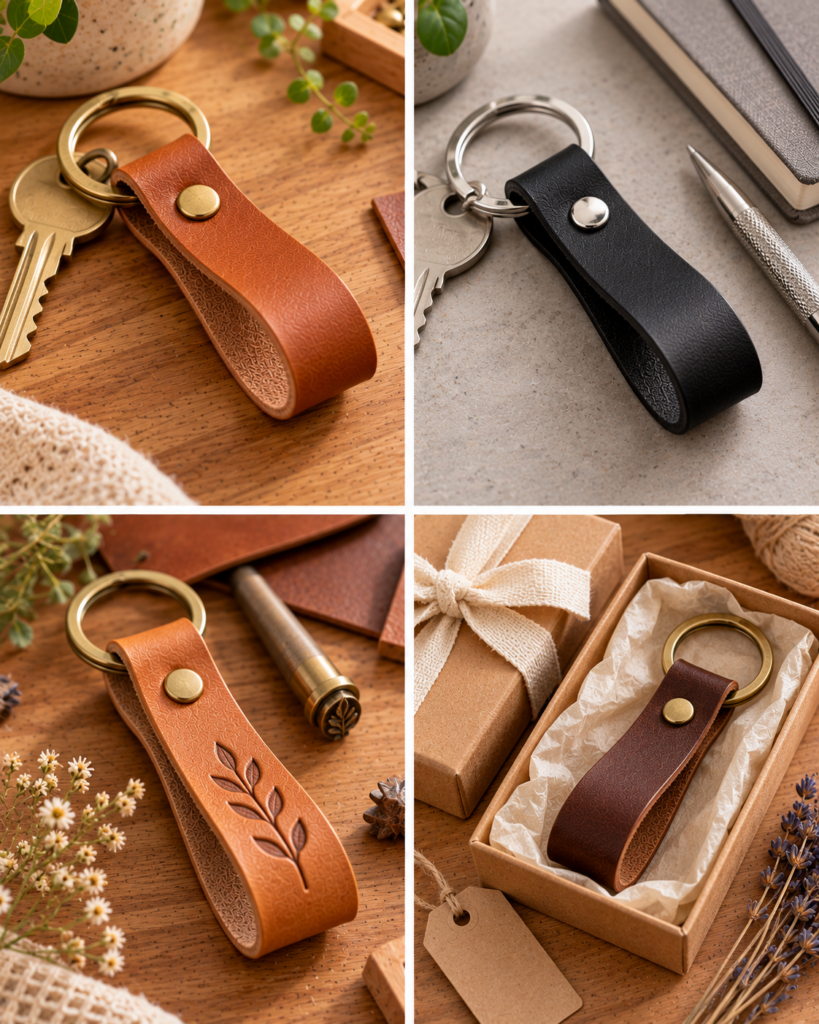
- Wristlet strap keychain: Cut a longer strip (10 to 11 inches) and use a larger ring. This is great for people who carry keys while jogging or walking the dog. Use two rivets or a rivet plus stitching for extra strength.
- Tabbed “mini tag” keychain: Make a short folded strap and add a separate small leather tag with initials. You can attach the tag with a jump ring or small rivet.
- Tassel leather keychain: Cut fringe into the bottom half of a wider piece, roll it tightly, and secure at the top with a rivet around the key ring. Soft chrome-tan leather works well here because it drapes.
- Braided key fob: Cut three narrow strands connected at one end, braid, then fold the top around the ring and rivet. Keep braids loose to avoid bulky stiffness.
- Two-tone layered look: Glue a thinner accent leather (2 to 3 oz) onto a base strap before punching holes, then burnish edges together. Choose contrasting colors for a modern look.
- Stamped coordinates or short message: On veg-tan, stamp initials, a date, or a simple word like “HOME.” Keep text away from rivet holes to prevent distortion when folded.
If you’re making multiples for the holidays, consider batching: cut all strips first, punch all holes second, then set hardware assembly-line style. This speeds up production and keeps sizing consistent across gifts.
Common Mistakes and How to Avoid Them
Most issues with a diy leather keychain come from rushed measuring, mismatched hardware, or skipped edge finishing. Here are the common pitfalls I see beginners run into, plus practical fixes.
- Misaligned holes: This happens when punching through two layers that shift. Fix it by clipping the folded leather tightly before punching. If holes are only slightly off, you can sometimes re-punch to the larger of the two and use a slightly wider post rivet.
- Rivets that spin or feel loose: Usually the post is too long for the thickness. Use shorter posts, add a thin leather washer layer, or switch to Chicago screws sized for your stack.
- Cracking at the fold: Very thick or dry leather can crack when sharply bent. Choose 4 to 6 oz leather, crease gently, and condition lightly. For stiff veg-tan, dampen the fold line slightly before bending.
- Ragged edges: Ragged edges come from a dull blade or cutting too fast. Replace blades often. Sand progressively (320 then 600 grit) before burnishing.
- Finish rub-off or tackiness: Applying dye or topcoat too heavily can remain tacky. Use thin coats, let each coat dry fully, and buff with a clean cloth.
- Weak attachment to the ring: A single rivet can work, but two rivets distribute stress and resist twisting. If you want maximum strength, consider adding a line of saddle stitching in addition to rivets.
When in doubt, test on scraps. Ten minutes of testing saves you from sacrificing a perfectly cut strap to a hardware mismatch.
Frequently Asked Questions About DIY Leather Keychain: Easy Handmade Gift Idea
How do you make a leather keychain?
Cut a leather strip, fold it around a key ring, then secure the overlap with hardware or stitching. For a beginner diy leather keychain, two rivets are the simplest strong option: mark the fold, punch two aligned holes through both layers, and set rivets firmly. Finish by sanding and burnishing the edges so they feel smooth and look professional. Personalize with stamped initials or a small tag if desired.
What leather is best for beginners?
Start with 4 to 6 oz leather (about 1.6 to 2.4 mm). Vegetable-tanned leather is easiest for stamping and edge burnishing, making it great for classic gift-style keychains. Chrome-tanned leather is softer and folds easily, which is helpful if your hands get tired, but it can be harder to get crisp stamped impressions and glassy burnished edges. Either works, but veg-tan is more “learnable” for first projects.
What tools do you need for a leather keychain?
At minimum you need a sharp knife, a ruler, a cutting mat, and a way to make holes (rotary punch or drive punch). For a no-sew build, add rivets and a rivet setter plus a mallet. For a nicer finish, include sandpaper and something to burnish edges (wood slicker or canvas cloth). Optional tools like edge bevelers and corner punches improve the look but are not required for a sturdy diy leather keychain.
Can you make a leather keychain without sewing?
Yes. Rivets or Chicago screws are common no-sew methods and are plenty strong for everyday use if installed correctly. Use two rivets instead of one to resist twisting and pulling. Choose rivet posts that match the total thickness of your folded leather so the hardware clamps tightly. If you prefer a removable option, Chicago screws work well, just add a small amount of removable threadlocker to help prevent loosening over time.
How do you attach a key ring securely?
Fold the leather around the ring so the ring sits at the crease, then secure the overlapping tail with two fasteners spaced apart. This spacing spreads stress and reduces the chance of tearing. Punch clean holes that are the correct diameter for your rivet posts. After setting the rivets, tug firmly on the ring to test. If the leather slips, your rivets are too loose, your holes are too large, or your post length is incorrect.
How do you personalize a leather keychain?
For veg-tan leather, stamp initials, a date, or a short word before applying any topcoat. Slightly dampening the leather helps the stamp impression stay crisp. You can also add color with dye, paint the edges, or attach a small secondary tag with a name. Another beginner-friendly option is to use letter punches on a separate small strip, then rivet it as a wrap band near the key ring for a layered look.
Final Thoughts
A diy leather keychain is one of those rare beginner projects that feels genuinely useful, looks elevated, and doesn’t require a big workspace. Once you’ve made one, you can easily batch a handful for birthdays, stocking stuffers, or thank-you gifts by repeating the same measurements and experimenting with different finishes. Your next step is simple: pick a leather color, choose a hardware style (rivets or Chicago screws), and make one test piece to confirm sizing and hole placement. Then commit to clean cuts and finished edges, because those small details make the gift feel special and built to last.