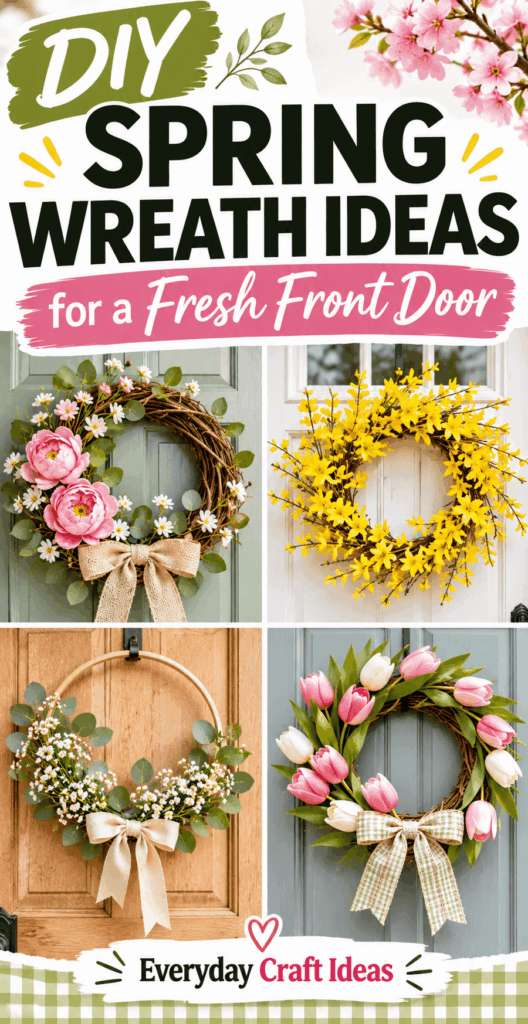
DIY Spring Wreath Ideas for a Fresh Front Door
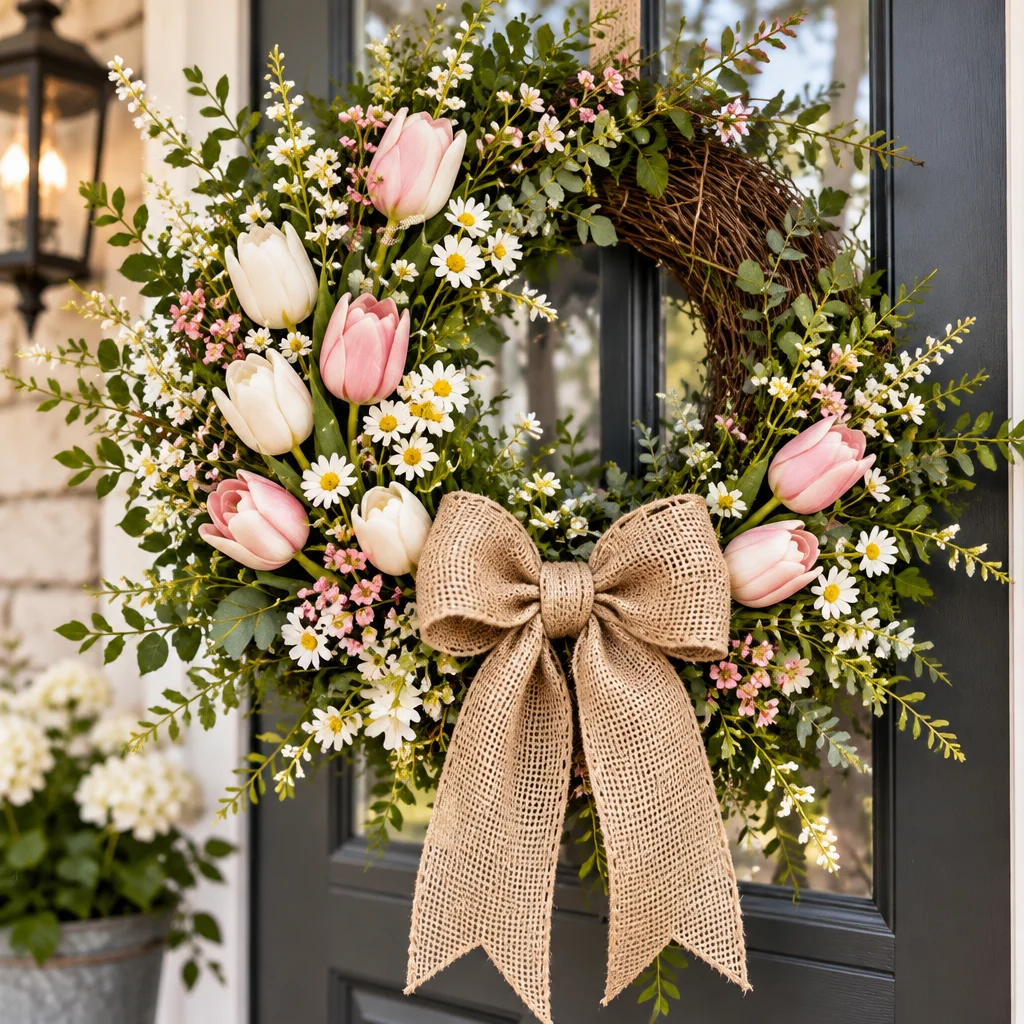
If you are searching for a spring wreath diy that looks fresh, welcoming, and truly “front door ready,” you are in the right place. A well-made spring wreath brightens your entryway instantly, and it is one of the easiest seasonal projects to customize to your home’s colors and style. In this guide, you will learn what to buy (and what to skip), how to build a wreath that stays put in wind and weather, and how to arrange flowers so it looks full without looking cluttered.
If you also enjoy practical, giftable crafts, you might like this roundup of DIY gifts people actually want for ideas that use similar supplies like ribbon, greenery, and hot glue. You can even adapt some of those techniques for a wreath bow or a small matching porch sign.
What You Need to Know Before Starting
A successful spring wreath diy starts with two decisions: where it will hang and what conditions it needs to handle. A covered porch can handle delicate dried elements, while an exposed door needs sturdier faux florals and secure fasteners that can tolerate sun and wind. Plan for a wreath size that fits your door: 18 to 22 inches is classic for most standard front doors, while 24 inches makes a bolder statement but can feel crowded on narrow entryways.
Difficulty is generally beginner-friendly. Expect about 60 to 120 minutes depending on how detailed your design is and whether you are cutting stems and wiring. The biggest “skill” is arrangement: you want a focal point, supporting elements, and a clean outline. Spring wreaths look best when they feel airy, not packed like a holiday evergreen.
Before you start, set up a work surface that you can easily clean. Faux florals shed bits of plastic, grapevine drops small twigs, and hot glue can be messy. If you are making the wreath indoors, open a window or work near good ventilation if you are using spray paint or floral sealant.
One more helpful note: do a quick “door test.” Hold your base against the door and open and close it to make sure it will not scrape the frame or hit a storm door. This simple check prevents crushed flowers and frustration later.
Supplies, Tools, and Material Choices
The best spring wreath diy supplies depend on the look you want. Below are the core materials, plus why you might choose each option. If you are shopping your stash, you can mix types as long as the base is strong and attachments are secure.
- Wreath base: Grapevine is natural and forgiving for beginners, wire forms are sturdy and lightweight, and foam is easiest for inserting picks but can crumble over time outdoors.
- Florals and greenery: Faux stems (peonies, tulips, ranunculus, eucalyptus) are weather-tough; dried elements (bunny tails, strawflowers) are beautiful but best under cover.
- Fasteners: Paddle wire (22 to 26 gauge) for strength, floral tape for bundling, and zip ties for quick, unbreakable holds on wire bases.
- Adhesives: Hot glue is great for quick tacks but should not be the only support for heavy stems; use it as a helper, not the main structure.
- Cutting tools: Wire cutters for stems and ties, and scissors for ribbon. Use the right tool so you do not crush stems or damage your scissors.
- Ribbon: Wired ribbon holds shape outdoors better than soft satin. Choose 1.5 to 2.5 inch width for a full bow that reads from the curb.
- Hanger: A wreath hanger, over-the-door hook, or a wide outdoor Command strip rated for the wreath’s weight. Avoid thin nails that split doors or leave large holes.
If you love making coordinated seasonal decor or gifts, you can pull craft staples from this collection of DIY gift projects, especially ideas that use ribbon techniques and simple embellishments that translate well to wreaths.
How to Make or Use It (Clear Beginner-Friendly Tutorial)
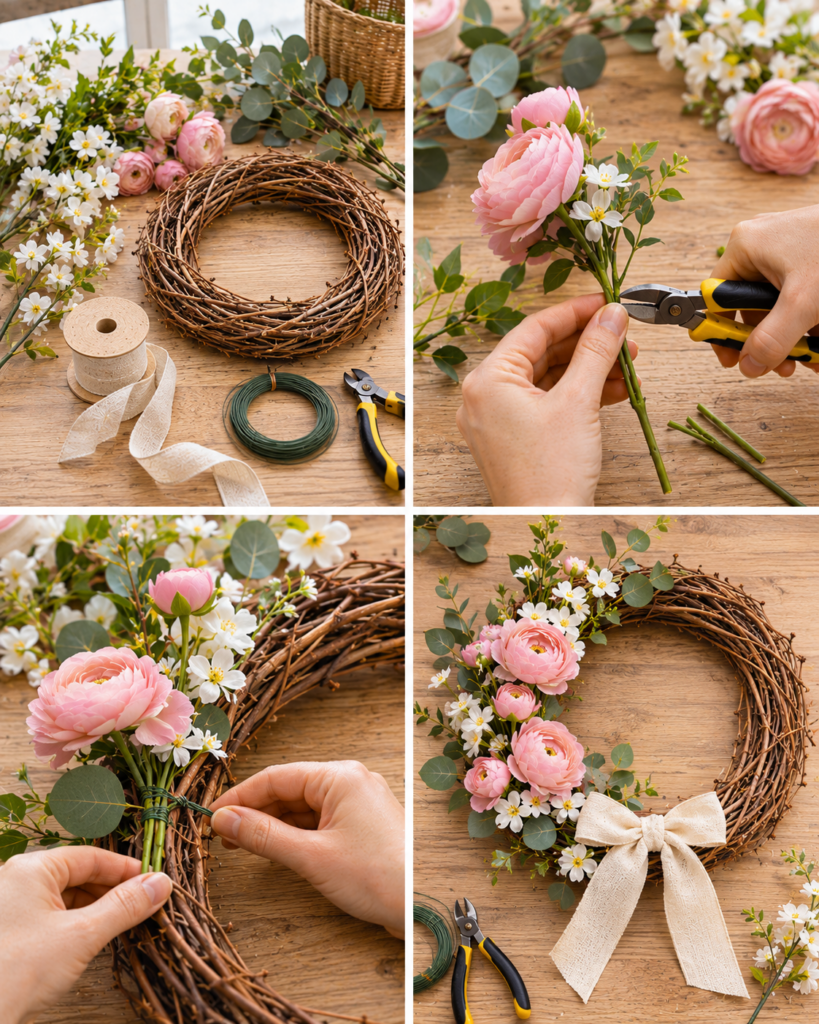
This step-by-step spring wreath diy tutorial uses a grapevine base because it is beginner-friendly and looks naturally “spring.” You can apply the same layout method to a wire or foam base, but your attachment method may change (wire and zip ties for wire frames, floral picks and glue for foam).
- Choose your color palette and set a focal area. Pick 2 main colors and 1 accent (example: soft pink and white with touches of yellow). Decide whether your focal cluster will sit at the bottom right, bottom center, or slightly off-center. Off-center usually looks more modern and gives you that airy spring feel.
- Prep stems before attaching anything. Trim long faux stems down to 2 to 4 inches so they sit close to the base. If stems are thick, strip excess leaves near the cut end. This step matters because long stems make the wreath wobble and can poke the door.
- Anchor your greenery first. Tuck eucalyptus or leafy stems into the grapevine openings and secure with paddle wire. Work in one direction so the greenery “flows.” Greenery creates coverage and hides mechanics, so you need less expensive flowers to look full.
- Build a flower cluster in odd numbers. Start with 1 large bloom (like a peony), then add 2 to 4 medium blooms (ranunculus or tulips), then smaller fillers. Wire the larger blooms through the base and add a small dab of hot glue only after the wire is tight.
- Add texture and movement. Place a few wispy stems (lavender, baby’s breath-style filler, or faux berry sprigs) extending slightly beyond the outer edge. Keep the longest pieces within 2 to 3 inches outside the base so it still clears the door.
- Finish with a bow or sign, then balance. Add a wired ribbon bow with chenille stems or wire, not just glue. Step back 6 to 8 feet and check balance. If one side feels heavy, add a small greenery pick on the opposite side rather than more big flowers.
- Secure and hang safely. Snip any sharp wire ends and tuck them inward. Test the wreath by gently shaking it. If anything shifts, add wire or a zip tie. Hang using a proper wreath hanger or a rated hook so it will not fall in wind.
Helpful Tips for Better Results
Small technique changes can make a spring wreath diy look professionally arranged. First, work from the base up: greenery, then focal flowers, then filler, then ribbon. When you add flowers too early, you end up fighting the greenery and crushing petals as you tuck things in.
Second, use the “triangle rule” for a natural look. Place three mini clusters of the same flower type in a loose triangle around your focal area, even if two are tiny. This creates repetition and keeps the eye moving without making the wreath busy.
Third, know when to wire versus glue. Wire is the structural support, especially for heavier flowers and anything that could catch wind. Hot glue is best for lightweight accents, covering wire points, or tacking ribbon tails where you want them to stay. If you rely on glue alone outdoors, heat and cold can loosen it over time.
Finally, take a photo in black and white (most phones have a filter). It helps you see whether you have enough contrast. If the wreath looks flat, add either deeper greenery, a darker ribbon, or a few small pops of a stronger spring color like coral or sunny yellow.
Reader testimonial: “I tried a spring wreath diy for the first time using a grapevine base and wired ribbon. The step that helped most was anchoring greenery first, because it covered the messy parts and I used fewer flowers than I expected. It survived a windy week on our front door with nothing falling off.”
Creative Variations and Project Ideas
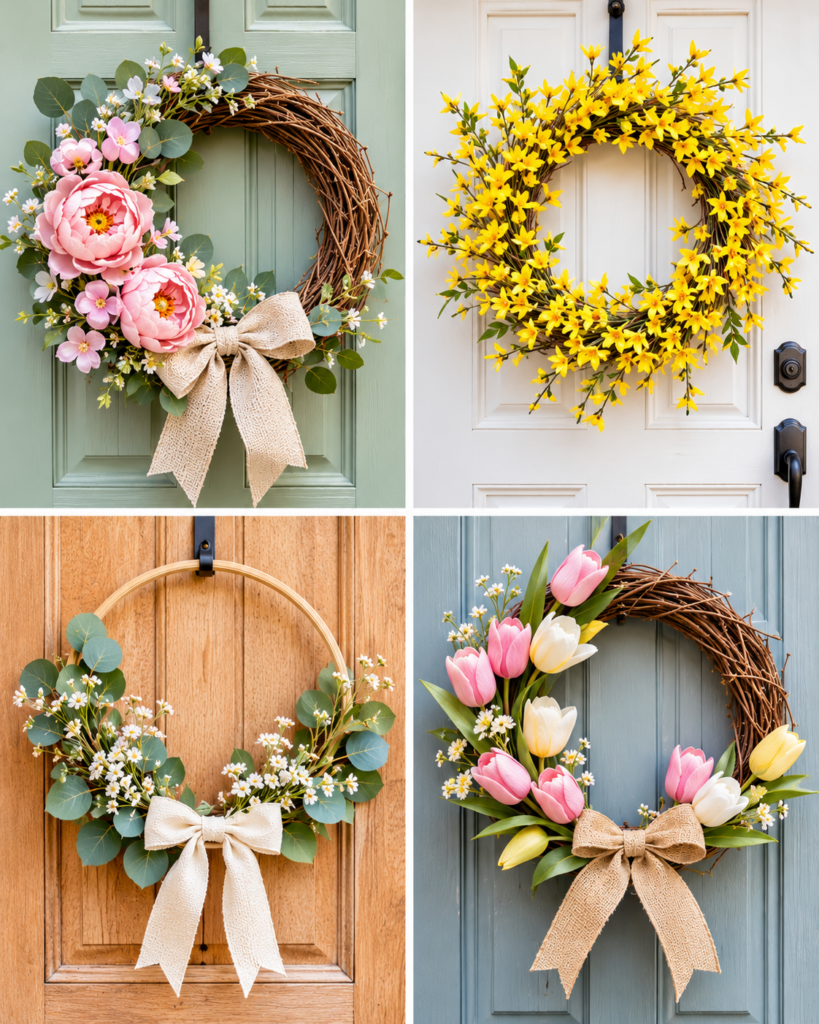
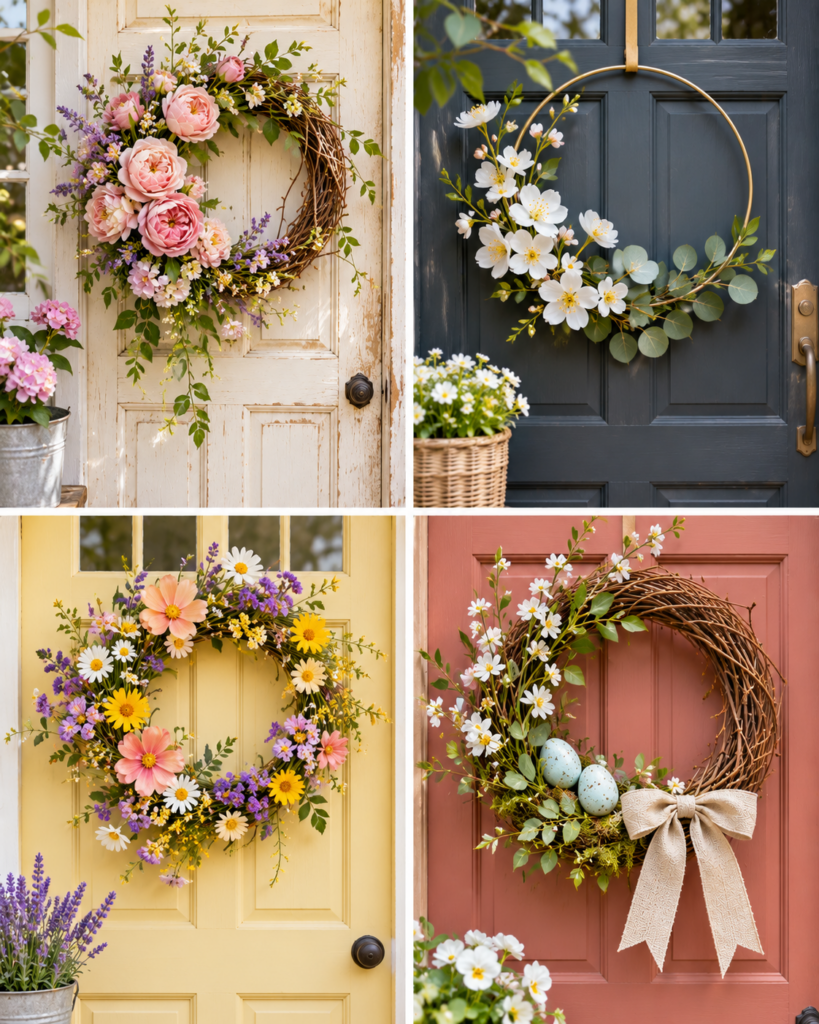
Once you understand the basic structure, you can make dozens of front door looks with the same spring wreath diy process. If you want something classic, try a tulip and eucalyptus crescent: keep most of the design along the lower half, leaving the top airy and natural. For a cottage feel, mix small wildflowers with wispy greenery and a soft gingham bow.
For a modern look, use a metal hoop wreath and attach a half-moon cluster at the bottom. A hoop wreath is especially nice if your door has glass, because it keeps the view open and feels light. You can also do a “monochrome spring” wreath in all whites and greens using faux hydrangea and eucalyptus, then add texture with twigs or seed pods.
Want something kid-friendly and playful? Add faux butterflies or tiny decorative ladybugs, but keep them near the focal area so the design does not look scattered. For a farmhouse vibe, attach a small mini sign (like “Hello Spring”) using wire or twine wrapped and tied to the frame.
If you like crafting gifts, wreath-making skills transfer well to seasonal packages and decor. Browse these DIY Christmas gift ideas people actually want for bow, greenery, and embellishment inspiration you can adapt for porch decor sets and hostess gifts.
Common Mistakes and How to Avoid Them
Most spring wreath diy problems come from structure, proportion, or placement. The first mistake is using hot glue as the only attachment for heavy stems. Glue can soften in heat and become brittle in cold. Avoid this by wiring or zip tying anything weighty, then using glue as a finishing helper.
The second mistake is overcrowding the design. Beginners often add “one more flower” until the wreath becomes a ball. Spring wreaths look best with breathing room. If you feel like it is sparse, add greenery or filler first, because they build volume without looking bulky.
Another common issue is a wreath that scratches the door or catches on the frame. This happens when stems are not trimmed or are pointing backward. Keep cut ends tight to the base and do a side-view check before hanging. Also, avoid stiff branches near the outer edge if your door is in a high-traffic walkway.
Finally, do not ignore weight distribution. If the wreath tilts, the hanger will show and the design will feel off. Fix it by adding a second tie point on the back, or attach a small counterweight (even a wired-in spare floral stem) opposite the heavy cluster. Always snip or fold wire ends inward to prevent scratches and finger pokes.
Frequently Asked Questions About DIY Spring Wreath Ideas for a Fresh Front Door
How do you make a spring wreath?
To make a spring wreath, start with a sturdy base (grapevine, wire, or foam), then build in layers: greenery first, focal flowers second, filler and texture third, and ribbon or accents last. Secure heavy pieces with wire or zip ties, not just hot glue. Step back often to check balance and shape. A good spring wreath diy looks airy, with one clear focal area rather than flowers evenly packed all around.
What base should you use for a DIY wreath?
The best base depends on where you will hang it. Grapevine is great for a natural spring look and gives lots of places to tuck stems, but it can shed bits. Wire frames are lightweight and very secure when you use zip ties, making them excellent for windy doors. Foam is easy for inserting picks, but it can crumble and degrade outdoors. For most beginners, grapevine or wire is the easiest starting point.
How do you attach faux flowers to a wreath?
For a durable spring wreath diy, trim stems short and attach them mechanically first, then use glue only as backup. On grapevine, thread floral wire around the stem and through the vine, then twist tight on the back. On wire frames, use zip ties or wire to lash stems to the rings. If a flower has a short plastic nub, glue it onto a wired pick first so you can secure the pick into the base.
How do you make a wreath on a budget?
To save money, spend on greenery and use fewer statement blooms. Greenery creates fullness, and a small number of quality flowers looks better than many cheap ones. Shop end-of-season florals, use coupons, or buy a mixed floral bush and cut it apart. Reuse a wreath base year after year, swapping the decor. You can also make a big bow from wired ribbon and let it do visual “heavy lifting” in place of extra flowers.
How do you store a seasonal wreath?
Store your wreath in a rigid container so flowers do not get crushed. A dedicated wreath storage box is ideal, but a large plastic bin also works if the wreath fits flat. Before storing, dust it gently, then place it face-up with tissue paper supporting delicate blooms. Keep it in a cool, dry area away from direct sunlight to prevent fading. Avoid attics that get extremely hot, which can warp faux stems and soften glue.
What colors work for a spring front door wreath?
Spring colors that read well from the street include soft pink, peach, lavender, pale yellow, and crisp white paired with fresh greens. If your door is bold (navy, red, black), lighter flowers pop nicely. If your door is light (white or pale gray), add contrast with deeper greenery or a patterned ribbon. The easiest formula is two main colors plus one accent, repeated in a few places so the design feels cohesive.
Final Thoughts
A beautiful spring wreath diy is less about using a lot of flowers and more about smart structure, balanced placement, and secure attachments that hold up on a front door. Start with a base you can work with confidently, build greenery first, and wire in your focal blooms before adding filler and a bow. If your first attempt feels imperfect, do not worry. Wreaths are very forgiving, and small tweaks like shifting a flower cluster or adding one extra greenery pick can completely change the look.
Your next step: gather your base and greenery, then choose a simple color palette and make one focal cluster. Once you do one, you will want to create a matching summer version too.