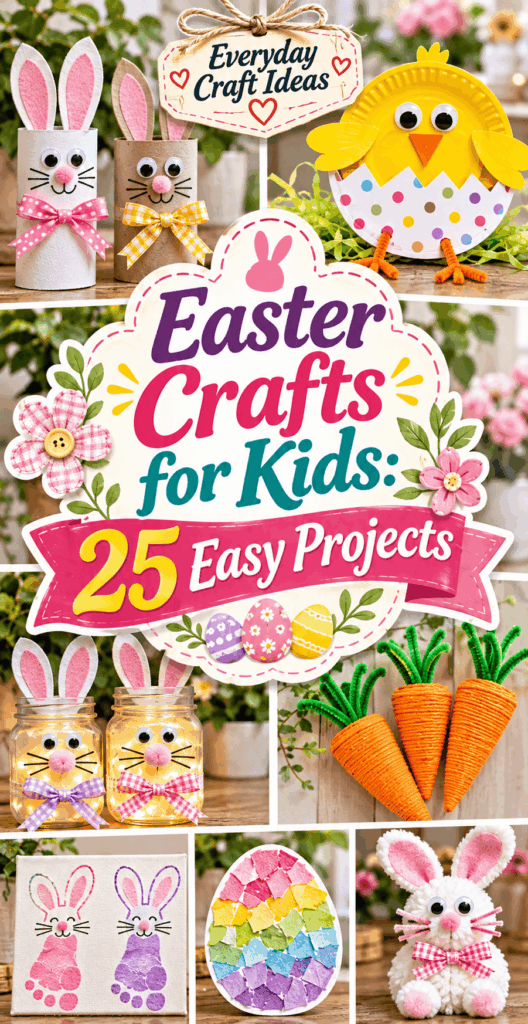
Easter Crafts for Kids: 25 Easy Projects
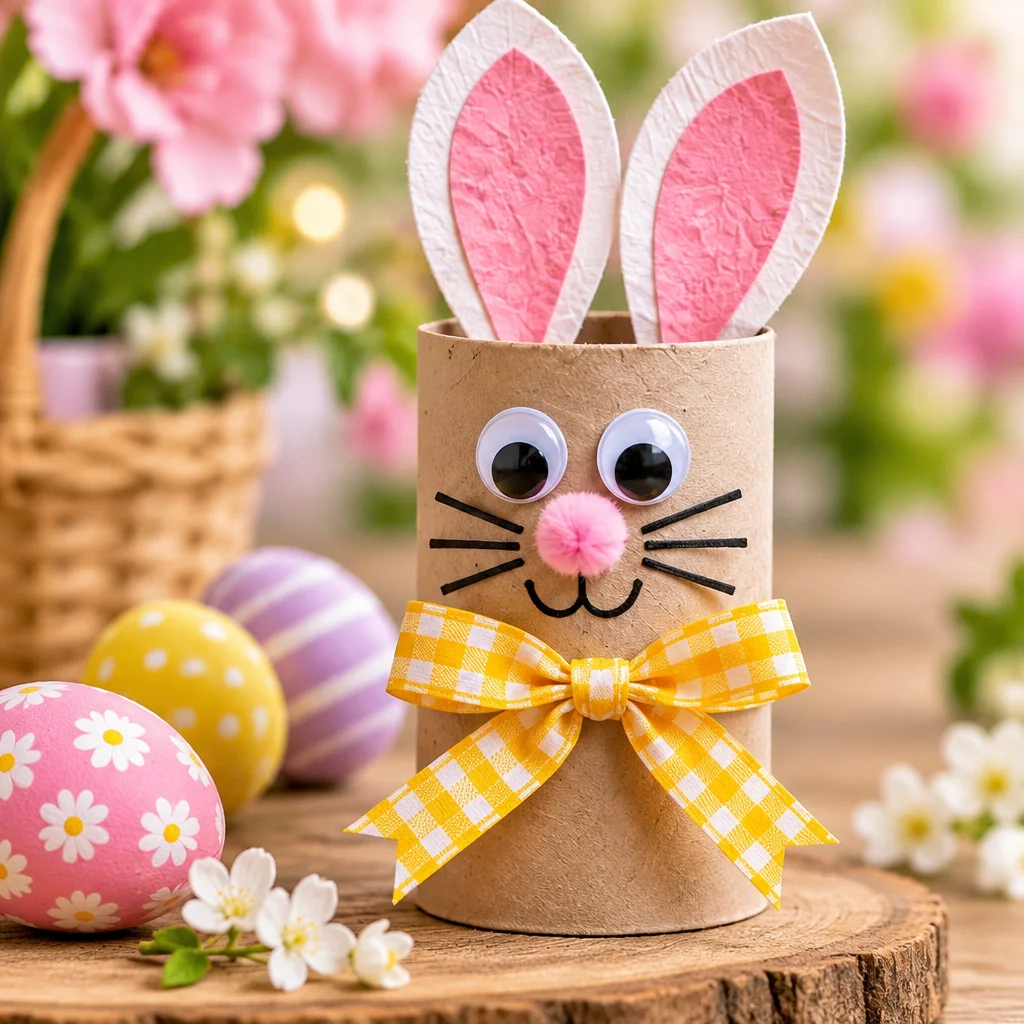
Easter crafts for kids are one of the easiest ways to build family traditions, keep little hands busy, and end up with decorations you actually want to display. The best part is that most projects can be made with basic supplies you likely already have: paper, glue, markers, cotton balls, and a few recyclables. In this guide, you’ll find 25 beginner-friendly projects grouped by type, plus practical advice on choosing age-appropriate materials, setting up a low-stress craft space, and getting durable results. I’ll also share common mistakes (and quick fixes), budget-friendly supply ideas, and classroom-tested activity tips. Whether you have 10 minutes before dinner or you’re planning an afternoon of crafting, you’ll be able to pick a project and finish it successfully.
Why This Project Is Worth Making
If you’re searching for easter crafts for kids, you’re probably hoping for three things: simple steps, affordable materials, and cute results. This collection is designed for exactly that. Most projects take 10 to 40 minutes and use low-cost supplies like construction paper, paper plates, cardboard, and washable paint. Difficulty is generally beginner, with optional “upgrade” ideas for older kids who want a challenge.
What you get at the end is more than a finished craft. Kids practice scissor skills, hand strength (punching holes, wrapping yarn), following steps in order, and basic design choices like symmetry and pattern. These crafts are also flexible. Many can be used as Easter party activities, classroom stations, table centerpieces, or gifts for grandparents.
Cost stays low because the “base shapes” repeat: eggs, bunnies, chicks, and baskets. Once you prep a few templates and set out a shared supply tray, you can make several projects in one session. If you’re crafting with mixed ages, you can assign the same theme with different methods, like stamping eggs for toddlers and paper-quilling eggs for teens.
Supplies, Materials, and Beginner Setup
A smooth setup is half the success with easter crafts for kids. Before you start, choose a washable table covering (plastic tablecloth or flattened trash bags) and create a “wet zone” (paint, glue) and “dry zone” (paper pieces, stickers). Keep a small bin or bowl for scraps to prevent the floor from becoming a confetti field.
- Adhesives: Glue sticks for paper, white school glue for pom-poms and heavier items, and low-temp glue guns for adult use only when you need fast hold.
- Cutting tools: Blunt-tip kid scissors, plus one sharp adult pair for clean cuts on cardboard. A hole punch is extremely useful for garlands and lacing crafts.
- Color tools: Washable markers and crayons for quick projects, watercolor or washable tempera for painting. If you use acrylic paint, keep it for older kids and protect clothing.
- Craft basics: Construction paper, cardstock, paper plates, cotton balls, googly eyes, pipe cleaners, pom-poms, yarn, and tape.
Budget substitutions work well: cereal boxes replace cardstock, brown paper bags replace kraft paper, and old magazines become collage material. For safety, avoid tiny loose items (mini pom-poms, small buttons) for children under 3, and supervise any craft involving staples, hot glue, or hole punches.
Age-appropriate materials
Choosing the right materials by age turns frustration into success. For toddlers (ages 2 to 3), prioritize large pieces and sensory-friendly tools: jumbo crayons, dot markers, big foam stickers, and pre-cut shapes. Great toddler-safe options include sticker eggs, sponge-stamped chicks, and paper plate bunnies where the adult pre-cuts ears and kids decorate.
Preschoolers (ages 4 to 5) can start practicing cutting on thick lines, simple folding, and glue-stick assembly. Try bunny face circles, chick pop-ups, and basic basket weaving with wide paper strips. Keep steps short and offer “choice points” such as selecting two colors or choosing between cotton ball tails or pom-pom tails.
Early elementary (ages 6 to 8) can handle multi-step crafts like toilet paper roll bunnies, egg garlands with patterns, and simple origami folds with help. They enjoy adding details: whiskers, layered ears, and mixed textures like tissue paper plus markers.
Older kids (ages 9 to 12) can do precision work: paper quilling eggs, felt stitching (with plastic needle), and more complex basket construction. A realistic constraint to plan for is drying time. If you paint, schedule a “decorate while it dries” activity like making name tags or drawing egg patterns on paper.
Bunny and chick paper projects
Paper is the easiest entry point for easter crafts for kids because it’s forgiving and fast. Here are 7 paper-based bunny and chick ideas, each designed to finish in one sitting:
- Paper plate bunny mask (20 to 30 min, easy): Cut eye holes, glue paper ears to the top, add a pink nose triangle, and attach a craft-stick handle. Tip: reinforce the handle with tape on both sides.
- Handprint bunny (15 min, very easy): Trace a hand on paper, use two fingers as ears, decorate with markers. Variation: add a cotton ball tail.
- Chick pop-up card (20 min, easy): Fold cardstock, glue a folded paper “spring” inside, and attach a chick circle so it pops forward when opened.
- Accordion bunnies (25 min, medium): Fold a strip back and forth for the body, glue on a circle head and paper ears. Troubleshoot: if the accordion won’t stand, widen the base strip.
- Corner bookmark bunny (30 min, medium): Make a square folded corner bookmark, then add ears and a face. Great for older kids who like paper folding.
- Chick hat headband (20 min, easy): Staple (adult) or tape a yellow strip to fit the head, then glue a chick face on the front.
- Bunny paper chain garland (15 to 25 min, easy): Cut strips and loop into chains, adding bunny faces every few links for a themed banner.
Finishing tip: if you want these to last past Easter, build on cardstock or glue construction paper to thin cereal box cardboard first for strength.
Egg decorations
Egg-themed crafts let kids explore patterns, color mixing, and texture. These 7 ideas avoid fragile real eggs unless you choose to include them.
- Salt dough eggs (45 min plus drying, medium): Shape egg cutouts, poke a hanging hole with a straw, bake low and slow, then paint. Seal with a thin layer of white glue mixed with water for a kid-friendly finish.
- Sticker resist eggs (15 to 25 min, easy): Place stickers on a paper egg, paint over with watercolor, then peel to reveal shapes. Best for kids who love quick results.
- Tissue paper “stained glass” eggs (30 min, easy): Tear tissue, glue pieces onto a cardstock egg. Variation: outline with a black marker once dry.
- Yarn-wrapped cardboard eggs (30 to 40 min, medium): Cut an egg from cardboard, cut small notches around the edge, and wrap yarn around. Tip: tape the yarn end on the back so it doesn’t slip.
- Marbled paper eggs (20 min plus dry time, easy): Use shaving cream marbling with washable paint or ink, then cut egg shapes after drying. Adult supervision helps keep this controlled.
- Plastic egg shaker maracas (10 min, easy): Fill plastic eggs with rice or pasta, tape shut, and decorate with washi tape. Safety: tape fully around the seam to prevent spills.
- Egg suncatchers (20 min, easy): Contact paper egg frame with tissue paper inside, hung in a window.
Realistic constraint: wet crafts need space. Set up a drying tray (old baking sheet lined with parchment) so painted eggs can be moved out of the way without smearing.
Easter baskets
A basket craft feels special because kids can use it immediately for an egg hunt or gift. Here are 5 basket projects with clear size expectations:
- Paper plate fold-up basket (25 to 35 min, easy): Cut four slits in a sturdy paper plate, fold sides up, and staple (adult) or tape corners. Add a handle strip. This holds lightweight items like plastic eggs or wrapped candy.
- Brown paper bag basket (20 min, very easy): Fold down the top edge for stability, decorate, then glue or tape on a handle. Tip: place a cereal-box cardboard rectangle inside the bottom to prevent sagging.
- Woven paper basket (40 to 60 min, medium): Cut a base strip set, then weave wide strips over-under. Use cardstock for less tearing. Troubleshoot: if the weave buckles, loosen tension and tape the first two strips as anchors.
- Felt no-sew pocket basket (30 min, easy): Cut a felt rectangle, fold sides, and secure with glue dots or fabric glue. Add a ribbon handle. Best for older kids due to precise alignment.
- Egg carton mini baskets (15 to 25 min, easy): Cut cups into pairs, paint, and add a pipe-cleaner handle through two punched holes.
Finishing advice: reinforce handles with a second layer of paper or tape on the underside. If the basket will carry heavier items, add a cardboard base and limit liquids like paint right before use so it stays stiff.
Classroom-friendly activities
For groups, the best easter crafts for kids are low-mess, repeatable, and easy to reset between students. Plan “stations” with one clear outcome and a simple example sample at each table. Here are 4 classroom-friendly projects (plus management tips) that work well in 20 to 35 minutes:
- Egg pattern collages: Provide pre-cut egg shapes and bins of paper squares. Kids glue patterns (stripes, checkerboard). Classroom win: minimal wet mess.
- Bunny ear headbands: Pre-cut ear shapes. Kids color, add inner ear pieces, then staple to bands (adult or helper). Great for photos and a quick success.
- Chick pinch puppets: Use yellow cardstock folded into a “V” pinch. Kids glue on beaks and eyes. Tip: use glue sticks to speed drying.
- Egg carton chicks: Pre-cut carton cups. Kids paint, then add feathers and eyes once dry. Alternative: skip paint and cover with yellow tissue squares for less drying time.
Group tip: label shared supply cups with pictures (glue, eyes, pom-poms). If you have only one set of scissors per table, pre-cut the tricky parts and let kids focus on assembly and decorating.
Budget supply lists
You can make a full week of easter crafts for kids without a big shopping trip. Think in “core supplies” that unlock multiple projects, then add one fun accent.
- $10 starter kit: Construction paper, glue sticks, washable markers, cotton balls. Makes: handprint bunnies, chick cards, paper chain garlands, sticker-resist eggs (swap stickers for masking tape shapes if needed).
- $20 upgrade kit: Add googly eyes, pipe cleaners, pom-poms, and a hole punch. Makes: egg carton baskets, bunny masks, shaker eggs, lacing cards (punch holes and lace yarn through).
- Recycled craft bin: Toilet paper rolls, cereal boxes, egg cartons, clean jar lids, magazine pages. Makes: roll bunnies, cardboard yarn eggs, collage eggs, mini baskets.
Realistic constraint: some “cheap” materials cost time. For example, cutting cardboard eggs takes longer than using pre-cut foam. If you’re short on time, use paper plates and pre-cut shapes. If you’re short on money, prep templates once and reuse them by tracing on scrap paper.
Helpful internal links you can add to your own site for readers who want more basics: a glue guide (glue stick vs school glue vs tacky glue), a scissor skills practice page, and a simple template-making tutorial (how to make durable templates from cereal boxes).
Mess management and safety
Craft mess is usually a systems problem, not a kid problem. Start by dressing kids in old shirts or smocks, then set out only what you need for the current step. For paint projects, put paint in small trays or paper plates and offer one brush per color to avoid the “brown paint soup” effect.
- Glue control: Teach “dot, dot, not a lot.” If using white glue, pour a small amount into a bottle cap or palette so the whole bottle can’t spill.
- Scissor safety: Use blunt-tip scissors and demonstrate “thumb on top.” Keep adult scissors out of reach and do cardboard cutting yourself.
- Small parts: Googly eyes, beads, and mini pom-poms are choking hazards for under-3s. Choose drawn eyes or large foam shapes instead.
- Allergies and sensitivities: If using feathers, consider paper “feathers” for kids who are sensitive. Use unscented wipes and wash hands after crafting.
Clean-up hack: lay a strip of painter’s tape sticky-side up along the table edge (secured at ends). It grabs glitter, paper fuzz, and tiny scraps quickly. For finished pieces, write the child’s name and date on the back before it goes into a backpack.
Common Mistakes and How to Fix Them
Even easy easter crafts for kids can go sideways with a few common pitfalls. Here’s how to fix them fast without starting over.
- Flimsy paper that buckles: If paint makes paper ripple, switch to cardstock or glue the painted piece onto cardboard after it dries. You can also use less water with watercolor.
- Pieces not sticking: Glue sticks work for paper-on-paper, but not for pom-poms or felt. Use white school glue for textured pieces and hold for 10 to 20 seconds. If the room is humid, allow longer drying time.
- Wrong size ears or handles: Before gluing, “dry fit” parts on the base and adjust. For headbands, measure around the head and overlap, then staple or tape.
- Markers bleeding through: Put scrap paper underneath, or choose thicker paper. For suncatchers, keep markers away from the adhesive edge so it still seals.
- Baskets collapsing: Reinforce the base with cardboard and use double layers for handles. If corners pop open, add a strip of tape inside the corner like a hinge.
- Paint smears during assembly: Build in a drying break. If you must continue, use a hair dryer on a low, cool setting held at a distance by an adult.
“I used the paper plate fold-up basket idea for my kindergarten class. Pre-cutting the slits was the key. Every kid finished on time and the baskets survived the walk home. The cardboard base tip saved us.”
Frequently Asked Questions About Easter Crafts for Kids: 25 Easy Projects
What are easy Easter crafts?
The easiest options use basic shapes and minimal drying time: paper plate bunny faces, sticker-decorated paper eggs, paper chain garlands, and plastic egg shakers. Aim for projects with 3 to 5 main steps: cut (or pre-cut), glue, decorate, and display. If you’re crafting with beginners, choose glue sticks and markers over wet paint so kids can finish in one session without waiting.
Which projects work for toddlers?
Toddlers do best with large, grippy materials and short steps. Good choices include contact paper tissue eggs (no liquid glue), big foam sticker eggs, cotton ball bunny tails on pre-made bunny shapes, and sponge-stamped chicks. Prep in advance by cutting the base shapes yourself and offering two or three decoration choices. Avoid small loose pieces and always supervise.
Can I use recycled materials?
Yes, and recycled materials often make the sturdiest crafts. Use cereal boxes for templates and basket bases, toilet paper rolls for bunnies, egg cartons for chicks and mini baskets, and magazines for egg collages. Wash and dry recyclables first, and check that edges are not sharp. If cardboard is hard to cut for kids, pre-cut it and let them assemble and decorate.
How do I keep crafts from looking “too messy”?
Limit the color palette to two or three colors, and give one “feature” material like cotton balls or tissue paper. Show one simple example, but allow variation. For painting, use a small brush and blot excess water first. Outlining shapes with a black marker after everything dries instantly makes eggs, bunnies, and chicks look more finished.
What if my child hates cutting?
Pre-cut the main pieces and let your child handle tearing, gluing, and decorating. Tearing tissue paper for egg collages builds hand strength without scissor frustration. You can also offer safety scissors and thick lines on cardstock for practice, but keep the “success” part of the craft independent of cutting ability.
How can I make crafts that last until next year?
Choose sturdier bases (cardstock, paper plates, thin cardboard) and let glue fully cure overnight. Store flat crafts in a large envelope or under-bed box. For ornaments like salt dough eggs, seal with a kid-safe sealer (diluted glue works) and store with tissue between layers to prevent sticking.
What’s the best adhesive for mixed materials?
Use glue sticks for paper layers, white school glue for cotton balls, pom-poms, and yarn, and tape for quick structural support like handles. For heavier items on cardboard, tacky glue holds better but needs more drying time. If you use a low-temp hot glue gun, reserve it for adult hands only and attach pieces after kids finish decorating.
How do I prevent paint from cracking on cardboard?
Cardboard absorbs moisture unevenly. Paint a thin first coat and let it dry, then add a second coat. Avoid soaking it with watery paint. If cracking happens, turn it into texture: add polka dots over cracks or cover the area with tissue paper pieces and glue for a collage look.
What are good last-minute crafts for a school party?
Pick projects with almost no prep: plastic egg shakers (tape and decorate), bunny ear headbands (pre-cut ears, quick assembly), and egg pattern collages (pre-cut eggs, glue squares). Bring wipes, extra tape, and a trash bag. If drying time is a risk, skip paint and use markers, stickers, or pre-colored paper.
Final Thoughts
Easter crafts for kids do not have to be complicated to feel special. Start with paper projects for quick wins, add egg decorations for pattern and texture play, and finish with a simple basket that kids can use right away. If you’re crafting with mixed ages, keep the theme the same and vary the method: stickers for toddlers, weaving for older kids, and pop-up cards for everyone in between. Your next step is to pick three projects that share supplies, then set up a small “craft tray” you can reuse all season. After Easter, a natural follow-up craft is a spring nature collage using leaves, petals, and paper butterflies, using the same glue-and-layer skills kids practiced here.