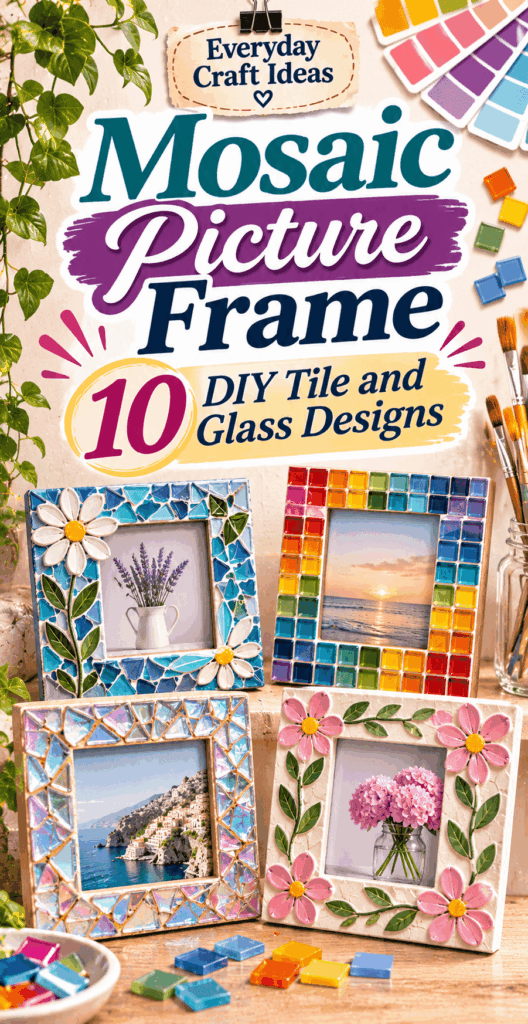
Mosaic Picture Frame: 10 DIY Tile and Glass Designs
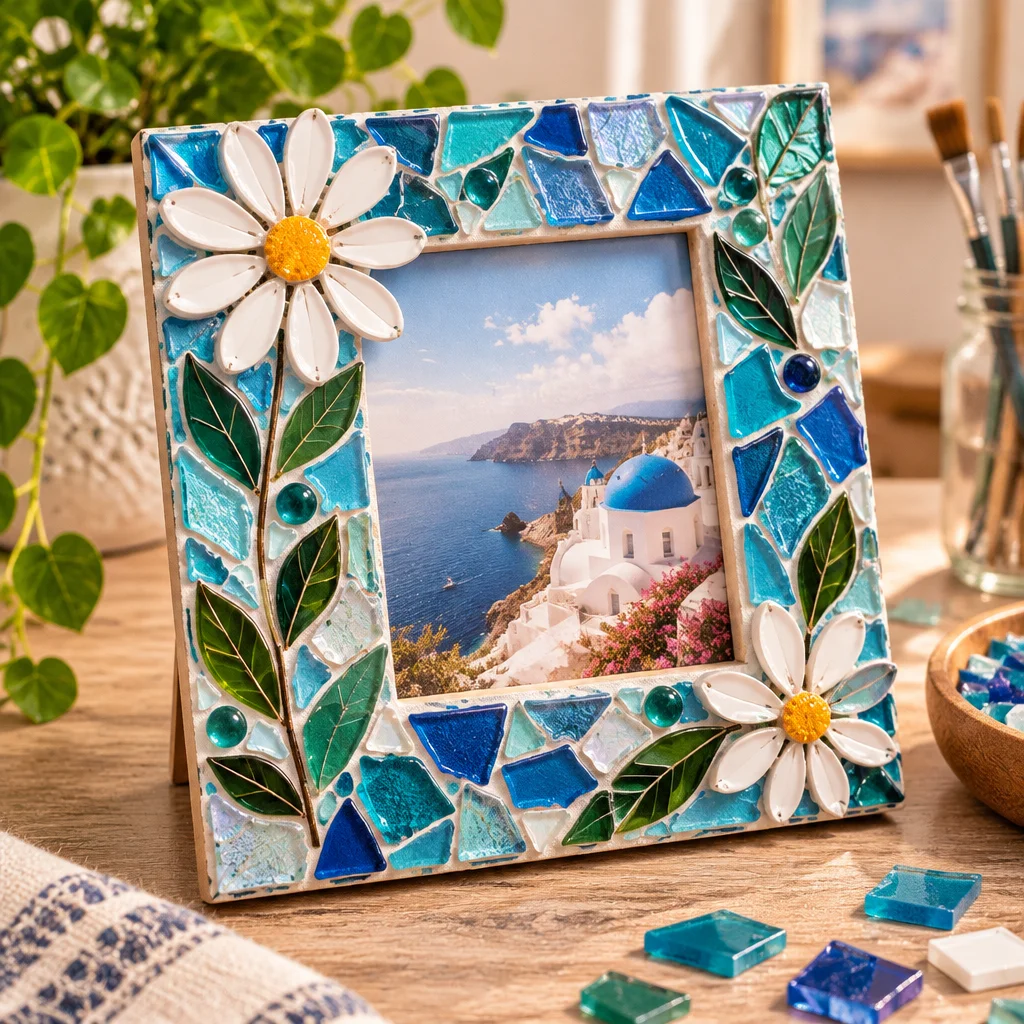
Mosaic Picture Frame projects are one of the most satisfying ways to turn a plain frame into something personal, colorful, and gift-worthy without needing advanced crafting skills. You get the sparkle of tile and glass, the charm of handmade imperfections, and a sturdy piece of decor you will actually use. This tutorial is written for beginners who want clear steps, sensible material choices, and designs that work even if you have never grouted before. If you are in a creative mood and want more ideas for the season, you might also enjoy these summer crafts for adults. And if you need a neat way to organize leftover tiles, grout floats, and small tools, a quick fabric basket sewing pattern can keep your craft space tidy while your mosaic cures.
A mosaic frame adds texture and color in a way paint alone cannot. The finished craft offers a durable border that highlights a favorite photo, a quote print, or even a small pressed-flower collage. This is ideal for beginners because the work happens on a small, manageable surface, and you can correct layout mistakes before you glue anything down. Most designs can be completed over a weekend: one session to prep and glue tiles, a second session to grout and clean, plus curing time before you insert a photo.
Expect a medium difficulty level mainly due to grout handling and keeping the photo opening clean. The appeal is flexibility: you can make it bold with bright tile, soft with pastels, or elegant with neutrals. The best part is that “perfectly even” is not required. In fact, slight variation in spacing often makes a Mosaic Picture Frame feel more handmade and artistic.
Prepare a Frame for Mosaic Decoration
Choose a sturdy wide-border frame
Select a frame with a flat border at least 1 inch wide, with room for tile plus grout. Wood frames are the easiest to mosaic because adhesives bond well and the frame resists flexing. MDF can work if it is sealed and kept dry. Avoid flimsy frames that bend when squeezed; grout can crack later if the base moves. A frame with removable backing is important so you can take out the glass and photo insert while working.
Select small tiles, beads or safe glass alternatives
Use mosaic tiles (ceramic or glass), mini craft tiles, or pre-tumbled “mosaic glass.” If you want a sea-glass look, buy tumbled glass made for mosaics instead of collecting sharp broken glass. For sparkle, you can mix in flat-backed gems or small beads, but keep them on the outer border so the frame still sits flat against a wall. If you plan to use broken china, wear eye protection and gloves, and wrap pieces in a towel before tapping with a hammer to control shards.
Plan thickness around the glass opening
Dry-fit the glass and backing, then measure how much raised mosaic you can add without blocking the glass from seating. Keep tile thickness consistent near the inner edge. If tiles are too thick, the frame may not close properly, or the glass may press against the mosaic and crack. A simple rule is to keep the inner 1/4 inch border low-profile and reserve thicker embellishments for the outer corners.
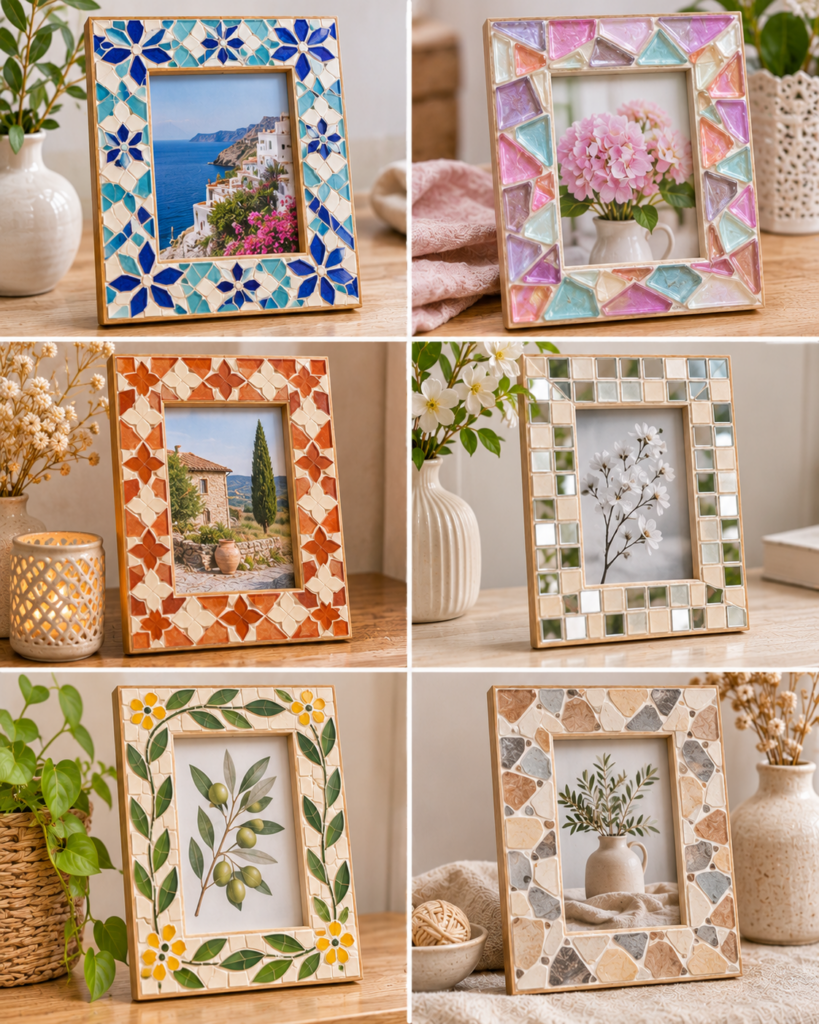
10 Mosaic Picture Frame Designs
Blue-and-white tile border
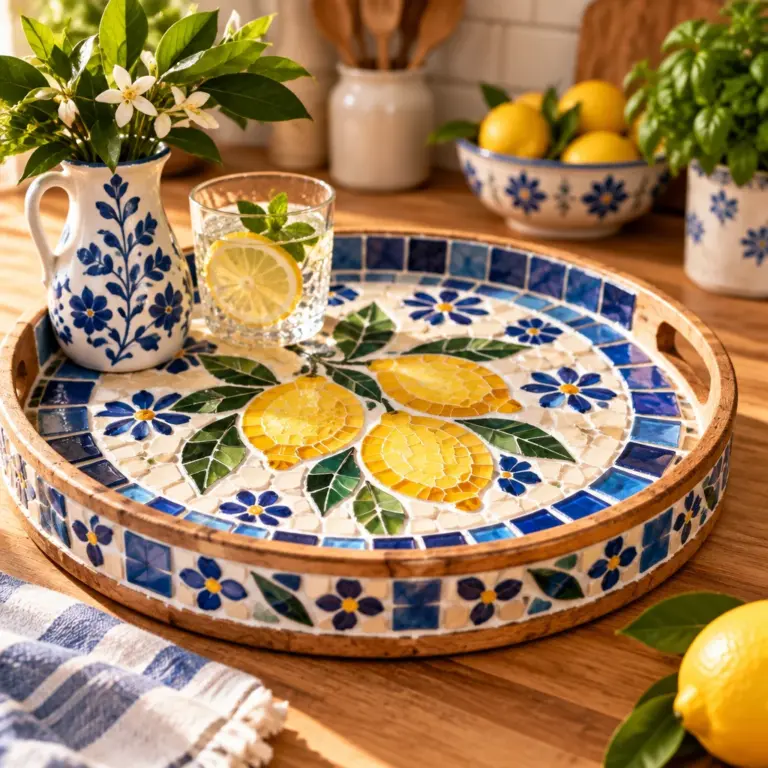
This classic style looks crisp in bathrooms, kitchens, or coastal rooms. Use small square tiles in two or three shades of blue plus bright white. Place white tiles at regular intervals to create a repeating rhythm. Choose a medium-gray grout to emphasize the pattern without looking dirty. Tip: if your blues vary a lot, lay them out first and distribute the darkest pieces evenly so the frame feels balanced.
Rainbow tile frame
A rainbow Mosaic Picture Frame is cheerful and great for kids’ rooms or a craft studio. Arrange tiles by color families in a smooth gradient: red to orange to yellow to green to blue to purple. Keep spacing consistent so grout lines do not interrupt the flow. Use white grout for a clean, candy-like finish, or light gray grout if you want a slightly more “grown-up” look.
Soft pastel floral mosaic
Pick pastel glass tiles (mint, blush, lavender) and add a few flower shapes if you can find ceramic floral pieces. If not, create flowers by arranging teardrop tiles around a small round gem center. Keep the floral clusters in two corners and sprinkle “leaf” pieces diagonally for movement. A warm white grout helps pastels stay soft rather than harsh.
Geometric black-and-white frame
For a modern look, use black, white, and one accent (like metallic gold). Create triangles by cutting ceramic tiles with tile nippers, or use pre-cut shapes. Make a repeating pattern around the frame, turning the angles at corners. Choose charcoal grout to reduce visible staining over time. This design looks especially sharp around black-and-white photos.
Broken china patchwork
Broken china mosaics feel heirloom and story-rich. Choose pieces with a similar scale of pattern, like small florals or thin lines, so the frame does not become visually chaotic. Place the most interesting motifs where they will be seen, usually along the top edge. Use white grout to keep the “patchwork” bright. Safety note: sand any razor-sharp edges with a rubbing stone or fine sandpaper before gluing.
Sea-glass-look mosaic
Use tumbled mosaic glass in aqua, frosted white, and pale green. The key is irregular shapes and slightly varied spacing, mimicking beach finds. Keep the inner edge more uniform so it frames the photo neatly. A pale gray grout blends well and makes the glass look more “watery.” Optional: add a few tiny shell beads on the outer corners, but keep them minimal so the frame still rests flat.
Warm terracotta frame
This earthy style suits rustic or boho spaces. Mix terracotta-toned tiles with cream and a few dark brown accents. You can also break a terracotta saucer into pieces and use the shards for an organic look. Use a sand-colored grout for a seamless finish, then seal the grout so it does not absorb oils if handled often.
Tiny heart-tile frame
Perfect for anniversaries and Valentine photos. Use mini heart cabochons or cut hearts from thin ceramic tiles if you are comfortable with nippers. Arrange hearts in a border with small filler tiles between them to keep grout lines strong. Use white grout for a sweet look, or pale pink grout for a subtle blush effect. Keep hearts away from the inner edge so the glass fits smoothly.
Mixed-shape ceramic mosaic
If you have leftover tiles, this “everything works” design is forgiving. Combine squares, rectangles, and a few circles. The trick is to repeat each shape at least 4 to 6 times around the frame so it feels intentional. Use a mid-tone grout (light gray or beige) to unify the mix. This is a great first Mosaic Picture Frame because it turns scraps into something cohesive.
Minimal neutral stone-look frame
For a calm, spa-like vibe, use small stone-look ceramic tiles in beige, greige, and soft gray. Keep lines straight and spacing tight for a refined finish. Choose grout close to the tile color so the mosaic reads as one continuous texture rather than a busy grid. This style pairs well with botanical prints and simple typography art.
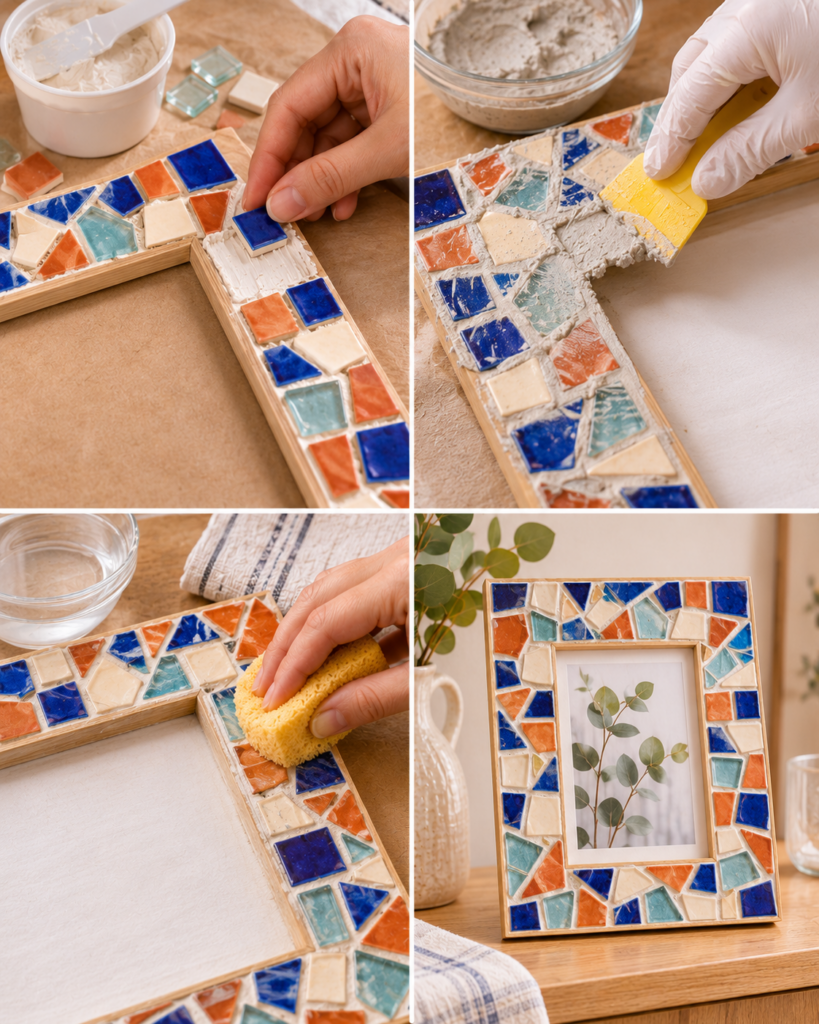
How to Assemble a Mosaic Frame
Lay out tiles before gluing
- Remove glass and backing. Store them safely away from your work area so no adhesive or grout gets trapped under the glass later.
- Clean and scuff-sand the frame. Wipe dust away. Light sanding helps adhesive bond, especially on glossy finishes.
- Dry-lay the full design. Arrange tiles on the frame without glue. This is where you fix spacing and balance colors before anything is permanent.
- Mark corner decisions. Corners can look messy if you improvise. Decide now whether corners will be diagonal, wrapped, or feature a special accent tile.
Protect the photo opening and glass
- Mask the inner opening with painter’s tape. Run tape along the inner edge to prevent glue squeeze-out from creeping into the photo area.
- Create a “no-tile zone” if needed. Leave a slim inner margin if your frame is tight and the glass needs clearance to seat properly.
- Keep the back clean. Avoid glue blobs near turn buttons or clips so the backing can close.
Grout and clean narrow edges
- Choose the right grout type. Sanded grout is stronger for wider gaps; unsanded grout is better for very narrow gaps and delicate glass pieces.
- Mix to peanut-butter consistency. Too wet causes shrinkage and pinholes; too dry crumbles.
- Pack grout into gaps. Use a rubber grout float or a gloved finger for small frames. Push grout in, do not just smear it over the top.
- Wipe in stages. After grout firms slightly, wipe with a barely damp sponge. Rinse often. A final haze can be buffed off with a dry cloth once fully set.
Allow curing before inserting a photo
- Let grout cure undisturbed. Follow the grout package, usually 24 to 72 hours. Moving it too soon can crack corners.
- Seal grout if recommended. A grout sealer helps prevent staining, especially on light grout colors.
- Reassemble only when fully dry. Trapped moisture can fog glass or warp cardboard photo backs.
Display and Gift Ideas
Create a coordinated gallery pair
Make two Mosaic Picture Frame pieces as a set for a shelf or small wall gallery. Coordination matters more than perfect matching. Try repeating one element across both frames, such as the same grout color or a shared accent tile in the corners. Keep the photos similarly toned, like both black-and-white portraits, so the mosaic does not compete. For hanging, use proper hardware rated for the frame’s new weight, since tile and grout add more heft than you might expect.
Choose frames for wedding and birthday gifts
For weddings, aim for neutral, elegant palettes: stone-look neutrals, black-and-white geometric, or soft pastels. Add a small metallic accent tile for a celebratory touch. For birthdays, lean into themes: rainbow for kids, terracotta for someone who loves earthy decor, or a sea-glass look for beach lovers. If you are crafting with children, keep it simpler with larger tiles and pre-tumbled glass, and consider pairing the gift with other kid-friendly makes like these easy gifts kids can create. You can also package the frame with a matching party lantern from these DIY paper lantern designs for a coordinated celebration corner.
Reader testimonial (from Mia, weekend crafter): “I tried a sea-glass-look Mosaic Picture Frame as my first mosaic project. Dry-laying the pieces first made a huge difference, and masking the inner edge saved me from a lot of cleanup. The grout step felt intimidating, but wiping in stages worked exactly like described. I already started a second frame with leftover tiles.”
Frequently Asked Questions About Mosaic Picture Frame: 10 DIY Tile and Glass Designs
What glue works best for mosaic picture frames?
For most frames, a strong craft adhesive labeled for tile and glass is a safe choice. Many crafters also use a thin-set mortar for heavy tile, but on a small frame it can be messier than necessary. Avoid school glue and hot glue for permanent mosaics because they can release over time. Whatever you choose, confirm it bonds to your frame material (wood, MDF, or sealed surfaces) and allow full cure time before grouting.
Can I mosaic a plastic picture frame?
Yes, but it needs extra preparation. Plastic is flexible and can cause grout to crack if the frame bends. Choose a thick, rigid plastic frame, scuff-sand it well, and clean it with rubbing alcohol before gluing. Keep tile pieces small and lighter-weight, and avoid heavy ceramic chunks. If the frame still flexes, consider mounting the plastic frame to a thin wooden panel first, then mosaic over the stable surface.
How do I keep grout off the frame glass?
Remove the glass before you start whenever possible. If the glass is not removable, mask it completely with painter’s tape and overlap tape onto the frame edge so grout cannot creep under. During grouting, use a controlled amount and wipe away residue frequently with a barely damp sponge. Do not flood water toward the tape edge. After grout firms up, remove tape carefully and buff any remaining haze with a dry cloth.
How long does a Mosaic Picture Frame take from start to finish?
Most frames take 2 to 4 hours of hands-on work spread across two days. Day one is prep and gluing, then you wait for adhesive to cure (often overnight). Day two is grouting and cleanup, then you allow the grout to cure for at least 24 hours before sealing and reassembling. Dry time is part of the process, so plan for a weekend rather than a single afternoon.
Do I need tile nippers, or can I avoid cutting tiles?
You can absolutely avoid cutting by buying mini tiles, using pre-tumbled mosaic glass, or choosing a mixed-shape layout that welcomes irregular gaps. Tile nippers help for clean corners and geometric patterns, but they are not mandatory for your first frame. If you do cut tile, wear eye protection and cut into a container or box to control flying chips. Smooth sharp edges before handling.
Why are my tiles popping off after grouting?
This usually happens when the adhesive was not fully cured, the frame surface was dusty or glossy, or grout pressure shifted tiles that were only lightly stuck. Fix it by removing loose tiles, scraping off old adhesive, and regluing them. Let cure fully, then patch-grout those sections. For future frames, scuff-sand shiny surfaces, wipe clean, and give adhesive the full recommended drying time.
What grout color should I choose if I am unsure?
Light gray is the most forgiving beginner choice. It hides minor staining better than white while still keeping colors bright. White grout looks crisp but shows residue if not wiped carefully. Dark grout makes colors pop dramatically, but it can make small spacing inconsistencies more noticeable. When in doubt, place a few tiles on paper and draw grout lines with markers in different shades to preview the effect.
How do I prevent scratches on tables or walls from the mosaic texture?
If the mosaic wraps over the outer edge, add small felt pads to the back corners so raised tile does not scrape the wall. For tabletop display, ensure no sharp glass edges remain. You can lightly sand sharp points on ceramic or china, and you can position the most textured pieces on the face rather than the bottom edge. Keeping grout slightly recessed from tile tops also reduces scratchy contact points.
How should I store leftover supplies for the next frame?
Keep tiles sorted by color in small containers so your next design is faster to plan. Store grout tightly sealed in its original bag inside an airtight bin to prevent moisture clumps. Wash and dry tools immediately so grout does not harden on them. If you enjoy keeping craft areas organized, a dedicated bin or a simple sewing project like a DIY sewing machine cover can also protect nearby tools from grout dust during messy steps.
Final Thoughts
If you are choosing your first Mosaic Picture Frame, start with a mixed-shape ceramic mosaic or a blue-and-white border. Both designs look intentional even with beginner-level spacing, and they teach the core skills: dry-laying, gluing, grouting, and final cleanup. Take your time on preparation, especially protecting the photo opening and planning tile thickness so the frame closes properly. Your sensible next step is to pick one color palette, gather all materials before you begin, and do a complete dry layout before opening any glue. Once you finish one frame successfully, you will have the confidence to try broken china patchwork or a more intricate geometric pattern.