Pressed Flower Crafts: 20 Beautiful DIY Ideas
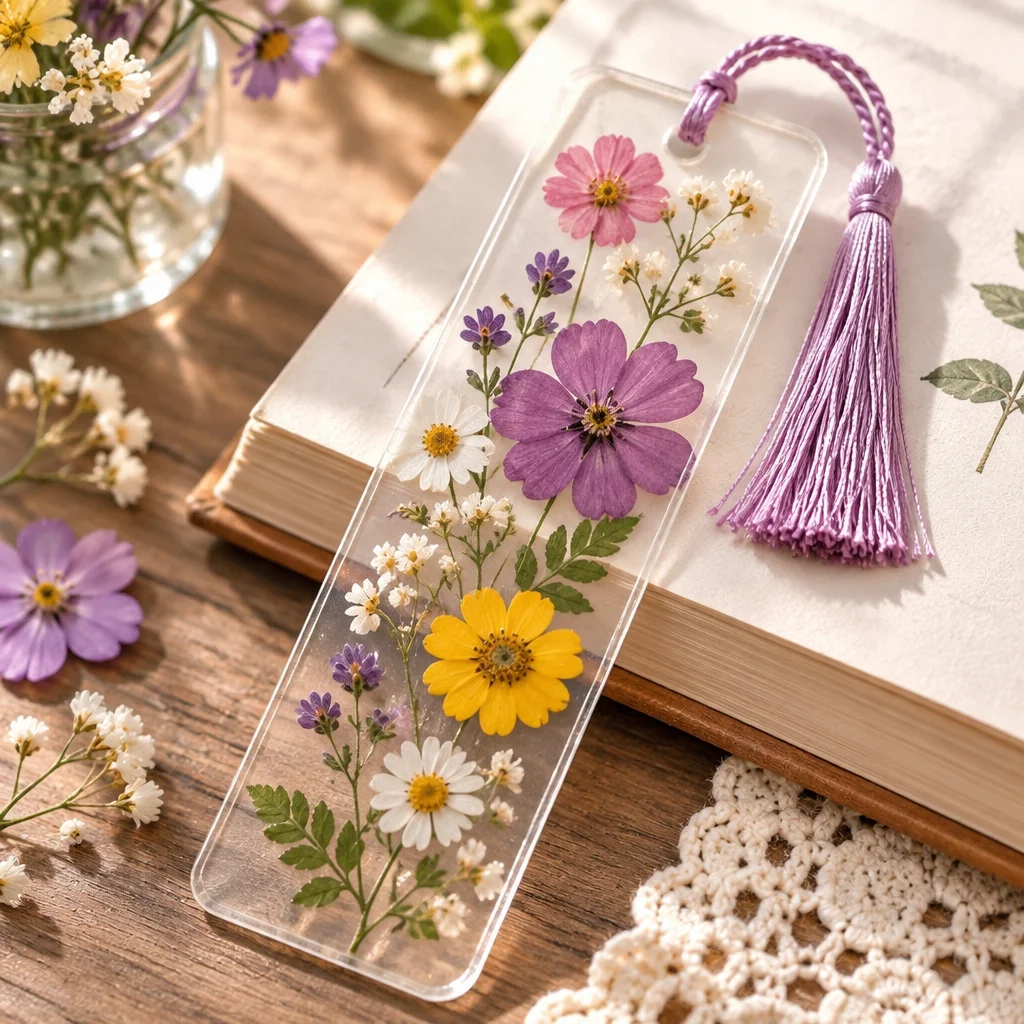
Pressed flower crafts are one of the easiest ways to turn ordinary blooms into lasting art you can actually use. If you have ever saved a bouquet petal “just in case,” this is your sign to make something beautiful with it. In this guide, you will learn how to choose flowers that press well, dry them without mold, and attach them cleanly to paper, glass, and other surfaces. I will also share 20 beginner-friendly DIY ideas, from bookmarks and greeting cards to framed botanicals and decoupage projects that look polished without expensive tools. Expect practical steps, realistic timeframes, and troubleshooting tips so you can get consistent results even on your first try.
Why This Project Is Worth Making
Pressed flower crafts are ideal when you want high-impact results with low cost and low mess. Most projects use scraps you may already have: books, parchment paper, glue, cardstock, and a frame. The pressing stage takes the longest, but the hands-on crafting time is often under an hour once the flowers are dry.
- Difficulty: Beginner-friendly. The main skill is patience and gentle handling.
- Time: Pressing is usually 1 to 3 weeks; assembly is 15 to 90 minutes depending on the project.
- Cost: Budget to mid-range. You can start with items at home, then upgrade to a flower press, archival paper, or UV-protective glass.
- Best for: Gift makers, memory keepers, scrapbookers, teachers, and anyone who wants calming crafts that do not require drawing or painting skills.
The outcome is also practical: bookmarks you will use daily, cards that feel personal, and wall art that brings nature indoors year-round. If you enjoy seasonal crafts, pressed flowers let you “save” spring and summer blooms to use in autumn and winter projects.
Supplies, Materials, and Beginner Setup
You can start pressed flower crafts with a simple setup, but the right materials make the work cleaner and longer-lasting. Here is a beginner kit with budget swaps and why each item matters:
- Pressing materials: Heavy books, cardboard, and absorbent paper (blotting paper, coffee filters, or plain uncoated printer paper). Avoid wax paper because it traps moisture.
- Fine-point tweezers: Pressed petals tear easily; tweezers prevent fingerprint smudges and crumbling edges.
- Adhesives: Acid-free glue stick for paper crafts; PVA craft glue (used sparingly) for sturdier paper; double-sided tape for quick, flat bonds.
- Small paintbrush: Lets you apply a thin, controlled layer of glue without soaking petals.
- Cutting tools: Scissors and a craft knife for neat edges on cardstock or mat board.
- Sealers: Clear-drying decoupage medium or archival spray fixative if you want extra protection (use sprays outdoors).
Safety notes: If you use spray sealers, work outside or in a well-ventilated area and follow the label. If you try resin, wear nitrile gloves and protect your workspace. If you forage, confirm plants are non-toxic and avoid areas treated with pesticides.
Flower selection and pressing methods
Not all flowers press the same, so good selection saves frustration. The best candidates are naturally flatter and not overly juicy. Great beginner flowers include pansies, violas, cosmos, daisies, alyssum, buttercups, and fern fronds. For larger blooms like roses or peonies, press individual petals instead of the whole flower. Leaves like eucalyptus and maple also press beautifully and add structure to designs.
Pick at the right time: Harvest mid-morning after dew dries. Choose blooms that are fresh and unbruised. Avoid flowers that feel wet, very thick, or already curling at the edges.
Two reliable pressing methods:
- Book pressing (best for beginners): Place flowers between absorbent paper, then between two pieces of cardboard, then inside a heavy book. Add more weight on top. This method is slow but consistent.
- Flower press (best for frequent crafters): A wooden press with bolts provides even pressure and faster drying. It is great for batches and helps reduce wrinkling.
Design variations: Press color-coordinated sets (all whites and greens) for minimal art, or press mixed wildflower palettes for cheerful cards. Keep in mind that some reds and purples darken as they dry, and very thick centers can mold if not separated.
Drying and mold prevention
Mold is the biggest enemy of pressed flower crafts, and it usually comes from trapped moisture. The fix is simple: use absorbent layers, keep airflow reasonable, and change papers early on when the moisture load is highest.
Practical mold-prevention routine:
- Start dry: Do not press damp flowers. If you rinsed them, let them air-dry completely first.
- Use the right papers: Blotting paper is ideal. If using printer paper, use multiple sheets because it saturates faster.
- Change papers: After 24 to 48 hours, carefully replace the inner papers. This one step dramatically reduces browning and mold.
- Press thin layers: One flower layer per “sandwich.” Stacking multiple blossoms together traps moisture and creates pressure dents.
- Check thickness: For daisies and similar flowers, consider removing the bulky center or pressing petals separately if your climate is humid.
Constraints to be honest about: In humid weather, pressing can take longer and colors can dull. If your home is very humid, run a dehumidifier in the room where flowers are pressing, or choose thinner flowers and leaves for more predictable results.
If you spot a musty smell, stop and replace all papers immediately. Discard flowers that show fuzz or spotting, and wipe down your press surfaces before starting again.
Bookmarks and cards
Bookmarks and cards are the fastest way to see results from pressed flower crafts, and they are forgiving if your first layouts are simple. These projects work best with flatter flowers and leaves that will not create bulky bumps.
DIY pressed flower bookmark (laminated or layered):
- Cut the base: Trim cardstock to about 2 x 6 inches (or any size you like). Rounded corners resist bending.
- Plan the layout dry: Arrange flowers without glue first. Use tweezers and keep a small border so petals do not snag.
- Glue lightly: Use a glue stick or a tiny amount of PVA applied with a brush. Too much glue makes petals translucent and wrinkled.
- Protect: Either laminate (best durability) or sandwich between clear contact paper sheets, then trim. Burnish gently with a bone folder or the back of a spoon.
- Finish: Punch a hole and add ribbon if desired, but keep it short so it does not fray quickly.
Pressed flower greeting card ideas: Make a simple bouquet on the front, a wreath shape around a message, or a single “specimen” with the flower name written inside. If you use darker blooms, pair them with a cream or kraft card for contrast. Keep embellishments flat so the card can be mailed without extra postage surprises.
Framed botanicals
Framed pressed botanicals look high-end, and they are perfect when you want to preserve meaningful flowers from a garden, event, or trip. The key is keeping the work flat and protected from humidity and sunlight.
Three frame styles that work well:
- Floating glass frame: Flowers appear suspended between two panes. Use tiny dots of clear-drying glue behind thicker parts, and keep the arrangement minimal to avoid shifting.
- Matted frame: A mat hides edges and gives a gallery look. Attach flowers to the backing paper, then place the mat on top to keep petals from touching glass.
- Specimen grid: Press multiple small flowers and arrange them in a tidy grid with handwritten labels. This is ideal for beginners because it is structured and forgiving.
Assembly tips: Work on a clean, dry surface. Test composition first, then adhere flowers sparingly. If you frame without matting and petals touch glass, condensation can cause sticking over time, so choose a mat if your climate fluctuates. For extra protection, use UV-protective glass or display away from direct sunlight to slow fading.
One easy upgrade: Add a painted or inked background wash on watercolor paper before you attach flowers. Let the paper dry completely and flatten it under books overnight, then build your design. This gives depth without competing with the botanicals.
Resin alternatives and decoupage
Many crafters jump straight to resin, but you can get a similar “encapsulated” look with safer, simpler methods. These resin alternatives are excellent for pressed flower crafts when you want durability without mixing chemicals.
Option 1: Decoupage on wood or canvas
- Paint the surface (optional) and let it cure fully.
- Brush a thin coat of decoupage medium where the flower will sit.
- Place the pressed flower with tweezers and gently tap it down.
- Seal with 2 to 3 very thin coats, drying completely between coats. Thin coats reduce wrinkling and cloudiness.
Option 2: Glass “faux resin” coasters (no pour resin)
- Use flat glass coasters or small glass panels.
- Mount flowers on the underside using clear-drying glue, then seal the back with a felt or cork circle. This keeps the top surface smooth and wipeable.
Option 3: Packing tape or self-adhesive laminating sheets
For lightweight keychain tags or suncatcher-style ornaments, sandwich pressed flowers between clear adhesive sheets and trim. It is not as rigid as resin, but it is quick and kid-friendly with supervision.
Realistic constraint: Decoupage dries clear, not thick like resin. If you want a domed effect, resin is the true method, but decoupage and glass mounting are easier to redo if you make a mistake.
Sealing and fading
Sealing helps protect pressed flower crafts from humidity, handling, and minor scuffs, but no sealant can stop all fading. Flowers are natural pigments, and UV light will slowly change them. Your goal is to slow that process and keep pieces clean and flat.
When to seal: Seal items that will be handled often, like bookmarks, tags, and decoupaged surfaces. For framed art behind glass, sealing is optional if it is well protected.
Sealant options (and how to use them well):
- Decoupage medium: Best for paper-on-wood/canvas. Apply with a soft brush in thin coats. Thick coats can rehydrate petals and cause bleeding.
- Archival spray fixative: Helpful for paper crafts before framing. Spray lightly, let dry, and repeat. Always test on a spare pressed flower first because some sprays deepen colors.
- Clear laminating: Most protective for bookmarks and small paper items. Trim edges cleanly to prevent peeling.
Anti-fade strategies: Display away from direct sun, use UV-filtering glass when possible, and choose naturally stable botanicals (many whites and yellows hold better than deep reds). If you love the “antique” look, lean into fading by using vintage papers and muted palettes so color shift feels intentional.
Display and gift ideas
Pressed flower crafts make thoughtful gifts because they are lightweight, personal, and easy to customize to a recipient’s style. The best gifts are also practical to store and ship, so consider sturdier formats if you are mailing them.
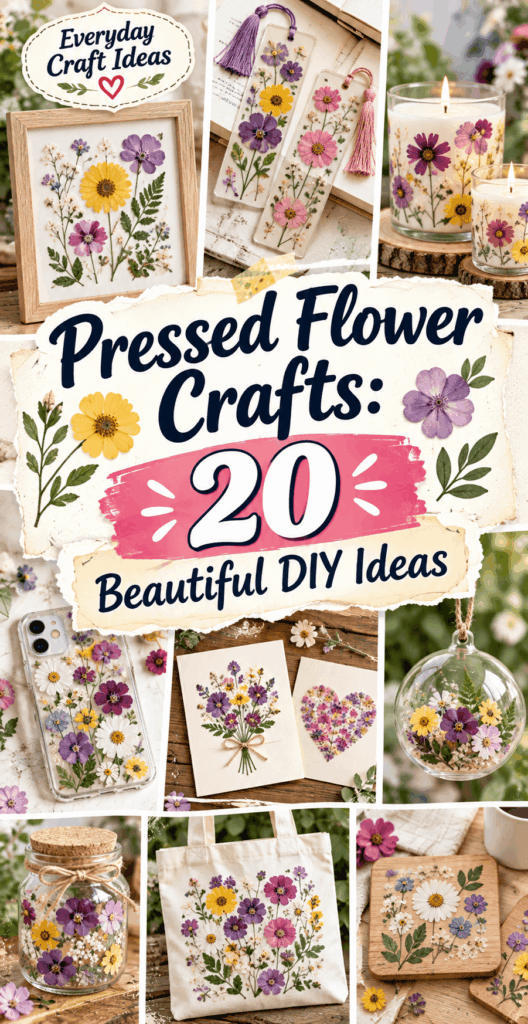
20 beautiful DIY ideas (quick scan):
- Bookmarks: Laminated, tassel-topped, or corner bookmarks (10 to 30 minutes assembly).
- Greeting cards: Birthday, sympathy, wedding thank-you, and “thinking of you” cards (20 to 45 minutes).
- Gift tags: Mini pressed flower clusters on cardstock (10 to 20 minutes).
- Framed specimen art: Floating frame or matted botanical (45 to 90 minutes).
- Herbarium page: A labeled “collection” page in a binder (30 to 60 minutes).
- Phone case insert: Pressed flowers arranged on paper, slipped behind a clear case (15 to 30 minutes).
- Candle wrap (no heat contact): Decorate the outside of a glass candle holder, not the candle itself (30 minutes).
- Decoupaged trinket box: Seal well for handling (60 to 90 minutes).
- Wall garland medallions: Flowers sandwiched in laminating sheets, hung as a mobile (45 to 75 minutes).
- Place cards: One pressed bloom per name card for events (batch-friendly).
- Coasters: Glass-mounted or decoupaged tiles with felt backs (45 to 90 minutes).
- Notebook cover: Clear cover overlay with pressed flowers on an insert page (30 to 60 minutes).
- Jar labels: Decorative pantry labels protected under clear tape (20 to 40 minutes).
- Picture mat decoration: Add flowers to the mat, not the photo (30 to 60 minutes).
- Ornaments: Clear fillable ornaments with pressed petals (30 to 60 minutes).
- Tealight lantern panels: Use LED lights only to avoid heat damage (45 to 75 minutes).
- Scrapbook accents: Clustered corners and borders (15 to 45 minutes).
- Wedding keepsake: A small frame with petals from the bouquet (60 to 90 minutes).
- Magnet fronts: Flowers under a clear cabochon sticker (30 to 60 minutes).
- Mini art swaps: Tiny framed botanicals for friends (batch-friendly).
Reader testimonial: “I tried pressed flower crafts for the first time with my kids and made laminated bookmarks. The tip about changing the papers after the first day saved our flowers from turning brown. We ended up making a whole set as teacher gifts.”
Common Mistakes and How to Fix Them
Mistake: Flowers stick to the paper when you open the press.
Fix: Use smoother absorbent paper (blotting paper or plain paper) and avoid tissue that can bond to damp petals. Open the press slowly and peel paper back rather than pulling the flower up.
Mistake: Browning and dull color.
Fix: Start with fresh flowers, press quickly after picking, and change papers after 24 to 48 hours. Try lighter blooms like pansies or daisies while you learn; some reds naturally darken.
Mistake: Mold spots.
Fix: Discard affected flowers. Reduce moisture by using more absorbent layers and pressing thinner materials. Do not crowd multiple blooms in one stack.
Mistake: Wrinkled petals after gluing.
Fix: Apply less adhesive. Use a glue stick for paper projects, or brush on a whisper-thin layer of PVA. Press the finished piece under clean paper and a book for 10 minutes to dry flat.
Mistake: Finished piece sheds petals.
Fix: Add a protective top layer: lamination, a clear overlay, or a frame. For cards, consider placing the design on a panel and adhering that panel to the card base so it stays flatter.
Frequently Asked Questions About Pressed Flower Crafts: 20 Beautiful DIY Ideas
How long do flowers take to press?
Most flowers take 1 to 3 weeks to press fully in a book, depending on thickness and humidity. Thin petals (pansies, cosmos) can be ready in 7 to 10 days, while thicker flowers or leafy stems often need 2 to 4 weeks. If you change papers after the first 24 to 48 hours, drying is faster and cleaner. Flowers are done when they feel papery and cool-dry, not flexible.
How do you prevent browning?
Prevent browning by pressing fresh, dry flowers as soon as possible after picking, then swapping out the absorbent papers early. Browning often happens when moisture sits too long against petals. Choose flowers that are not overly thick, avoid pressing damp blooms, and keep the press in a dry indoor spot away from steamy kitchens or bathrooms. If color matters, display finished pieces out of direct sunlight.
What glue works?
For most pressed flower crafts on paper, an acid-free glue stick is the simplest and least likely to wrinkle petals. For heavier paper, wood, or canvas, use PVA craft glue applied sparingly with a small brush. Double-sided tape works well for very flat flowers and quick cards, but it can show through translucent petals. Whatever you choose, use the smallest amount that holds, because excess glue causes dark spots and rippling.
Can I press flowers in the microwave?
Yes, but it requires caution and the right tools. Use a microwave flower press designed for microwaves, or follow a trusted manufacturer method. Overheating can scorch petals or start a fire if materials are wrong. For beginners, book pressing is safer and gives more consistent color. If you microwave press, do short bursts and cool completely between cycles.
Which flowers press best for beginners?
Start with pansies, violas, cosmos, small daisies, and ferns. They are naturally flatter and dry evenly. Avoid very thick centers at first (some marigolds, zinnias) unless you separate petals. Leaves like fern fronds and small herbs are also reliable and make your layouts look more professional because they add shape and contrast.
How do I store pressed flowers before crafting?
Store them flat in a rigid container like a photo box or a folder with sheets of clean paper in between layers. Keep the box in a cool, dry place. Avoid plastic bags, which can trap humidity. Label stacks by color or season so you can build designs quickly without handling the flowers too much.
Can I use hairspray to seal pressed flowers?
It is not recommended for keepsakes. Hairspray can yellow, stay tacky, or react unpredictably over time. For better longevity, use an archival spray fixative made for artwork or a clear decoupage medium where appropriate. If the piece is framed behind glass and not handled, you may not need a spray at all.
Why are my flowers cracking or crumbling?
This usually happens when flowers are over-dried, handled roughly, or naturally brittle (some thin petals). Use tweezers, support petals with a small scrap of paper when moving them, and avoid bending. If they crumble during placement, incorporate the fragments intentionally as a “confetti” sprinkle in cards or bookmarks, then seal or laminate to keep everything contained.
How do I keep designs flat in frames?
Use a mat to create space between flowers and glass, and make sure the backing paper is smooth and dry. Attach flowers with minimal adhesive and let everything dry under light weight before framing. If you notice buckling, your glue was too wet or your paper absorbed moisture. Next time, use less glue and thicker backing paper like watercolor paper.
Final Thoughts
Pressed flower crafts are a rare DIY win where the materials are simple, the learning curve is gentle, and