Macrame Bottle Holder: Easy DIY Carrying Sling
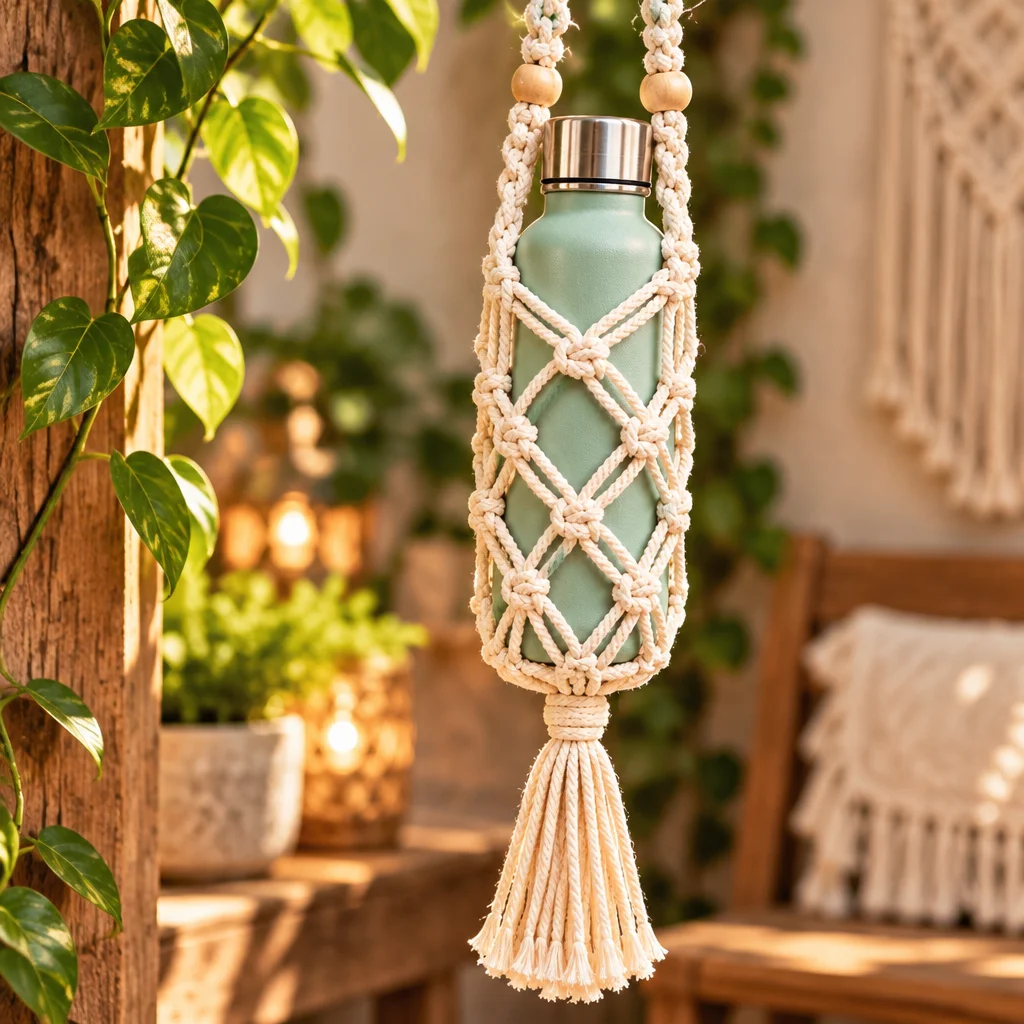
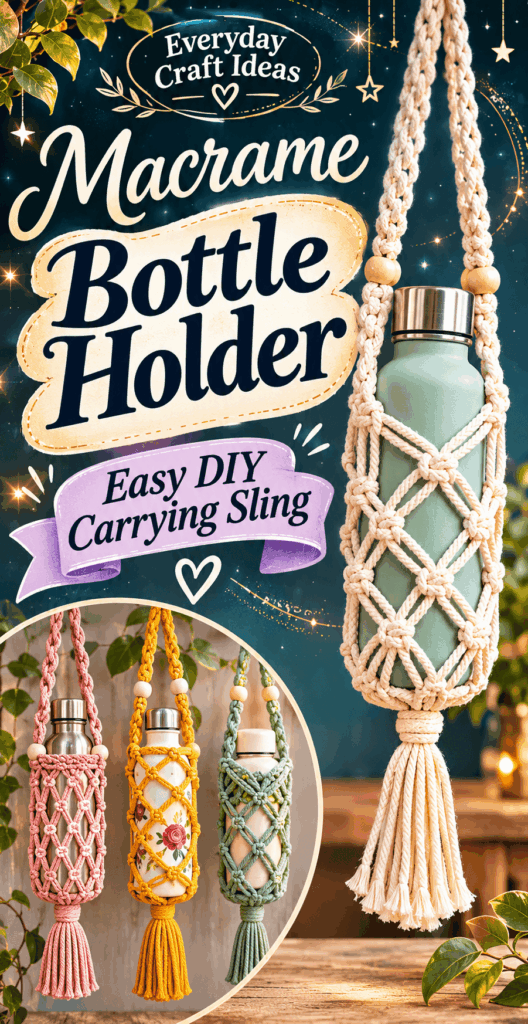
A Macrame Bottle Holder is one of those satisfying DIY projects that looks impressive, solves a real problem, and is genuinely beginner-friendly once you learn the rhythm of a few basic knots. The finished sling keeps your water bottle, iced coffee, or reusable bottle close at hand while you walk, hike, commute, or browse a market. It also makes a thoughtful handmade gift because you can customize the cord, colors, and strap length for the person who will use it.
If you are new to knotting, you will build confidence fast because this project repeats the same knot sequences in a simple pattern. For extra inspiration beyond bottle slings, you can also explore this easy macrame feather pattern for beginners and, if you love handmade decor, skim these creative DIY candle holder ideas for more craft projects that pair nicely with macrame accents.
What The Finished Craft Offers
This Macrame Bottle Holder tutorial walks you through creating a sturdy, good-looking carrying sling that hugs your bottle securely with a flexible net. It suits beginners who can tie a basic square knot, and it is also fun for more experienced crafters who want a quick, practical make with lots of room for customization. Expect a finished holder that sits comfortably at your side, with an opening that is easy to use and a bottom that supports the bottle weight instead of letting it slip.
Difficulty level is beginner to confident beginner. Set aside about 60 to 120 minutes depending on your pace and whether you add a long crossbody strap or decorative details. The size is adaptable: you will measure your specific bottle, then build the net around it. If you have struggled with “mystery sizing” in macrame, this project is refreshing because you can test fit as you go.
In addition to being practical, a bottle sling is a great first macrame “utility” item. You will practice tension control, knot consistency, and finishing techniques you can reuse for plant hangers, tote straps, and wall hangings.
Choose Cord and Measure Your Bottle
Your results depend heavily on choosing the right cord and taking a few quick measurements. A Macrame Bottle Holder carries weight, so cord strength matters more here than in purely decorative pieces. Before cutting anything, decide what bottle you are making this for: a slim single-wall bottle, a wide vacuum-insulated bottle, or a glass bottle with a shoulder.
Cord strength and knot security
For most bottle slings, 3 mm to 5 mm braided cotton cord is the easiest for beginners because it ties clean knots without excessive bulk. Braided cord is strong and resists fraying, which makes it ideal for a working item. Single-twist rope looks rustic but can fuzz with friction; if you use it, plan to trim and seal ends carefully. If the bottle will be heavy (full 1 liter bottle or a chunky insulated bottle), choose 4 mm to 5 mm cord and avoid very stretchy materials. Waxed cord is durable but can be slippery; tighten knots firmly and test extra carefully.
Bottle diameter, height and weight
Measure three things: (1) the bottle’s widest diameter (often the base), (2) the height from base to just below the cap, and (3) the “grip zone” where you want the net to hold. A wider base needs a wider bottom cradle, while a taller bottle needs more net rows. If your bottle has a tapered waist, you can make the net slightly snugger around that area for better stability.
Comfortable strap length and suitable hardware
Decide if you want a hand-carry loop, a shoulder strap, or a crossbody strap. As a quick guide: shoulder straps often land around 28 to 36 inches total length; crossbody is often 42 to 55 inches depending on height and where you want the bottle to sit. Optional hardware includes a wooden ring for the top, a metal ring for a sportier look, or a swivel clip for removability. Make sure any hardware is rated for the weight and has no sharp edges that can cut cord.
Knots Used in a Macrame Bottle Holder
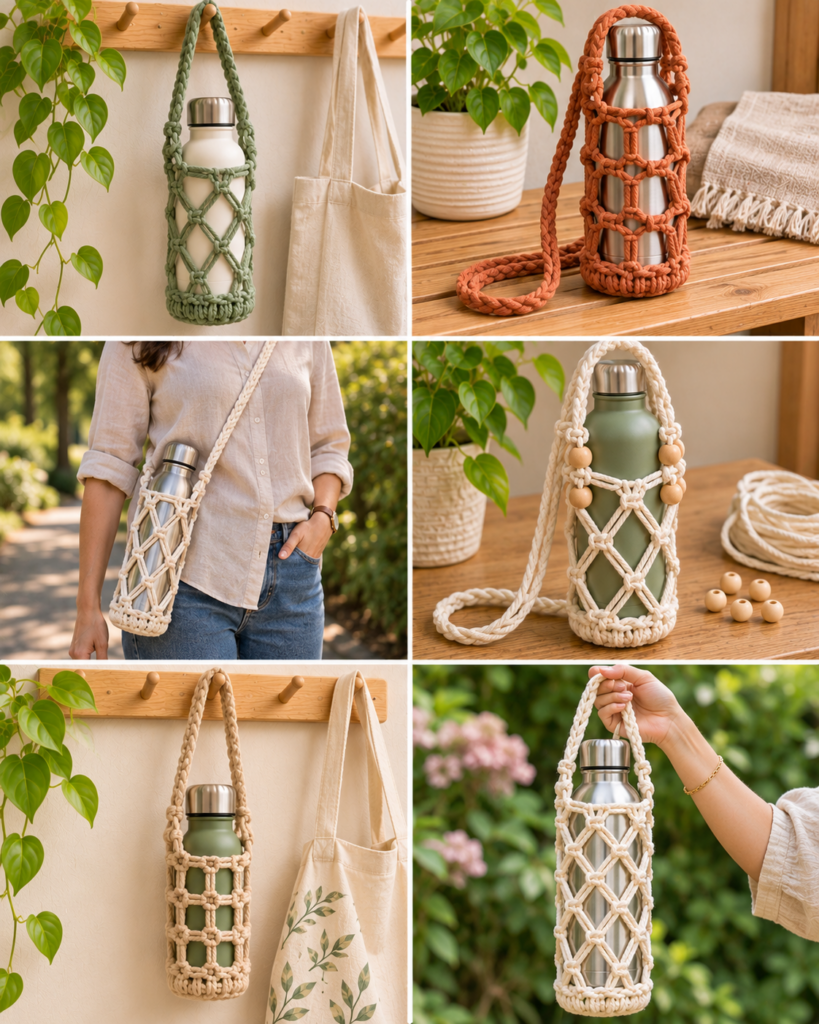
A strong Macrame Bottle Holder does not require a long knot glossary. You can make a reliable sling with three core techniques: square knots, alternating square knots, and a gathering knot to finish cleanly. The “secret” is consistent tension and thoughtful spacing so the net grips without squeezing too hard.
Square knot netting
The square knot is the backbone of most macrame net patterns. It is made with four cords: two center filler cords and two working cords that tie around them. In a bottle sling, square knots create stable “cells” that distribute weight across many strands. Keep each knot snug and aligned; loose square knots can shift and open, while overly tight knots can distort the net and make it hard to insert the bottle.
Alternating square knots
Alternating square knots (also called offset square knots) are formed by tying the next row using cords from adjacent groups. This creates a diamond mesh that naturally hugs curves. For a bottle, that curve-hugging quality is what prevents slipping and wobbling. When you alternate, pay attention to the row spacing. Even spacing creates a professional look and a more predictable fit.
Gathering knot for a neat finish
A gathering knot (wrapping knot) cinches multiple cords together, typically at the bottom closure or at strap joins. It creates a tidy “collar” that resists unraveling and looks finished. Use a separate short piece of cord for the wrap, pull firmly, and bury the tail ends inside the wrap so they do not loosen with use.
How to Build the Bottle Sling
This is the step-by-step build for a classic Macrame Bottle Holder with a netted body and a comfortable strap. Read through once before you start so the logic of the structure makes sense: top attachment, net body, bottom cradle, then strap.
Form the upper attachment loops
- Cut cords: For an average bottle (2.75 to 3.25 inch diameter), cut 8 cords at 8 feet each. If you want a longer crossbody strap or thicker knots, cut 9 to 10 feet. Longer is safer than running short.
- Attach to a ring (optional) or create a loop: If using a ring, fold each cord in half and lark’s head knot onto the ring. If not using a ring, bundle the folded cords and tie a gathering knot near the fold to create a top loop.
- Set your workspace: Hang the ring on a hook or clip it to a board so the cords hang freely. This helps you keep tension even.
Create a secure netted body
- Split into groups: Arrange cords into 4 groups of 4 strands (because each folded cord creates two strands). Each group will form square knots.
- First row of square knots: Tie 1 square knot in each group, about 2 to 3 inches below the top ring or top loop. This spacing becomes the “neck” opening.
- Alternate for mesh: Tie the next row as alternating square knots: take two middle strands from one group and two middle strands from the neighboring group. Repeat around. This creates diamonds that grip the bottle.
- Test fit early: Insert the empty bottle after 2 to 3 net rows. Adjust spacing by tightening or loosening slightly. It should slide in without forcing, but not feel loose.
- Continue to length: Keep adding alternating rows until the net reaches about 1 to 1.5 inches above the base of the bottle.
Close and reinforce the bottom
- Create a base closure: Gather all cords together under the bottle base area. Remove the bottle and tie an overhand knot or a tight gathering knot to close the bottom.
- Reinforce with a wrap: Use a 12 to 18 inch separate cord to make a gathering knot around the bundle just above the bottom knot. This reduces stretching over time.
- Trim thoughtfully: Leave at least 2 to 4 inches of fringe if you like tassels. If you want a clean end, trim shorter and consider lightly melting synthetic cord ends (only if the fiber is meant to be heat-sealed). Cotton should be taped or knotted instead of melted.
Add a comfortable carrying strap
- Choose your strap method: Easiest is a simple braided strap using 6 to 10 strands. Another sturdy option is a series of square knots down the length for a thick, grippy strap.
- Anchor strap cords: If you used a ring, you can tie strap cords to the ring. If you made a top loop, attach strap cords with lark’s head knots around the loop or incorporate some of the existing strands.
- Check length on your body: Before finishing, wear it with an empty bottle. Adjust until it sits where you want, then finish strap ends with a gathering knot or secure knots.
- Final load test: Insert a filled bottle and gently bounce the sling. The net should hold without slipping and the strap should feel stable on your shoulder.
Beginner tip: Keep a soft measuring tape nearby and measure from the top attachment to the bottom closure as you go. Symmetry matters for comfort.
Macrame Bottle Holder Variations
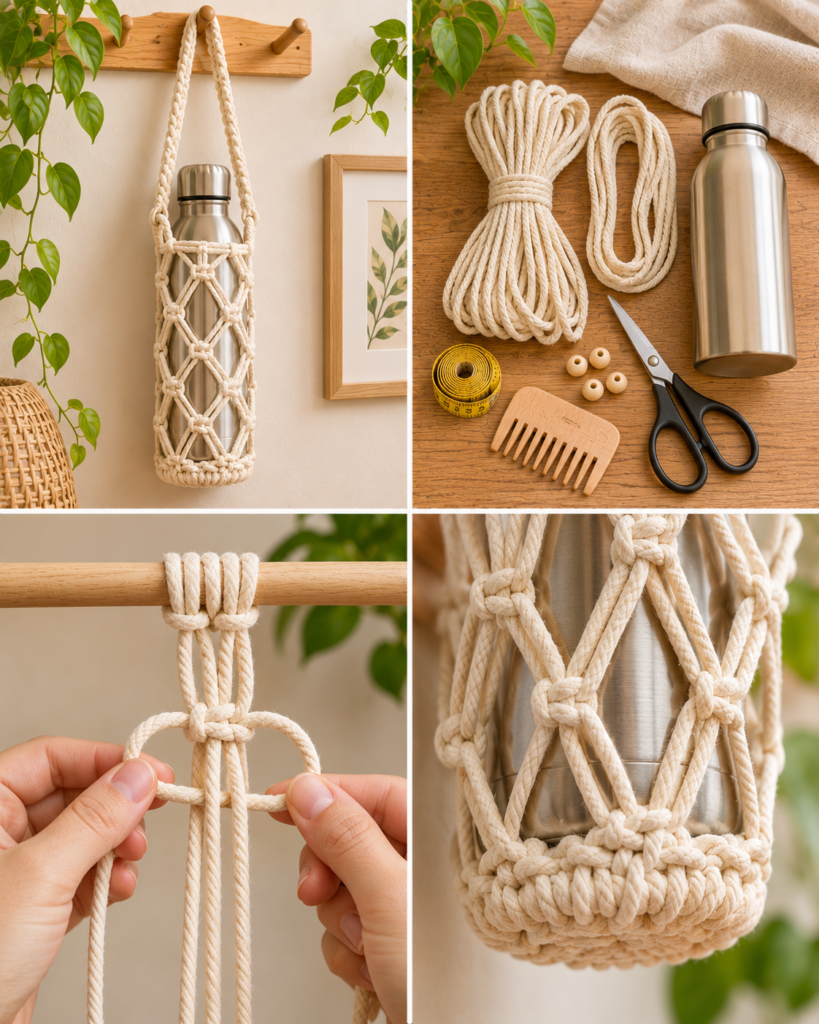
Once you understand the basic structure, you can make your Macrame Bottle Holder match your style and how you actually carry a bottle. Variations are not just decorative. They can improve comfort, adjustability, and security depending on your bottle type.
Minimal natural cotton sling
Use un-dyed 4 mm braided cotton and keep the design simple: a top ring, evenly spaced alternating square knots, and a short fringe. This version is quick, timeless, and great for a “capsule” handmade look. If you want a slightly more polished feel, trim fringe to an even line and comb it gently (for single-twist rope) to create a soft tassel.
Two-color festival bottle carrier
Add two colors by alternating cords when you attach them to the ring: for example, 4 cords in color A and 4 cords in color B. The diamond mesh will show a checker effect. For an even bolder look, make the strap in one solid color and the body in another. When using dyed cord, pre-test for color bleeding if the sling may get wet.
Short-handled bottle holder
Instead of a long strap, make two small handles that meet at the top like a mini tote. This is perfect for carrying a bottle from car to gym. Keep handles short and thick by using square knots or braiding many strands together. Short handles reduce swing, which is helpful if you dislike a bottle bumping your hip.
Adjustable crossbody bottle sling
For adjustability, incorporate a slider ring or a sturdy buckle, or tie an adjustable knot section on the strap. A practical low-hardware method is to tie a series of looping half knots on one end and a large stopper knot on the other, so you can shorten or lengthen by selecting different loops. Always test that the adjustable section does not slip under load.
Safety and Care
A Macrame Bottle Holder is meant to carry weight, so a little safety thinking goes a long way. Macrame cords are strong, but knots can loosen if they were not tightened evenly or if the cord fiber stretches with use. Maintenance is simple and keeps your sling reliable.
Test with a filled bottle before use
Start with the bottle filled with water, not hot liquid. Hold the sling low over a soft surface and gently bounce the bottle to simulate walking. Listen and look for shifting knots, widening mesh, or a bottom closure that creeps open. If anything moves, tighten knots row by row. If the bottle can slip through the bottom, redo the base closure tighter and add a second gathering knot.
Check cord wear and avoid hot containers
Inspect cords near hardware, at the bottom knot, and where the strap rubs your shoulder. Fraying, thinning, or stiffness can signal wear. Replace the sling if the cords are compromised. Avoid carrying hot containers, especially glass with hot liquid, because heat and condensation can weaken some fibers and create burn risk if the bottle swings. If you carry metal bottles in sun, be mindful of heat transfer against your body.
“I made my first Macrame Bottle Holder for a wide stainless bottle and was surprised how secure the diamond mesh felt once I tightened each row. Testing the fit with the empty bottle halfway through saved me from making it too small. Now I use it on dog walks and it has not loosened at all.”
Frequently Asked Questions About Macrame Bottle Holder: Easy DIY Carrying Sling
How much cord do I need for a macrame bottle holder?
For a typical 20 to 32 oz bottle, a reliable starting point is 8 cords cut to 8 feet each (total 64 feet). If you want a long crossbody strap made from the same cords, plan closer to 9 to 10 feet per cord. Thicker cord and denser knot patterns also require more length. When unsure, cut longer and trim at the end.
What knots hold a bottle securely?
Square knots and alternating square knots are the most dependable combination because they create a structured mesh that grips around curves. A tight bottom closure knot, backed up with a gathering knot, prevents drop-through. Avoid relying only on loose spiral knots for a working bottle sling; spirals look nice but can stretch open and shift under weight unless reinforced.
Can a macrame bottle holder be washed?
Yes, most cotton macrame slings can be hand washed in cool water with mild soap. Soak briefly, gently agitate, and rinse well. Do not wring aggressively, because twisting can distort knots. Press excess water out with a towel and air dry flat or hanging so the weight is evenly distributed. If your cord is dyed, wash separately the first time.
Why does my bottle holder stretch too much over time?
Stretch happens when knots were tied loosely, the cord is very soft, or the bottle is heavier than the cord thickness can comfortably support. Tighten all knots firmly during construction, especially the first few rows under the top attachment and the bottom closure. Consider switching to braided cotton or a slightly thicker cord, and add an extra reinforcement gathering knot near the base.
How do I stop the bottle from wobbling or swinging?
Wobble usually means the net is too loose around the bottle’s widest point or the strap attachment is not centered. Add one more row of alternating square knots closer together to snug the fit. Also check that your top ring or loop is aligned and that cord groups are evenly spaced. A shorter strap or a shoulder pad wrap can also reduce swing.
Can I make one for a wine bottle or a large insulated bottle?
Absolutely. For a wine bottle, make the upper opening slightly narrower so it catches under the shoulder, and keep the mesh snug around the middle. For large insulated bottles, use thicker cord (4 to 5 mm), add more cords (10 cords folded, for 20 strands), and reinforce the bottom with both a closure knot and a tight gathering knot. Always test with the full bottle weight.
Final Thoughts
A Macrame Bottle Holder is a smart first project because it teaches core knots, tension control, and clean finishing while giving you something you will actually use. Take your time with measurements, test fit early with the empty bottle, and do a gentle load test before heading out the door. Once you have made one, your next step could be experimenting with decorative add-ons like a two-color body, a shorter handle, or a more comfortable strap. If you want another quick confidence-builder, try a beginner macrame feather, or if you are crafting for home vibes, browse DIY candle holder ideas that pair beautifully with handmade fiber accents.
For more macrame inspiration and technique practice, revisit this macrame feather beginner tutorial and, when you are ready to style your space, explore these creative candle holder projects for an easy next make.