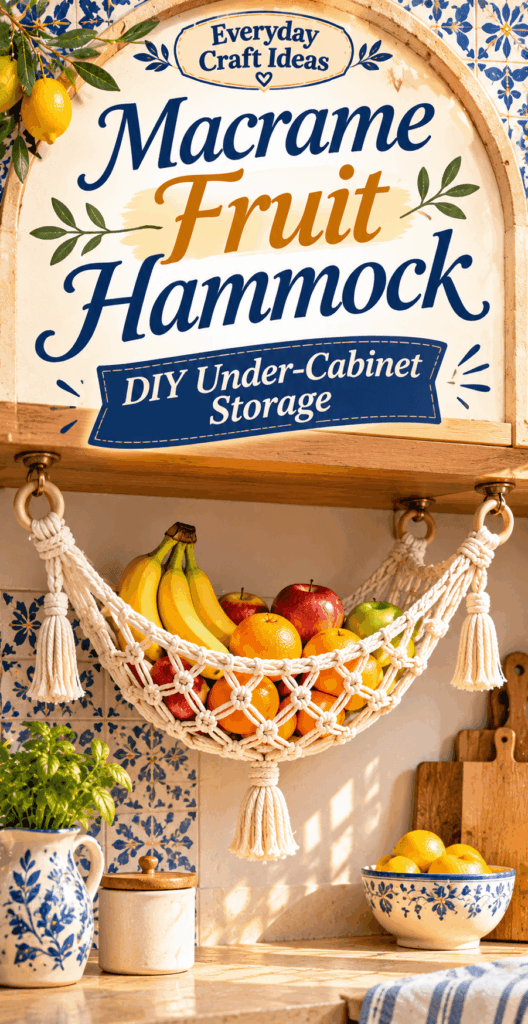
Macrame Fruit Hammock: DIY Under-Cabinet Storage
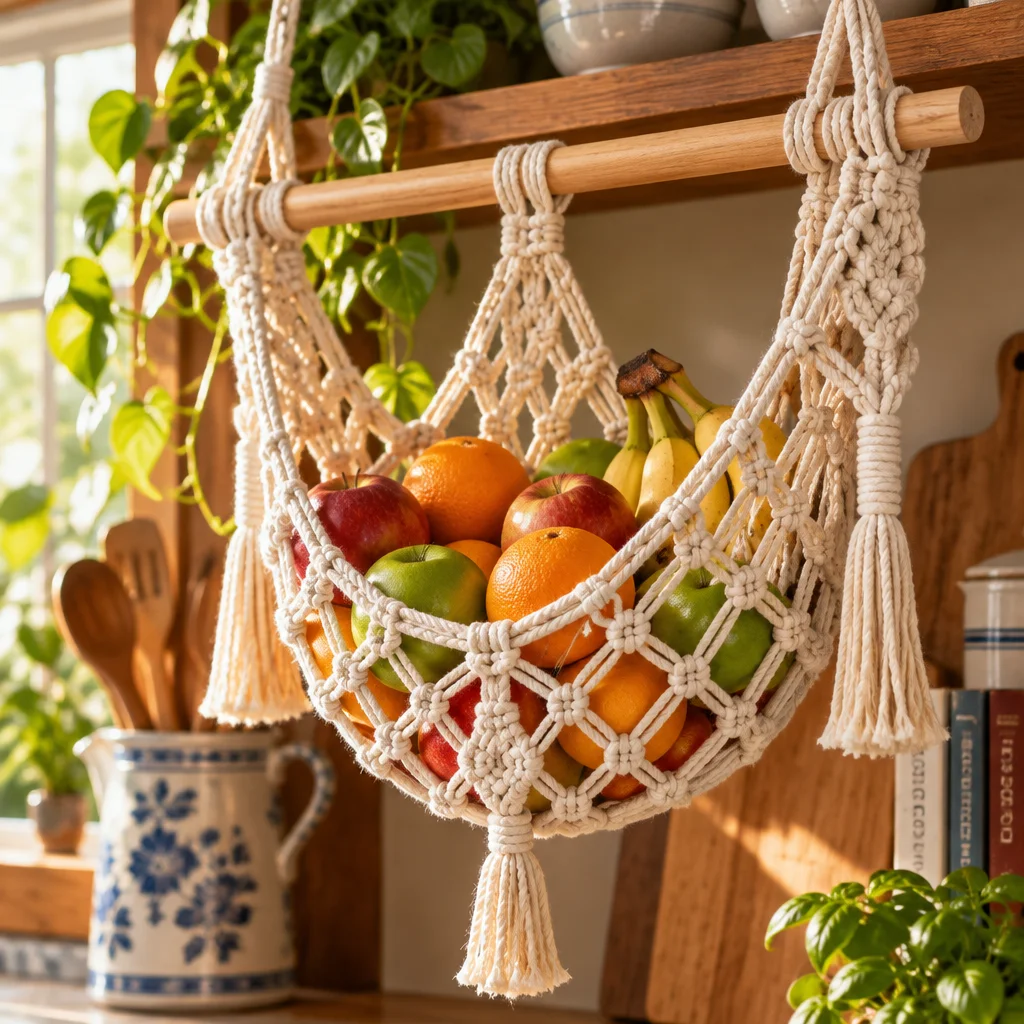
Making a Macrame Fruit Hammock is one of the most satisfying ways to add under-cabinet storage without cluttering your counters. Instead of a bulky fruit bowl that invites bruising and attracts fruit flies, a hammock keeps produce off the work surface, lets air circulate, and uses that “dead space” under upper cabinets. This project suits true beginners because the structure is repetitive and forgiving, yet it teaches foundational macrame skills you can reuse in plant hangers and wall hangings. If you have never tied a square knot before, you can practice on a small swatch first, or warm up with a simple pattern like this easy macrame feather for beginners to get comfortable with tension. By the end, you will have a washable, sturdy net sized for your kitchen and your favorite fruits.
A well-made Macrame Fruit Hammock acts like a soft net shelf that cradles fruit while keeping it visible and reachable. It is especially useful if you have limited counter space, small kids who knock bowls over, or you are trying to keep onions and citrus away from direct sunlight near a window. The main appeal is efficiency: you gain storage without drilling into tile backsplashes or giving up cabinet space.
This is a beginner-friendly DIY because it relies on a few core knots and basic measuring. You do not need a macrame board or fancy tools. You do need patience for even knot spacing and the willingness to load-test your work before filling it with produce. If you enjoy quick wins, you can also make a matching decor accent like a simple macrame feather from leftover cord, but the hammock itself is designed to be functional first.
Expect to spend about 60 to 120 minutes on your first one, depending on size and how often you stop to measure. The finished hammock typically spans 14 to 24 inches wide and holds 6 to 12 pieces of fruit comfortably, depending on weight and ripeness.
Plan a Fruit Hammock That Fits Your Kitchen
Measure cabinet spacing and intended capacity
Start by measuring the underside of the cabinet where you want the hammock. You need three measurements: the clear width between cabinet edges (or between obstacles like trim), the front-to-back depth available, and the vertical clearance to your countertop. A Macrame Fruit Hammock works best when its lowest point sits at least 6 to 8 inches above the counter so you can wipe underneath.
Decide what you want to store. Bananas take more volume and bruise easily, while apples and oranges are denser and heavier. Plan for a gentle “sag” rather than a deep pouch. A shallow net reduces pressure points and makes fruit easier to grab.
Choose washable cord and secure mounting hardware
For kitchen use, pick cord that can be cleaned. Twisted cotton cord (4 mm to 6 mm) is a common choice because it knots neatly and feels soft against fruit. Cotton can be spot-cleaned and hand-washed. If you want something even more wipeable, braided polyester can work, but it is slicker and needs tighter knots.
Mounting matters as much as knotting. Use two or four closed screw eyes or cup hooks rated for more weight than you intend to store. For most hammocks, aim for hardware rated at 20 to 30 pounds each. If your cabinet is particleboard, pre-drill carefully and use appropriate anchors designed for that material. When in doubt, mount into solid wood rails or add a thin mounting strip screwed into studs inside the cabinet base.
Consider airflow, weight and fruit bruising
Airflow is a key advantage of a Macrame Fruit Hammock, but it only works if you avoid crowding. Choose a mesh size that supports fruit without squeezing it. Larger knots and wider spacing allow better ventilation but can create pressure lines on softer fruit. Keep the hammock away from direct heat sources like toaster ovens, stovetops, and the hot air vent of a microwave.
Also consider how you will load it. If you store heavier items like potatoes or onions, increase cord thickness and reinforce the end loops. For delicate peaches, reduce weight per section and keep the net shallower so fruit does not stack.
Macrame Knots for a Strong Fruit Net
Square-knot mesh
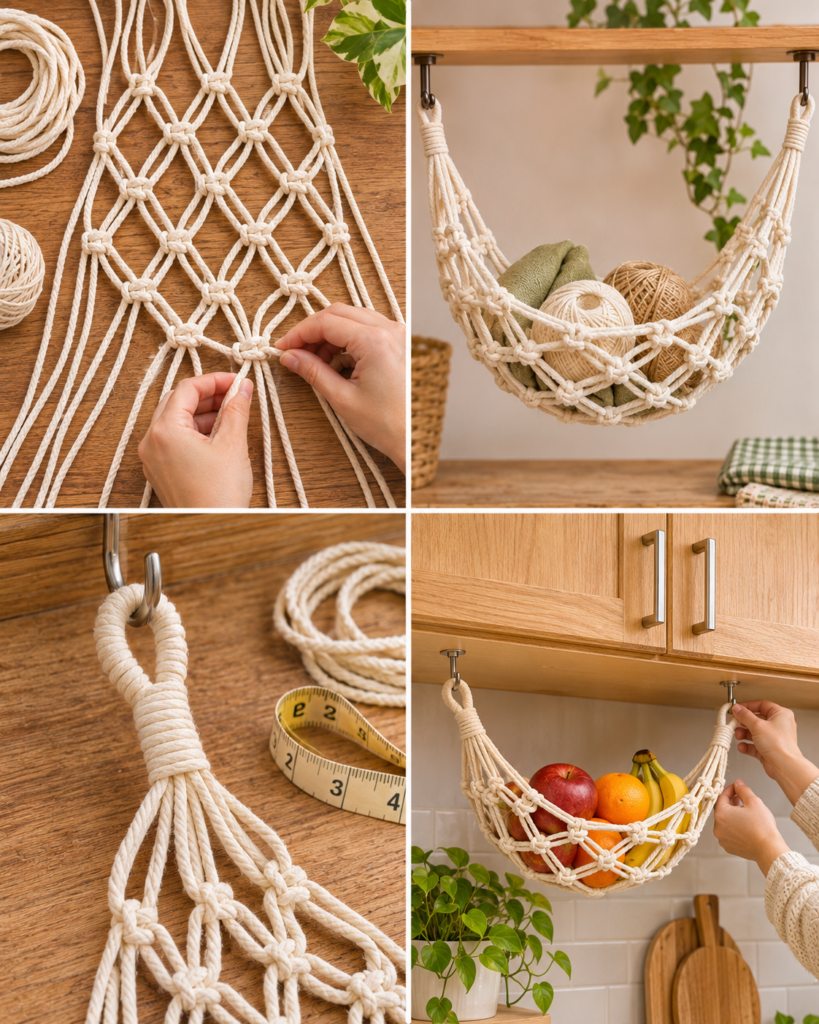
The workhorse knot for a functional Macrame Fruit Hammock is the square knot. It is stable, lies relatively flat, and creates a tidy grid when repeated. A square knot uses four cords: two center filler cords and two outer working cords. The key to strength is consistency. Tight, even square knots distribute weight across the net rather than concentrating it in one area.
If square knots feel confusing, practice 10 to 15 knots on scrap cord first. Focus on pulling the working cords evenly so the knot cinches square, not lopsided. A lopsided knot can twist your net and make it hang unevenly.
Alternating knot spacing
Mesh becomes a net when you alternate knot groups. After you tie one row of square knots, the next row shifts over by two cords, tying between the previous knots. This creates diamond openings that flex under load. For fruit storage, spacing is a balance: about 2 to 3 inches between rows is a practical starting point for apples and citrus. If you plan to store smaller items like limes or garlic, tighten the spacing.
Marking a guide helps. You can tape a ruler to your work surface or clip a measuring tape to your cord bundle. Beginners often drift wider as they relax their tension, so measure every few rows.
Reinforced hanging loops
The hanging loops are the stress points of any Macrame Fruit Hammock. Reinforce them using wrapping knots (also called gathering knots) or by doubling cords through a ring. If you are hanging directly on screw eyes, you can create a loop by folding a bundle back on itself and securing it with a tight gathering knot. Leave a long tail for wrapping so the cinch does not slip.
Before you commit, pull hard on each loop with your body weight distributed gently (do not jerk). If anything shifts, re-tie tighter now rather than after you have fruit inside.
How to Make an Under-Cabinet Fruit Hammock
Set the width and cut cord lengths
This method makes a rectangular hammock with reinforced ends and a square-knot mesh center. Adjust the dimensions to your cabinet space.
- Choose finished size. A common beginner size is 18 inches wide by 10 to 12 inches deep. The deeper it is, the more it sags, which can bruise fruit if overloaded.
- Calculate cord count. For an 18-inch width, 12 to 16 cords works well (must be a multiple of 4 for clean square-knot groups). More cords create smaller openings and better support.
- Cut cord lengths. Cut each cord 6 to 8 times the hammock depth plus extra for loops and knots. For a 12-inch depth, start with 90 to 110 inches per cord. It is better to have extra and trim later.
- Prevent fraying. Wrap tape around cut ends or melt ends only if using synthetic cord (never melt cotton). This keeps your work tidy while knotting.
Build symmetrical side supports
- Create two end bundles. Divide cords evenly into left and right sides. Each side will become an end support that ties into your mounting loops.
- Form the first hanging loop. On the left bundle, fold the top portion back to form a loop sized for your screw eye or ring. Secure with a tight gathering knot, wrapping 10 to 15 turns and threading the tail through to lock it.
- Repeat for the right loop. Measure the loop length against the first one so both ends hang level. Uneven loops are the most common reason a hammock tilts.
- Add a stabilizing bar if desired. For extra stability, you can tie the top cords of each side around a small wooden dowel or ring, but it is optional if your hardware is placed accurately.
Form the hammock net and reinforced ends
- Start the first row. With the hammock laid out flat, tie square knots across using groups of 4 cords. Keep the row close to the end supports so weight transfers smoothly.
- Build the mesh. Tie the next row offset by 2 cords (alternating pattern). Continue until the net reaches your desired depth. Measure the depth every 2 rows to stay consistent.
- Reinforce the “lip.” At the front edge (the side you will reach into most), tie one extra row with slightly tighter knots. This creates a firmer edge that helps fruit stay put when you remove one piece.
- Finish the far end. Bring cords together into the right-side support area and tie a final row close to the end, then secure cords with a gathering knot or a series of tight square knots to prevent spreading.
- Trim or knot tails. You can leave fringe, but in a kitchen it can collect dust. Many people prefer to trim ends to 1 to 2 inches and tie small overhand knots to prevent unraveling.
Mount and load gradually to check strength
- Mark hardware points. Hold the finished hammock under the cabinet and mark where each loop naturally sits. Ensure marks are aligned front-to-back and left-to-right so the hammock hangs square.
- Pre-drill. Drill small pilot holes to reduce splitting, especially in hardwood cabinet rails.
- Install screw eyes or hooks. Tighten fully so they do not wiggle. If the hardware shifts, it will enlarge the hole over time.
- Hang the hammock. Attach loops to hardware and check that it hangs level. Adjust by re-tying a loop if needed.
- Load-test slowly. Add one or two pieces of fruit first, then wait a minute and check knots and hardware. Gradually increase to your normal load. This step prevents sudden failure and protects both cabinets and toes.
Style and Placement Options
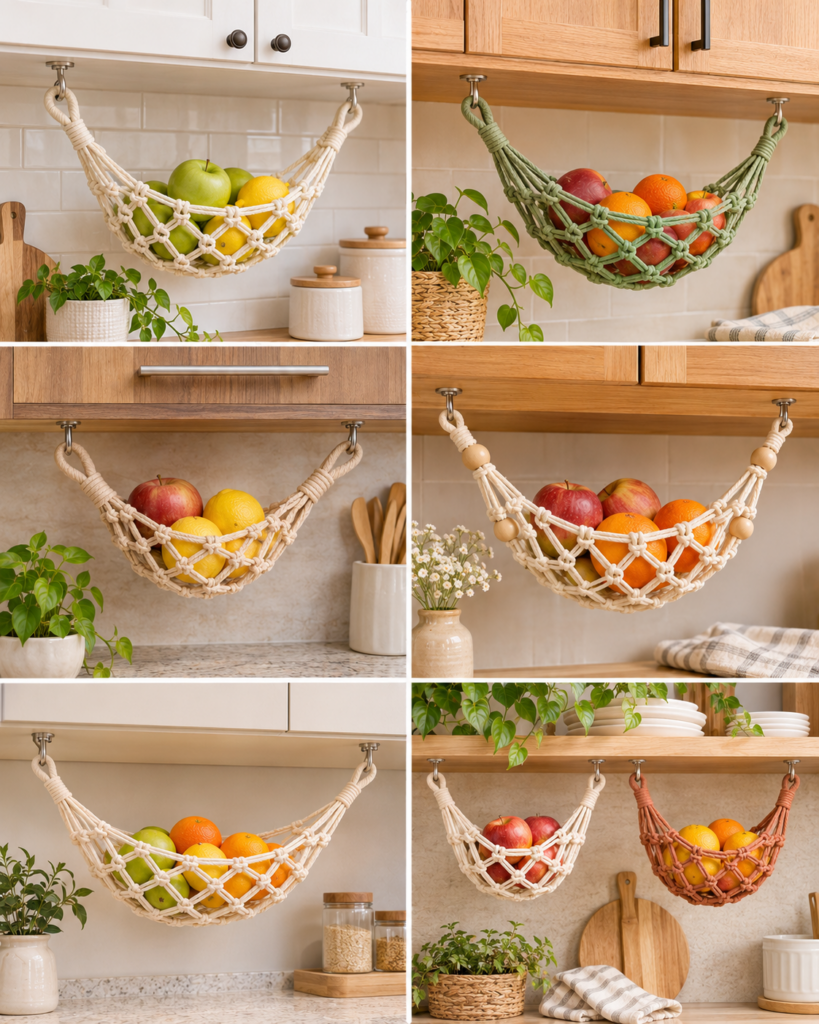
Natural rope farmhouse hammock
If you love a warm, neutral kitchen, a natural cotton or jute-look cord makes a classic Macrame Fruit Hammock. Cotton is softer and less scratchy than true jute, which is why it is usually the better choice around delicate produce. Pair it with brass or matte black screw eyes for a simple farmhouse vibe. Keep the knot pattern straightforward: medium-size diamond mesh with a clean, trimmed edge looks intentional and easy to wipe around.
Compact hammock for small kitchens
For apartments or galley kitchens, go smaller rather than deeper. A compact hammock might be 12 to 14 inches wide and only 8 to 9 inches deep, perfect for 4 to 6 pieces of fruit. Use thinner cord (3 mm to 4 mm) and tighter spacing so fruit does not roll. Consider hanging it near the corner of the cabinet run, where it will not interfere with coffee makers or cutting boards.
Colorful macrame hammock with wooden rings
If you want a pop of color, use dyed cotton cord and add wooden rings at each end. Rings create a clean mounting point and reduce wear on the cord where it meets metal hardware. When using color, choose a cord labeled colorfast and pre-wash a short piece to see if dye transfers. A two-tone pattern looks great: neutral cords for the structure and a colored row at the front lip.
For a fun matching accessory using the same cord, try a small decorative project like an easy macrame feather pattern for beginners as a coordinating key hook or cabinet pull charm.
Practical Food Storage Considerations
Avoid overcrowding and inspect ripening fruit
A Macrame Fruit Hammock works best when fruit can “breathe.” Overcrowding increases bruising because fruit presses against knots and against each other. A good rule is one layer whenever possible. If you must stack, place firmer fruit (apples, oranges) on the bottom and softer fruit on top, and check daily.
Make inspection part of your routine. One overripe peach or banana can speed ripening for the whole group due to ethylene gas. Rotate fruit so the pieces that are ripest are easiest to grab first. If you notice fruit flies, remove all fruit, wash the hammock if possible, and wipe the cabinet underside and nearby surfaces.
Keep the hammock away from heat and moisture
Heat shortens shelf life and can weaken some cords over time. Avoid placing your hammock directly above a toaster, air fryer, kettle, or the steam path of a dishwasher. Moisture is another concern. If the hammock is near a sink, splashes can dampen cotton cord, encouraging odors and mildew. If you live in a humid climate, choose tighter twisted cotton that dries faster, and plan to wash it regularly.
Reader note (Emma, DIY beginner): “I made my first Macrame Fruit Hammock for a tiny apartment kitchen. Measuring the cabinet and keeping my knots even was the hardest part, but load-testing slowly gave me confidence. It freed up my counter, and now I actually remember to eat the fruit because I can see it.”
Frequently Asked Questions About Macrame Fruit Hammock: DIY Under-Cabinet Storage
How much weight can a macrame fruit hammock hold?
It depends on cord thickness, knot quality, and mounting hardware. A hammock made with 4 mm to 6 mm cotton cord, tight square knots, and hardware rated 20 to 30 pounds per hook commonly handles 8 to 15 pounds safely when the load is spread out. Do not guess. Load-test gradually, watch for knot slipping, and never exceed what your cabinet material and hooks can support.
Where should I hang a fruit hammock?
Choose a spot with good airflow and easy access, typically under an upper cabinet that is not directly above heat-producing appliances. Aim for a location where the hammock will not bump your head while you prep food. Leave enough clearance to wipe the counter and to remove fruit without scraping knuckles on cabinet trim. If you have pets that jump on counters, hang it higher and keep it shallow.
What cord is best for a washable fruit hammock?
Twisted cotton cord is the most beginner-friendly and comfortable for fruit, and it can be hand-washed with mild soap and air-dried. Look for 100 percent cotton if you want absorbency and easy knotting, or a cotton blend for slightly faster drying. If you need frequent wipe-downs, braided polyester is more water-resistant, but you must tie knots extra snug because the fibers are slippery.
Do I need wooden rings, or can I hang loops directly on screw eyes?
You can absolutely hang loops directly on closed screw eyes. Rings are optional, but they reduce friction and make removal easier for washing. If you skip rings, make your cord loops slightly larger so they do not bind on the hardware. Use closed hardware rather than open cup hooks if you have kids or if you might accidentally lift the hammock off while grabbing fruit.
My hammock hangs unevenly. How do I fix it without starting over?
First, confirm your hardware is level by measuring from the cabinet front edge to each hook. If the hooks are even, the issue is usually loop length or uneven knot tension. You can re-tie one end loop slightly shorter or longer, or add a small linking ring to the shorter side to match. If the net twists, check for rows where square knots are not fully tightened.
What if my mesh openings are too big and fruit slips through?
If fruit slips, you have three easy fixes: tighten the spacing between rows, add more cords across the width next time, or weave a support strand through the bottom row like a “safety line.” For a quick improvement on an existing Macrame Fruit Hammock, you can tie an extra offset row midway through the net to reduce the diamond size where fruit rests.
Can I store onions and potatoes in the same hammock as fruit?
It is better to separate them. Onions and potatoes prefer cooler, darker storage and can transfer odors. Some fruits also release ethylene gas, which can affect nearby produce. If you want a hammock for pantry items, make a second one specifically for onions or garlic and hang it in a darker, drier area. Use a cord that is easy to wash, since onion skins can leave residue.
How do I wash and dry the hammock safely?
Remove all fruit, shake out crumbs, and spot-clean first. Hand-wash in lukewarm water with a small amount of mild detergent, then rinse thoroughly. Avoid harsh bleach that can weaken fibers. Press out water with a towel rather than twisting, which can distort knots. Air-dry fully before rehanging to prevent mildew. If you used wooden rings, dry them well to avoid warping.
What is a good next macrame project after this one?
Once you can tie even square knots and alternating rows, you can confidently try small decorative pieces or practical hangers. A fun, low-commitment next step is a beginner macrame feather pattern using your leftover cord. It helps you practice clean finishes and trimming, which will also improve the look of your next hammock.
Final Thoughts
A Macrame Fruit Hammock is a practical first macrame project because it rewards careful measuring and consistent knots with something you will use every day. Keep your first version simple: sturdy cotton cord, square-knot mesh, reinforced loops, and hardware rated for more weight than you plan to store. Take the extra few minutes to load-test gradually and adjust for level before filling it up. Your sensible next step is to save your measurements and cord counts in a note on your phone, then make a second “refined” hammock after a week of real use. Small tweaks like shallower sag, tighter mesh, or rings at the ends will make the next one even better.