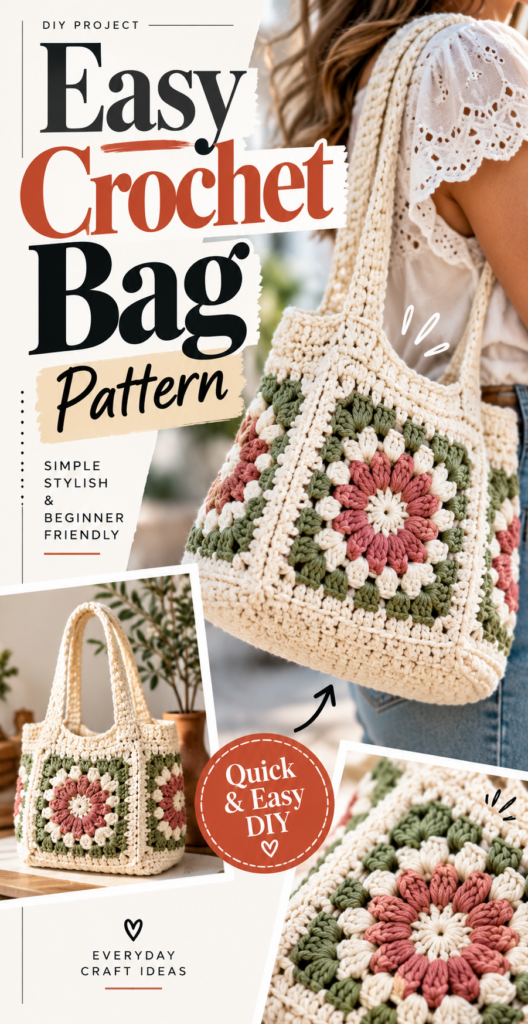
Easy Crochet Bag Pattern
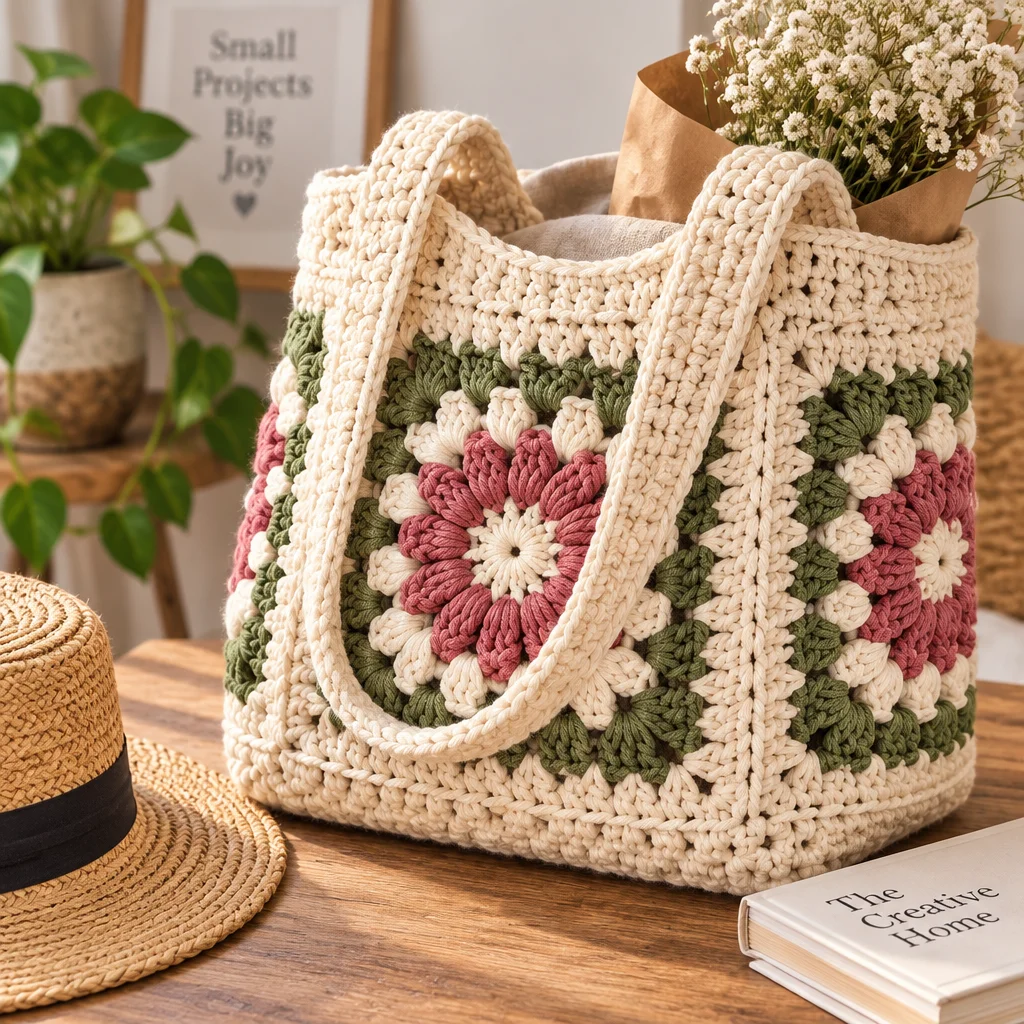
If you are searching for a practical crochet bag pattern that is truly beginner-friendly, you are in the right place. A simple crochet tote is one of the fastest ways to build skill and confidence because the shape is forgiving, the repeats are easy to memorize, and you can customize the size without complicated math. In this guide, I will walk you through an easy bag that works as an everyday market tote, beach bag, or library carryall. You will learn which yarn holds up best, how to choose the right hook, and exactly how to crochet the base, sides, and handles. I will also share finishing tips that make a handmade bag look polished and help it stay sturdy over time.
Materials and Yarn
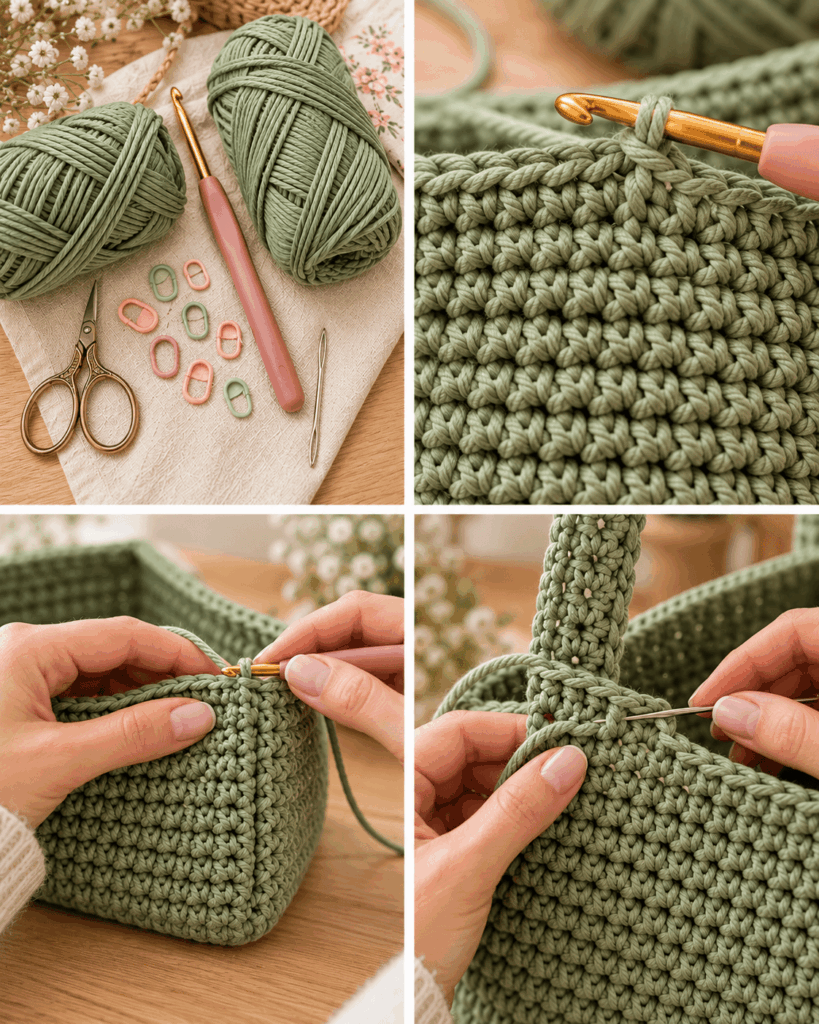
Before starting any crochet bag pattern, gather materials that match how you plan to use the bag. A bag meant for groceries needs different yarn and finishing than a light summer tote. Here is what you will need for the pattern in this article, with notes on why each item matters.
- Yarn (200 to 300 g / 400 to 650 yd worsted or aran): Choose a durable fiber so the bag keeps its shape. Cotton is the classic choice for a reason.
- Crochet hook: Typically 4.5 mm to 6.0 mm, depending on yarn and desired firmness. A slightly smaller hook creates a denser fabric that stretches less.
- Stitch markers: Helpful for marking the start of rounds and handle placement so your bag stays symmetrical.
- Tapestry needle: For weaving in ends securely and stitching a lining if you add one.
- Scissors: Sharp scissors make clean cuts, especially on splitty cotton yarns.
- Measuring tape: Bags are all about sizing. Measure base width and strap length as you go.
- Optional: magnetic snap or button: Adds closure, especially if you plan to use the bag daily.
Preparation tip: crochet a small swatch in your chosen stitch and tug it gently. If it stretches dramatically, go down a hook size or switch to a firmer stitch for better structure.
Best Yarn for a Crochet Bag
The best yarn for a crochet bag pattern depends on the bag’s purpose and how much structure you want. For most totes, 100% cotton (worsted/aran weight) is the easiest win: it is washable, grippy (so stitches do not slide around), and holds up to abrasion. Mercerized cotton gives a smoother, slightly shinier look and tends to pill less, making it great for a “nice” everyday bag.
If you want a lighter bag with a bit of drape, a cotton-linen blend works well, but keep in mind linen softens with use and can relax over time. For maximum sturdiness, some crafters use cotton macramé cord or t-shirt yarn, which makes a thick fabric quickly, though it can be heavy on the shoulder.
Avoid very stretchy yarns for most bags. Acrylic can work for decorative totes, but it may pill and can stretch out, especially in open stitches. Wool is generally not ideal for bags you will wash often, and it can felt unexpectedly if laundered incorrectly.
Color tip: medium shades show stitch definition and are easiest for beginners. Very dark yarn can hide your stitch placement and slow you down.
What Crochet Hook Size Should You Use?
Hook size matters more for a bag than for many wearables because stiffness and stretch control the final shape. For this crochet bag pattern, start with the hook size recommended on your yarn label, then adjust based on the fabric you create. If your bag fabric feels loose and airy, it will likely stretch when filled. Going down 0.5 mm to 1.0 mm is a common fix.
As a baseline:
- Worsted cotton: often 5.0 mm is recommended, but many bag makers prefer 4.0 mm to 4.5 mm for a denser fabric.
- Aran cotton: 5.0 mm to 6.0 mm depending on your tension.
- Cotton cord: follow the cord label, often 6.0 mm to 8.0 mm, and aim for firm stitches without straining your hands.
Fit check: fold your swatch and look for “daylight” between stitches. A little is fine, but if you can easily poke a finger through, items may snag and the bag may lose shape. Also consider comfort. If you must fight the hook through stitches, try a slightly larger hook or a smoother yarn, and take breaks to protect your hands and wrists.
Easy Crochet Bag Pattern
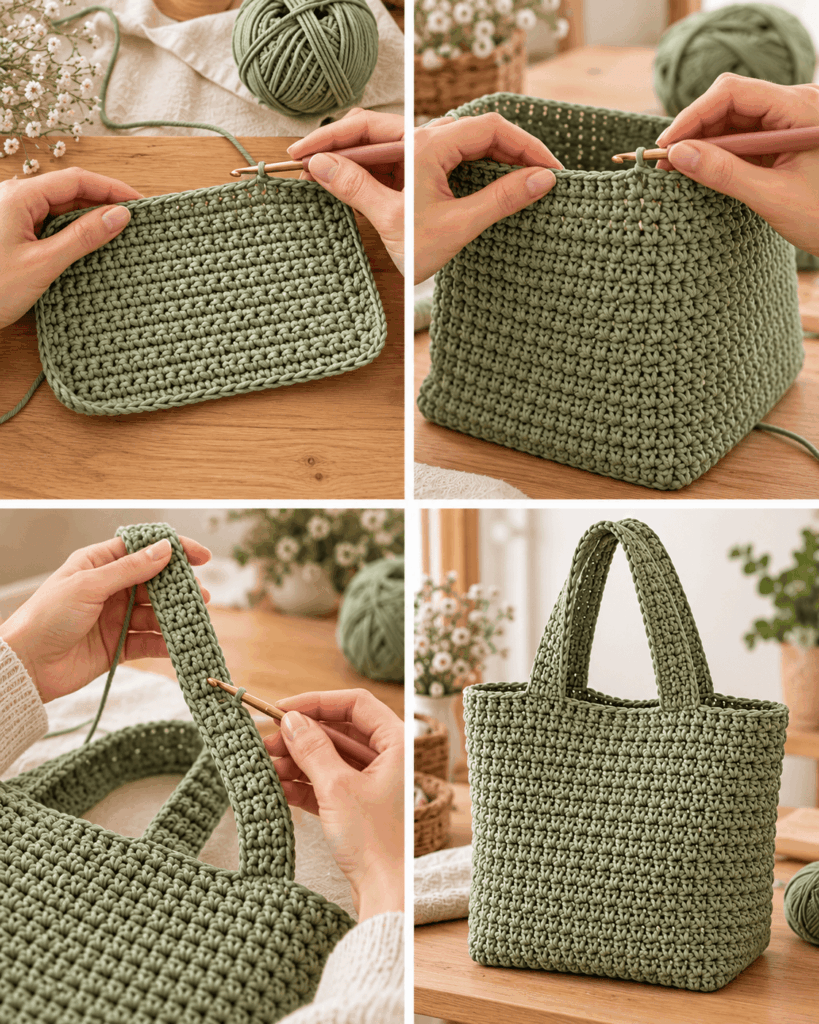
This is a simple, sturdy tote-style crochet bag pattern worked in the round from the base up. It uses mostly single crochet for strength. The finished bag is approximately 12 in wide, 11 in tall (not including handles), with 22 to 24 in straps. Adjust sizing by adding rounds to the base and/or more rounds for height.
Abbreviations: ch (chain), sc (single crochet), sl st (slip stitch), st(s) (stitch(es)).
Notes: Work in continuous rounds unless stated. Use a stitch marker to mark the first stitch of each round.
Crochet the Base
- Chain 31 (or any odd number for a similar proportion). This chain becomes the length of your base. Keep chains relaxed but even so the base does not curl.
- Round 1: Sc in 2nd ch from hook and in each ch across (29 sc). In the last chain, work 3 sc to turn the corner. Now work back along the underside of the chain: sc in each ch across (29 sc). In the last chain, work 2 sc (this plus the first sc you made forms the corner). You should have 63 sc total. The oval shape prevents sharp corners that wear faster.
- Round 2: Sc in each st until you reach the 3-sc corner. Work 2 sc in each of the next 3 sts (6 sc around the curve). Sc along the long side. At the other end, work 2 sc in each of the next 3 sts. This increases smoothly, keeping the base flat.
- Round 3: Sc along the long side. At each curved end, repeat an even increase pattern like: (sc, 2 sc in next st) around the curve. If the base ruffles, reduce increases slightly. If it cups, add an extra increase near the center of the curve.
- Round 4: Repeat Round 3, spacing increases so the base stays flat. Stop once the base is about 4.5 to 5.5 in wide, depending on desired bag capacity.
Build the Sides
- Side setup round: Sc in the back loop only of each stitch for one full round. This creates a crisp fold line so the sides stand up instead of slumping.
- Work even rounds: Continue with sc in both loops, 1 sc in each st, for 20 to 26 rounds (or until the bag is about 10 to 12 in tall). Count your rounds every few inches so both sides stay even.
- Optional texture band: For visual interest, swap 2 rounds of sc for 2 rounds of half double crochet, then return to sc. Keep in mind taller stitches can stretch more, so use them sparingly if you want maximum structure.
Make the Handles
- Mark handle zones: Lay the bag flat. Mark 2 sections for handles on the front and back, each about 6 to 7 in wide, leaving 4 to 5 in between handles at the sides. Adjust for your shoulder width.
- Create handle chains: Sc to the first marker, then chain 45 to 60 for strap length. Skip the marked stitches (the width of the handle gap), then sc into the stitch after the gap. Repeat for the second handle on the other side.
- Reinforce: On the next round, sc across the top edge and work sc around the handle chain (placing 1 sc in each chain). This thickens the strap and makes it more comfortable.
- Extra strength option: Work one more round of sc around the entire top and handle area, paying attention not to twist the straps.
Join and Finish
- Neaten the top edge: Finish with a final round of sc, then sl st to the first stitch to join if you want a cleaner seam at the end.
- Fasten off: Cut yarn leaving a 6 to 8 in tail, pull through, and tighten.
- Weave in ends securely: Use a tapestry needle to weave tails through several stitches in different directions. Bags take stress, so do not rely on a short weave-in.
- Block lightly if needed: For cotton, steam blocking can even out stitches. Avoid over-stretching. Let dry fully before use.
What Crochet Stitch Is Best for Bags?
The best stitch for a bag balances durability, minimal stretch, and abrasion resistance. For many projects, single crochet is the top choice. It creates a dense fabric that holds its shape, hides wear well, and keeps small items from poking out. That is why this crochet bag pattern leans heavily on single crochet.
Other excellent bag stitches include:
- Waistcoat stitch: looks knit-like and very sturdy, but can be tight to work. Use a slightly larger hook if your hands strain.
- Linked double crochet: faster than single crochet with fewer holes than regular double crochet.
- Moss stitch (linen stitch): flexible and attractive, but can stretch if worked too loosely. Great for casual totes when paired with a firm yarn.
Stitches to be cautious with for heavy-use bags include tall, open lace patterns. They are beautiful, but they stretch and can snag on keys, corners of boxes, or produce stems. If you love an open look, consider adding a fabric lining or using the stitch only for a decorative upper band.
Rule of thumb: if you can easily see through your fabric, plan for lining or reserve the bag for lightweight items.
How Much Yarn Do You Need for a Crochet Bag?
Yarn needs vary with stitch choice, hook size, and bag dimensions, but you can estimate fairly well. For this tote-style crochet bag pattern (about 12 in by 11 in plus straps) in worsted cotton, plan on 400 to 650 yards. If you crochet tightly with a smaller hook, you will use more yarn because the fabric becomes denser. If you make the bag taller or add wider straps, your yardage increases quickly.
Here are practical guidelines:
- Small pouch (8 in wide): 150 to 250 yards of worsted cotton.
- Medium tote (this pattern): 400 to 650 yards.
- Large market bag (15 in plus): 650 to 900 yards, especially if you add a thick border or lining.
Colorwork and stripes also affect yardage. If you add two contrasting colors, buy a little extra so you do not run short near the end of a handle. Dye lots can vary, especially with cotton, so it is safer to purchase all yarn at once.
Planning tip: weigh your finished base after a few rounds. If it is already using yarn quickly, consider shortening the height or switching to a slightly taller, still-sturdy stitch like linked double crochet for the sides.
How Do You Make a Crochet Bag Sturdy?
Structure is the difference between a bag that stays cute and one that turns into a saggy net after two errands. To make a crochet bag pattern sturdy, focus on fiber choice, stitch density, and reinforcement points.
- Use a firm fabric: single crochet, waistcoat stitch, or tightly worked moss stitch reduce stretching. A smaller hook size creates a denser textile that supports weight.
- Build a strong base: an oval base with well-spaced increases helps the bag stand up and prevents distorted corners.
- Reinforce the top edge: add one or two extra rounds of single crochet at the opening. This acts like a frame and reduces flare.
- Stabilize handles: straps are the highest-stress area. Reinforce by crocheting around handle chains and considering an internal strap support (see handle section below).
- Consider a lining or canvas base insert: for heavy loads, a simple fabric lining or removable insert spreads weight and limits stretch.
Safety note: very heavy loads can strain your hands while crocheting and can also cause straps to fail unexpectedly. If you plan to carry books or groceries often, choose stronger yarn, crochet densely, and reinforce handles rather than relying on a decorative stitch.
Do Crochet Bags Need a Lining?
A lining is optional, but it can dramatically improve usability. Many people skip lining for casual market totes, especially when using dense stitches in cotton. However, a lining is helpful when your crochet bag pattern has any openness in the fabric or you want the bag to keep a crisp shape.
Reasons to add a lining:
- Prevents stretching: fabric supports the crochet, especially at the sides and base.
- Stops snags: pens, keys, and corners of packaging will not poke through stitches.
- Improves security: easier to add a zipper, snap, or pocket to fabric than to crochet.
Simple lining method: Cut fabric the width of the bag plus seam allowance, sew a rectangle into a tube, box the bottom corners if desired, then hand-stitch the lining to the inside of the bag opening with small whip stitches. Use a needle that is sharp enough for fabric but be careful not to split yarn strands repeatedly, which can fuzz the top edge.
Choose pre-washed cotton fabric so it will not shrink later and distort your bag. If you hate sewing, even a removable canvas pouch can function as a liner.
How Do You Stop Crochet Bag Handles From Stretching?
Handle stretch is the most common complaint with any crochet bag pattern, especially when you carry heavier items. Crochet naturally has “give,” so the goal is to limit it in the direction of pull.
- Use shorter stitches: single crochet straps stretch less than double crochet straps.
- Reinforce handle chains: always work at least one round of single crochet around the chains to thicken and stabilize.
- Add an internal support: thread a strip of cotton webbing, grosgrain ribbon, or even a crocheted cord through the handle and tack it in place at the ends. The support should carry the weight, not the yarn alone.
- Work straps separately and sew on: a tightly stitched strap (like a dense single crochet strap worked lengthwise) can be sturdier than a chain-based strap.
- Mind the load: even the best straps will stretch if routinely overloaded. If you want a grocery workhorse, use cotton cord and a reinforced lining.
Practical tip: if you add ribbon or webbing, pre-shrink it if it is cotton, and stitch it down with small, strong stitches at stress points to prevent shifting.
Ways to Customize Your Bag
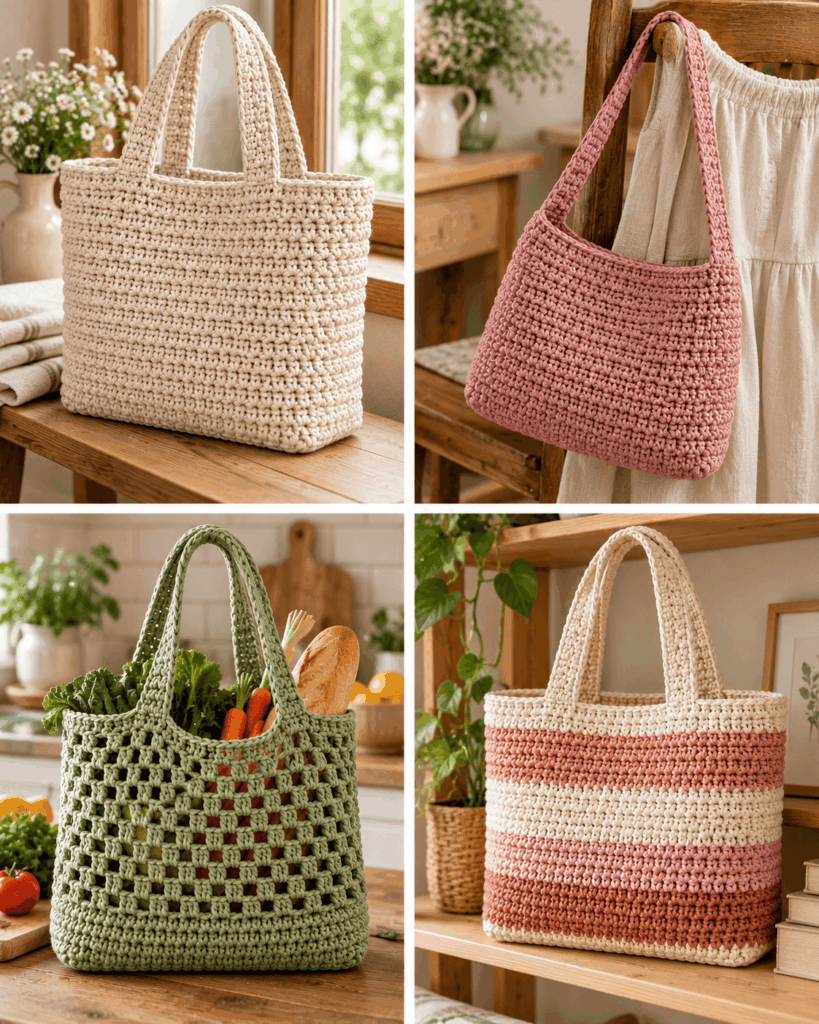
The fun part of an easy crochet bag pattern is that small changes make it look like a totally different design. Try one customization at a time so you can see what affects structure and stretch.
- Change the size: add 1 to 3 base rounds for a wider bottom, then add or subtract side rounds for height. Keep the base increases smooth to avoid rippling.
- Add pockets: crochet a small rectangle in single crochet and sew it inside. Or sew a fabric pocket to a lining for a cleaner look.
- Swap the stitch band: keep the base and top sturdy in single crochet, but add a decorative middle section in moss stitch or a subtle texture like single crochet in the back loop only.
- Try color blocking: use one color for the base, a second for the body, and a third for the top edge. Change colors on the last yarn-over of the final stitch to keep transitions neat.
- Add a closure: magnetic snap, button loop, or drawstring top. If adding hardware, reinforce the area with extra stitches or a small fabric patch.
- Strap options: short handles for hand-carry, long crossbody strap (with reinforcement), or braided straps for a boho look.
“I tried this crochet bag pattern as my first ‘real’ project after learning single crochet. The base instructions made everything click, and adding the extra round around the handles helped a lot. I use it for the farmers market and it still looks neat after a few weeks.”
Frequently Asked Questions About Easy Crochet Bag Pattern
Why is my bag base curling or cupping?
Curling usually means your tension is too tight or you need more increases at the rounded ends of the oval. First, try going up 0.5 mm in hook size for the base only. If it still cups, add one or two extra increase stitches near the center of each curved end in the next round. If the base is ruffling instead, you have too many increases and should space them out more.
Can I use acrylic yarn for this crochet bag pattern?
You can, but expect more stretch and potential pilling, especially on straps and corners. If acrylic is what you have, use a smaller hook to create a denser fabric and consider adding a lining to control stretching. Also keep the stitch choice tight, such as single crochet. Acrylic bags are best for lightweight use like a project bag for yarn, not heavy groceries.
My sides look wavy and uneven. What did I do wrong?
Wavy sides often come from accidentally adding stitches, skipping stitches, or losing track of the round start. Use a stitch marker in the first stitch of every round and count stitches every few rounds. Another cause is inconsistent tension. If your tension changes as you relax into the project, it can show. Light steam blocking can help even out mild waviness.
How do I make the bag taller without making it wider?
Once the base is complete and you have worked the back-loop-only round to turn the corner, simply add more rounds with no increases. That will add height without changing width. If you notice it slowly getting wider, you may be accidentally increasing. Counting stitches and keeping an even rhythm helps. This is one of the easiest adjustments in a crochet bag pattern.
What is the cleanest way to change colors?
Change colors on the last step of the last stitch of the old color. For single crochet, insert hook, yarn over and pull up a loop, then yarn over with the new color and pull through both loops. Carrying yarn up the side can look messy on bags, so for wide stripes it is often cleaner to cut yarn and weave ends securely, especially because bags receive a lot of handling.
How do I keep items from poking through the stitches?
The most reliable fix is to crochet more densely by using a smaller hook and sticking with short stitches like single crochet. If you still see gaps, add a fabric lining. Linings also prevent snagging and help the bag keep its shape. For quick improvement without sewing, use a removable pouch or organizer insert inside the bag.
Conclusion
A good beginner crochet bag pattern should be simple to follow, sturdy enough for real life, and flexible enough to personalize. Start by choosing a durable yarn, crochet a flat base with smooth increases, then build strong sides in a dense stitch. Take a little extra time reinforcing the top edge and handles, because those details make the difference between a bag you occasionally use and one you reach for every day. Your next step is to pick your yarn and crochet the base up to your preferred width, then continue round by round until the height feels right. Once you finish, load it with a few items at home and see how it hangs, then adjust