Easy Crochet Edging Patterns for Blankets and More
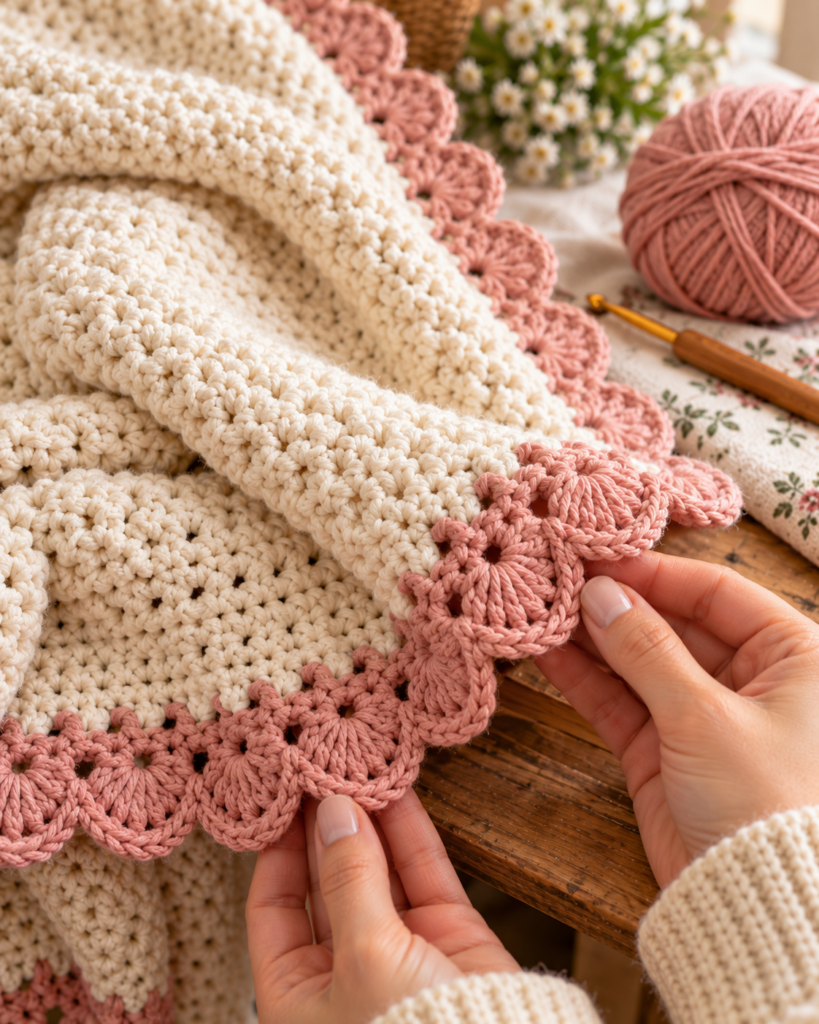
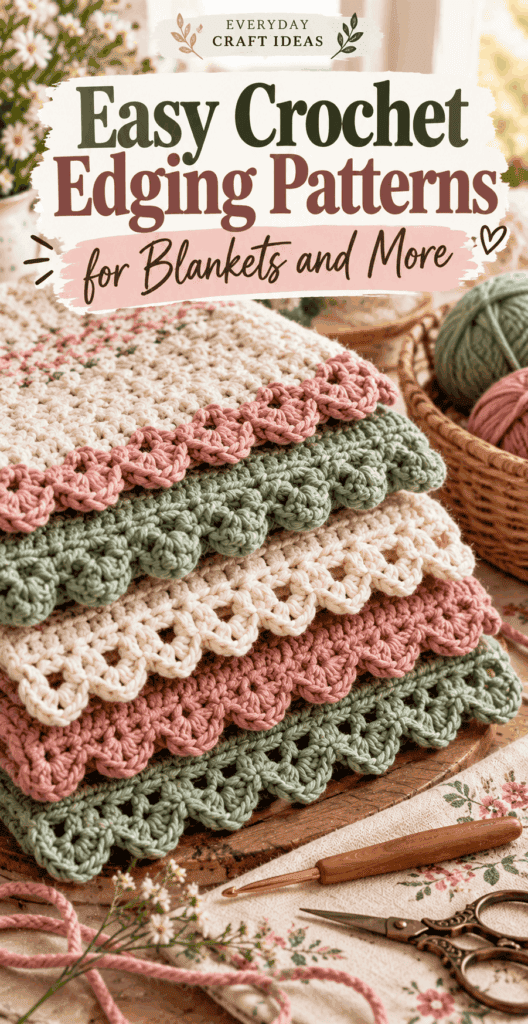
Crochet edging patterns are the fastest way to make a blanket, scarf, towel, or pillow look finished and intentional, even if the main fabric is simple. A good border can straighten wavy sides, add a pop of contrast, or make a gift look polished without much extra time. In this guide, you will learn easy edging options you can repeat on almost any project, plus exactly how to handle corners, uneven stitch counts, and different yarn types. If you are building your skills on smaller projects first, practice your tension on an easy crochet dishcloth pattern or add a delicate finish to an easy crochet bookmark pattern before moving on to a full-size blanket.
What You Need to Know Before Starting
Before you pick one of these crochet edging patterns, take a minute to assess the project you are adding it to. Borders work best when the base fabric is stable and reasonably flat. If your blanket is rippling, curling, or flaring, the border will not magically fix it. It will usually highlight the issue. Block your piece first if possible, or at least lay it flat and gently steam block if your yarn allows.
Next, identify what you are crocheting into. If your blanket has a finished stitch edge with clear “V” stitches along all sides, you will work into those stitches. If you are working into row ends (the sides of a back-and-forth project), you will insert your hook into the side “bars” instead. Row ends do not have a fixed stitch count, so you will create one as you go. A consistent setup round is what makes most crochet edging patterns look neat.
Finally, think about the look you want. A modern blanket often looks best with a simple single crochet or linen stitch edge. Baby items and heirloom throws often suit shells, picots, or scallops. Also consider function: a heavy ruffled edge on a dishcloth can snag, while a tight crab stitch edge holds up beautifully.
Supplies, Tools, and Material Choices
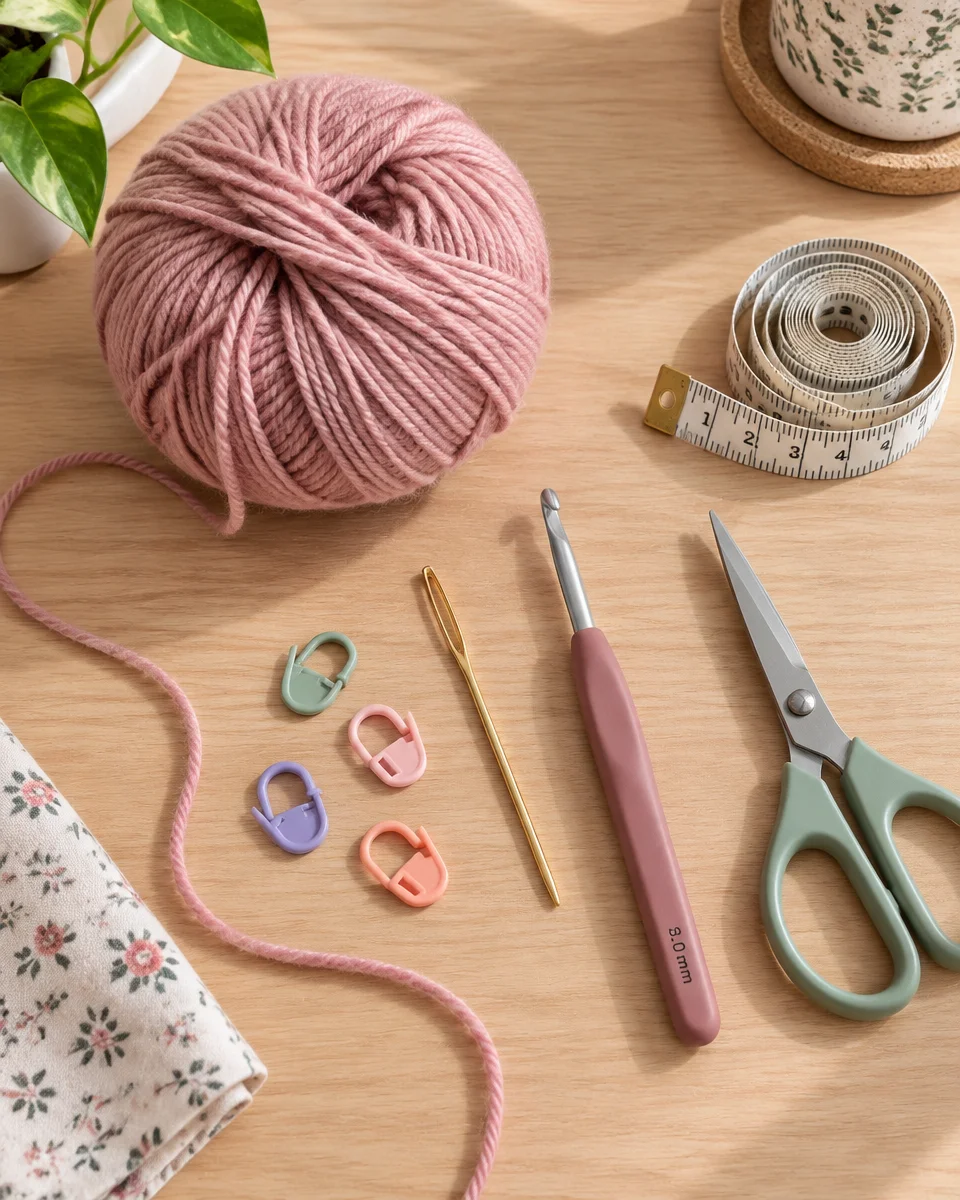
You do not need specialty tools for crochet edging patterns, but the right basics make the work smoother and more durable. Start with the same hook size you used for the main project, then adjust if needed. If your border looks tight and starts to cup, go up a hook size. If it looks loose and floppy, go down a size.
- Yarn: Using the same yarn as the project creates a seamless finish. Using a contrasting color highlights the edge and can disguise minor unevenness. For blankets, choose yarn with similar weight to the body fabric so the edge does not pull or flare.
- Hook: A comfortable ergonomic hook helps, especially on large blankets where you will do hundreds of stitches around the perimeter.
- Tapestry needle: Essential for weaving in ends securely. A rushed weave-in is the most common reason border ends pop out after washing.
- Stitch markers or safety pins: Mark corners, the first stitch of each round, and any “problem zones” along row ends so you can keep counts consistent.
- Scissors and measuring tape: Useful for planning yarn amounts and keeping borders even on all sides.
Material note: for dishcloths and towels, cotton yarn is best because it handles heat and frequent washing. For baby items, choose soft, washable fibers and avoid scratchy novelty yarns on edges that will touch skin.
How to Make or Use It (Clear Beginner-Friendly)
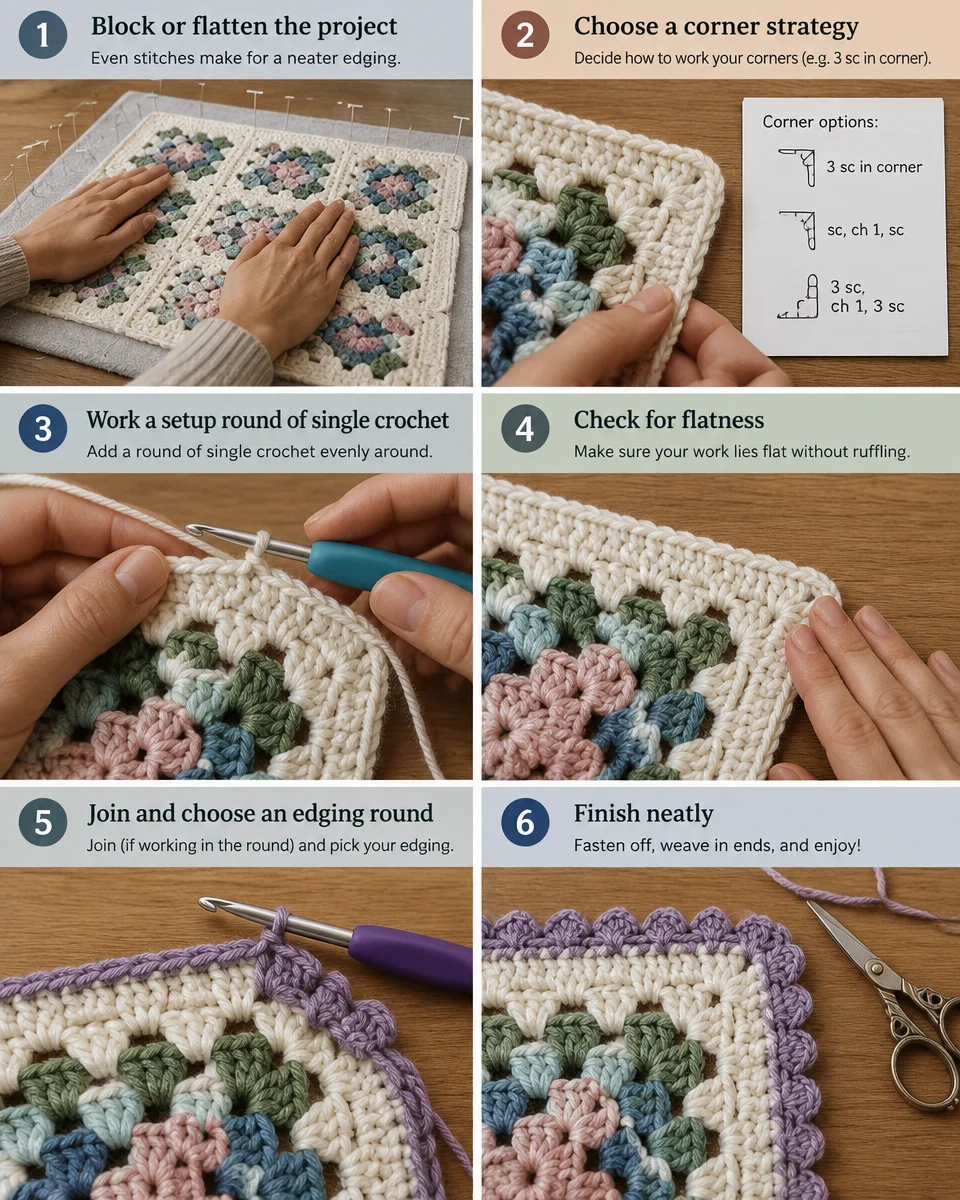
This beginner-friendly method works for most crochet edging patterns because it starts with a “setup round” to create clean, even spacing. Once that foundation is in place, you can add almost any decorative round on top.
- Block or flatten your project first. Lay your piece on a flat surface and gently shape it. This helps you see if edges are wavy and prevents crocheting a border that locks in distortion.
- Choose your corner strategy. For square or rectangular items, plan on working (sc, ch 2, sc) or (3 sc) in each corner space to create a turn. The goal is to add enough stitches to turn without pulling.
- Work a setup round of single crochet. Join yarn in any corner. Work single crochet evenly around. On row ends, a reliable starting point is 1 sc per row for single crochet rows, 2 sc per row for double crochet rows, and “3 sc over 2 rows” for mixed height fabrics. Adjust as needed to keep the edge flat.
- Check for flatness as you go. After each side, stop and smooth it out. If the edge is rippling, you have too many stitches. If it is pulling inward, you have too few. Fixing it now is much easier than after you finish the round.
- Join and choose an edging round. Slip stitch to the first sc. Now you can add one of these easy crochet edging patterns:
- Classic single crochet: Another round of sc for a clean frame.
- Crab stitch (reverse single crochet): Work sc in the opposite direction for a rope-like edge. Great for durability.
- Shell border: In the next stitch, work 5 dc, skip 2, sc, skip 2, repeat. Adjust skips based on your gauge so shells lie flat.
- Picot edge: Sc, ch 3, slip stitch into the first chain to form a picot, then sc in next stitch. Space picots every 2 to 4 stitches for the look you want.
- Linen stitch (moss stitch): *Sc, ch 1, skip 1* around for a modern, flexible edge.
- Finish neatly. Slip stitch to join. Cut yarn leaving a tail, pull through, and weave in ends by running the yarn under multiple stitches in two directions for security.
If you want a super simple, polished option for almost any project, the Quick & Easy One Row Crochet Border – Sweet Potato 3 is a great reference for a minimal border that still looks intentional.
Helpful Tips for Better Results
Small adjustments make crochet edging patterns look professional. First, keep your setup round consistent. Many “messy borders” are really uneven spacing along row ends. If you are unsure, place stitch markers every 10 to 20 stitches and count between them to keep distribution even.
Second, match the border stitch height to the fabric. If your blanket is made of tall stitches like double crochet, a single crochet border can look tight unless you use a larger hook or add an extra setup round. For lacy blankets, linen stitch or a light shell edge often complements without overwhelming.
Third, corners are everything. If your corners curl upward, you likely need more stitches in the corner. If they ruffle, you need fewer. Do not be afraid to redo just one corner segment. That fix can transform the whole piece.
Fourth, choose a joining method that looks clean. Instead of a noticeable slip stitch join, try an “invisible join” for the final round by cutting yarn, threading the needle, and mimicking the top of a stitch before weaving in. It takes an extra minute and looks extremely tidy on contrasting borders.
“I always avoided borders because my blankets ended up wavy. Doing a single crochet setup round first and checking each side for flatness made the biggest difference. My shell edging finally lies flat, and the corners look sharp instead of pointy.”
Creative Variations and Project Ideas
Once you have the setup round down, crochet edging patterns become a design tool you can apply to almost anything. Try color-blocking by adding two rounds: one in the main color to calm the edge, then one contrasting decorative round for impact. This is especially pretty on granny square blankets and striped throws.
You can also mix textures. A linen stitch setup round followed by a picot edge gives a modern base with a delicate finish. For rustic décor, a crab stitch edge in a slightly darker shade creates a subtle “outlined” frame.
Edgings are not just for blankets. Add a tight single crochet or crab stitch border to scarves, shawls, and even fabric items like fleece blankets. If you are edging fleece, you will need to pre-punch holes with a rotary cutter and fleece edging tool or use blanket stitch by hand first, then crochet into those holes evenly.
For gift toppers and cute add-ons, use small motifs at the corners or as a repeating border accent. A heart at each corner is adorable on baby blankets, and a flower every few inches makes a simple wrap look special. Try these motif tutorials and then stitch them on after you finish the edging:
- easy crochet heart pattern for sweet corner accents
- easy crochet flower pattern for decorative repeats or appliqués
Common Mistakes and How to Avoid Them
The most common issue with crochet edging patterns is waviness. Wavy edges usually mean too many stitches, especially along row ends. Fix it by spacing stitches farther apart. For example, instead of placing 2 sc into every row end, try alternating 2 sc and 1 sc down the side, or use the “3 sc over 2 rows” rhythm. If it is already wavy, rip back just the setup round and redo it with fewer stitches rather than trying to “tighten it up” in the decorative round.
Curling or cupping is the opposite problem: too few stitches or too tight tension. Go up a hook size for the border, add more corner stitches, or place more stitches along the sides. Curling can also happen if you switch from a loose blanket body to a very tight border stitch like crab stitch without adjusting hook size.
Another frequent mistake is ignoring stitch counts at corners. If you miss the corner space, your border will drift and look twisted. Place a stitch marker in each corner stitch cluster during the setup round and keep it there until you finish.
Finally, color changes can look bumpy. When changing colors between rounds, join the new color with a standing single crochet or join at the back and crochet over the tail for several stitches before weaving in. This reduces loose ends and creates a cleaner transition.
Frequently Asked Questions About Easy Crochet Edging Patterns for Blankets and More
What is the easiest crochet border for beginners?
The easiest option is a single crochet border, often done as one or two rounds. It is simple, sturdy, and helps smooth uneven edges. If you want a little more style without complexity, try a picot edge added on top of a single crochet setup round. Because the setup round creates consistent spacing, the decorative part becomes almost automatic and the results look much more even.
How do you crochet a border around a blanket?
Start by joining yarn in a corner and crocheting a setup round, usually single crochet, all the way around. Work extra stitches in each corner so the border can turn without pulling. Along row ends, place stitches evenly rather than guessing randomly. Once the setup round lies flat, add your chosen crochet edging patterns round, such as shells, linen stitch, or crab stitch.
How do you keep crochet edging from curling?
Curling typically means the edge is too tight or you do not have enough stitches to match the blanket’s perimeter. Use a larger hook for the border, relax your tension, and add more stitches along row ends. Make sure corners have enough stitches to turn. If your fabric is already slightly tight at the edges, block the blanket first, then add a simple border with minimal tightening, like linen stitch.
Which edging works for a dishcloth or scarf?
For dishcloths, pick an edging that is flat and durable, like single crochet, crab stitch, or a very small picot. Big shells can catch on cookware and wear faster. For scarves, you can choose something softer and drapier, like linen stitch or a small shell repeat. If you need a practical project to test borders, try an easy crochet dishcloth pattern and finish it with a crab stitch edge.
How do you crochet around corners?
In most cases, corners need an increase so the border can pivot. A reliable formula is (sc, ch 2, sc) into the corner stitch or corner space for a single crochet setup round. For taller stitches, you may use (dc, ch 2, dc) or add more stitches. The correct corner has enough space to lie flat. If the corner points upward, add stitches. If it ruffles, remove stitches.
How much yarn do you need for a crochet border?
It depends on the blanket size, stitch pattern, and number of rounds. As a rough guide, a single crochet round on a throw-size blanket may use 50 to 150 yards, while a shell border or multiple rounds can use 150 to 300 yards or more. If you are using leftover yarn, crochet the setup round first, then weigh your yarn and estimate remaining rounds. When in doubt, choose a one-round edging.
Final Thoughts
Crochet edging patterns are one of the most satisfying upgrades you can add to blankets and everyday crochet pieces because they deliver a clean finish with a small time investment. Start with a careful setup round, make your corners intentional, and adjust stitch spacing along row ends until the fabric lies flat. Then choose a decorative round that matches how the item will be used, sturdy for dishcloths and baby blankets, drapey for scarves and wraps. For a quick win, try the Quick & Easy One Row Crochet Border – Sweet Potato 3 and practice on a small project like a bookmark or dishcloth. Your next step: pick one border style from this guide, swatch it, then add it to your current WIP and enjoy the instant “finished” look.