Felt Crafts for Beginners: Easy Handmade Projects
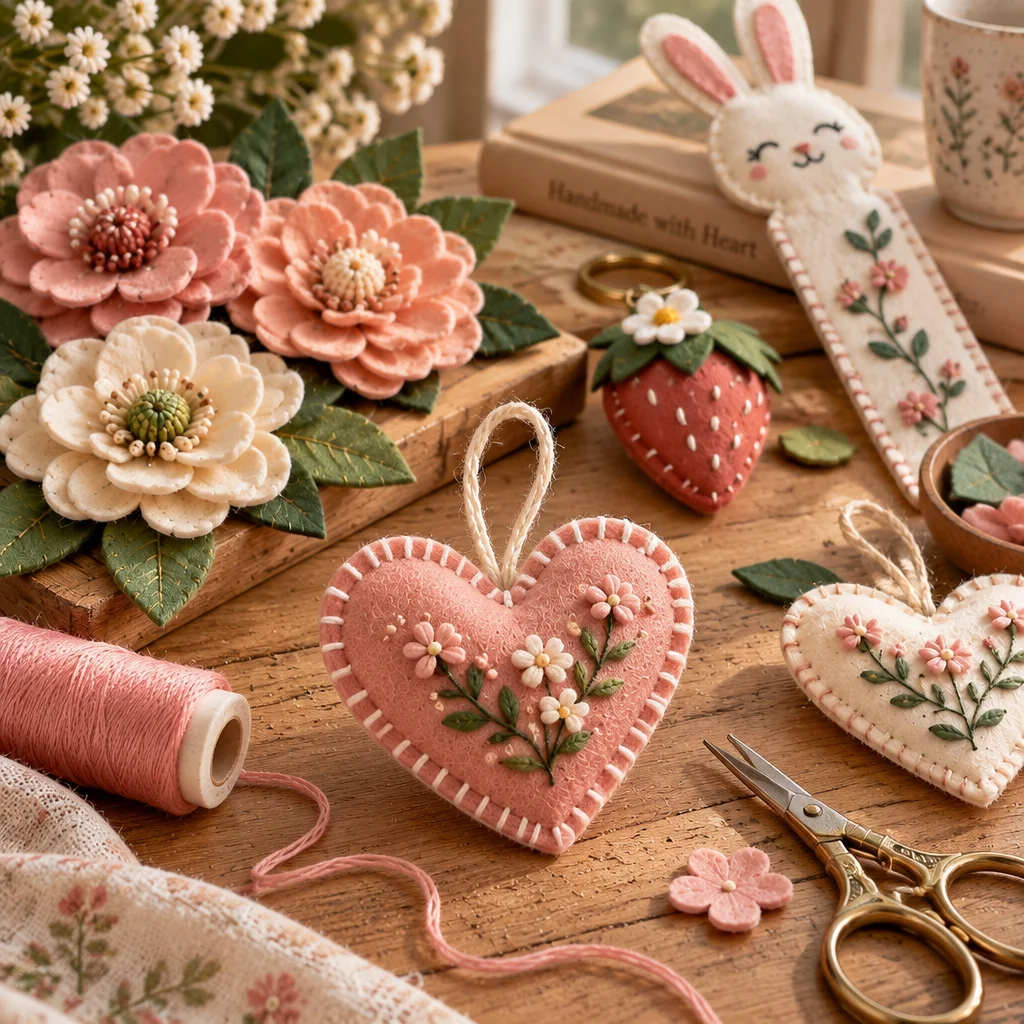
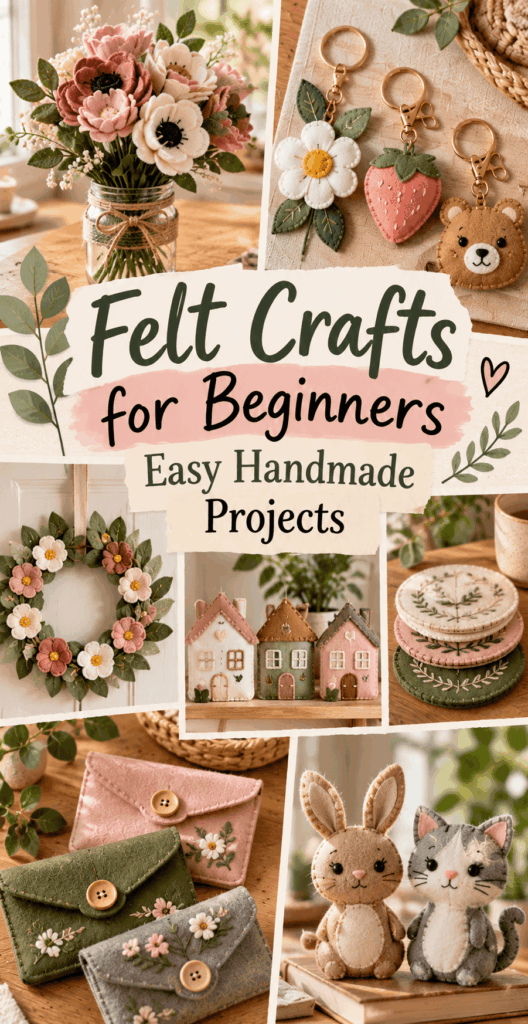
Felt crafts for beginners are one of the fastest, friendliest ways to start making handmade projects that actually look finished, even on your first try. Felt does not fray like woven fabric, it comes in cheerful colors, and you can choose no-sew options (glue) or simple hand stitches (needle and thread). In this guide, you will learn the basics and then follow a clear tutorial to make a small felt project you can use right away, a sturdy keychain charm. Once you have the core skills, you can apply them to seasonal makes too, like ornaments and gift toppers inspired by Christmas crafts for kids or quick patterns from printable crafts for kids. By the end, you will know what felt to buy, how to cut it neatly, and how to get clean seams and smooth edges.
What You Need to Know Before Starting
Felt is a non-woven fabric made by matting fibers together, which is why it cuts cleanly and holds its shape. For felt crafts for beginners, this means less frustration: edges will not unravel, and small shapes are easier to handle than with regular fabric. The main choices you will make are (1) whether to use glue or stitches and (2) what thickness and fiber content to buy.
Difficulty level: beginner. Estimated time: 30 to 60 minutes for a simple charm, longer if you add embroidery details. Project size: about 2 to 3 inches wide, perfect as a keychain, zipper pull, or backpack charm. You will also build transferable skills: tracing a template, cutting accurately, aligning layers, and finishing edges.
Before you start, decide how the item will be used. A decoration can be glued and lightly stuffed. A keychain gets tugged daily, so hand stitching is worth it for durability. Also note that some crafting tools are sharp or hot. Keep scissors, needles, and hot glue away from children and pets, and work on a stable surface with good lighting.
Supplies, Tools, and Material Choices
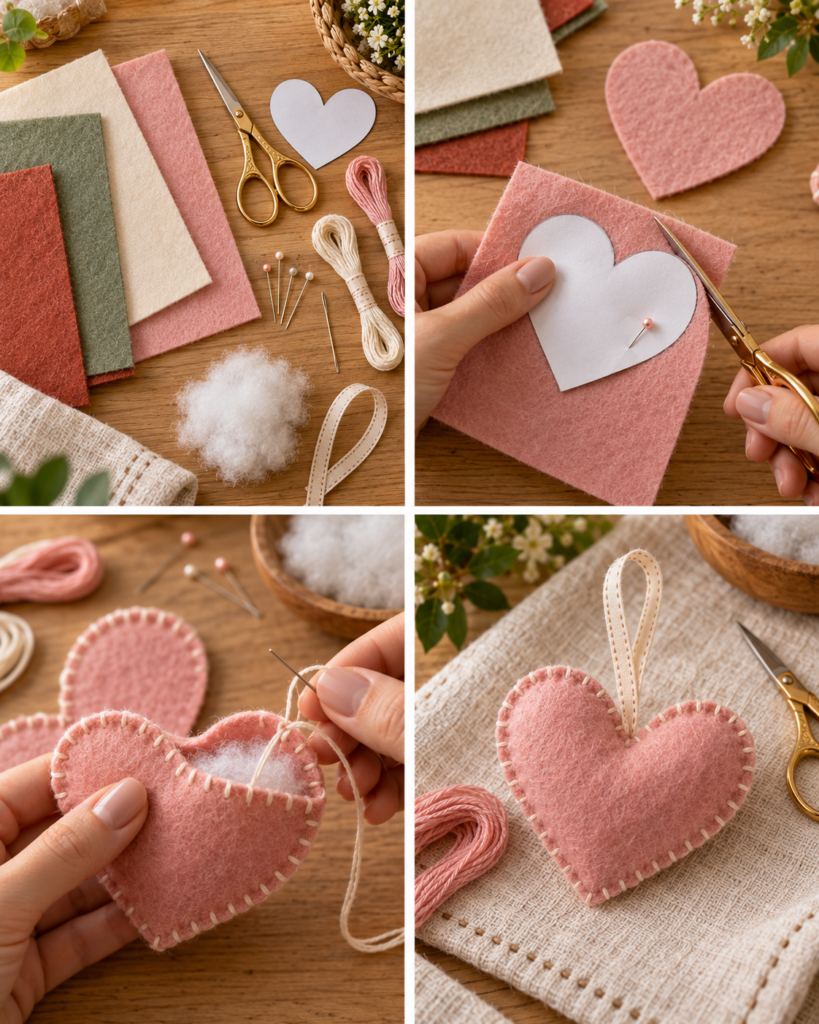
You can do most felt crafts for beginners with a small toolkit. Buy the best quality you can for the parts that matter (felt thickness and scissors), and save money on extras until you know what you enjoy making.
- Felt sheets: Craft felt (usually acrylic) is inexpensive and widely available. Wool or wool-blend felt is denser, cuts cleaner, and pills less. For a keychain, choose stiff felt or wool blend around 1.5 to 2 mm thick so it holds shape.
- Sharp scissors: Dedicated fabric scissors give smoother curves. Small embroidery scissors help with tight corners.
- Needles and thread: Use embroidery floss (6-strand) for bold, visible stitches, or all-purpose sewing thread for subtle seams. A size 7 to 9 hand-sewing needle works well.
- Glue options: Tacky glue is beginner-friendly and dries flexible. Hot glue bonds fast but can be bulky and can burn skin. Fabric glue is strong but can soak into thin felt.
- Stuffing: Polyester fiberfill for a plush look, or felt scraps for a firmer charm.
- Template and marking tools: Paper template, pencil, or disappearing fabric marker. Avoid heavy markers that can bleed through light felt.
- Hardware: Keyring, lobster clasp, or jump ring. For a hanging loop, use ribbon or embroidery floss.
If you want extra guidance on materials and basic techniques, A beginner’s guide to felt craft – The Crafty Kit Company is a helpful overview that pairs well with the step-by-step tutorial below.
How to Make or Use It (Clear Beginner-Friendly Tutorial)
This tutorial teaches a core “stuffed shape” method you can reuse for countless felt crafts for beginners. You will make a simple heart (or star) keychain charm with a neat blanket stitch edge. The same process works for ornaments, soft badges, and mini plushies.
- Create a template: Draw a heart about 2.5 inches wide on paper and cut it out. A template ensures both felt pieces match, which is key for a clean edge when stitching.
- Trace and cut two felt shapes: Place the template on felt, trace lightly, and cut two identical hearts. Cut with long, confident snips rather than tiny bites, which can cause jagged edges.
- Add decoration before assembly: If you want initials, a small flower, or simple embroidery lines, stitch or glue them onto the front piece now. Working on a flat piece is easier than sewing on a stuffed shape.
- Attach the hanging loop: Cut a 4 to 5 inch piece of ribbon or embroidery floss, fold into a loop, and place the raw ends between the two hearts at the top. Clip or pin in place. This traps the ends inside the seam so the loop cannot pull out easily.
- Start stitching: Thread a needle with embroidery floss (use 2 to 3 strands for a slimmer look or all 6 for bold stitches). Knot the end. Begin at one side near the top and stitch through both layers using a blanket stitch. Keep spacing consistent (about 1/8 to 1/4 inch) for a professional finish.
- Stuff lightly: When you are about 2/3 around the shape, pause and add small pinches of stuffing. Use a blunt tool (like the back of a pencil) to nudge stuffing into curves. Overstuffing can stretch the seam and make the edges wavy.
- Finish the seam: Continue stitching until closed. Tie off securely by passing the needle under a few stitches on the back and knotting. Trim the thread close.
- Add keychain hardware: Attach a jump ring or keyring to the loop. If using a jump ring, open it sideways (twist, do not pull apart) to keep its shape, then slide it through the loop and close tightly.
Use your charm as a keychain, zipper pull, or backpack tag. This same method scales up into ornaments and garlands for cozy seasonal decor, similar in spirit to winter crafts for adults where soft textures really shine.
Helpful Tips for Better Results
Small adjustments make a big difference with felt crafts for beginners, especially around cutting and stitching. Start with these practical upgrades and you will see cleaner edges immediately.
- Cutting tip for smooth curves: Rotate the felt, not your scissors. Keep your cutting hand steady and turn the material with your other hand to maintain even curves.
- Keep pieces aligned: If your two shapes drift while stitching, use sewing clips or a few dots of tacky glue as temporary “basting” to hold layers together. Let glue get slightly tacky before pressing.
- Choose the right stitch for the job: Blanket stitch is ideal for visible edging and strength. Whip stitch is quicker and beginner-friendly but can look looser. Running stitch works for seams that will be turned (less common with felt).
- Control thread twist: Embroidery floss can twist and knot. Let the needle dangle every few minutes to unwind, and use shorter lengths (18 to 24 inches) to prevent tangles.
- Press gently, do not iron hot: Acrylic felt can melt. If your felt is wrinkled, place it under a heavy book overnight, or use the lowest heat with a pressing cloth only if the felt is wool and the label says it is safe.
Reader testimonial: “I tried the heart keychain as my first felt project and it actually turned out cute. The tip about decorating the front before sewing saved me. I added a tiny initial and the blanket stitch looked much neater when I slowed down and kept the spacing even.”
Creative Variations and Project Ideas
Once you master the basic stuffed shape, felt crafts for beginners open up quickly. You can keep the same construction and simply change the silhouette, details, or function.
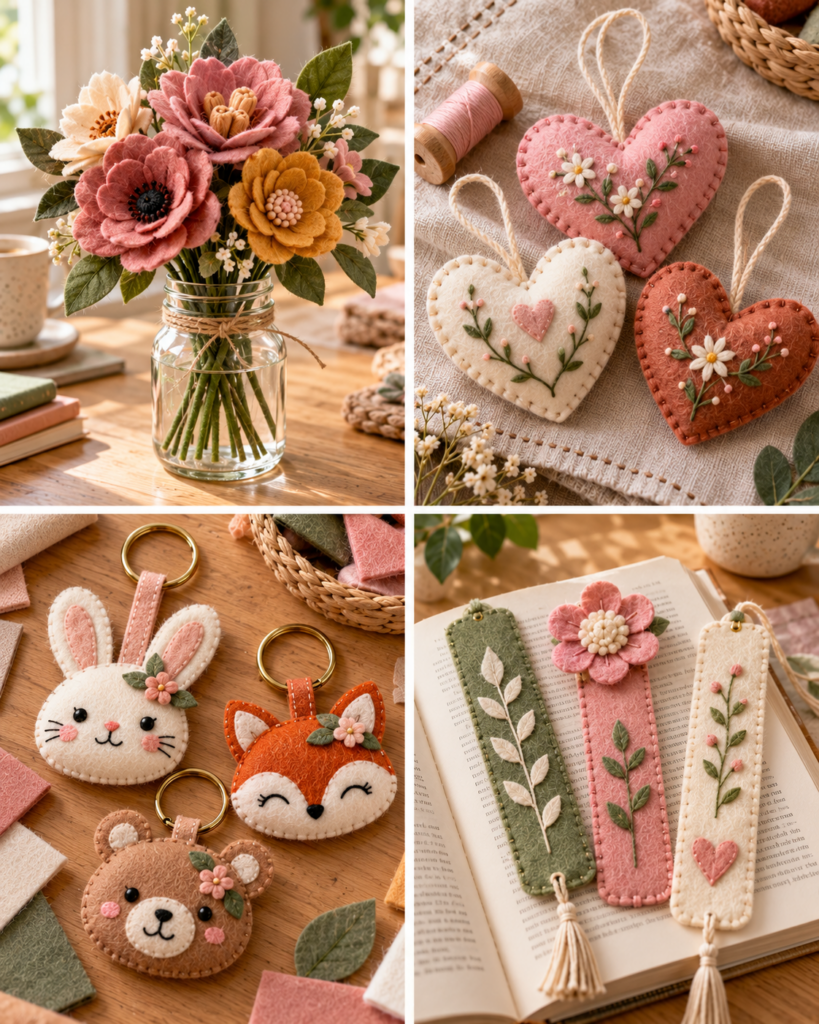
- Felt ornaments: Make stars, mittens, or trees, then add sequins or simple embroidery. Swap the keychain hardware for a hanging loop. These pair naturally with family-friendly holiday crafting and ideas like Christmas crafts for kids.
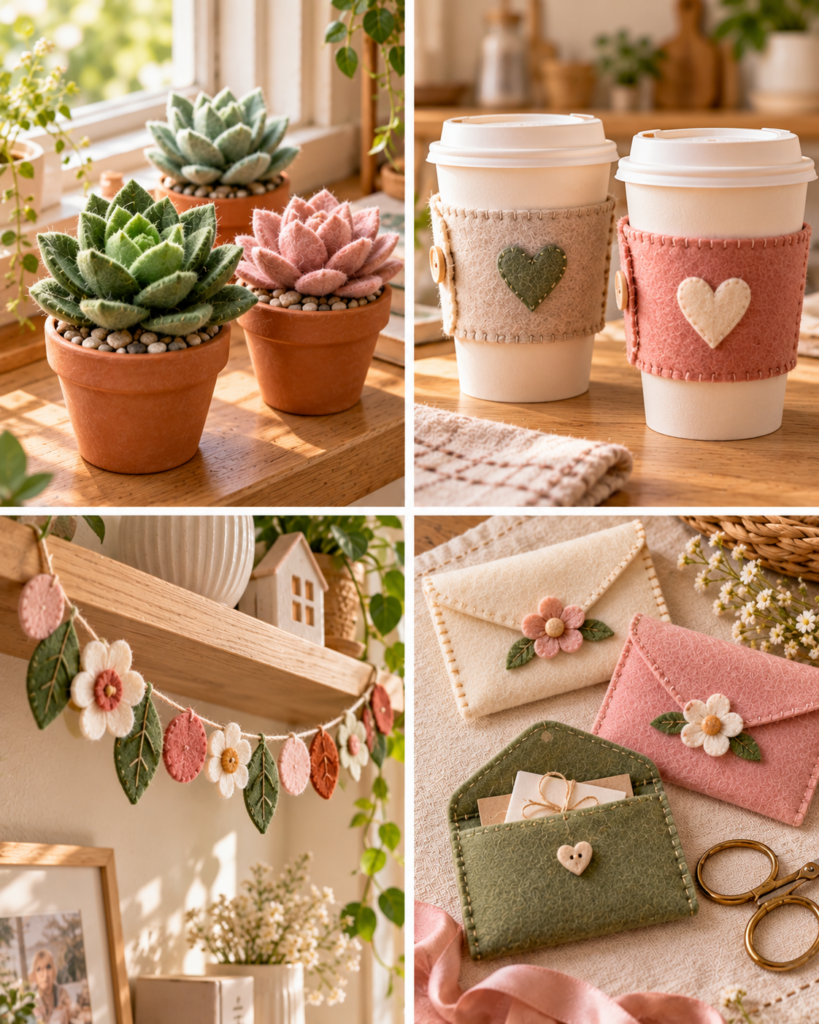
- Coasters and mug rugs: Cut circles, hexagons, or scalloped shapes from thicker felt. Layer two pieces and stitch around the edge for stability. Skip stuffing for a flat finish.
- Felt hair clips: Glue a felt flower or bow to a metal snap clip. For durability, stitch through the felt around the clip openings, or sandwich the clip between two felt layers.
- Bookmarks: Make a long rectangle with a small character or leaf at the top. Keep it unstuffed so it lies flat.
- Soft gift toppers: Mini hearts, pumpkins, or snowflakes become reusable tags. For fall gatherings, you can coordinate these with table decor themes similar to Thanksgiving crafts for adults.
- Kid-friendly kits: Pre-cut shapes, provide plastic needles, and use pre-punched holes for lacing. If you love quick templates, mix felt with paper patterns from printable crafts for kids.
Try limiting your palette to 2 to 3 colors for a more polished look, then add a single accent like metallic thread or a tiny button (only for decor, not for items used by very young children).
Common Mistakes and How to Avoid Them
Most issues in felt crafts for beginners come from cutting inaccuracies, rushing stitches, or using the wrong adhesive. Here are the big pitfalls and the fixes that work.
- Jagged edges after cutting: This usually happens from dull scissors or tiny snips. Sharpen or replace scissors and cut with longer strokes. For tight inner curves, switch to small embroidery scissors.
- Layers don’t match: Tracing can shift. Stack two felt sheets and cut them together (if your scissors can handle it), or cut one piece, pin it to the second sheet, and cut around it like a pattern.
- Puckered or wavy seams: Stitches may be too tight or stuffing is too firm. Relax your tension and stuff in small amounts. Your seam should lie flat without pulling the edge inward.
- Glue showing through: Some glues soak into felt and leave dark spots, especially on light colors. Use tiny dots, spread thinly, and test on a scrap first. If you want a crisp look, stitch instead of gluing visible edges.
- Keychain loop pulls out: If the loop ends are too short inside the seam, it will fail. Leave at least 1/2 inch of loop ends inside and stitch over that area twice for reinforcement.
- Fuzz and pilling: Cheap acrylic felt can pill with friction. For items handled daily (keychains, coin pouches), choose higher-quality felt or wool blend, and avoid rough Velcro contact.
If something looks slightly uneven, do not throw it away. Felt is forgiving. You can often trim edges carefully after stitching, add a second border stitch to disguise gaps, or cover a wobbly area with a small applique.
Frequently Asked Questions About Felt Crafts for Beginners: Easy Handmade Projects
What can beginners make with felt?
Great starter projects include keychain charms, flat ornaments, coasters, simple flowers, bookmarks, and mini garlands. These builds teach you tracing, clean cutting, and basic hand stitching without needing complex patterns. If you want a confidence boost, start with a flat project like a coaster first, then move to a lightly stuffed shape. Most felt crafts for beginners can be finished in under an hour.
Do you need a sewing machine for felt crafts?
No. A sewing machine can speed up straight seams, but felt is ideal for hand sewing because edges do not fray and stitches look decorative. Many projects can also be made with glue, especially decor pieces that are not handled much. For items that get pulled or bent, like keychains and hair clips, hand stitching is usually stronger and looks tidier than heavy glue lines.
What type of felt is best for beginners?
For practice and kids’ crafts, standard craft felt (acrylic) is fine and budget-friendly. For cleaner cuts and more durable results, choose wool felt or a wool blend, especially for small details or projects that will be used often. Thickness matters too: around 1 to 2 mm is versatile. Very thin felt can stretch and ripple when stitched, while very thick felt can be harder to pierce by hand.
How do you cut felt neatly?
Use sharp scissors dedicated to fabric, and cut with long, smooth strokes. Rotate the felt as you cut curves rather than turning your wrist sharply. For intricate shapes, print a template, trace lightly, and cut just inside the line to avoid visible pencil marks. If the felt shifts while cutting, place it on a non-slip mat or use a few pieces of low-tack tape to hold it flat.
What glue works on felt?
Tacky glue is a reliable all-purpose option because it grabs quickly and dries flexible. Fabric glue can be very strong but may seep through thinner felt, so apply sparingly and test first. Hot glue bonds fast but can create lumps and is easy to burn yourself with, so it is better for hidden areas or quick decor fixes. For felt crafts for beginners, use glue as a helper, not a substitute for structural seams on high-wear items.
How do you stitch felt by hand?
Start with a simple whip stitch or a blanket stitch. Thread your needle with embroidery floss or strong thread, knot the end, and keep your stitch spacing consistent. Blanket stitch is popular because the edge looks finished and it resists pulling apart. If piercing feels difficult, use a thimble, or pre-poke evenly spaced holes with an awl or thick needle (carefully) so your stitches stay straight and your hands do not strain.
Final Thoughts
Felt crafts for beginners are rewarding because the material is forgiving, the tools are simple, and the results feel instantly giftable. If you made the heart keychain, you now have a repeatable method: cut two matching shapes, decorate the front, stitch around, stuff lightly, and finish neatly. Your next step is to pick one variation, like an ornament set or coaster pair, and make it in a coordinated color palette. For more foundational guidance on supplies and techniques, revisit A beginner’s guide to felt craft – The Crafty Kit Company and keep experimenting with small projects. The more you practice smooth cutting and even stitching, the more professional your handmade pieces will look.