How to Bind Off Knitting: Easy Beginner Guide
If you are searching for how to bind off knitting, you are at the exact “almost finished” moment every knitter reaches: your piece looks right, your stitches are even, and now you need a neat edge that will not unravel. Binding off (also called casting off) secures live stitches so your scarf, dishcloth, hat brim, or sweater hem can actually be worn and washed. In this beginner guide, you will learn a reliable basic bind-off, how to keep it stretchy enough, and how to finish the yarn tail cleanly. If you like hands-on crafts beyond knitting, you might also enjoy this tutorial on hemming pants by hand for another satisfying “finished edge” skill, or explore quick seasonal makes like Christmas paper crafts.
What You Need to Know Before Starting
Binding off is the final row that locks your stitches together into a stable edge. When learning how to bind off knitting, the key idea is simple: you will pass stitches over one another so only one loop remains, then cut the yarn and secure it. Even though it is simple, your bind-off can change how your project behaves. A too-tight edge can pucker a blanket or make a sweater hem uncomfortable, while a too-loose edge can flare out and look messy.
Before you start, check three things:
- Pattern instruction: Many patterns specify “bind off in pattern.” That means if you have ribbing (knit 2, purl 2), you should keep knitting and purling those stitches as they appear while binding off so the edge matches.
- Right side vs wrong side: Binding off on the right side can create a slightly different look than binding off on the wrong side. If appearance matters (like on a scarf), choose the side you want facing out.
- Fit and stretch needs: Cuffs, socks, and necklines need more stretch than a dishcloth. For those, you may want a stretchier method or a looser tension approach.
Give yourself a few extra inches of yarn in your working ball, and take a breath. A careful bind-off is often what makes a beginner project look polished.
Supplies, Tools, and Material Choices
You do not need fancy supplies to master how to bind off knitting, but the right tools make the edge cleaner and the finishing easier. Here is what to gather and why it helps:
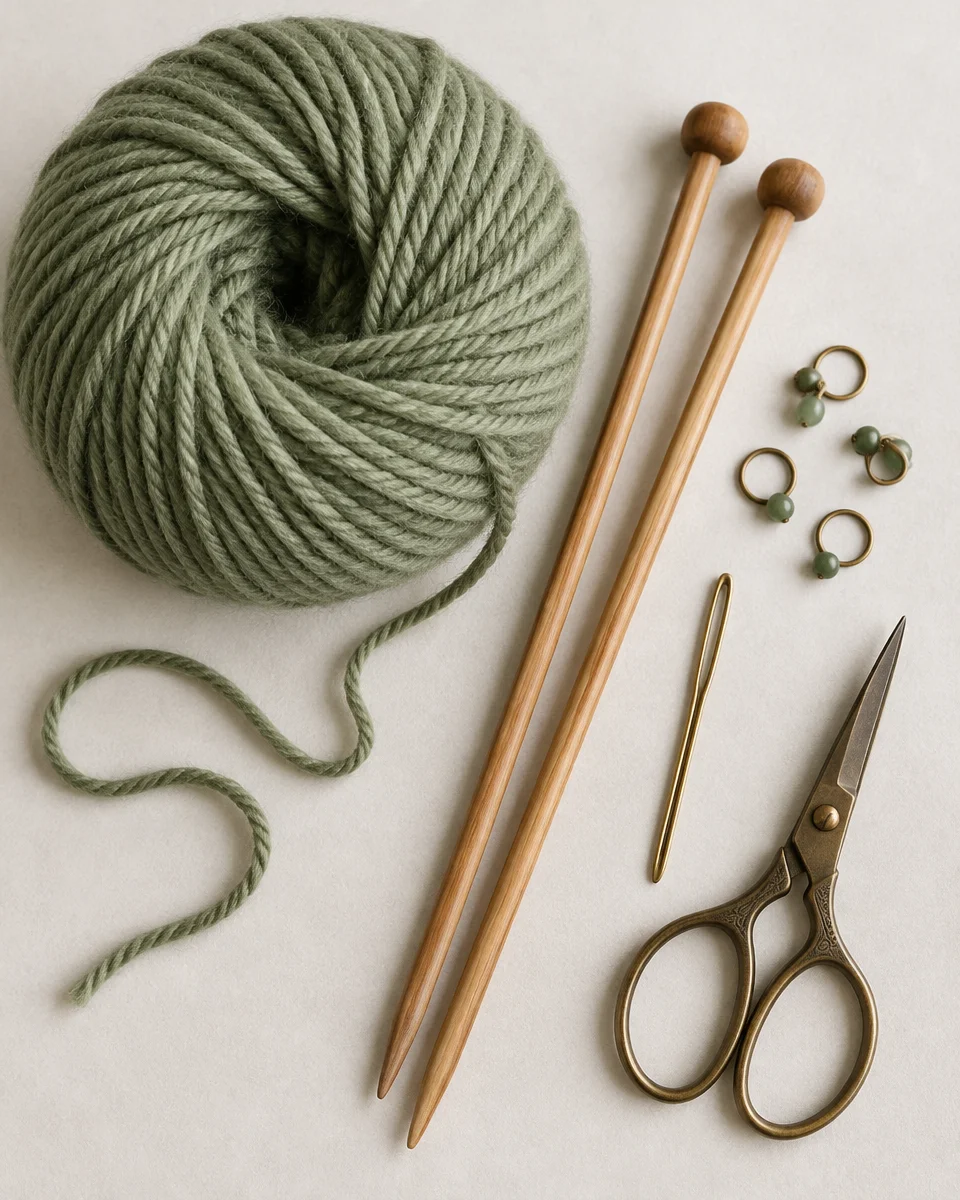
- Your knitting needles: Bind off using the same needle size you used to knit the piece unless the pattern suggests otherwise. Swapping to a larger needle can help prevent tight bind-offs, especially for ribbing and garments.
- Yarn (same as the project): Bind off with the working yarn from your ball. If you are changing colors at the end, you can bind off with the new color, but keep the tension even so it does not look bumpy.
- Tapestry needle (blunt tip): This is essential for weaving in the yarn tail neatly without splitting fibers. Blunt needles glide through stitches safely.
- Scissors: Any sharp craft scissors are fine. Cut a tail long enough to weave in securely, usually 6 to 10 inches for most projects.
- Stitch markers (optional): Helpful if you are binding off in pattern across a complex section and want to keep your place.
Material note: slippery yarns (like smooth cotton or some superwash wools) can loosen over time, so weaving in tails thoroughly is extra important. Fuzzy yarns grip more, but can hide messy finishing, so take your time for a tidy edge anyway.
How to Make or Use It (Clear Beginner-Friendly)
This is the classic “basic bind off,” the one most beginners learn first. It creates a firm, clean edge suitable for scarves, squares, and many garment hems. If you want a second reference alongside this guide, the instructions from Basic Bind Off: Step-By-Step Knitting Instructions – Purl Soho are a clear companion.
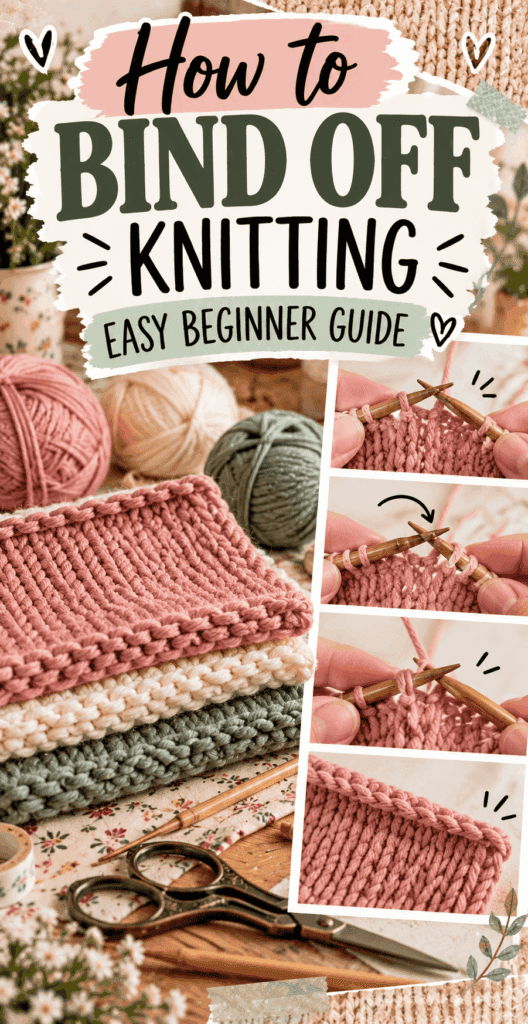
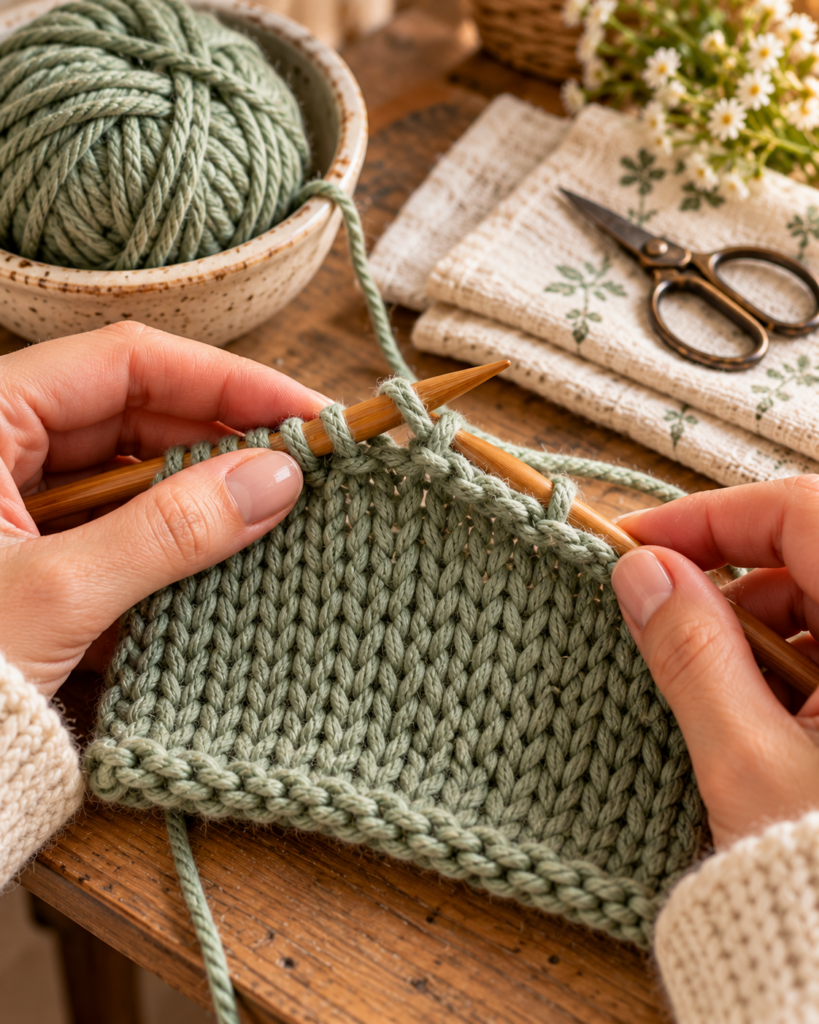
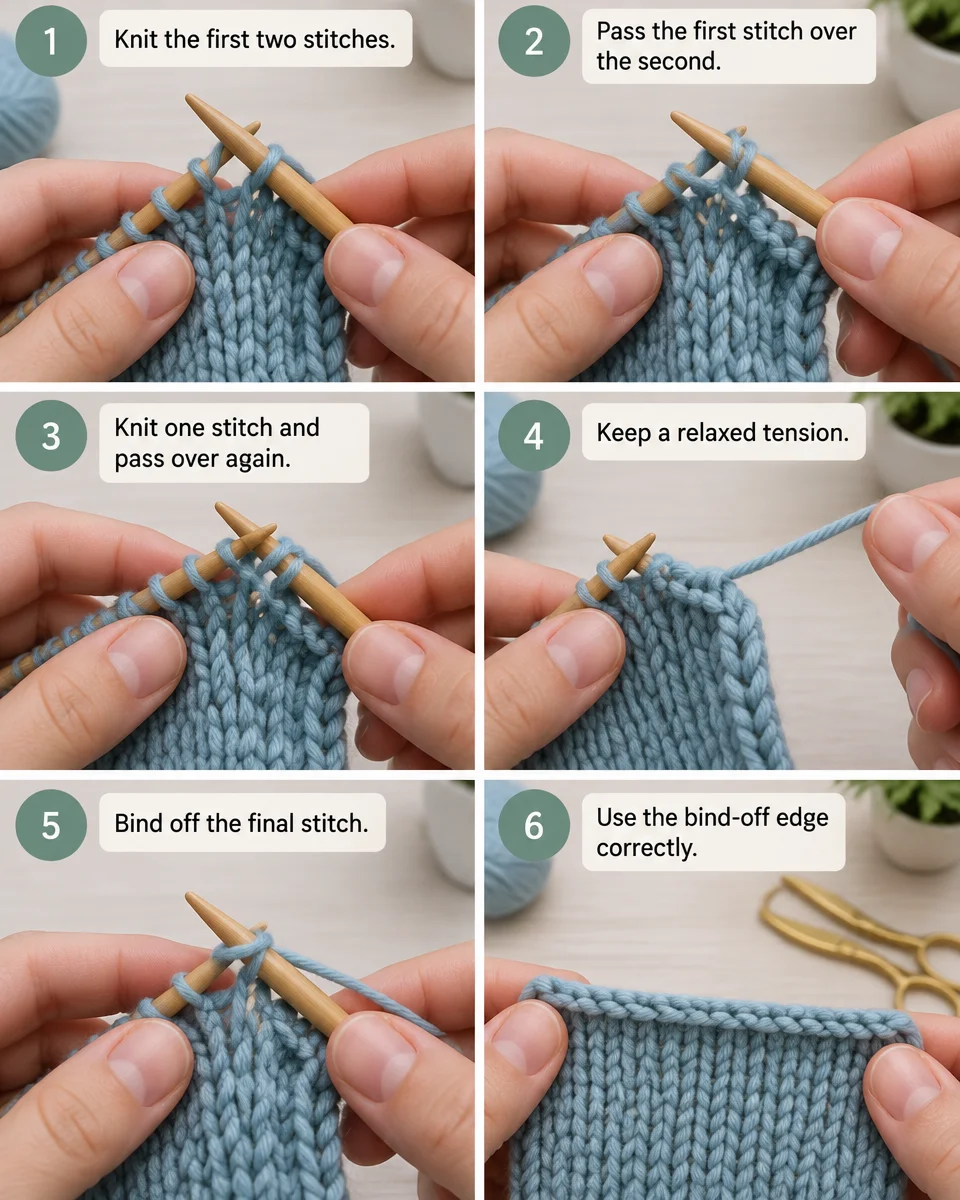
- Knit the first two stitches. Insert your right needle into the first stitch on the left needle, knit it, and slide it off. Knit the next stitch the same way. You now have two stitches on your right needle. This sets up the “pass over” action that locks stitches in place.
- Pass the first stitch over the second. Using the tip of your left needle, lift the first stitch on the right needle up and over the second stitch, then off the needle. This leaves one stitch on your right needle and binds off one stitch.
- Knit one stitch, then pass over again. Knit the next stitch from the left needle so you again have two stitches on the right needle. Lift the first stitch over the second and off. Repeat across the row. The repeat is: knit 1, pass previous stitch over.
- Keep your tension relaxed. The most common beginner issue with how to bind off knitting is pulling the working yarn too tight after each pass-over. Instead, let the stitches stay roughly the same size as your knitted stitches. If you tend to knit tightly, consider using a needle one size larger just for binding off.
- Bind off the final stitch. When one stitch remains on your right needle, cut the yarn leaving a 6 to 10 inch tail. Pull the tail through the last stitch and snug it gently to secure. Do not yank hard or you can distort the corner.
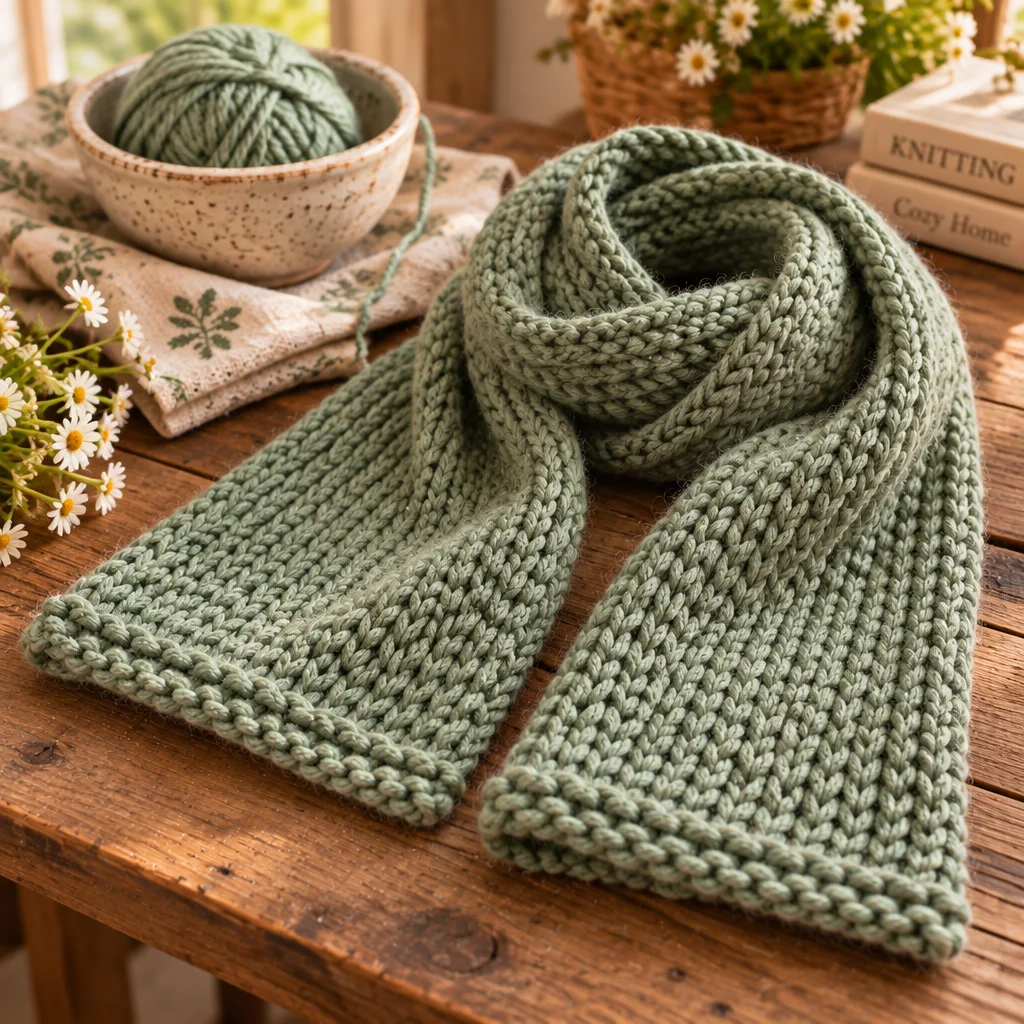
- Use the bind-off edge correctly. This edge is the finished edge of your piece. For flat items, it becomes the top edge. For garments, it might be a hem, neckline, or armhole edge depending on construction.
Binding off in pattern (quick note): If your row is ribbing, work each stitch as it appears (knit the knit stitches, purl the purl stitches), and still pass the previous stitch over the new stitch after each one. That keeps the texture consistent instead of switching to an all-knit edge.
“I used to dread finishing because my edges always looked tight and wavy. Slowing down and using a bigger needle just for binding off made a huge difference. My scarf finally lays flat.”
Helpful Tips for Better Results
Once you understand the mechanics of how to bind off knitting, small adjustments can take your edge from “secure” to “professional-looking.” These practical habits help right away:
- Check stretch as you go: Every 10 to 15 stitches, gently tug the bound-off section sideways. It should stretch similarly to the fabric beneath it. If it feels rigid, loosen your tension or switch to a larger needle.
- Mind your working yarn path: Keep the yarn feeding smoothly from the ball. If it catches or twists, you may tighten stitches unintentionally.
- Keep the edge even: Try to make each new stitch on the right needle the same size before passing the old stitch over. Oversized loops create a loopy edge; tiny loops create puckers.
- Use a table for support: Resting your forearms on a surface reduces “death grip” tension that many beginners develop while finishing.
- Block if appropriate: Many pieces look better after blocking. Wet blocking or steam blocking (depending on fiber) can help even out a slightly uneven bind-off edge. Always follow the yarn label’s care guidance and test steam on a swatch first.
Finishing matters, too. Weaving in tails neatly prevents the bind-off from loosening, especially with slick yarns. Treat binding off as part of the project, not an afterthought.
Creative Variations and Project Ideas
Learning how to bind off knitting opens the door to lots of finishing styles. The basic bind-off is dependable, but you can choose other methods depending on the look and function you want.
- Stretchy bind-off for cuffs and necklines: If your edge needs extra give (like a hat brim), look for “stretchy bind-off” options such as Jeny’s Surprisingly Stretchy Bind-Off. The concept is similar, but it adds yarnovers for more elasticity.
- Decorative picot edge: Picot bind-offs add a tiny looped trim, great for baby blankets or feminine shawls. It takes longer, but it creates a purposeful design feature.
- I-cord bind-off: This creates a rounded cord-like edge, beautiful on blankets and cardigans. It uses a few extra stitches and gives a polished, durable finish.
If you want quick projects to practice on, knit small squares as coasters or dishcloths. They are perfect for testing tension and different bind-offs without the pressure of a big garment. And if you enjoy giftable crafts, pairing handmade items can be fun: attach a small knitted ornament to a package along with felt Christmas ornaments for a cozy handmade theme, or combine knitting with paper decor ideas from this Christmas paper crafts guide.
Common Mistakes and How to Avoid Them
Most problems beginners have with how to bind off knitting come down to tension, orientation, or skipping finishing steps. Here are the most common issues and reliable fixes:
- Bind-off edge is too tight: This is the classic. Fix it by binding off with a needle one or two sizes larger, loosening your grip, or switching to a stretchy bind-off for areas that must expand.
- Edge flares or looks ruffly: This often happens when stitches on the right needle get too large before passing over. Focus on making the knit (or purl) stitch a normal size, then pass over. Blocking can help minor flare.
- Accidentally binding off the wrong way: Some beginners drop stitches off the left needle without securing them. Remember: you only remove a stitch from the needle after it has been worked and then passed over by the previous stitch.
- Twisted last stitch or messy corner: If you yank the tail through the final loop too hard, it can distort the corner. Pull snug, not tight. You can adjust with your tapestry needle later.
- Tail comes loose later: Weaving in the tail “straight through” once is often not enough. Weave in at least two directions, or follow the path of the stitches for a couple inches so friction holds it in place.
Think of the bind-off as both structure and aesthetics. A careful, even edge can elevate a simple scarf the same way a neat hem improves clothing, like in this practical hand-hem pants tutorial.
Frequently Asked Questions About How to Bind Off Knitting: Easy Beginner Guide
What does binding off mean in knitting?
Binding off means finishing your knitting by securing the live stitches so they cannot unravel. You convert each stitch into part of a chained edge by passing one stitch over another until only one loop remains. That final loop is tightened with the yarn tail. In other words, binding off turns “stitches on a needle” into a stable edge you can wear, wash, seam, and handle safely.
How do you bind off knitting step by step?
Knit two stitches, then lift the first stitch on the right needle up and over the second stitch and off the needle. Knit one more stitch, then lift the previous stitch over again. Repeat the pattern (knit 1, pass over) across the row. When one stitch remains, cut the yarn, pull the tail through the last stitch, and snug it gently. Weave in the tail to finish.
How do you bind off the last stitch?
When you have bound off across the row, you will end with one stitch on your right needle. Cut the working yarn, leaving a tail long enough to weave in securely (usually 6 to 10 inches). Pull that tail through the final loop and gently tighten. The goal is a secure knotless finish that matches the rest of the edge without puckering the corner.
How do you keep a bind-off edge from being too tight?
Use a larger needle for the bind-off row, relax your grip, and avoid pulling the working yarn after each pass-over. A good test is to stretch the edge as you go. If it barely stretches compared to your fabric, it is too tight. For cuffs, necklines, or any edge that must expand, choose a stretchy bind-off method rather than forcing the basic bind-off to behave like elastic.
What is the difference between binding off and casting off?
In most patterns, “bind off” and “cast off” mean the same thing: finishing stitches so they are secure and off the needles. The difference is mostly regional wording, with “cast off” appearing more often in UK instructions and “bind off” in US instructions. The technique described in this guide applies to both terms unless a pattern names a specific bind-off style.
How do you weave in the yarn tail after binding off?
Thread the tail onto a tapestry needle. On the wrong side of your work, follow the path of the stitches for 1 to 2 inches, then change direction and weave back through nearby stitches to lock it in place. Avoid pulling tight, which can pucker the edge. Trim the excess tail close to the fabric once it feels secure. For slippery yarn, weave a bit farther for extra hold.
Final Thoughts
Knowing how to bind off knitting is one of the most empowering beginner skills because it turns your work into a finished item you can actually use. Start with the basic bind-off, focus on relaxed tension, and do the simple stretch test as you go. Then take an extra minute to weave in the tail neatly so your edge stays secure through wear and washing. If you want a dependable visual reference, keep the Purl Soho basic bind-off tutorial bookmarked for future projects. Your next step: practice on a small swatch, try binding off with a larger needle, and compare the difference. With just a little repetition, your finishes will look clean, even, and confidently handmade.