Printable Bookmarks to Color: Cute Designs
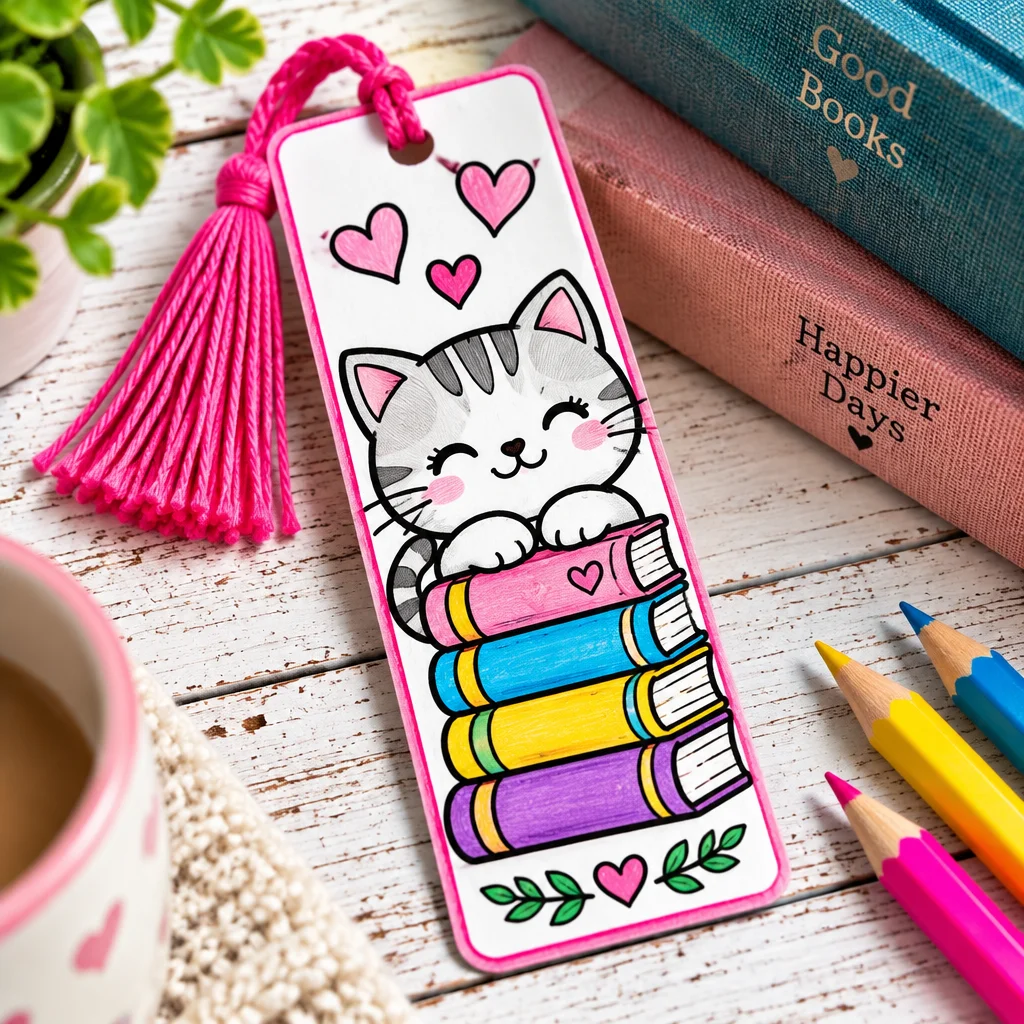
Printable Bookmarks to Color are one of those quick, satisfying craft projects that feel special without requiring a lot of supplies. If you are looking for cute designs you can print at home, color in your own style, and actually use in real books, you are in the right place. I love these for calm creative breaks, rainy afternoons with kids, and last minute gifts for teachers and friends. If you want a set of ready to print options, start with these free printable bookmark designs to color and then come back here to learn how to choose paper, keep your print size accurate, and make them sturdy enough for everyday reading. You can make a batch in about 20 to 45 minutes, depending on how detailed your coloring gets.
Printing bookmarks that are fun to color
The best Printable Bookmarks to Color start with a clean print: crisp lines, the right paper weight, and a size that fits neatly inside a book without bending. Most printable bookmarks are designed to fit US Letter paper (8.5 x 11 inches) with multiple bookmarks per page. Your goal is to print the outlines clearly so they are enjoyable to color, then cut accurately so the finished edges look intentional, not rushed.
Before you hit print, check whether your file is a PDF or a high resolution image. PDFs usually preserve sizing better and keep lines sharp. If the designs look fuzzy on screen, they will likely print fuzzy too. Also think about who is coloring. Small, detailed patterns are fun for teens and adults, while younger kids do better with bolder shapes and more open spaces.
Finally, plan for how you want to finish them. If you intend to laminate or use clear contact paper, you can print on lighter cardstock. If you want a soft, flexible bookmark, heavy paper plus a tassel is often enough. Choosing the end goal now helps you avoid reprinting later.
Paper, printer settings and cutting supplies
- Paper: Bright white cardstock in the 65 lb to 80 lb range is the sweet spot for most Printable Bookmarks to Color. It is thick enough for markers, but still feeds through most home printers reliably.
- Printer settings: Use “Best” or “High Quality” for sharper outlines. Select “Grayscale” or “Black and White” to keep lines clean and avoid color cast. Turn off any “Fit to page” settings unless the file specifically instructs you.
- Cutting tools: A paper trimmer makes straight edges easy, but sharp scissors work fine. For corners, a corner rounder punch gives a professional look and prevents pokey corners from bending in books.
- Extras: A single hole punch, embroidery floss or thin ribbon for tassels, and clear tape or glue stick for small repairs or reinforcements.
Printable bookmark designs to color
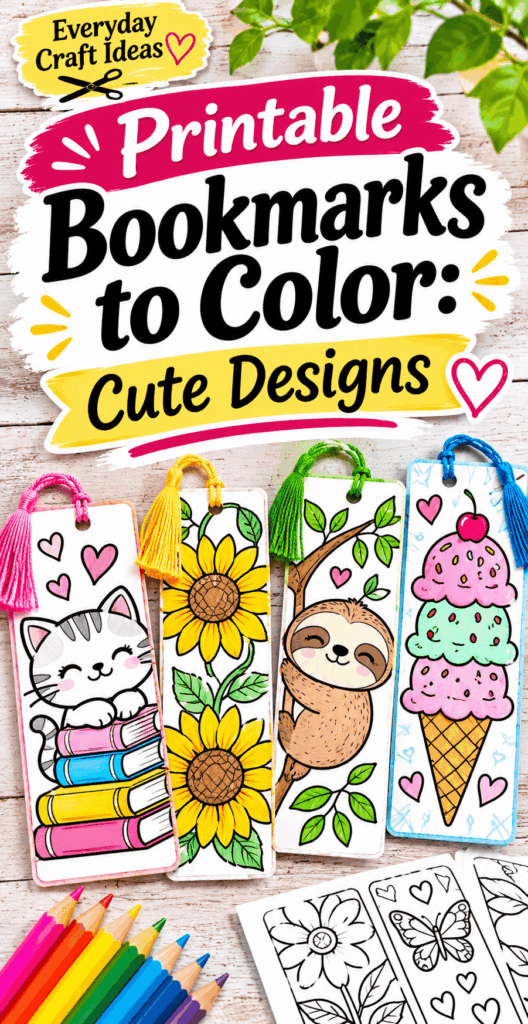
One reason Printable Bookmarks to Color are so popular is the variety. You can match the design to a reader’s personality, the season, or a classroom theme, and the same base template looks completely different depending on how it is colored. When you are choosing designs, look for thick, closed outlines (easier for kids) versus thin, intricate linework (better for colored pencils and careful shading). Also consider the “white space” around the art. A small border of blank area helps the design look finished after trimming, especially if your cut is not millimeter perfect.
If you are building a small set, aim for variety: one floral, one animal, one geometric pattern, and one book quote. This makes your print session feel worthwhile, and it gives kids choices without printing endless pages. Seasonal themes are also wonderful for gifting. For example, winter designs pair nicely with simple paper crafting projects. If you are already in holiday mode, these Christmas paper crafts to make are great companions to a bookmark gift set.
Flower and botanical bookmarks
Florals are a classic choice for Printable Bookmarks to Color because they work with almost any coloring style. Beginners can block in petals with one or two shades, while more advanced colorists can blend gradients and add tiny veins. Botanical designs also look beautiful with limited palettes, such as greens plus one accent color. For a polished look, color the leaves in two greens (a light base and a darker edge) and keep the background white. If you want the bookmark to feel “modern,” try unexpected colors like teal leaves or coral flowers.
Animal and nature-themed bookmarks
Animals are instant crowd pleasers, especially for kids and classroom rewards. Look for designs with friendly faces, bold outlines, and larger shapes, such as cats, sloths, foxes, owls, or sea animals. Nature scenes like mountains, rainbows, stars, and mushrooms are also fun because they encourage experimentation with sky gradients and texture. A practical tip: if your design includes lots of tiny fur lines, colored pencils will usually look cleaner than markers because they do not bleed into small spaces.
Geometric and patterned bookmarks
Geometric Printable Bookmarks to Color are perfect for relaxing, repetitive coloring. Patterns like chevrons, mandalas, scallops, and mosaic tiles look impressive even with simple color choices. To avoid visual chaos, pick 3 to 5 colors and repeat them in a predictable order. If you want a more sophisticated finish, use two neutrals (gray and tan) plus one bold color. These are also great for using up gel pens or fineliners once the base coloring is finished.
Book-themed bookmarks and reading quotes
Bookmarks with book stacks, open books, glasses, and reading quotes make especially thoughtful gifts. When coloring quote designs, make sure the text stays readable. Keep the letters dark and the surrounding area lighter, or outline the letters with a fine black pen after coloring. If you are making gifts for a book club, add the club name and date on the back. A small personal detail makes Printable Bookmarks to Color feel custom without adding much work.
Simple coloring bookmarks for younger children
For younger kids, choose designs with thick outlines, large shapes, and minimal tiny sections. Big hearts, simple flowers, cute animals, and bold stars are ideal. Avoid heavy black backgrounds because they can be frustrating to color and can transfer smudges onto hands. If you are crafting with a group, print two types: one “easy” page and one “detailed” page. Kids can choose what feels comfortable, and everyone ends up with a finished bookmark they are proud to use.
How to print and make coloring bookmarks
This is where your Printable Bookmarks to Color go from a file on your computer to a finished, usable craft. The steps are simple, but each one prevents common beginner problems like wrong sizing, jagged cuts, or smeared coloring. If you are crafting with kids, do the printing and cutting first, then set up a coloring station. That keeps the activity calm and reduces tool sharing issues.
Plan for about 10 minutes to print and cut a page, then anywhere from 10 to 60 minutes to color depending on the design. If you want to make several at once, assemble in batches: print everything, cut everything, then color. Batch crafting feels faster and your results tend to look more consistent.
- Open the file in a reliable viewer. PDFs should be opened in a PDF reader (not a browser preview) to preserve line quality and sizing.
- Set sizing correctly. Choose “Actual size” or “100%” so the bookmarks print at the intended dimensions.
- Print one test page. A quick test avoids wasting cardstock if your printer tries to auto-scale.
- Cut with a steady method. Use a ruler and scissors slowly, or a paper trimmer for crisp edges.
- Color before adding 3D details. If you plan to add tassels or laminate, coloring first prevents warping and keeps everything clean.
Printing at actual size on US Letter paper
Most Printable Bookmarks to Color are designed for US Letter. In your print dialog, look for a section called “Page sizing and handling.” Select Actual size or 100%. Avoid “Fit” or “Shrink oversized pages,” which can make bookmarks slightly too small or distort margins. If your printer has borderless printing turned on, switch it off for this project. Borderless printing can enlarge artwork to fill the page, which changes the bookmark width.
If you are printing from a phone, be extra cautious. Many mobile print apps auto-scale. If possible, print from a desktop or laptop for the cleanest sizing control.
Cutting straight edges and rounding corners
Straight cuts instantly make your Printable Bookmarks to Color look more professional. If you have a paper trimmer, line up the printed crop marks (if included) and press firmly for a clean cut. With scissors, cut just outside the line first, then trim more precisely on a second pass. That reduces jagged edges caused by trying to be perfect in one cut.
Rounding corners is optional, but it helps prevent dog-eared bookmark corners and makes them slide into pages smoothly. A corner rounder punch is the easiest. If you do not have one, trace a coin at each corner and cut along the curve.
Coloring, adding names and personalizing designs
Colored pencils are the most forgiving because they rarely bleed through paper. Markers are bold and fun, but test first, especially on regular printer paper. If you want to add a child’s name, do it after coloring so you can place it where it looks best. Use a fine tip marker or gel pen for names, and consider outlining bubble letters for a cute finished look.
Personalization ideas include adding a favorite character color palette, writing a short note on the back, or adding a mini “This book belongs to” label. For classroom sets, you can number the bookmarks so you know which student they belong to.
Making bookmarks sturdy enough to use
Coloring is the fun part, but durability is what makes Printable Bookmarks to Color actually last inside backpacks, library books, and nightstands. The most common problems are bending, ink smudging, and corners fraying. You can solve all three with simple finishing choices: thicker paper, a protective cover layer, and reinforced holes if you add tassels.
Think about your reader. Kids tend to be tough on bookmarks, so laminating or contact paper is worth the extra step. Adults may prefer a slimmer feel, in which case a quality cardstock with rounded corners is often enough. If you plan to sell or gift sets, a sturdier finish also makes them feel more “store bought.” For more ideas that work well for gifting and craft fairs, browse these handmade Christmas crafts to sell and consider adding bookmark bundles as an easy add-on item.
Cardstock, laminating and clear contact paper
- Cardstock only: Choose 65 lb to 80 lb cardstock and round the corners. This keeps bookmarks light but reasonably sturdy.
- Laminating: Laminating pouches (3 mil or 5 mil) provide the best protection. Leave a small clear border around the bookmark when cutting so the seal stays intact. If you cut exactly on the paper edge, lamination can peel over time.
- Clear contact paper: A great no-laminator option. Apply to the front first, smooth with an old gift card to remove bubbles, then apply to the back. Trim with a small border just like lamination.
Important note: if you used markers, make sure coloring is completely dry before sealing. Some inks can smear under plastic if they were not dry.
Adding tassels and organizing classroom activities
Tassels make Printable Bookmarks to Color feel extra special and help kids find their page quickly. Punch a hole about 1/4 inch from the top, centered. If the bookmark is not laminated, reinforce the hole with a small piece of clear tape on both sides before punching. Then thread embroidery floss, yarn, or thin ribbon through and knot securely.
For classrooms, set this up as stations: one table for coloring, one for corner rounding, one for tassels. Pre-cutting the bookmarks is helpful for safety and speed. If you need a calm add-on craft theme for early finishers, simple stitch projects can pair nicely with reading time. These beginner embroidery patterns are a good next step for older kids and teens who enjoy quiet crafting.
“I printed a page of Printable Bookmarks to Color for my daughter’s class reading challenge. Using cardstock and contact paper made them sturdy enough for backpacks, and the kids loved trading designs. The tip about rounding corners made a huge difference. No more bent edges after a week.”
Frequently Asked Questions About Printable Bookmarks to Color: Cute Designs
What paper should I use for printable bookmarks?
For most Printable Bookmarks to Color, 65 lb to 80 lb white cardstock is ideal. It is thick enough to handle colored pencils, crayons, and many markers without buckling, but still feeds through most home printers. If you only have regular printer paper, it will work, but consider adding clear contact paper or gluing the finished bookmark onto thin cardboard (like cereal box cardboard) for stiffness. Always test one sheet first if your printer is picky about heavier paper.
How do you print bookmarks without changing their size?
Open the file in a PDF reader and select “Actual size” or “100%” in the print settings. Avoid “Fit to page” because it often shrinks or enlarges the design slightly. Also turn off borderless printing, which can automatically scale artwork. If your file includes a test square (for example, 1 inch), measure it with a ruler after printing. If it is off, reprint after adjusting the scaling setting until it matches.
Can you make durable bookmarks without a laminator?
Yes. Clear contact paper works very well and is widely available. Apply it slowly, smoothing from the center outward to prevent bubbles, then trim with a small sealed border around the edge. Another option is packing tape in overlapping strips, though it can leave visible seams. If you want a non-plastic option, print on heavier cardstock, round the corners, and add a thin coat of a brush-on craft sealer. If you use any sealer, allow full drying time in a well-ventilated area.
Do markers bleed through printable bookmarks?
They can, especially alcohol-based markers or very juicy water-based markers on standard paper. For Printable Bookmarks to Color, cardstock reduces bleed and buckling, but it is still smart to do a quick test swatch in an unused corner or on a spare print. If bleed is a problem, switch to colored pencils or crayons, or laminate/contact-paper the bookmark only after the ink is completely dry to avoid smearing.
Should I color before or after laminating?
Color before laminating or adding contact paper. Coloring on top of plastic usually smears and does not blend well, and crayons may not adhere. The only exception is if you intentionally want a reusable, dry-erase style bookmark. In that case, laminate first and then use dry-erase markers on the surface, but keep in mind it will look different than traditional coloring and can rub off inside books.
How do I keep contact paper from getting bubbles?
Cut the contact paper slightly larger than the bookmark. Peel back a small section of the backing, stick one end down, then slowly peel and smooth as you go. Use an old gift card or a plastic scraper to push air outward. If a bubble forms, lift the contact paper gently and re-smooth. For tiny trapped bubbles, a pin-prick can release air, then smooth the spot flat.
What is the best way to punch a tassel hole without tearing?
If the bookmark is not laminated, reinforce the area first. Place a small piece of clear tape on both sides where the hole will go, then punch through the tape and paper together. If it is laminated or covered with contact paper, punch after sealing so the hole edges are protected. Keep the hole at least 1/4 inch from the top edge, and avoid placing it too close to a corner where it can rip.
How can I make bookmarks that look like a matching set?
Choose 3 to 5 colors and repeat them across each design, even if the art is different. Keeping a consistent background approach also helps, such as leaving backgrounds white, or adding a light pastel wash behind each design. Use the same corner shape on all bookmarks, and add a small signature detail, like a tiny heart or star in the same spot on each one. Consistency makes Printable Bookmarks to Color feel coordinated and gift-ready.
Can I use these for party favors or class rewards?
Absolutely. Printable Bookmarks to Color are ideal for party craft tables and classroom celebrations because they are low-mess and easy to customize. Pre-print and pre-cut them to save time, then offer a limited selection of coloring tools so kids are not overwhelmed. For party favors, package finished bookmarks in simple clear sleeves or envelopes. If you need a source for designs to start with, this collection of printable bookmarks to color makes it easy to build a themed bundle.
Final thoughts and using finished bookmarks as gifts
Printable Bookmarks to Color are a small craft with a big payoff: they are practical, personal, and fun to make at any skill level. Once you have your printing set correctly and a favorite paper picked out, you can create a whole stack in one relaxing afternoon. For your next session, choose two designs with different detail levels, print on cardstock, round the corners, and try one durability upgrade like contact paper or a tassel. Then tuck a finished bookmark into a book you are gifting, add a short note on the back, or bundle a set with colored pencils for a thoughtful, budget-friendly present that truly gets used.