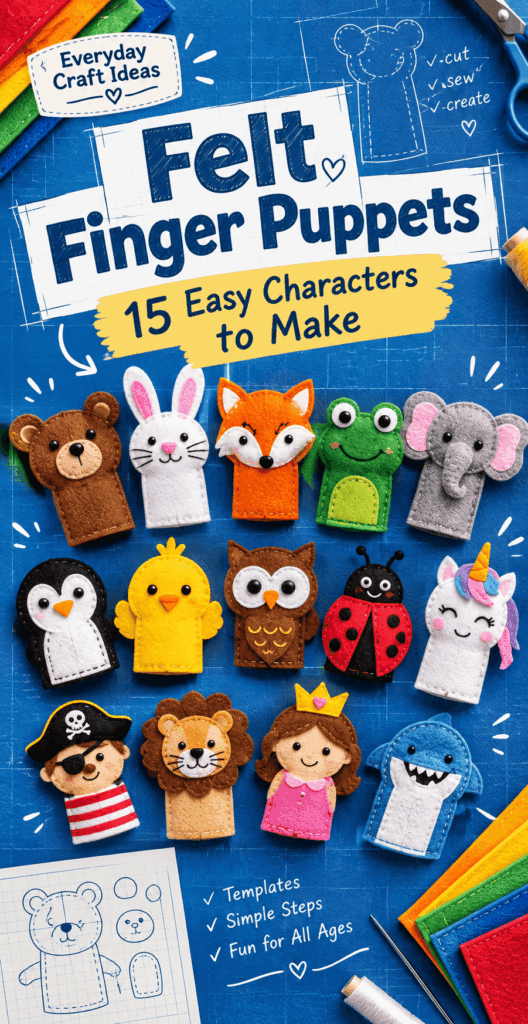
Felt Finger Puppets: 15 Easy Characters to Make
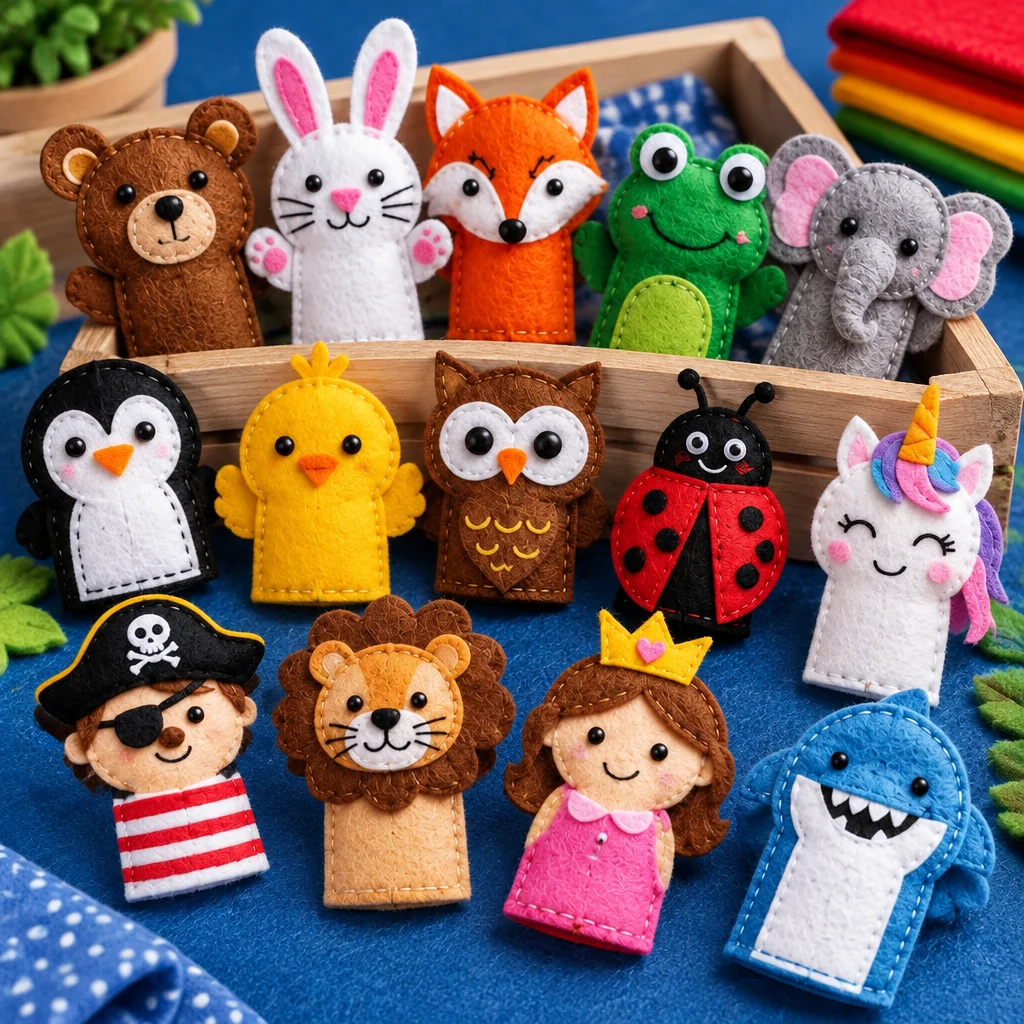
Felt Finger Puppets are one of the fastest, most satisfying hand-sewing (or no-sew) projects you can make, and they instantly turn into a toy you will actually use. In about an afternoon, you can create a whole cast of tiny characters for bedtime stories, classroom circle time, party favors, or a rainy-day craft that does not require special equipment. Because felt does not fray, it is beginner-friendly and forgiving, even if your stitches are not perfect yet.
This guide teaches you sizing, safe embellishment choices, and simple assembly methods, then walks you through 15 easy characters you can mix and match. If you are new to felt, you may also enjoy these felt crafts for beginners for more confidence-building projects. And if you want seasonal ideas after you finish your puppet set, browse these easy handmade felt ornament ideas for more small, stash-friendly makes.
Expect simple shapes, small pieces, and big payoff: a handmade set that is cute, portable, and endlessly customizable.
Materials and Sizing for Felt Finger Puppets
Good results start with the right felt, the right size opening, and a realistic plan for how you will assemble. Felt Finger Puppets are small, but they get handled a lot, so durability matters. Choose materials that hold up to repeated play, and keep safety in mind if the puppets are for young children.
- Felt sheets: Craft felt works, but higher-density felt (often labeled “premium” or wool blend) stitches cleaner and pills less.
- Thread: Embroidery floss for visible blanket stitches, or all-purpose sewing thread for smaller, subtler stitches.
- Needles: A sharp hand-sewing needle; a tapestry needle is helpful for thicker floss.
- Scissors: Small sharp scissors for detail cutting; paper scissors for templates (keep them separate).
- Fabric glue or tacky glue: Useful for no-sew builds or holding tiny parts before stitching.
- Marking tool: Chalk pencil or washable marker for tracing templates.
- Optional stuffing: A pinch of fiberfill for raised snouts or beaks (use sparingly so the puppet still fits).
Choose durable felt and child-safe embellishments
If the puppets are for kids under three, skip hard eyes, beads, sequins, and anything that could pop off. The safest choice is embroidered features: simple backstitch for mouths, straight stitch for whiskers, and French knots only if the toy is for older kids who will not mouth it. Felt-on-felt features stitched down around the edge are also sturdy. If you love the look of googly eyes, reserve them for display puppets or older children and glue plus stitch around them so they cannot peel away.
Measure finger openings and allow for seams
A comfortable average puppet fits an adult index finger but still works for most kids. A reliable starting size is about 2 to 2.25 inches (5 to 5.7 cm) wide and 3 inches (7.5 cm) tall, plus seam allowance. Add about 1/8 to 1/4 inch (3 to 6 mm) around the sides and top for stitching. If the puppet will go on a child’s finger, reduce the width slightly, but keep enough room so it slides on and off without stretching the stitches.
Sewing versus no-sew assembly
Sewing creates the longest-lasting Felt Finger Puppets, especially at the side seams. Blanket stitch is ideal because it wraps the edge and prevents stretching. No-sew is faster and can be sturdy if you use strong tacky glue, press well, and keep design pieces flat. A hybrid approach works beautifully: glue facial pieces in place, then stitch the body seams.
15 Felt Finger Puppet Characters
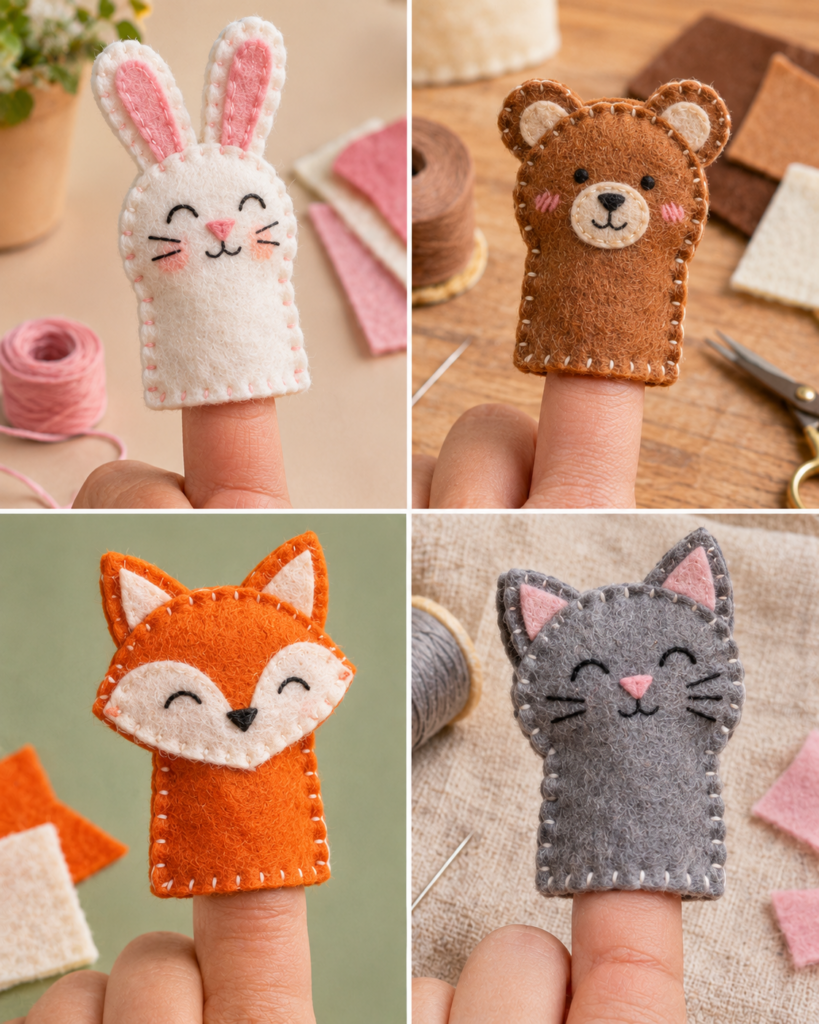
All 15 characters below use the same basic body: a front and back shape with an open bottom. Change the ear shape, colors, and face pieces, and you have an entire puppet theater. When making a set, cut all body pieces first, then batch-cut ears, snouts, and bellies assembly-line style. This saves time and helps your characters look consistent.
Fox with pointed ears
Use orange felt for the body, cream for the muzzle and inner ears, and a darker orange or brown for tiny eyebrow marks. Cut two tall triangles for ears and angle them slightly outward. A small cream teardrop muzzle stitched down makes the fox instantly recognizable. Add a tiny black nose with thread or a small felt dot stitched securely.
Bear with round ears
Choose brown, tan, or even pastel. Cut two small circles for ears and two smaller circles for inner ears. A rounded muzzle oval in a lighter shade, plus a simple vertical mouth stitch, creates a sweet bear face. Bears look especially cute with slightly wider bodies, so add a few millimeters to the side width.
Rabbit with long ears
Cut long ear shapes (like narrow leaves). Stitch them between the front and back layers at the top seam so they are extra secure. Add a tiny triangle nose and a single line down for the mouth. Pink inner ears add charm without needing extra details.
Cat with embroidered whiskers
Make triangle ears and a small pink nose. For whiskers, use three straight stitches on each side in a contrasting thread. Keep whiskers short so they do not snag. A cat face looks best when the eyes sit slightly higher and wider apart than you think.
Dog with floppy ears
Use a basic rounded body. Cut two droopy ear shapes and attach them at the side seams so they hang down. Add a felt spot over one eye or a two-tone muzzle for personality. A simple curved mouth stitch makes the dog look friendly rather than surprised.
Lion with a felt mane
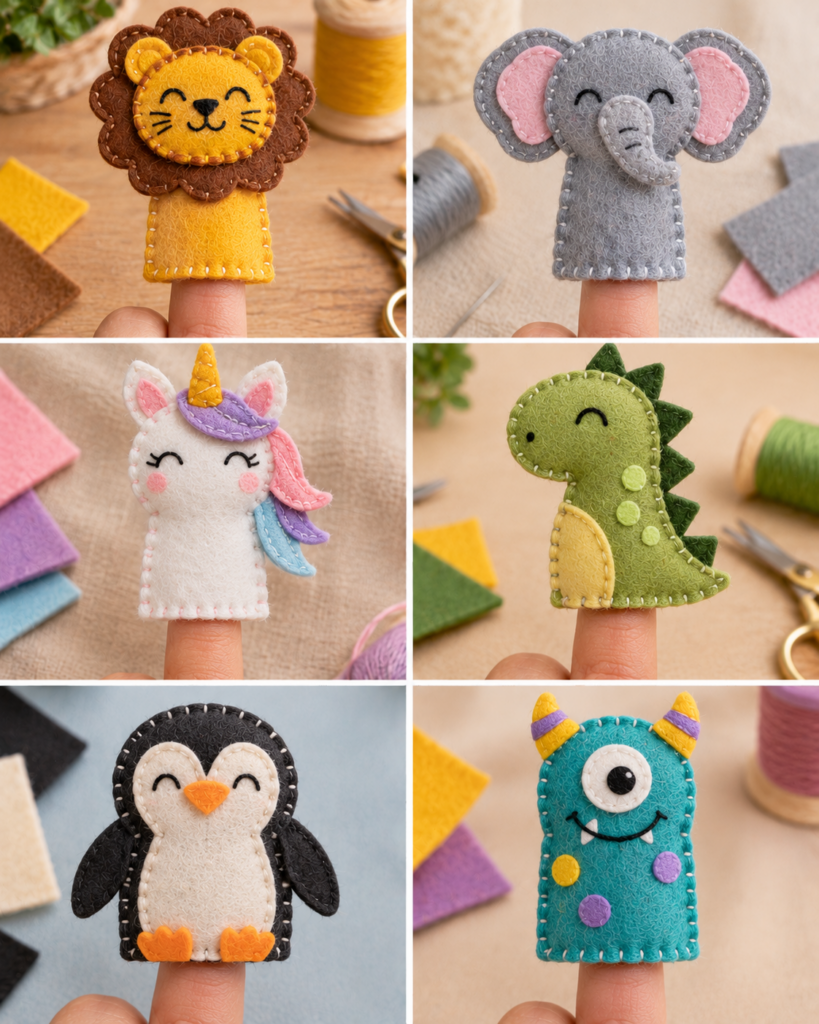
Make a golden or tan face circle on the front. For the mane, cut a ring of fringe: a larger circle with a smaller circle cut out of the center, then snip evenly around the outer edge to create strips. Stitch the mane down well around the face so fringe does not peel up with play.
Frog with raised eyes
Create two small green eye bumps (tiny circles) and stitch them to the top corners of the front piece. Add smaller white circles and black stitched pupils. A wide stitched smile sells the frog character. Keep the eyes low-profile so the puppet still stores easily.
Penguin with white belly
Use black or navy for the body and a white oval belly. Add small orange felt triangles for the beak and tiny orange feet at the bottom front (stitched into the seam or sewn onto the front only). Keep the beak flat for durability.
Owl with layered wings
Owls are perfect for felt layering. Cut a belly panel and two wing shapes. Stitch wings down along the curved top edge only so the lower edge is free and looks feathery. Add big circular eyes and a small beak triangle in the center.
Duck with orange beak
Use yellow body felt and a flat orange beak. A beak can be a simple rounded diamond folded in half and stitched at the fold for a slightly 3D look, or just a flat oval for toddlers. Add small black stitched eyes and optional rosy cheek circles.
Pig with round snout
Use pink felt and a darker pink snout circle or oval. Stitch two nostril lines or small ovals. Tiny triangle ears angled outward keep it playful. If you want a “farm set,” pigs pair nicely with ducks and dogs for quick storytelling.
Mouse with small ears
Choose gray felt and two small circles for ears. Add a lighter inner ear circle and a tiny nose dot. Mice look cute with very small eyes and a longer muzzle shape. Skip a tail on finger puppets unless you are sure it will not get tugged.
Dinosaur with felt spikes
Make a green or teal body and cut small triangle spikes. Stitch spikes into the back seam so they stand up. Keep spikes short and rounded at the tips for kid-friendliness. A row of lighter belly plates can be added as stitched-down ovals.
Unicorn with felt horn
Use white or pastel body felt. Cut a small horn triangle, roll it into a cone, and stitch the seam. Attach it securely at the top center, catching it in the body seam if possible. Add a simple yarn or felt forelock and embroidered closed eyes for a calm unicorn look.
Simple puppet person
Create a skin-tone face panel and add hair from felt or yarn. Use tiny felt shapes for a shirt collar or a tie. Embroider a smile and simple eyes. A person puppet is a great “narrator” character for stories, and you can customize it to resemble family members or classroom helpers.
How to Cut and Assemble a Basic Puppet
This is the core method I use for most Felt Finger Puppets. Once you make one good template and test the fit, you can repeat it for every character. Take your time on the first one, because neat edges and consistent seam allowance make even simple designs look polished.
- Create and test a paper template: Draw a rounded rectangle shape with a curved top (like a simple arch). Cut it out and wrap it around your finger to check width. This prevents finishing a puppet that is too tight to use.
- Cut two body pieces: Trace the template onto felt twice for each puppet. Cut cleanly with small scissors, turning the felt rather than chopping at it. Smooth cuts make stitching easier and reduce fuzz.
- Plan the face layout: Before stitching the body, place eyes, muzzles, beaks, or bellies on the front piece. Take a quick photo so you can replicate the placement across a set.
- Attach flat features first: Stitch or glue the facial pieces onto the front piece while it is still a single layer. It is much easier than trying to sew details after the puppet is assembled.
- Align front and back: Clip with small sewing clips (or pin carefully) around the edges. Start stitching at one bottom corner, go up one side, over the top, and down the other side.
- Leave the bottom open: Stop stitching when you reach the other bottom corner. Backstitch a couple of stitches (or knot securely) so play does not unravel the seam.
- Trim and tidy: If edges are uneven, trim carefully after sewing. Do not cut too close to stitches, or you may weaken the seam.
“I made the fox, owl, and unicorn for my daughter’s story basket. I was nervous about sewing tiny pieces, but stitching the faces before closing the sides made it so manageable. The blanket stitch hid my uneven edges, and the puppets have survived two weeks of daily play.” – Kelly, reader
Make a reusable front-and-back body template
After your first test puppet fits well, transfer the template to thin cardstock or a piece of plastic packaging. A firm template speeds up tracing and keeps your set uniform. If you want both child and adult sizes, label two templates and store them in your felt bin.
Join side edges while leaving the bottom open
Blanket stitch is the classic choice: it is decorative and strong, and it grips felt edges nicely. Whip stitch works too and is faster, but it can pull the edge inward if you stitch too tight. Keep your stitches evenly spaced, about 1/8 inch (3 mm) apart, and do not tug hard. The puppet should keep its shape without puckering.
Add facial features without loose small parts
For kids, the safest approach is embroidered eyes and stitched-down felt shapes. If you use glue, treat it as a temporary “basting” tool and still stitch around edges that might peel, like beaks or snouts. Avoid tiny buttons or beads for children who might mouth toys. If your puppet is for decor only, you can add more delicate embellishments, but label it as not a toy.
Storytelling and Storage Ideas
Once you have a small cast, Felt Finger Puppets become more than a craft. They become a reusable activity that encourages storytelling, vocabulary practice, and imaginative play. A little planning also keeps them from getting lost under the couch.
Build animal sets around a familiar story
Use your 15 characters to create mini story kits. A woodland set might include fox, bear, rabbit, owl, and frog. A farm set might include pig, duck, dog, and a puppet person as the farmer. If you are crafting with a group, assign each person one character, then perform a short story together. For seasonal storytelling, it is fun to pair puppets with simple felt decor. If you like holiday crafts, these felt Christmas ornaments to make can inspire color palettes and small details like scarves and hats for winter characters.
Make a simple felt puppet storage pouch
A pouch keeps your set clean and makes it easy to travel. Cut two felt rectangles about 6 x 8 inches (15 x 20 cm). Stitch around the sides and bottom, leaving the top open. Add a flap with a snap for adult use, or use a wide overlap for child safety (avoid long drawstrings for small kids). You can decorate the pouch with a stitched label or a tiny appliqué. If you enjoy small felt projects like this, you will find more ideas in these beginner-friendly felt crafts.
Frequently Asked Questions About Felt Finger Puppets: 15 Easy Characters to Make
What size should a felt finger puppet be?
A practical “universal” size is about 2 to 2.25 inches (5 to 5.7 cm) wide and roughly 3 inches (7.5 cm) tall, plus seam allowance. For adult hands, add a little width and height. For small children, reduce width slightly and keep the opening easy to slide on. Always test with a paper template first, because thick felt and tight stitches can shrink the opening.
Can you make felt finger puppets without sewing?
Yes, you can make no-sew Felt Finger Puppets with tacky glue or fabric glue, especially if they are for gentle play or decor. Use overlapping seams (about 1/4 inch or 6 mm) and press firmly under a book while drying. Still choose flat, lightweight features and avoid heavy add-ons. For longer life, consider a hybrid approach: glue details, then hand-stitch the side seams.
Are felt finger puppets suitable for toddlers?
They can be, but build them with toddler safety in mind. Skip beads, buttons, plastic eyes, sequins, and any loose accessories. Use embroidered faces or securely stitched felt pieces. Keep horns, spikes, and ears short and firmly caught in seams so they cannot be pulled free. If a toddler mouths toys, supervise use and inspect seams regularly for wear.
Why does my puppet look lopsided when I finish sewing?
Lopsided shapes usually come from uneven cutting or the layers shifting while you stitch. Trace with a firm template, cut slowly, and stack-cut only if your scissors are very sharp. When sewing, use clips to hold layers aligned and check every few stitches that the edges are still matched. If it is slightly uneven, you can carefully trim the edge after sewing, leaving enough felt beyond the stitches.
My blanket stitches look messy. How can I make them neater?
Use fewer, slightly larger stitches at first, and keep spacing consistent. Thread length matters too: long strands tangle and cause uneven tension, so cut embroidery floss around 18 to 24 inches (45 to 60 cm). Make sure the loop of the blanket stitch always catches on the same side of the thread. Practicing on two scrap felt strips for five minutes makes a big difference.
What is the best way to attach tiny ears or horns so they do not fall off?
Catch them in the seam. Place the ear or horn between the front and back body pieces with the raw edge extending slightly into the seam allowance, then stitch through all layers. For extra security, add a few reinforcing stitches at the base. If the part is glued on top instead, stitch around its base because glue alone can peel over time with handling.
How do I keep glued pieces from peeling off felt?
Use the right glue and the right pressure. Tacky glue typically grabs felt better than watery school glue. Apply a thin, even layer, press firmly, and let it dry fully under weight. Avoid gluing dusty felt, and do not over-handle while drying. For puppets that will be played with often, add a simple running stitch around the edge of the glued piece as “insurance.”
Can I wash Felt Finger Puppets?
Spot-cleaning is safest. Dab with a barely damp cloth and mild soap, then press in a towel to remove moisture and air-dry completely. Soaking can loosen glue, distort felt, and cause colors to bleed depending on the felt type. If you plan for frequent cleaning, lean toward stitched construction and embroidered faces rather than glued embellishments.
How can I make a matching themed set quickly?
Batch your steps. Cut all body pieces first, then cut all repeated features, like bellies or ears, in one session. Keep a small tray for each character so parts do not get mixed up. Limit your palette to 6 to 8 felt colors and repeat them across animals. For more small felt projects that teach this kind of assembly-line crafting, revisit these handmade felt ornament ideas and borrow their simple shape-based approach.
Final Thoughts
If you want a craft that feels approachable but still looks charming when finished, Felt Finger Puppets are a smart first project. Start with two or three characters that use simple shapes, like the bear, penguin, and pig, then build up to fringed or layered designs like the lion and owl once your stitching feels steady. Keep details flat, prioritize embroidered or stitched-on features for durability, and test your template on a finger before cutting a whole set.
Your next step: pick one theme (woodland, farm, or fantasy), cut all the bodies at once, and sew just one “test puppet” start to finish. After you confirm the fit and stitching, the rest of the set becomes easy and relaxing to repeat.