DIY Wooden Candle Holders: Safe Decorative Ideas
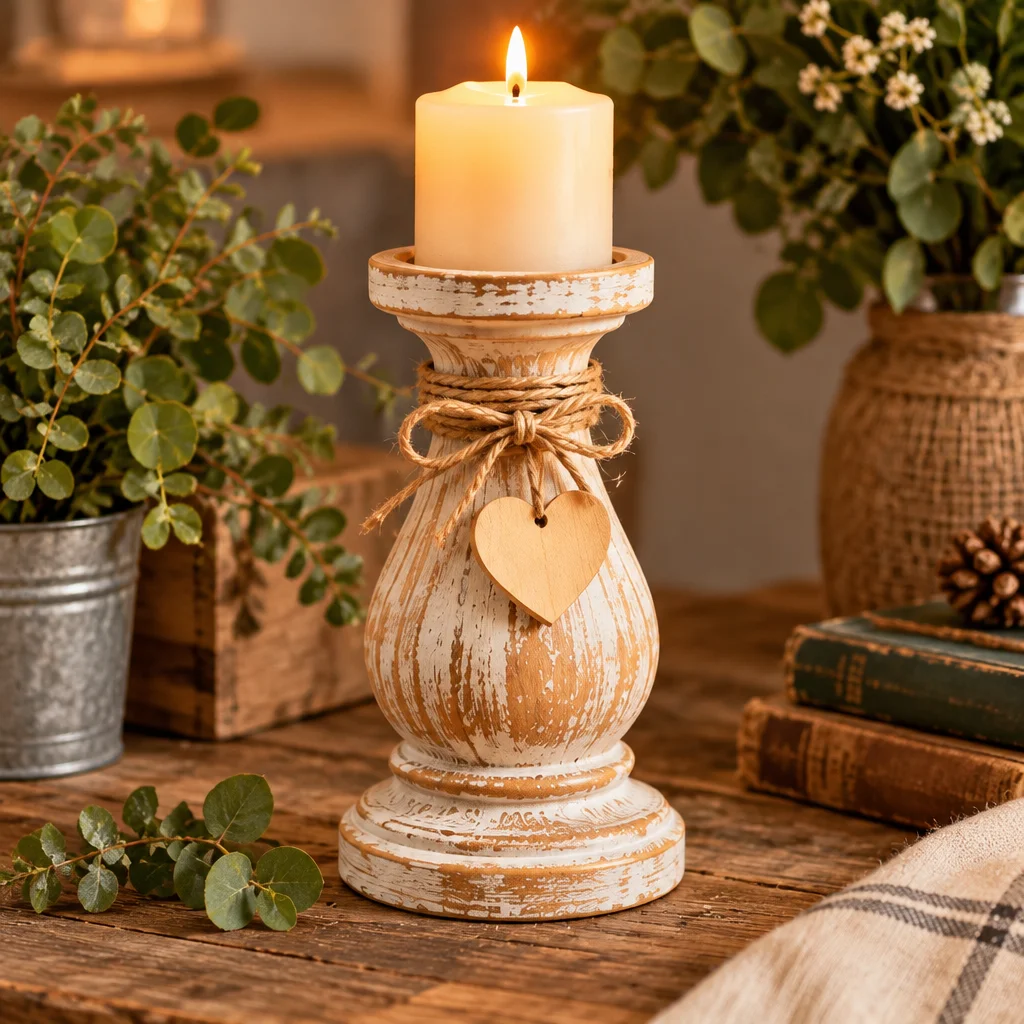
DIY Wooden Candle Holders are one of those satisfying beginner projects that look high end, cost very little, and instantly warm up a room. The big question is how to get that cozy candle look without introducing fire risk, scorch marks, or unstable bases. In this guide, you will learn safe design choices, how to prep and finish wood cleanly, and several decorative ideas you can customize for your home or to give as gifts. If you want more inspiration beyond wood, you can also browse these creative DIY candle holder ideas, and if you are styling a table for a party, these easy centerpiece ideas are a great companion read. Expect simple tools, clear steps, and lots of safety notes.
Choosing a Wooden Candle Holder Design Safely
Before you cut or drill anything, decide what “candle” you are actually holding. For wooden projects, the safest path is to design around LED tealights, LED pillars, or fairy-light “candle” sticks. Wood is combustible, and even if a real flame starts small, it can scorch finishes, weaken glue joints, and create hidden smoldering in cracks. Safety-first design also tends to look better because it prioritizes stability and clean proportions.
Start by picking a wide base footprint. A good rule is that the base width should be at least half the height of the display, and more if you have pets or kids. If you are building a multi-candle centerpiece, keep the weight low by using thicker base boards and shorter upright elements.
Next, plan how the LED candle will “register” in the holder. A shallow recess, a snug ring, or a shallow tray lip prevents sliding. Avoid narrow dowels supporting tall candles unless you counterweight the base.
Finally, think about placement. If this will sit on a dining table, you want smooth edges, a wipeable finish, and felt feet to protect surfaces. If it is for a shelf, you can use a deeper base and a slightly taller design for better visibility.
Materials, Tools and Surface Preparation
Most DIY Wooden Candle Holders can be made with scrap lumber and basic tools, but the quality of your prep work determines whether the project looks polished or homemade. Choose straight, dry wood, take time to sand, and test-fit your LED candles before finishing. Below are the main materials and why they matter.
- Wood stock: pine, poplar, oak, birch, or plywood offcuts. Avoid punky, cracked, or damp wood that will warp.
- LED candles: bring them to the shop. Sizes vary, and your recess must match the exact base diameter.
- Wood glue and clamps: for stacked or tray designs. Clamping improves bond strength and prevents gaps.
- Sandpaper (80, 120, 180, 220 grit): stepping through grits removes tool marks without rounding edges too much.
- Finish: water-based polyurethane, hardwax oil, or acrylic craft paint plus a protective topcoat for durability.
- Felt pads or cork: protects furniture and reduces sliding.
Selecting Stable Wood Blocks and Shapes
For block-style holders, aim for at least 1 inch thickness so the piece feels substantial and does not tip. If you are using 2×4 lumber, check it is not twisted. For trays, 1/2 to 3/4 inch boards work well when reinforced with a perimeter frame or underside runners. Branch or log styles should be fully dry and free of loose bark where debris can fall off.
Sanding, Drilling and Finishing Basics
Sand flat faces first, then edges. When drilling recesses, use a Forstner bit for a clean, flat-bottom hole. Drill press is ideal, but a handheld drill with a depth stop and careful alignment can work. Always pre-test stain or paint on a scrap from the same wood, because pine and poplar can blotch without conditioner. Let finishes cure fully before placing LED candles so the bases do not stick.
Decorative Wooden Candle Holder Ideas
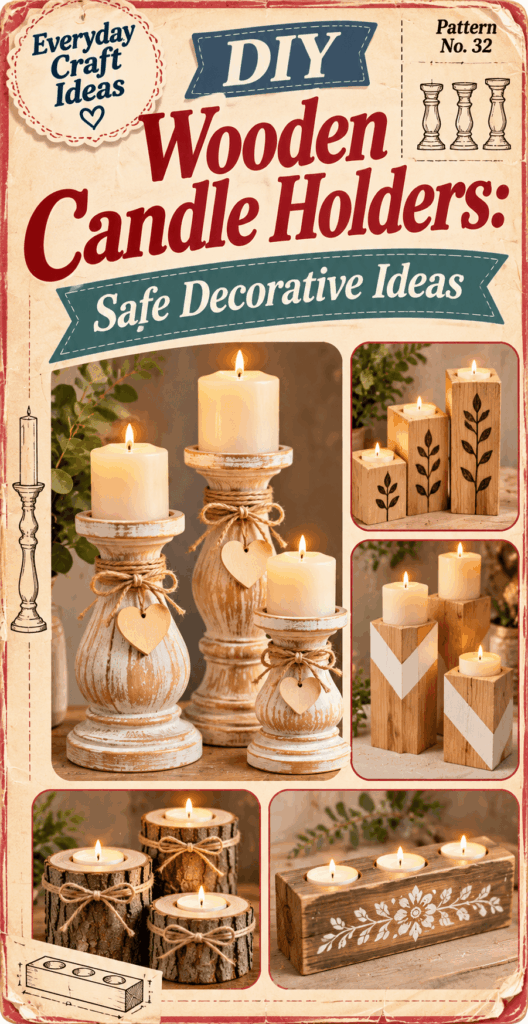
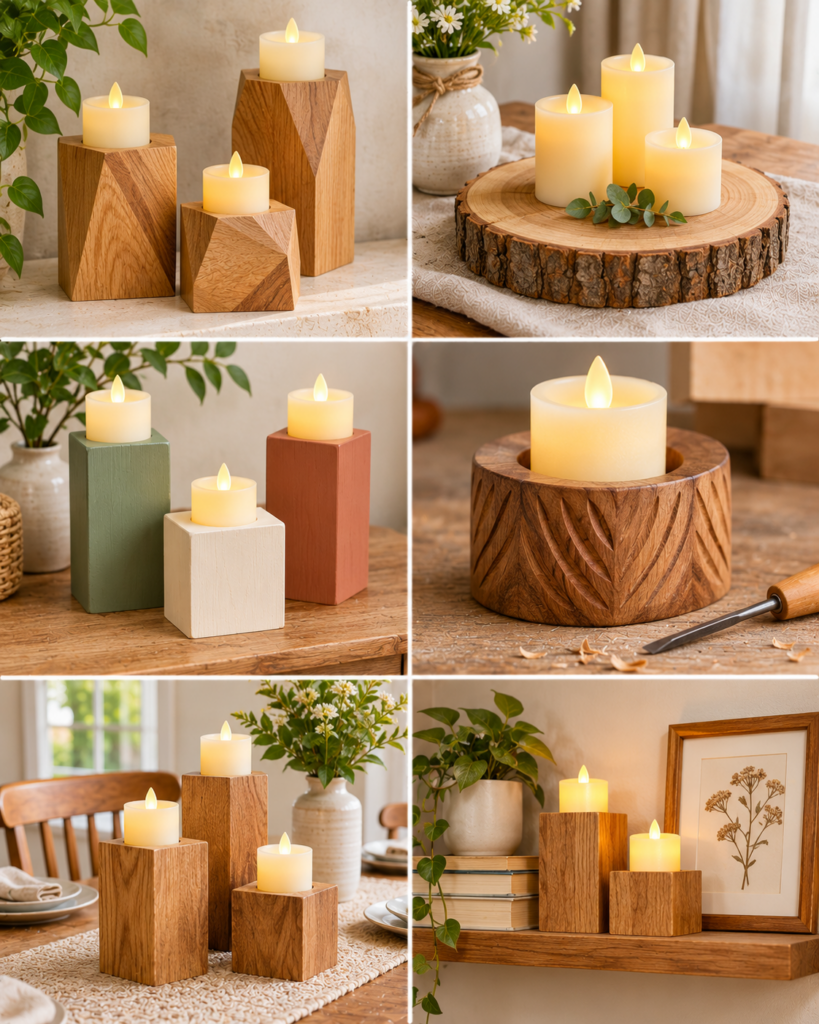
Once you commit to an LED-focused design, you can get very creative with shape, color, and texture. The goal is to build a piece that looks intentional from every angle and is easy to clean and store. Here are several DIY Wooden Candle Holders styles that are beginner friendly but still customizable.
Minimalist Wood Block LED Holders
Use a single hardwood or pine block with one or three shallow recesses. Keep edges crisp for a modern look, or lightly bevel the top edges with sandpaper for a softer feel. A clear satin finish highlights grain and makes it easy to wipe off dust.
Rustic Branch-Inspired LED Display
Cut a dry branch or small log section into a stable length, then sand the bottom flat so it sits without rocking. Add LED tealight recesses along the top. For rustic charm without mess, remove loose bark but keep some texture. Seal it with a clear matte finish to reduce shedding.
Geometric Stacked Wood Display
Stack and glue small blocks in offset layers like a skyline. This looks great painted monochrome, or with alternating stain tones. Keep the stack low and wide, and clamp well to avoid glue-line gaps. Add a recess only on the topmost flat surfaces.
Painted Wooden Candle Tray for LED Candles
A tray corrals multiple LED pillars and makes it easy to move the whole arrangement. Build a simple rectangle base with low sides, then paint it to match your décor. Add a thin topcoat so the paint resists scuffs. This style pairs well with greenery and seasonal accents.
Wooden Bead LED Candle Centerpiece
String unfinished wood beads into garlands and wrap them around a block base, or glue beads around the rim of a tray for texture. Keep beads away from any heat source and seal them if you want a less dusty surface. This style photographs beautifully for parties and holidays.
Seasonal Wood Block Display
Make a base that can be restyled: drill simple recesses, then swap add-ons like mini wreaths, felt shapes, or vinyl lettering. For giftable ideas, pair it with a seasonal theme and include batteries for the LED candles. If you are planning holiday gifting, these DIY gift ideas people actually want can help you build a full handmade bundle.
How to Make a Simple LED Candle Holder
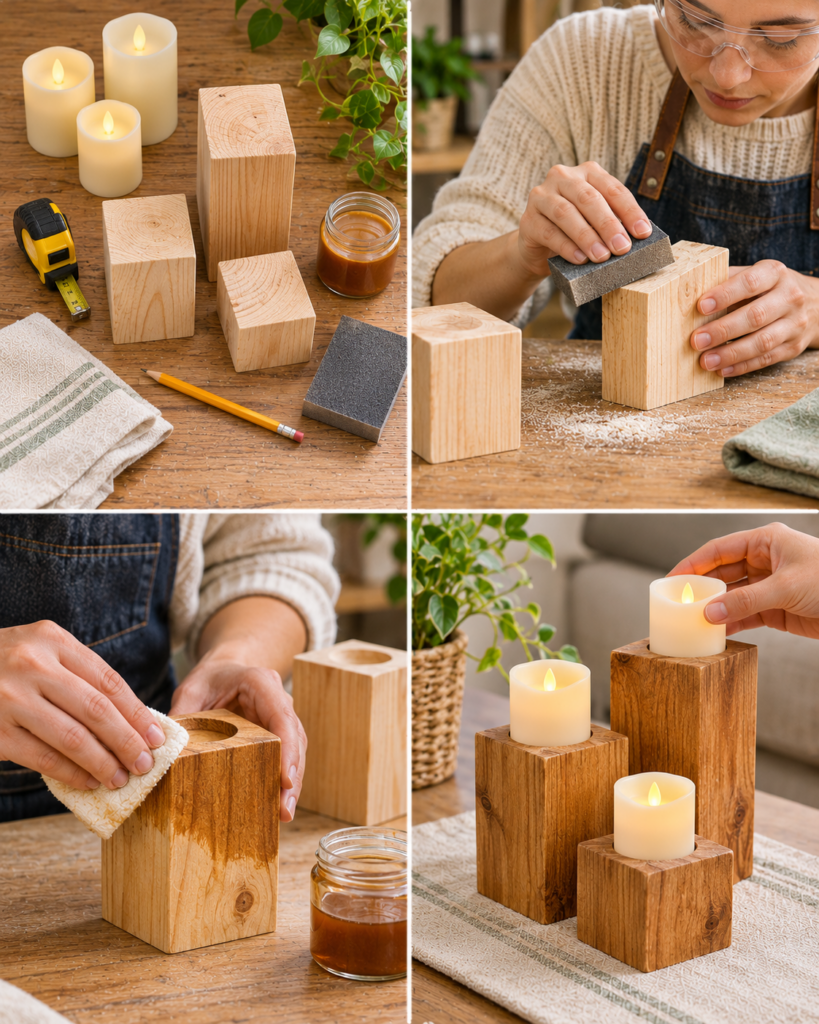
This tutorial is a reliable first project: a clean wood block that holds one LED tealight or small LED pillar. Difficulty is beginner. Estimated time is 45 to 90 minutes plus drying time for finish. Size can be as small as a 3×3 inch block, but a 3×6 inch block feels more stable and looks intentional.
Marking and Cutting the Base
- Choose your blank: start with a flat, straight board or 2x lumber cut to length. A 1.5 inch thick piece is ideal for a recess without drilling through.
- Square the ends: use a miter saw, hand saw with a miter box, or a circular saw with a guide. Square cuts keep the holder from rocking.
- Mark the center: draw diagonal lines corner-to-corner on the top face to find the center point. Accurate marking prevents a recess that looks “off” even if it functions.
- Plan your recess size: measure the LED candle base diameter, then choose a Forstner bit slightly larger, or match the size and sand for a snug fit.
Smoothing Edges and Applying Finish
- Sand in stages: 80 grit to remove saw marks, 120 to refine, 180 to smooth, 220 for finish-ready surfaces. Wipe dust between grits.
- Ease sharp corners: do a light pass with 220 grit on corners. This prevents splintering and makes it feel nicer to handle.
- Apply finish: choose one: clear water-based poly for durability, hardwax oil for a natural matte feel, or paint plus topcoat for color. Thin coats reduce drips and brush marks.
- Let it cure: “dry to touch” is not the same as cured. Give it enough time so the LED candle base does not stick or imprint the finish.
Adding a Stable LED Candle Recess
- Set drilling depth: recess depth of 1/8 to 3/8 inch is usually enough to keep an LED tealight from sliding. Use painter’s tape on the bit as a depth marker if you do not have a stop collar.
- Drill slowly: keep the drill perpendicular. Start at low speed so the bit does not skate across the wood.
- Test-fit: the candle should sit flat. If it is too tight, sand the recess walls lightly by wrapping sandpaper around a dowel.
- Add felt feet: felt pads reduce wobble on slightly uneven tables and protect surfaces.
Fire Safety: Why LED Candles Are the Preferred Option
DIY Wooden Candle Holders look beautiful, but wood and open flame do not belong together without specialized inserts, heat shielding, and careful supervision. Even then, the risk is often not worth it for a decorative project. LED candles give you the same warm glow with a far wider safety margin, especially in homes with children, pets, curtains, bookshelves, or crowded holiday tables.
LED options are also more forgiving with finishes. Many clear coats and craft paints are not rated for high heat and can discolor or soften. With LEDs, you can confidently use water-based polyurethane, acrylic paint, decoupage details, or decorative glue-ons without worrying about heat damage. You also avoid soot marks and smoke residue on your wood grain.
If you love the look of a flickering flame, choose “flicker” LEDs with a warm white color temperature. For centerpieces, remote-controlled LEDs let you turn everything on at once. For gifting, timer LEDs are ideal because they feel magical without requiring the recipient to remember to turn them off.
One more safety note: even LEDs use batteries. Make sure the battery compartment closes securely, and do not give small battery-powered candles to households with very young children unless you know they can be stored safely.
Styling Ideas for Tables, Shelves and Gifts
The styling is where these projects really shine. Because DIY Wooden Candle Holders are neutral, they work as everyday décor and can also shift into seasonal decorating with simple add-ons. For a dining table, group three holders of varying heights on a tray, then add a small garland or a few pinecones around the base. Keep the arrangement low enough for conversation sightlines.
For shelves and mantels, balance the holder with vertical items like framed art or a small vase. Odd-number groupings look natural, and mixing wood tones adds depth. If your room already has a lot of wood, paint your holders a soft matte color so the glow becomes the focal point.
For events, these make thoughtful accents without blowing the budget. A bead-trimmed centerpiece or painted tray can work for showers and parties. If you are planning a celebration, these budget-friendly baby shower decorations have great styling tips that pair well with LED candle décor.
For holiday gifting, wrap a holder with two LED candles and spare batteries. Add a tag with a “timer tip” if the candles have one. You can even include a tiny ornament tied to the ribbon, and these DIY ornament ideas offer easy options.
“I made the simple wood block version with a Forstner bit and a tiny bevel on the edges. The felt feet tip was a game changer because my table is slightly uneven. I ended up making a set of three as gifts, and everyone thought they were store-bought.”
Troubleshooting Wobbly Bases and Uneven Finishes
Most beginner frustration with DIY Wooden Candle Holders comes down to two issues: the holder does not sit flat, or the finish looks blotchy or streaky. Both are fixable without scrapping the whole project.
If the base wobbles: First, check the surface you are testing on. Countertops and tables can be uneven. If it wobbles on multiple surfaces, identify the high corner by pressing opposite corners. Lightly sand the bottom on a flat surface with sandpaper taped down, using slow figure-eight motions. For larger pieces, a hand plane can true the base quickly if you are comfortable using one. Felt pads can compensate for tiny imperfections, but do not rely on them to fix a severely twisted base.
If your recess is off-center: You can visually “rebalance” by adding a second recess and making it a two-candle holder, or by painting/staining the top and adding a decorative border that reframes the layout. Small design pivots often look intentional.
If stain looks blotchy: Pine and poplar often absorb unevenly. Sand back lightly, apply a pre-stain wood conditioner, then stain again. Alternatively, switch to a gel stain, which sits more on the surface and can look more even.
If your finish has brush marks: Use thinner coats, a better-quality synthetic brush for water-based products, and sand lightly with 320 grit between coats. Dust control matters, so wipe with a clean cloth before recoating.
Frequently Asked Questions About DIY Wooden Candle Holders: Safe Decorative Ideas
Can I Put a Real Flame Directly in Wood?
It is not recommended. A real tealight or candle flame can char wood, heat nearby glue joints, and ignite finishes that are not heat-rated. Even if the flame seems contained, the metal cup can get hot enough to scorch the surface underneath. If you insist on real flame for a specific situation, use a properly rated metal or glass insert designed for candles, keep generous clearance around it, and never leave it unattended. For most home décor, LED is the safer and more practical choice.
Which Finish Works Best for Decorative Wood?
For most indoor candle holders, a water-based polyurethane is durable, low odor, and dries clear without yellowing too much. Hardwax oil gives a natural, touchable matte look and is easy to refresh, but it is slightly less resistant to scratches than poly. Acrylic paint is great for color, especially on tray styles, but add a clear topcoat for wipeability. No finish makes wood safe for direct flame, so choose finishes for durability and appearance, not heat resistance.
How Do I Make the Base Stable?
Start with straight, dry wood and make sure your cuts are square. Wider bases are more stable than tall narrow designs, so increase footprint as you add height. Flatten the bottom carefully by sanding on a known-flat surface. If your design is tall, add weight low by using thicker stock for the base or gluing on a hidden underside plate. Finish with felt feet to reduce sliding and to “tune” small rocking issues.
What is the best drill bit for a clean LED tealight recess?
A Forstner bit is usually the best choice because it cuts a flat-bottom hole with clean edges. Spade bits tend to tear out and leave rough rims, and hole saws can leave a plug and a ragged edge. If you only have a spade bit, drill from both sides to reduce tear-out, but you will still need extra sanding. Always test on scrap wood first to confirm fit and depth.
How deep should I drill the recess for an LED candle?
Most LED tealights only need 1/8 to 3/8 inch depth to keep them from sliding. Deeper is not always better because you want easy removal for battery changes. For LED pillars, consider a shallow “locator” recess or a rimmed tray rather than a deep hole. Measure your specific candle base and test-fit often so you do not drill too deep.
Can I use reclaimed pallet wood for wooden candle holders?
Yes, but be selective. Pallet boards can be contaminated, cracked, or full of hidden nails and staples. Only use pallets stamped HT (heat treated), not chemically treated. Remove all metal hardware, then cut away split ends. Because pallet wood often has rough grain, plan extra sanding and consider a paint finish if the boards look mismatched after cleaning.
How do I prevent paint from chipping on edges?
Edge chipping usually comes from sharp corners and inadequate curing time. Lightly ease edges with sandpaper before painting, then apply thin coats and let them dry fully. A clear topcoat helps a lot, especially on trays that get handled. If the piece will be moved often, consider a more durable paint like a furniture-grade acrylic and avoid thick, brittle layers.
My stacked wood design shifted while drying. How can I fix it?
If the glue is still wet, loosen clamps, realign, and clamp again with cauls or scrap wood to distribute pressure. If it is already dry and the shift is small, sand the edges flush and treat it as a design detail. For bigger misalignment, you may need to cut the piece apart at the glue line with a thin saw, then reglue. Next time, use fewer glue puddles and more clamp points to prevent skating.
What is a simple way to make these gift-ready?
Add felt feet, include batteries, and attach a small care tag that says “LED candles only” and notes the finish used. Wrap the holder in kraft paper and tie with twine for a handmade look. If you want a themed bundle, pair it with other décor pieces or seasonal accessories. You can also include a link to inspiration, like these more candle holder projects, so the recipient can expand the set.
Final Thoughts
DIY Wooden Candle Holders are a perfect mix of practical woodworking and creative decorating, and choosing LED candles keeps the project firmly in the safe, beginner-friendly zone. Focus on stability, clean sanding, and a finish that fits your lifestyle, then build from there with paint, beads, stacked shapes, or seasonal styling. If you are making your first one, start with a simple block holder and treat it like a skill builder: measure carefully, drill slowly, and test-fit often. Once you have one finished, make a matching set of three and experiment with different heights and finishes for a cohesive display.