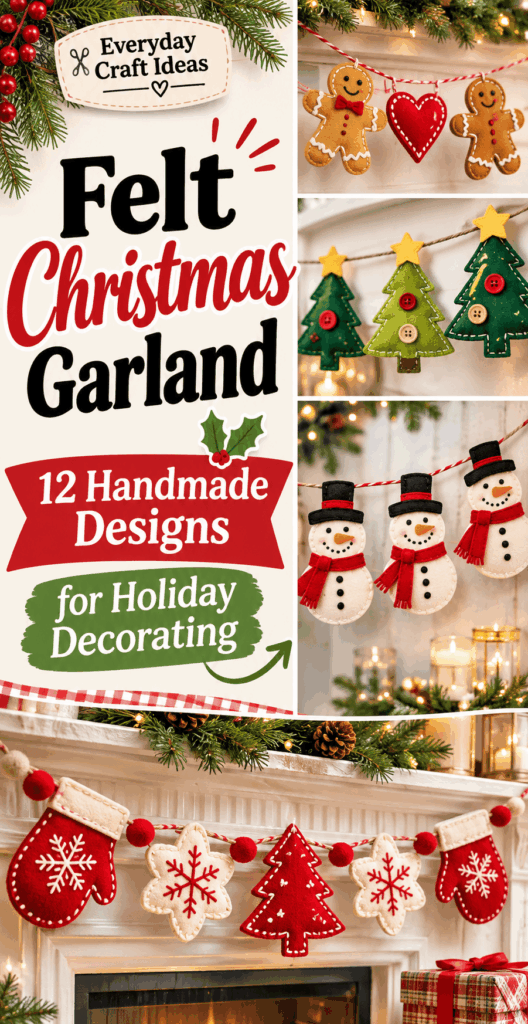
Felt Christmas Garland: 12 Handmade Designs for Holiday Decorating
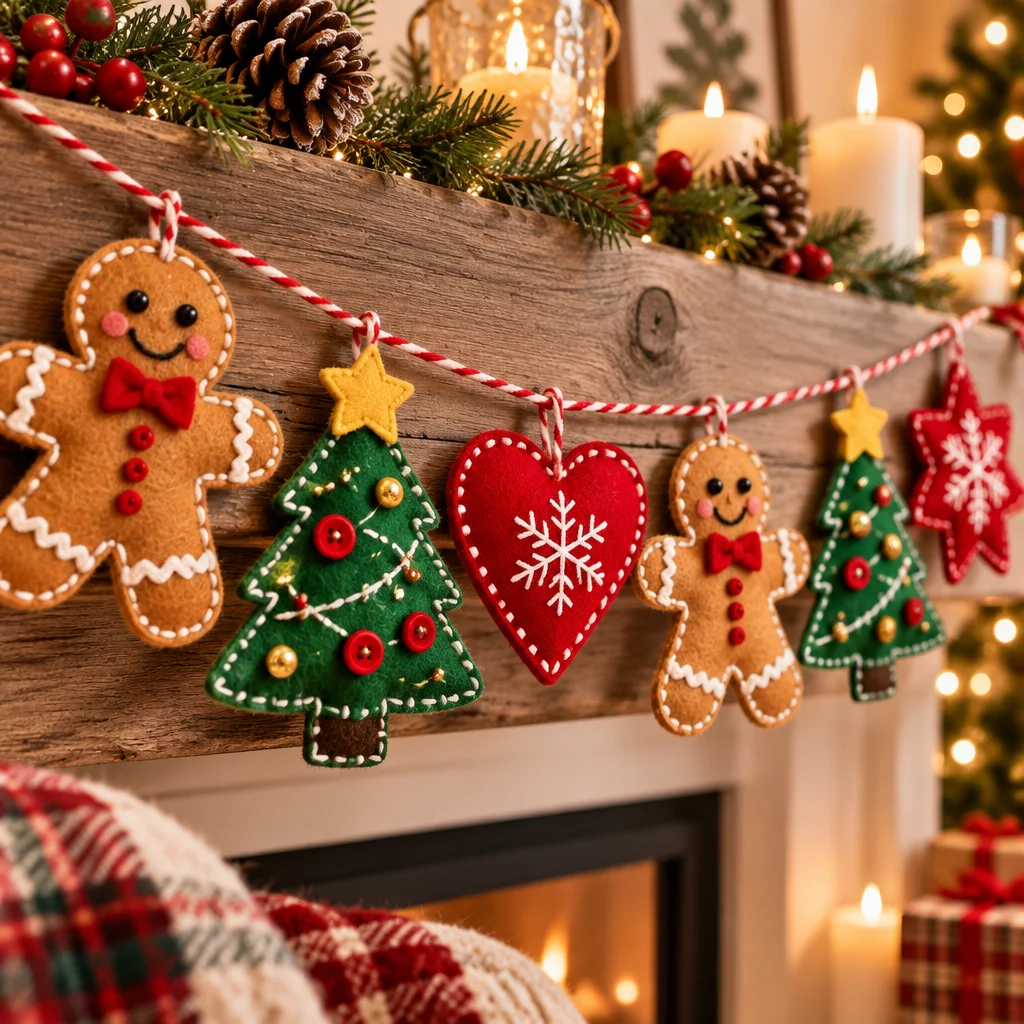
Felt Christmas Garland is one of the most forgiving holiday crafts you can make: it is lightweight, soft around kids and pets, and it instantly adds color and coziness to a mantel, staircase, doorway, or small tabletop tree. If you are a beginner, felt is a friendly material because it does not fray, hides small stitching mistakes, and can be assembled by hand sewing, machine sewing, or even careful gluing. The best part is that you can mix simple flat shapes with a few stuffed accents for a professional, handmade look without complicated patterns.
If you also love making ornaments, you can coordinate your garland with ideas from these easy felt Christmas ornament ideas or browse more options in this guide to felt ornaments to make. In this post, you will learn the right supplies, 12 reliable designs, and the assembly tricks that keep a garland hanging neatly all season.
Supplies for a Handmade Felt Christmas Garland
Before you cut your first shape, choose supplies that match how and where you will hang the garland. A garland over a fireplace needs heat awareness and a sturdier cord. A kids room garland benefits from extra-soft felt and secure attachments. In general, plan for 6 to 10 feet for a mantel, 8 to 12 feet for a staircase section, and 4 to 6 feet for a doorway or window.
- Felt sheets or felt by the yard: Craft felt works, but wool-blend looks richer and pills less. Pick 2 to 4 core colors plus one accent.
- Sharp scissors: Fabric scissors for long cuts, plus small detail scissors for curves and notches.
- Needles and thread: Matching sewing thread for subtle seams, embroidery floss for decorative stitches.
- Strong cord: Waxed cotton, twine, satin ribbon, or crochet cotton depending on your style.
- Adhesive (optional): Low-temp hot glue for quick assembly, or fabric glue for a flatter finish.
- Templates: Cardstock patterns help you make consistent pieces fast.
Wool-blend versus acrylic felt
Wool-blend felt (often 20 to 35 percent wool) cuts cleanly, resists fuzzing, and gives crisp edges on stars, snowflakes, and letters. It also holds shape better for stuffed designs. Acrylic craft felt is budget-friendly and widely available, but it can stretch and pill, and fine details may look softer. If you are making a long garland with many repeated shapes, acrylic is totally fine. If you want heirloom quality, choose wool-blend for the focal pieces (like gingerbread or hearts) and use acrylic for supporting shapes (like small circles or backing layers).
Thread, embroidery floss, cord and stuffing
For seams that disappear, use all-purpose polyester thread and a small running stitch. For visible decoration, embroidery floss is perfect for blanket stitch edges, “icing” lines on gingerbread, or vein details on holly. Cord choice matters more than most people expect: thin twine can sag under heavy stuffed pieces, while ribbon can twist. For best results, use a non-stretch cord like crochet cotton or paracord-style craft cord for long spans. For stuffing, use small pinches of polyester fiberfill and avoid overstuffing, which can warp edges and make pieces rotate on the string.
Cutting templates and hanging hardware
Cardstock templates save time and improve symmetry. Label each template with the number of pieces needed and any markings for stitch placement. If you plan to hang the garland on a mantel, add removable hooks or adhesive strips rated for your surface. For staircases, use clear command-style hooks every few feet to prevent drooping. If you are hanging on a tree or across a window, small screw-in cup hooks (in wood trim) can be a long-term option, but always check your surface and do not drill into rental walls without permission.
12 Felt Christmas Garland Ideas
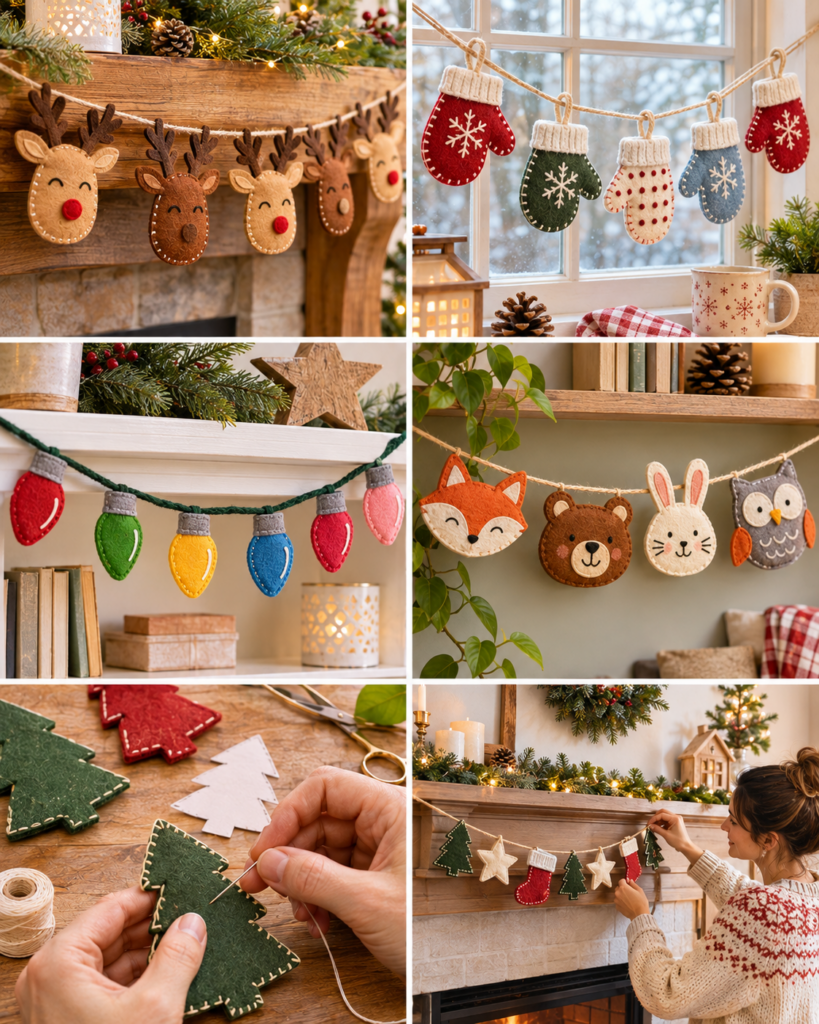
All 12 designs below can be made as flat shapes, or upgraded with simple layering and light stuffing. If you are new, pick two designs and repeat them in a pattern (for example: star, tree, star, tree). If you want a boutique look, mix three designs and keep your color palette tight. As you read, notice where a design works best as “flat” versus “puffy,” because too many stuffed pieces can make a long Felt Christmas Garland heavier and harder to hang neatly.
Classic red-and-white felt stars
Cut 10 to 20 stars in two sizes. Layer a small white star on a larger red star for dimension. Stitch the center with a few crosses of floss or add a tiny button. Stars are ideal for threaded garlands because they hang evenly and do not twist much. Tip: lightly mark the top two points where the string will pass through so the star stays upright.
Mini felt Christmas trees
Use a simple triangle tree shape with a small trunk rectangle. Add garland “swags” using embroidery floss, seed beads, or tiny felt dots. If you want a 3D look without stuffing, cut two identical trees, stitch around the edges with blanket stitch, and leave them flat. Add a tiny star at the top from metallic felt for sparkle.
Layered holly leaves and berries
Holly looks best layered: cut two shades of green for leaves and stack them slightly offset. Add three red felt circles as berries. A dab of fabric glue holds the berries, but a few hand stitches are more secure for storage year after year. Place holly clusters between larger motifs as “connectors” to fill gaps.
Stuffed felt gingerbread figures
Cut two gingerbread people per figure. Decorate the front first: white floss for icing, tiny felt buttons, or a stitched smile. Then sew front to back with blanket stitch, leaving a 1 inch opening. Add small pinches of stuffing, flatten gently, and close. Keep stuffing light so the figure stays lightweight on the cord.
Scandinavian neutral felt hearts
Choose cream, beige, gray, or muted red. Cut two hearts, stitch around with contrasting floss, and add a simple stitched “X” or stripe. These look beautiful on natural twine. If you like minimal holiday decor, make an entire Felt Christmas Garland of alternating heart sizes for a calm, Nordic vibe.
Felt candy-cane shapes
Cut candy cane silhouettes and layer on red felt stripes. For speed, cut the stripes as long thin rectangles and trim to fit. Candy canes look best spaced a little farther apart so their curved tops do not bump neighboring shapes. Add a tiny bow cut from ribbon or felt at the bend.
Snowflake silhouette garland
For sturdy snowflakes, avoid extremely thin “arms” unless you are using wool-blend felt. Cut simple six-point flakes and add small triangle notches along the edges. If you want a lacy look, cut interior holes with small sharp scissors. Always cut slowly and keep your non-cutting hand away from the scissor path.
Mini felt stockings
Stockings are perfect for small embellishments: a cuff in contrasting felt, a stitched toe line, or a tiny initial. Sew two pieces together, but do not stuff; flat stockings hang straighter. Add a stitched loop at the top corner so each stocking hangs upright on the cord.
Felt orange-slice ornaments
Create citrus “slices” with layered circles: orange base, lighter orange segments, and a tiny white center. Add a thin off-white ring near the outer edge to mimic pith. These are cheerful paired with greenery and look especially cute in kitchens or breakfast nooks.
Woodland mushroom and pinecone shapes
Use warm browns, rust, and cream. Mushrooms can be simple: a rounded cap and a small stem, with white spots. Pinecones can be made by layering small scalloped ovals down a teardrop base. Woodland motifs pair well with neutral hearts and mini trees for a cozy cabin look.
Colorful felt pom-pom strand
You can make pom-poms by wrapping yarn around a fork or pom-pom maker, tying tightly, and trimming evenly. String the pom-poms onto a sturdy cord using a large-eye needle. Add felt balls or flat circles between pom-poms for variety. This is a great option if you are crafting with kids because it is forgiving and fast.
Personalized felt letter garland
Cut block letters to spell “JOY,” “NOEL,” or a family name. To keep letters readable, choose a high-contrast color and avoid overly thin fonts. Back each letter with a second layer of felt for stiffness. If the letters curl, add a line of fabric glue between layers and press under a heavy book (protected with parchment paper) until dry.
How to Assemble a Garland That Hangs Neatly
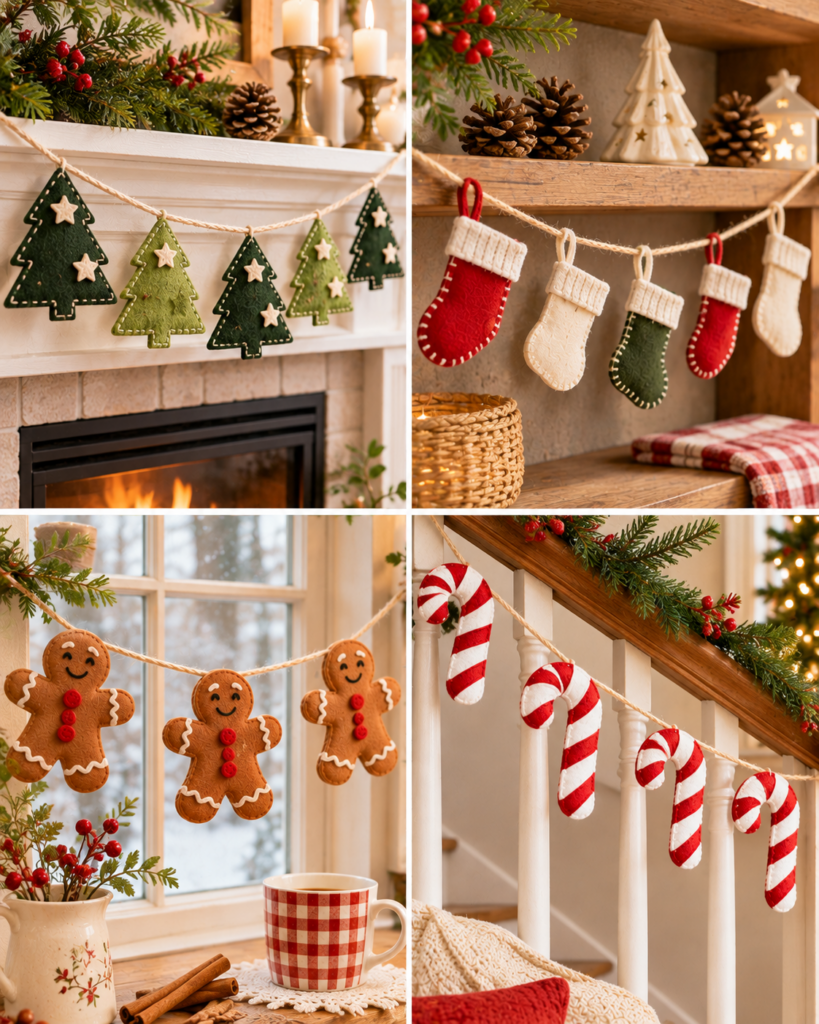
A beautiful Felt Christmas Garland is not just about cute shapes. It is also about balance, spacing, and attachments that keep everything facing forward. The steps below help prevent twisting, sagging, and uneven lengths, especially on longer garlands.
Cut matching shapes efficiently
- Batch your cutting. Stack 2 to 4 felt sheets (fewer for thick wool-blend) and cut multiple shapes at once to keep them consistent.
- Trace with care. Use tailor’s chalk or a disappearing fabric pen instead of marker, which can bleed through lighter felt.
- Mirror pairs for stitched pieces. For shapes sewn front-to-back, flip your template for the back piece if you have asymmetrical details.
Consistency matters because mismatched pairs can cause puckers when stitched and can make spacing look uneven across the finished garland.
Choose sewn loops, glued tabs or threaded shapes
- Threaded shapes: Punch or pierce two small holes near the top and run the cord through both. This keeps pieces from spinning. Reinforce holes with a few stitches if using soft acrylic felt.
- Sewn loops: Stitch a small folded strip of felt to the back of each piece. Loops are great for thicker cords and for swapping pieces later.
- Glued tabs: Fold a small felt tab over the cord and glue to the back. Use this only for lightweight flat shapes and let glue cure fully before hanging.
If your garland will be handled often, sewn attachments are the most durable and survive storage best.
Plan spacing and total garland length
- Measure your display area. Add 12 to 18 inches extra on each end for tying and adjusting.
- Lay everything out first. Arrange pieces on a table or floor in your desired order and take a quick photo so you can replicate the layout while assembling.
- Use consistent gaps. Aim for 3 to 6 inches between medium shapes, slightly more between bulky stuffed pieces. Mark the cord with small bits of painter’s tape as temporary guides.
- Check weight distribution. Place heavier pieces closer to the ends or plan extra hooks in the middle to prevent sag.
This planning step is what makes a DIY garland look polished instead of “slid together.”
Where to Display Felt Christmas Garlands
One reason Felt Christmas Garland is so popular is its flexibility. It can look rustic on twine, modern on white cord, or playful in bright colors. If you are decorating with children, consider pairing your garland-making session with age-appropriate projects from these Christmas crafts for kids so everyone has a role. And if you craft for markets, garlands can be a strong seller because they are lightweight and customizable, similar to ideas in these Christmas crafts to sell.
Mantel and staircase displays
Use removable hooks every 2 to 3 feet so the cord does not sag in the middle. Keep garlands away from open flames and high heat. If you have a working fireplace, hang the garland on the wall above the mantel, not on the mantel edge closest to heat. For staircases, attach at several points along the banister for a gentle drape rather than one long unsupported span.
Kids rooms and tabletop trees
In kids rooms, avoid small detachable parts like loose buttons for very young children. Stitch embellishments instead of gluing when possible. For tabletop trees, make a shorter garland (3 to 4 feet) with smaller motifs so it does not overwhelm the tree. Pom-poms and mini stars are especially cute here.
How to store garlands without tangling
Wrap your garland around a piece of cardboard, a paper towel tube, or an empty wrapping-paper roll. Secure the ends with a soft tie, not tape directly on felt. Store in a breathable bag or a lidded bin with silica packets if your area is humid. If pieces crease, steam lightly from a distance and finger-press flat, but do not touch a hot iron directly to synthetic felt because it can melt.
“I made the mini stockings and holly clusters for our mantel using crochet cotton as the cord. Marking the spacing with painter’s tape was the game changer. Everything hung straight and I did not have to re-tie it three times like my old garlands.”
Frequently Asked Questions About Felt Christmas Garland: 12 Handmade Designs for Holiday Decorating
Can I make a felt garland without sewing?
Yes. Choose flat designs like stars, trees, or circles, then use fabric glue or low-temp hot glue to attach tabs on the back. For the neatest results, cut identical backing pieces and sandwich the cord between layers with glue, pressing firmly until set. Avoid relying on glue alone for heavy stuffed motifs, since the pull of gravity over time can loosen adhesive, especially if the garland is stored in warm spaces.
What type of felt works best for holiday garlands?
Wool-blend felt is the most durable and “crisp,” so it is excellent for snowflakes, letters, and anything with sharp points. Acrylic craft felt is fine for beginners, budget projects, and kid-friendly crafting sessions, but choose a thicker grade if possible. If you want the best of both, use wool-blend for the main shapes and acrylic for backing layers or small accent dots and stripes.
How do I keep a long felt garland from sagging?
Use a stronger, non-stretch cord (crochet cotton or sturdy cording), and add more hanging points. Instead of hanging only from the two ends, place removable hooks or tie points every 2 to 3 feet. Also distribute weight: do not cluster all stuffed gingerbread figures in the center. If the garland still dips, shorten the drop by raising the center hook slightly higher than the ends.
Why do my shapes twist and face backward?
Twisting usually happens when shapes are attached with a single point, like one hole or one loop, allowing them to spin on the cord. Fix this by using two holes (left and right near the top) so the cord passes through twice, or by sewing two small loops spaced apart. Another trick is to add a small felt “spacer bead” between shapes to reduce rubbing and rotation.
What is the safest way to craft with kids?
Pre-cut shapes for younger kids and focus on decorating with large, easy items like felt dots, big pom-poms, or simple stitches with plastic needles and embroidery floss. Supervise scissors closely and consider using safety scissors for felt. If you use hot glue, an adult should handle it. For family crafting sessions, paper-based alternatives can also be fun, like the projects in these Christmas paper crafts.
How do I make my garland look “finished” and not homemade in a bad way?
Pick a limited palette (2 to 4 colors), repeat shapes in a predictable pattern, and keep spacing consistent. Use decorative blanket stitch in a matching or intentionally contrasting floss for clean edges. Trim stray fibers and threads, and avoid over-embellishing every piece. A few focal shapes (like stuffed gingerbread) mixed with simpler connectors (like holly clusters or small circles) usually looks more balanced and professional.
Final Thoughts
If this is your first Felt Christmas Garland, start with flat stars and mini trees on a sturdy cord, then add one “special” element like a few stuffed gingerbread figures or personalized letters. You will get a great result quickly, and you will learn the key skills that matter most: clean cutting, consistent spacing, and secure attachments. As a next step, make two extra motifs beyond what you think you need. Those extras are perfect for turning into quick matching ornaments or gift toppers later. Once you have your garland hanging neatly, take a photo and note the length and spacing so you can recreate or expand it next year with confidence.