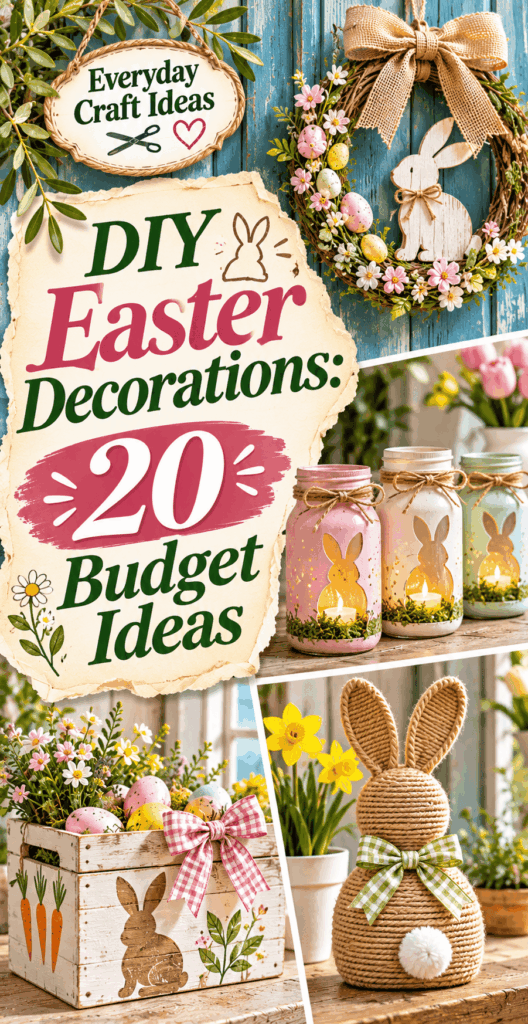
DIY Easter Decorations: 20 Budget Ideas
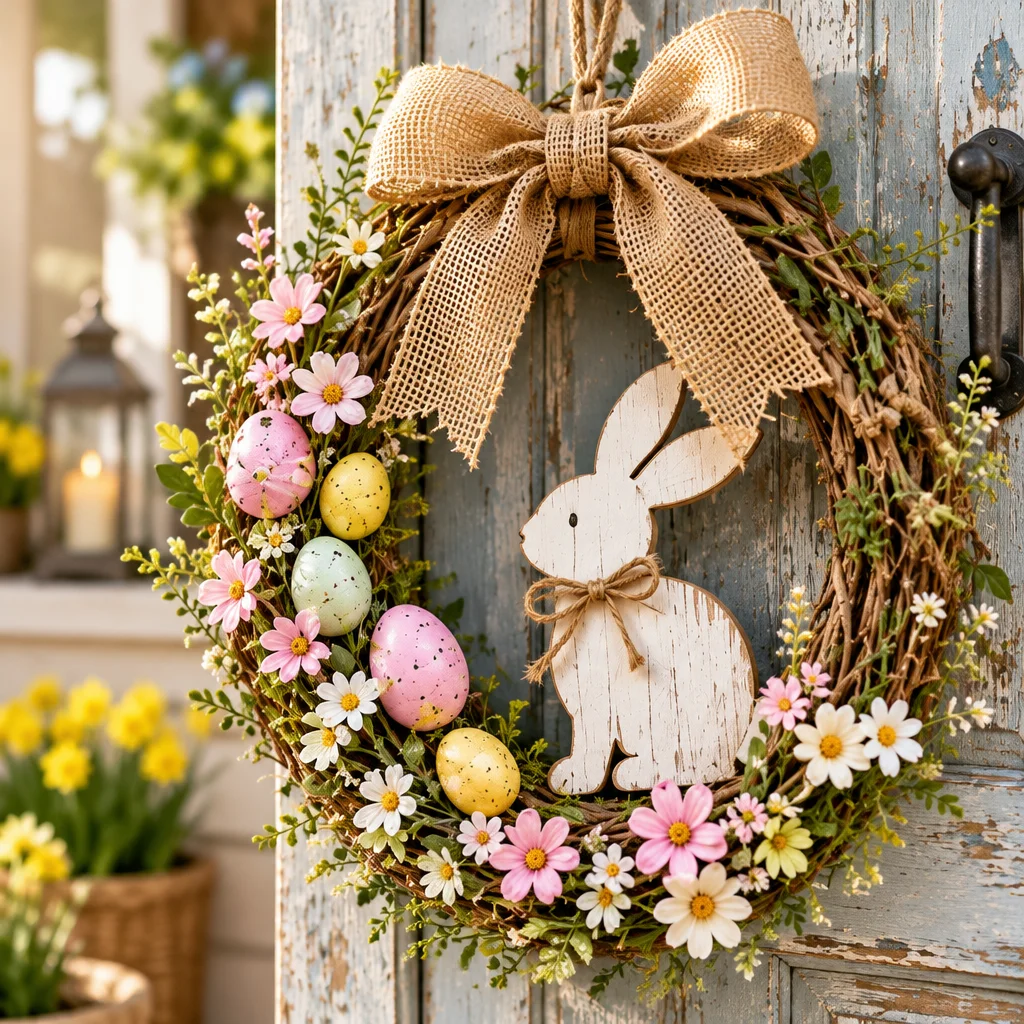
Easter Decorations DIY projects are one of the easiest ways to make your home feel fresh and festive without buying a cart full of seasonal decor. With a few basics like paper, ribbon, jars, and paint, you can create decorations that look coordinated and intentional even on a tight budget. In this guide, you will find 20 practical ideas with beginner-friendly steps, plus planning tips so you do not overbuy supplies. If you want even more inspiration, these easy DIY Easter decoration ideas for the home pair perfectly with the projects below, and you can also plan your gifting at the same time with these DIY Easter basket ideas for kids and adults. Pick just a few projects, repeat colors, and you will get a pulled-together look fast.
Planning Easter decorations on a budget
The secret to budget-friendly Easter Decorations DIY is planning around what you already have and choosing crafts that share supplies. Before you start, decide where you will decorate (front door, table, mantel, kitchen shelf) and choose a simple color palette. That prevents buying “one-off” items that do not work together. For beginners, I recommend selecting 3 to 5 projects total: one for the door, one for the table, and a couple small accents for shelves or windows.
Difficulty level is usually easy to medium, depending on whether you are painting or cutting detailed shapes. Most projects here take 20 to 60 minutes each, and several are kid-friendly with supervision. Keep a basic tool kit nearby: scissors, ruler, pencil, craft glue or hot glue, and a small paintbrush. If you use hot glue, always work on a heat-safe surface and keep a bowl of cool water nearby for quick first aid if you accidentally touch the glue.
To save money, buy materials that do double duty: a single roll of ribbon can become a wreath bow, napkin ties, and a garland hanger. Acrylic craft paint in white plus one or two spring colors goes a long way.
Reusing jars, paper, fabric and faux eggs
Reusable basics are the backbone of Easter Decorations DIY. Glass jars become vases, candle holders, or candy containers. Scrap paper transforms into garlands, place cards, silhouettes, and table confetti. Fabric remnants work as bunting, napkin wraps, or bow accents. Faux eggs are especially useful because you can repaint them every year and they are lightweight for wreaths and hanging decor.
Prep is simple but important. Wash jars and remove labels fully so glue and paint stick well. Iron fabric scraps so you cut clean shapes and avoid frayed edges. For paper crafts, use slightly heavier paper (cardstock or gift wrap) when you want crisp shapes that hold up on a mantel. If you are working with faux eggs, lightly sand glossy plastic eggs before painting, and wipe away dust. That one step prevents chipping later.
20 DIY Easter decoration ideas
These 20 Easter Decorations DIY projects are designed to look “store-bought” without the price tag. Choose ideas based on where you need impact: door and entryway decor reads from far away, while table details shine up close. Many of these share materials, so you can batch-make items in one crafting session.
- Paper bunny wreath: Cut 20 to 30 bunny silhouettes from cardstock and glue them around a foam or cardboard ring.
- Faux egg door hanger: Paint a large craft egg (or cut an egg from sturdy cardboard), add a ribbon hanger, and stencil a simple greeting.
- Ribbon embroidery hoop wreath: Wrap an embroidery hoop with ribbon, add faux florals, and tie a bow at the top.
- Carrot swag: Twist orange and green fabric scraps into carrot shapes and string them along jute.
- Mossy egg centerpiece: Fill a shallow tray with moss and nestle painted eggs in clusters of three.
- Bunny napkin rings: Cut felt bunny ears, glue to a paper ring, and slide around rolled napkins.
- Egg place cards: Write names on small cardstock eggs and tuck into napkin folds or mini nests.
- Jar bud vases: Wrap jars with twine or ribbon and add a few stems each.
- Paper egg garland: Stitch or glue paper eggs onto baker’s twine for a mantel-length garland.
- Framed bunny silhouettes: Mount a black bunny cutout on pastel paper and frame it.
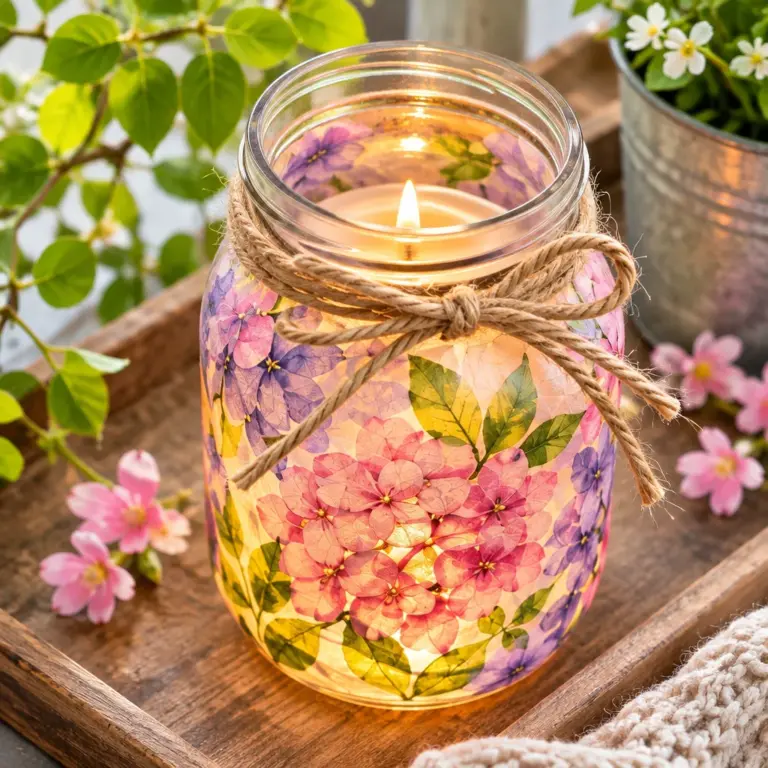
- Floral jar lanterns: Decoupage floral napkin pieces onto jars and add LED tealights.
- Fabric bunting: Cut triangles from scrap fabric and glue to ribbon.
- Painted candlesticks: Paint thrifted candlesticks in one solid pastel for instant height on a table.
- Decoupage egg jars: Decoupage egg shapes onto jars and outline with a paint pen.
- Egg-carton flowers: Cut egg cartons into petal shapes, paint, and hot glue onto stems.
- Tin-can planters: Wrap cleaned cans with paper and ribbon and plant small flowers or faux stems.
- Mini grapevine nests: Twist raffia or twigs into tiny nests and add speckled eggs.
- Hanging paper eggs: Cut and fold paper to make 3D eggs and hang from branches.
- Spring shelf mini-scene: Group a bunny figurine, a framed silhouette, and a small vase on a tray.
- Basket arrangement: Fill a basket with moss, eggs, and faux florals as a reusable centerpiece.
Troubleshooting tip: if something looks “busy,” reduce patterns and repeat one solid color (for example, all white eggs with one floral jar). A consistent finish reads more expensive.
Bunny wreaths, egg door hangers, ribbon hoops and carrot swags
Door decor is where Easter Decorations DIY makes the biggest impact. Here is a reliable method for four door-friendly projects that hold up well.
- Choose a sturdy base: Use a foam wreath form, grapevine, or a thick cardboard ring. A firm base prevents sagging on the door.
- Create one focal point: For a bunny wreath, make slightly larger bunnies for the bottom center. For a ribbon hoop, cluster florals at one side. This keeps the design intentional.
- Attach with the right adhesive: Hot glue works best on wreath forms and faux florals, but use tacky craft glue for paper so it does not wrinkle. Hold pieces in place until fully set.
- Add a secure hanger: Tie a loop of ribbon or jute and knot tightly. For heavier wreaths, wrap the hanger around the frame, not just glued on.
- Finish with a “distance test”: Step back 6 to 8 feet. If details disappear, add contrast: a darker bow, a few speckled eggs, or greenery.
Variation ideas: Make carrot swags from paper cones instead of fabric, or use bandanas for a farmhouse look. Safety note: if the wreath will hang on an exterior door, avoid real candy and use weather-resistant ribbon to prevent bleeding in rain.
Egg centerpieces, bunny napkins, place cards and bud vases
Table decor should be low enough for conversation and easy to clean up. These Easter Decorations DIY ideas look polished but are simple to execute.
- Start with a tray or runner: A tray contains the display, while a runner creates a “path” for small items like eggs and bud vases.
- Create height with odd numbers: Use three bud vases or one candle plus two vases. Odd groupings feel balanced and natural.
- Keep centerpieces lightweight: Use faux eggs, paper grass, or moss. Heavy items can slide or chip dishes.
- Make bunny napkin rings: Cut ears from felt, glue to a simple paper ring, and slip over rolled cloth napkins. Felt is forgiving and does not fray.
- Add place cards last: Write names on cardstock eggs with a fine marker. Add them right before guests arrive to prevent smudges.
Troubleshooting: If painted eggs feel tacky, they need more drying time or thinner coats. Use two thin coats instead of one thick coat, and let them cure overnight before stacking.
Paper egg garlands, framed silhouettes, floral jars and fabric bunting
Paper and fabric projects are some of the cheapest Easter Decorations DIY options, and they store flat for next year. To make them look high-end, focus on clean cutting and consistent spacing.
- Pick your paper type: Cardstock gives crisp edges for silhouettes and garlands. Scrapbook paper adds patterns, but limit to one or two patterns total.
- Use a template: Trace one egg shape and one bunny shape onto cardboard, then reuse as a stencil. This keeps sizes consistent.
- Assemble garlands neatly: Glue eggs to twine with equal spacing, or stitch through the center if you have a basic sewing machine. Stitching holds better than glue in warm rooms.
- Frame silhouettes: Center the bunny on a pastel background and leave a clean margin. Even inexpensive frames look great with a simple design.
- Make floral jars: Decoupage floral napkin pieces using a thin layer of decoupage medium. Smooth gently with a soft brush to avoid tearing.
- Fabric bunting: Cut triangles, fold the top edge over ribbon, and glue. For extra durability, add a second triangle as a backing.
Care tip: Store paper decor in a lidded box with a silica gel packet if your storage area is humid. Paper curls when it absorbs moisture.
Painted candlesticks, decoupage jars, egg-carton flowers and tin-can planters
This group of Easter Decorations DIY projects is perfect for thrifted finds and recyclables. They are also great if you want decor that lasts beyond Easter and still feels like spring.
- Painted candlesticks: Clean candlesticks with rubbing alcohol, lightly sand glossy surfaces, then paint with acrylic or chalk-style paint. Seal with a water-based sealer if they will be handled a lot.
- Decoupage jars: Apply a thin coat of decoupage medium, place your paper, then seal on top with another thin coat. Thin layers prevent bubbles and wrinkling.
- Egg-carton flowers: Cut cups into petals, paint, and hot glue into layered blooms. Add a button or bead center. Use floral wire or skewers as stems wrapped in green tape.
- Tin-can planters: File or cover sharp edges with a strip of duct tape inside the rim. Wrap the outside with paper and ribbon. Add a small plant in a nursery pot so you can lift it out for watering.
Safety note: never place real flame candles inside paper-decorated jars. Use LED tealights for a safe glow.
Mini nests, hanging paper eggs, shelf displays and basket arrangements
Small accents are where Easter Decorations DIY really shines because you can use tiny leftovers. Mini nests can be made from raffia, shredded paper, or twigs wrapped into circles and glued in place. Add two or three speckled eggs, not five, because small groupings look more realistic. For hanging paper eggs, fold and glue multiple egg cutouts together along the centerline to create a 3D shape, then attach a loop of thread before closing the last seam.
Shelf displays look best when contained on a tray or in a shallow basket. Create a mini scene: a framed bunny silhouette, a small vase, and a nest. Keep the tallest item at the back and vary textures (smooth frame, soft moss, glossy eggs). For basket arrangements, fill the base with crumpled kraft paper or a spare towel so you do not need to buy lots of filler, then cover with moss. Tuck in eggs, a ribbon bow, and faux florals. To keep eggs from rolling, hot glue them to small cardboard circles first, then hide the circles under moss.
“I tried the ribbon embroidery hoop wreath and the jar bud vases using supplies I already had. The tip about limiting patterns made a huge difference, and my table finally looked coordinated instead of cluttered. It took me about an hour total for both projects.”
How to decorate for Easter without overspending
Budget decorating is mostly about repeating elements. If you commit to two main colors plus neutrals, you can reuse ribbon, paint, and paper across multiple Easter Decorations DIY projects. Another savings trick is choosing decor that transitions into spring: florals in jars, painted candlesticks, and bunting in soft colors can stay up for weeks after Easter.
If you need more “party-style” decorating strategies, many of the same cost-saving principles apply to other events. This guide to DIY baby shower decorations on a budget is full of ideas that also work for Easter gatherings, like using repeating paper shapes and simple centerpieces.
Creating a consistent spring color palette
A simple palette makes DIY look intentional. Try one of these: pastel rainbow (but keep it soft), pink and green with white, blue and yellow with kraft brown, or all neutrals with greenery. When painting, mix a small amount of white into bright colors to soften them. Repeat the same shade in at least three places: for example, the door bow, the table napkins, and the garland. That repetition is what makes budget crafts look coordinated.
Shopping your home before buying supplies
Do a 10-minute “home shop” before you buy anything. Look for: baskets, jars, picture frames, extra ribbon, buttons, twine, and neutral linens. Even kids’ craft supplies can help, especially pom poms and colored paper. Thrift stores are great for candlesticks, trays, and baskets. When you do buy, focus on versatile items like white paint, a multipack of cardstock, and jute twine. For another season of budget-friendly craft inspiration, these DIY Valentine’s decoration ideas include repeatable techniques like garlands and framed silhouettes that translate easily to Easter themes.
Where to display handmade Easter decorations
Placement matters as much as the craft itself. Spread your Easter Decorations DIY across a few high-visibility zones rather than decorating every surface. A door piece, a mantel or shelf moment, and a table centerpiece usually feel complete. Use the “triangle rule” for styling: group decor in threes with varied heights, and keep one neutral anchor (tray, frame, or runner) to prevent visual clutter.
Entryway and mantel styling ideas
In the entryway, hang a wreath or hoop, then echo that color on a small console table with a jar vase and a basket. On a mantel, use a garland as the base layer, then add framed silhouettes leaning against the wall and a couple of candlesticks for height. If you are using florals, cluster them on one side and keep the other side simpler so the mantel does not look crowded. Avoid placing paper decor too close to fireplaces or heat vents.
Small-space table and shelf arrangements
For small spaces, go vertical. A narrow garland on a wall, a couple hanging paper eggs from a branch in a jar, or a single basket arrangement can do the job without taking up counter space. On shelves, decorate in tiny “moments” rather than lining up items. Use a tray to contain small pieces like mini nests and eggs. If your shelf is dusty or frequently used, choose wipeable items like painted jars and faux eggs instead of paper.
Frequently Asked Questions About DIY Easter Decorations: 20 Budget Ideas
How can I decorate my house for Easter cheaply?
Pick 2 to 3 main colors, then make a short list of projects that share supplies: a ribbon hoop wreath, a paper garland, and jar bud vases can all use the same ribbon and paper. Shop your home first for jars, baskets, and frames, then fill gaps with inexpensive basics like cardstock and acrylic paint. Focus on one high-impact area (door or table) and add a few small accents rather than decorating every room.
What Easter decorations can I make with paper?
Paper is perfect for garlands, hanging 3D eggs, bunny silhouettes, place cards, and “carrot” cones. For best results, use cardstock for structure and a simple template for consistent shapes. If you are decorating near windows, avoid super-thin paper that curls. A light coat of glue stick works for flat layers, while tacky glue is better for edges and 3D pieces that need strength.
How early should I put up Easter decorations?
Most people decorate 2 to 4 weeks before Easter, but there is no strict rule. If you choose spring-forward decor like florals, painted candlesticks, and neutral bunting, you can put it up earlier and leave it through the season. If your decor includes obvious Easter icons like bunnies and eggs, aim for closer to the holiday. For outdoor doors, watch weather changes so paper elements do not get ruined.
What paint works best on plastic eggs and jars?
For plastic eggs, acrylic craft paint works well if you lightly sand the surface first and apply thin coats. For glass jars, acrylic paint can work, but it scratches more easily unless sealed. If you want a frosted look, use a thin layer of white acrylic mixed with a little water and apply in light coats. Always let paint cure overnight before handling, especially if you plan to stack or nest items for storage.
How do I keep my garland from sagging or curling?
Use a stronger string like jute, baker’s twine, or thin ribbon. For paper garlands, cardstock resists curling better than copy paper. If you are gluing, apply glue to the paper, not the string, and press firmly until set. If the garland still sags, reduce spacing between shapes or add a second anchor point in the middle with a clear removable hook.
Can I make these decorations if I do not have a hot glue gun?
Yes. Use tacky craft glue for paper-to-paper and light fabric-to-paper connections, and painter’s tape to hold pieces while they dry. For heavier items like faux florals on a hoop, floral wire or twist ties can replace hot glue. The main difference is drying time, so plan to assemble in stages and let items cure fully before hanging them on doors or placing them where they might be bumped.
How can I make my DIY decor look less “crafty”?
Limit your palette, repeat the same finish, and simplify shapes. For example, use all matte pastel eggs instead of mixing glitter, metallic, and glossy finishes. Cut clean edges using sharp scissors and a template, and center your designs with a ruler. Add one natural texture like twine, moss, or greenery to elevate the look. Finally, step back and remove one item if the display feels crowded.
How do I store Easter decorations so they last for years?
Store paper items flat in a lidded bin with a sheet of tissue paper between layers. Keep painted eggs and small nests in divided containers or egg cartons to prevent dents. Wrap wreaths and hoops in a large trash bag or wreath storage bag to keep dust off. Avoid hot attics and damp basements, which can warp paper and soften adhesives. Label your bin with a quick list of what is inside for easy setup next year.
Are these projects safe to do with kids?
Many are, especially paper garlands, place cards, and painting eggs, as long as you supervise. Adults should handle hot glue guns, craft knives, and any sanding. Choose washable paints and cover the work surface. For very young kids, avoid small embellishments like beads that could be choking hazards. LED candles are a safer choice than real flames for any jar lantern-style decor.
Final thoughts and an easy Easter decorating plan
Easter Decorations DIY does not need to be complicated or expensive to feel special. Start by picking a simple palette, then choose one “statement” project (like a ribbon hoop wreath or bunny wreath) and two supporting pieces (a paper egg garland and jar bud vases are a great combo). Use what you already own first, especially jars, baskets, and frames, and spend only on basics you will reuse. Set aside one crafting session, batch-cut paper shapes, and assemble everything assembly-line style. Your next step: choose three ideas from the list above and sketch where they will go. You will decorate faster, spend less, and end up with a home that feels bright and welcoming for spring.