Mosaic Garden Art: 15 Colorful Outdoor DIY Ideas
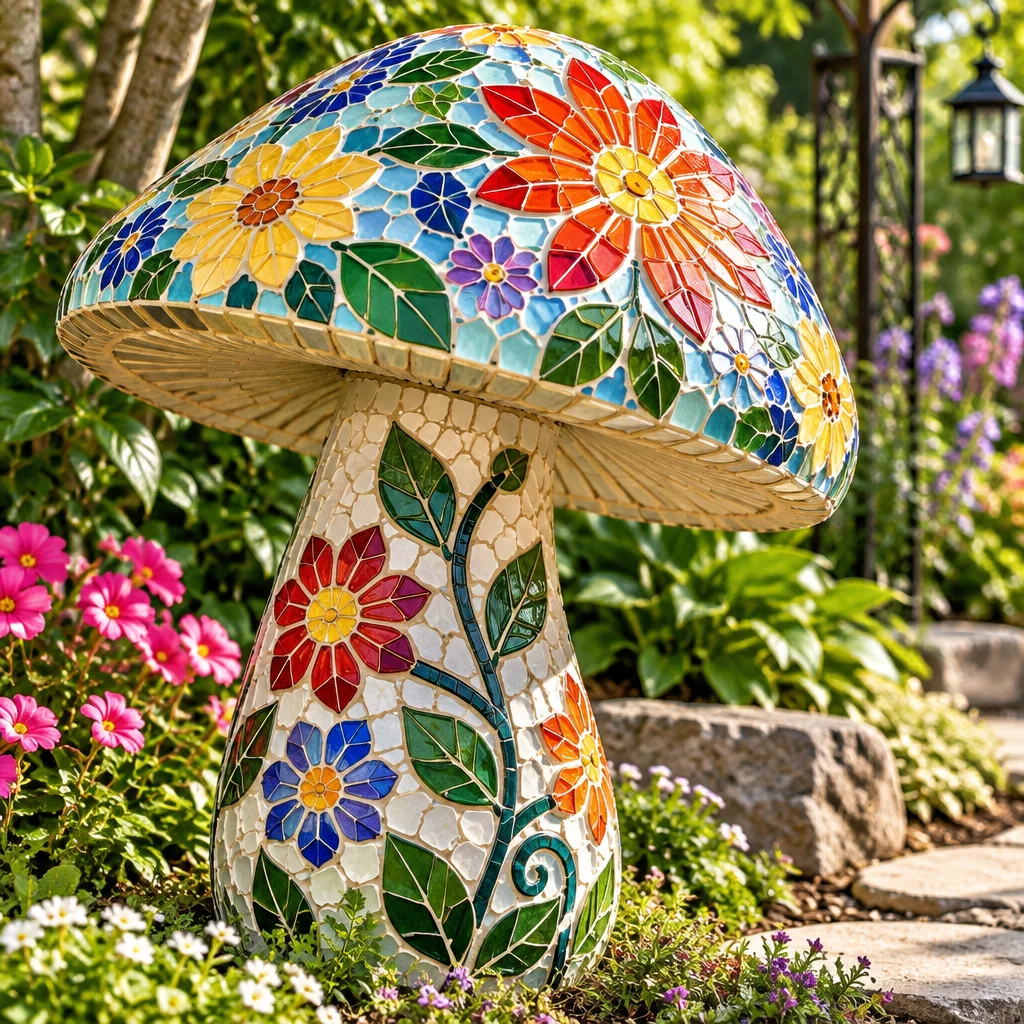
Mosaic Garden Art is one of the most satisfying outdoor DIY crafts because it turns everyday materials, like tile offcuts and broken ceramics, into durable color that lives happily among plants. The finished pieces add sparkle, pattern, and personal meaning to your yard without requiring advanced art skills. If you can arrange shapes like a simple puzzle and follow a few weatherproofing basics, you can make mosaics that last for years.
This guide is for beginners who want practical, reliable methods: which adhesives actually hold outside, how to avoid cracked grout in winter, and how to choose projects that match your time and tools. Many of these ideas also make great gifts or small products for local markets, and if you enjoy selling crafts, you may like these smart craft fair display setups for presenting finished work. If you want a relaxing “between-grout-drying” craft, an easy crochet heart pattern is a cozy companion project.
Materials That Work Outdoors
Outdoor mosaics succeed or fail based on three things: the base, the adhesive, and moisture protection. Indoor mosaic supplies are not automatically outdoor-safe, so it’s worth choosing materials designed for patios, bathrooms, and exterior repairs. You do not need the fanciest products, but you do need the correct type.
Here’s a simple shopping approach: pick a stable, weatherproof base; use a polymer-modified thinset mortar (or a rated exterior adhesive) to attach pieces; grout with exterior grout; then seal where appropriate. When you do that, your Mosaic Garden Art can handle sun, rain, and regular watering.
- Tesserae (the mosaic pieces): Ceramic tile, porcelain tile, stained glass rated for outdoors, vitreous glass tile, and tumbled stone all work well. Avoid anything that flakes or absorbs water like unsealed terracotta shards.
- Tools that make life easier: Tile nippers for shaping, a rubbing stone for smoothing sharp edges, a notched trowel or craft sticks for adhesive, and nitrile gloves for grouting.
- Finishing supplies: Exterior grout, grout float, sponges, microfiber cloths, and an outdoor-rated sealer if your grout or base benefits from it.
Weatherproof bases and suitable adhesive
Good outdoor bases include concrete stepping stone blanks, cement backer board, stone pavers, terracotta or glazed pots, and metal items that will not flex. Avoid plywood and standard MDF, since they swell and delaminate outside. If you’re covering a tabletop, it must be rigid: movement is what cracks tile and grout.
For adhesive, the most reliable choice is polymer-modified thinset mortar (often labeled for exterior or wet areas). It bonds strongly, tolerates temperature changes, and fills minor unevenness. Silicone and hot glue are not appropriate for outdoor mosaics. For small decorative items that will not get soaked, a high-quality exterior construction adhesive can work, but thinset remains the best all-around option.
Exterior grout and sealers
Use grout labeled for exterior, patios, or wet areas. Sanded grout is stronger for wider gaps; unsanded grout is smoother for tight spacing. Follow the bag directions for water ratio and slake time because grout that is too wet becomes weak and powdery. After curing, sealing is helpful on porous grout and stone, especially in rainy climates. Many glass tile projects do fine with a penetrating grout sealer applied carefully to grout lines, not smeared on the glass.
Safe handling of broken tile and glass
Broken ceramic and glass can be used safely if you treat it like any sharp material. Wear safety glasses when cutting or nipping. Use gloves when sorting pieces. Smooth razor edges with a rubbing stone or diamond hand pad, especially on pieces that will be touched like house numbers or table edges. Always sweep and vacuum your work area, and keep shards away from pets and kids. Dispose of tiny splinters by wrapping them in tape before trashing.
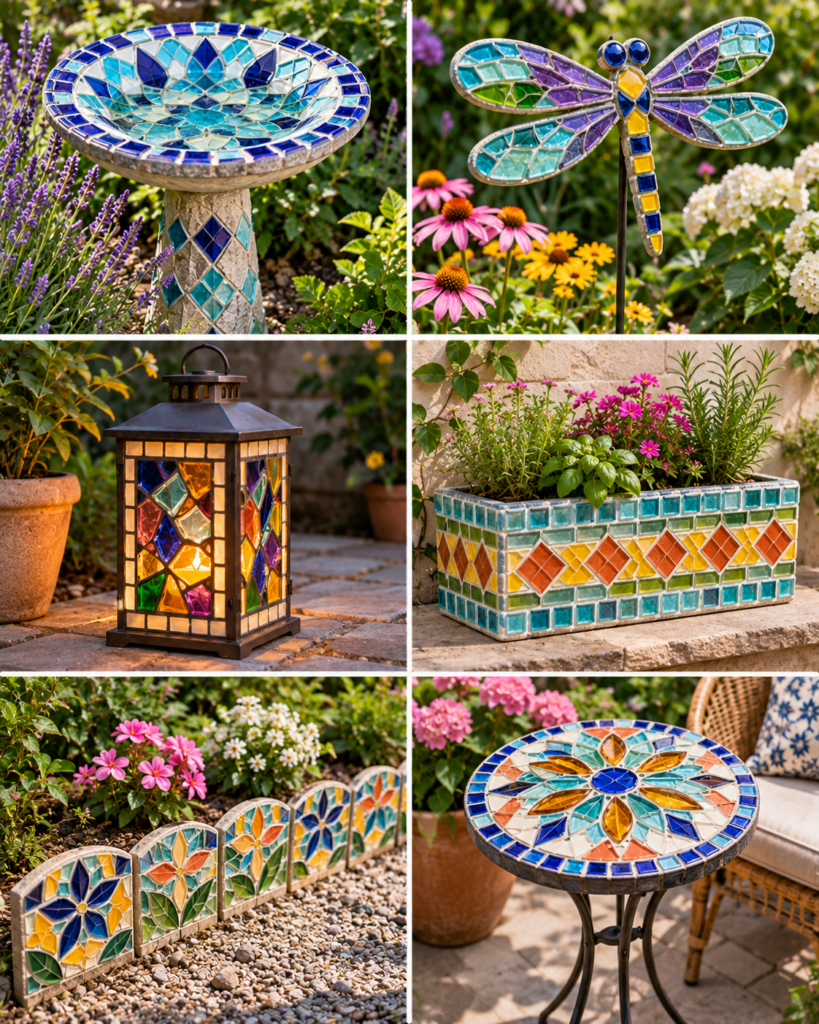
15 Mosaic Garden Art Projects
Below are 15 project ideas that cover different skill levels, sizes, and uses. If this is your first Mosaic Garden Art build, choose a flat, manageable surface like a stepping stone, plaque, or small wall panel. Curved items like spheres are fun, but they take more patience with spacing and piece shaping.
For each project, the basic workflow is similar: design, attach tesserae, grout, clean, cure, and protect. The differences are mostly in base prep and placement in the yard. When deciding, consider where the piece will live. Anything on the ground needs extra durability; anything hung needs secure hardware that will not rust.
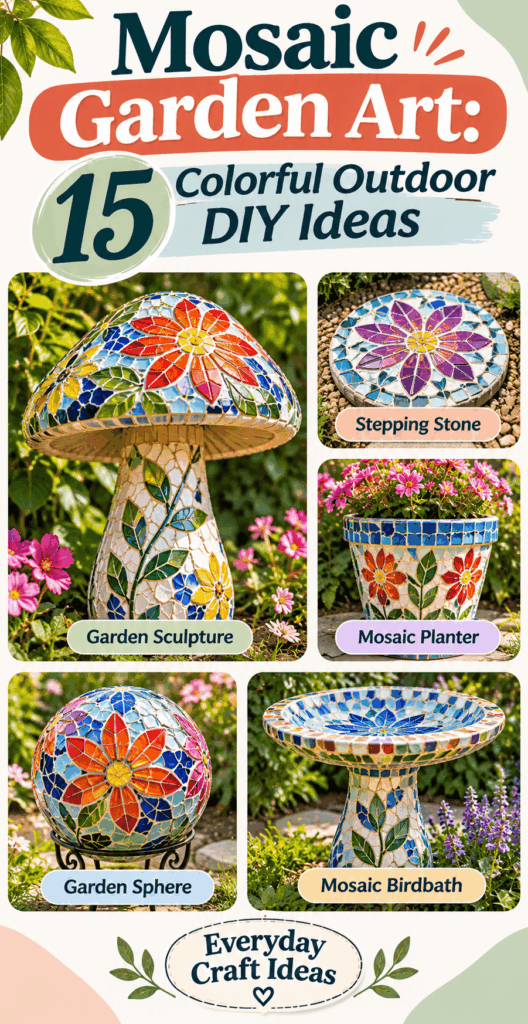
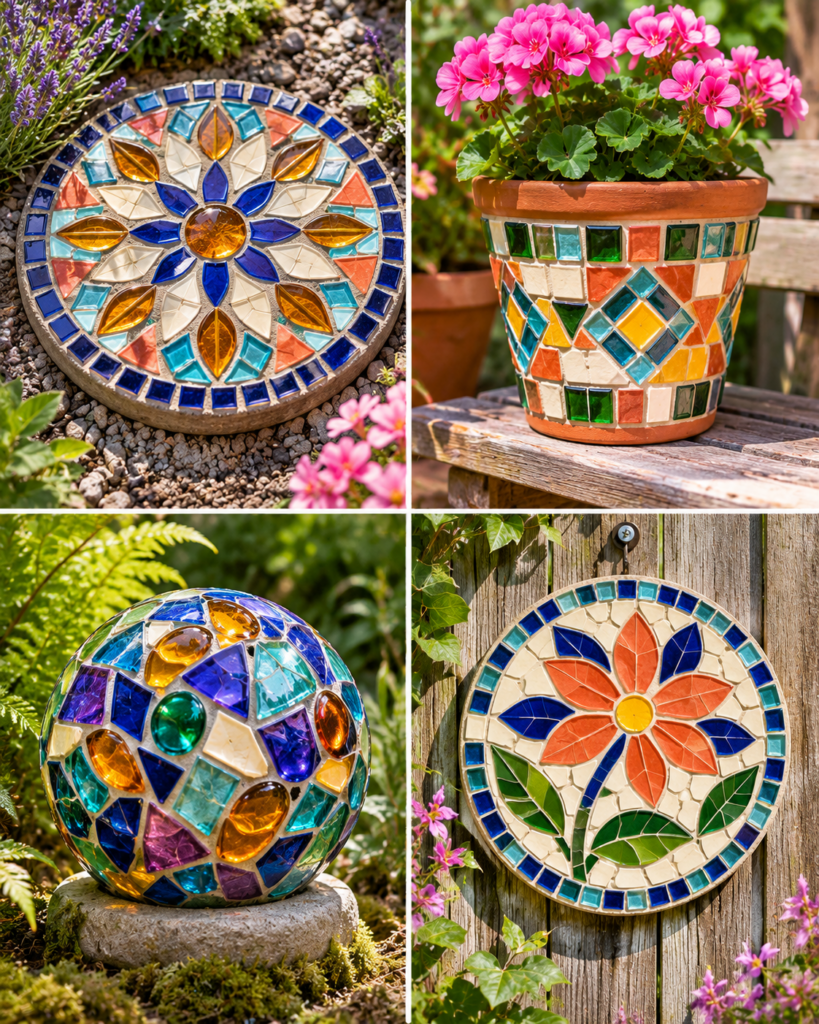
Decorative garden stepping stone
Difficulty: Beginner. Time: 2 to 4 hours active time plus curing. Use a concrete blank or make your own from a mold.
- Dry fit your pattern: Arrange tile or glass on the stone without adhesive. This prevents awkward gaps and helps you keep edges smooth for walking.
- Bond with thinset: Spread a thin layer and press pieces in firmly. Keep tops level so shoes do not catch.
- Grout after curing: Wait for the adhesive to set per instructions, then grout and wipe haze with a barely damp sponge.
- Cure and protect: Keep it out of rain while curing. In freeze climates, place stones where water will not pool.
Mosaic plant pot
Difficulty: Beginner to intermediate. Choose a sturdy terracotta or glazed pot. Lightly sand glossy surfaces so adhesive grips. Keep mosaic and grout below the rim so watering does not sit on grout. A fun twist is a color gradient that echoes blooms, for example orange to yellow like marigolds.
Tile-covered garden sphere
Difficulty: Intermediate. A bowling ball makes a classic base because it is heavy and weatherproof. Use small pieces, like 1 cm to 2 cm, so they follow curves. Work in bands, letting thinset firm up so pieces do not slide. Place the finished sphere on gravel or a stand so it dries quickly after rain.
Mosaic birdbath exterior
Difficulty: Intermediate. Mosaic the outside of the bowl and pedestal rather than the water-holding interior. Grout and sealer are not ideal for constant soaking. If you want color inside, use a removable glazed dish insert that can be cleaned and replaced. Focus on bold patterns visible from a distance.
Garden marker plaque
Difficulty: Beginner. Use a small concrete paver or backer board sealed on edges. Create plant names with tile letters or simplified block shapes. Keep letter spacing generous so grout lines do not swallow the typography. Seal grout to resist soil splash.
Small mosaic wall panel
Difficulty: Beginner. Use cement backer board in a simple frame, and hang on a fence or exterior wall. This is perfect for practicing clean grout lines. If you also enjoy fabric projects for home decor, these fat quarter sewing ideas pair nicely with a garden-themed crafting weekend.
Mosaic butterfly silhouette
Difficulty: Intermediate. Cut a butterfly shape from backer board or use a pre-cut wood shape sealed thoroughly with exterior primer and waterproofing. Use contrasting colors to define wing edges. For extra sparkle, place iridescent glass along the top wings where sun hits.
Mosaic sun ornament
Difficulty: Beginner to intermediate. Use a round base and add ray shapes with tile triangles. Warm yellows, oranges, and mirrored pieces look great outdoors. Hang from a sturdy hook with coated wire or chain, and ensure the hanger is anchored to the base, not just glued to tile.
Mosaic garden mushroom
Difficulty: Intermediate. Make a cap from an upside-down terra-cotta saucer and a stem from a pot or thick PVC section wrapped in backer board. Use small dots of glass for a toadstool look. Keep the underside simpler so it dries and cleans easily.
Colorful mosaic house number
Difficulty: Beginner. Choose a stable board like cement backer board and mount it with rustproof screws. Use high-contrast numbers for readability from the street. A dark grout can sharpen light tiles; a light grout can soften busy patterns. Seal grout so it stays crisp.
Mosaic outdoor side-table top
Difficulty: Intermediate. Use a rigid metal or concrete top. If using metal, roughen and degrease it first, and avoid flexing frames. Keep tile flush at the edge by adding a border. Let thinset and grout cure fully before placing drinks or planters.
Mosaic planter pedestal
Difficulty: Intermediate. A concrete pedestal or stacked pavers creates a strong base. Mosaic the sides, not the top surface where water sits under pots. This is a great project for using leftover tile in coordinated bands.
Tile-covered garden rock
Difficulty: Beginner to intermediate. Choose a stable, non-flaking rock. Wash, scrub, and let it dry completely. Use thinset and small pieces that can follow bumps. Place the rock where it will not be kicked or hit by a mower.
Mosaic fence accent
Difficulty: Beginner. Make a panel on backer board and screw it to the fence, rather than mosaicking directly onto fence wood that expands and contracts. Repeat panels create rhythm along a long fence line.
Hanging garden tile medallion
Difficulty: Beginner. Use a round base with a central motif. Keep it lightweight and hang it from a secure eye bolt through the base. This makes a lovely gift, and if you create multiples, store and transport them upright. If you also sew, these easy fat quarter projects can help you make padded wraps to protect finished medallions.
Designing for a Garden Setting
Garden light changes throughout the day, so a mosaic that looks perfect indoors can disappear outside if the colors are too similar to surrounding foliage. Thoughtful design choices help your Mosaic Garden Art stay visible and cheerful in every season, even when plants die back or when everything turns green in midsummer.
Choose color contrast against foliage
Green plants make reds, oranges, yellows, and bright whites pop. Blues and purples can be gorgeous, but use a strong outline color or a contrasting grout so shapes do not blur. A helpful trick is to photograph your dry layout in black and white. If the pattern still reads clearly in grayscale, it will likely read well from a distance outdoors.
Plan placement, visibility and maintenance
Think about viewing angle and cleaning. Stepping stones should have smoother surfaces and tighter grout lines to reduce dirt catch. Wall panels should be angled slightly or placed where rain can rinse them. Avoid placing mosaics where sprinklers constantly hit, unless you have used truly exterior-rated materials and sealed porous grout.
Create repeatable motifs across multiple pieces
A simple motif repeated across pots, plaques, and panels makes a yard feel intentional. For example, pick one “signature” element like a spiral, a daisy, or a checker border. Keep a small container of your core colors so you can add matching pieces later. This is also useful if you plan to sell: cohesive collections look professional, and these craft fair display ideas can help you group items as sets.
Outdoor Assembly and Protection
Even beautiful mosaics fail outdoors if moisture gets into cracks and freezes, or if the base flexes. The goal is a solid sandwich: stable substrate, strong adhesive, properly mixed grout, and sensible placement. Take your time during curing stages. Rushing is the fastest way to trap moisture and weaken bonds.
Prepare the substrate and apply tile securely
- Clean and roughen: Remove dirt, oils, and loose material. Lightly sand glossy bases. Adhesive needs a toothy surface to grip.
- Plan your layout: Dry fit and adjust spacing. Consistent gaps make grouting easier and reduce weak thin spots.
- Mix thinset correctly: Aim for peanut-butter consistency. Too wet causes slumping; too dry reduces bond strength.
- Press and wiggle: Press tesserae into thinset and gently wiggle so adhesive contacts fully.
- Let it cure: Keep the piece shaded and protected from rain and dew during cure time.
Use grout suited to the climate
In hot weather, grout can dry too fast and become crumbly. Work in smaller sections and lightly mist the surface after initial set if your grout instructions allow. In humid or cool weather, extend cure time before sealing or moving the piece. Choose sanded grout for wider joints on outdoor projects, especially stepping stones and rock mosaics.
Avoid freeze-thaw damage and standing water
Freeze-thaw cycles force water to expand inside tiny voids. To prevent this, avoid low spots where water collects, and do not mosaic inside birdbaths or bowls that hold water. If you live in a hard-freeze climate, store small mosaics in a shed over winter or raise them off soil. Sealing helps, but smart placement matters just as much.
“I started with a small herb marker plaque using leftover bathroom tile. The tips about using thinset and letting it cure before grouting made a huge difference. It survived our rainy spring without any loose pieces, and now I’m planning a matching set for my whole raised bed.”
Frequently Asked Questions About Mosaic Garden Art: 15 Colorful Outdoor DIY Ideas
What can I use as a base for outdoor mosaics?
The most reliable bases are concrete (stepping stones, pavers, pedestal forms), cement backer board, and natural stone. These materials do not swell with moisture and they stay rigid, which protects grout from cracking. Terracotta pots can work well if you keep mosaic away from constant water contact and allow full curing. Avoid plywood or particleboard outdoors, even if painted, because moisture eventually gets in and loosens tile.
How do I waterproof mosaic garden art?
Start by choosing water-friendly materials: thinset mortar and exterior grout. After the grout cures fully, apply a penetrating sealer to grout lines if the grout is porous or you expect lots of rain and soil splash. Waterproofing is also about design: keep mosaics out of standing water, avoid horizontal surfaces where puddles form, and ensure pieces can dry after storms. “Waterproof” is rarely absolute, but you can make projects very water-resistant.
Can I use broken ceramic dishes in garden mosaics?
Yes, if the ceramic is sturdy and non-crumbly. Plates and mugs can create beautiful, painterly shards. Use safety glasses to break them inside a sturdy bag or wrapped in a towel, and smooth sharp edges with a rubbing stone where fingers might touch. Avoid very thin, crackly ceramics that flake. For outdoor longevity, bond shards with thinset on a stable base and use exterior grout.
Why is my grout cracking or flaking?
Common causes are grout mixed too wet, grout drying too quickly in heat, weak or flexible bases, and joints that are too thin or too wide for the grout type. Another cause is movement: if the tabletop flexes or the stepping stone shifts in soft soil, grout will crack. Re-grout by removing loose material, cleaning thoroughly, and reapplying properly mixed exterior grout. Consider sealing and improving placement to reduce stress.
How do I clean grout haze without damaging tiles?
First, try dry buffing with a microfiber cloth after the grout has set slightly. If haze remains, use a barely damp sponge and gentle circular motions, rinsing often. Avoid flooding the surface with water, which can weaken fresh grout. For stubborn haze after full cure, a grout haze remover appropriate for your tile type can help, but test in a small area and avoid acids on stone or certain glass finishes.
How can I make my mosaic look more professional as a beginner?
Pick a limited palette of 3 to 5 colors, keep your spacing consistent, and choose a grout color intentionally rather than by default. A border does wonders: even a simple single-tile frame makes a piece look finished. Also, clean edges matter. Trim or sand sharp corners, wipe grout lines neatly, and mount or hang securely with rustproof hardware. If you make sets, repeat one motif across pieces for a cohesive look.
Final Thoughts
If you want the easiest first win in Mosaic Garden Art, make a decorative stepping stone or a small garden marker plaque. Both are flat, forgiving surfaces that teach the core skills: planning spacing, bonding with thinset, and cleaning grout without washing it out. Start with a simple shape like a spiral, flower, or bold initial, and choose a grout color that helps the design read from a few feet away.
Your sensible next step is to gather materials for one small project and do a complete dry layout before mixing anything. Take a photo of the layout, then build it exactly once you are happy. After that first success, expand into a matching set, like coordinating pot bands and fence panels, so your garden gains color in a cohesive, handmade way.