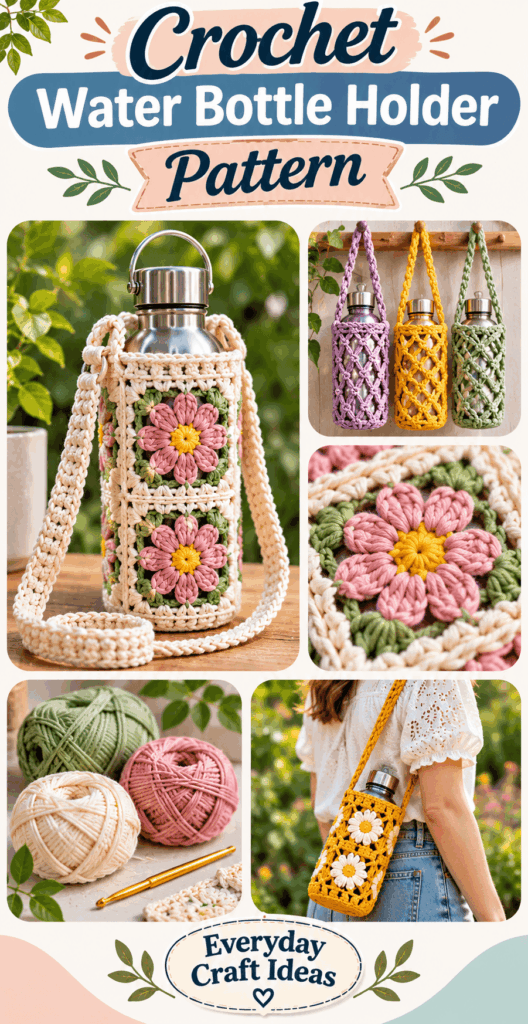
Crochet Water Bottle Holder Pattern
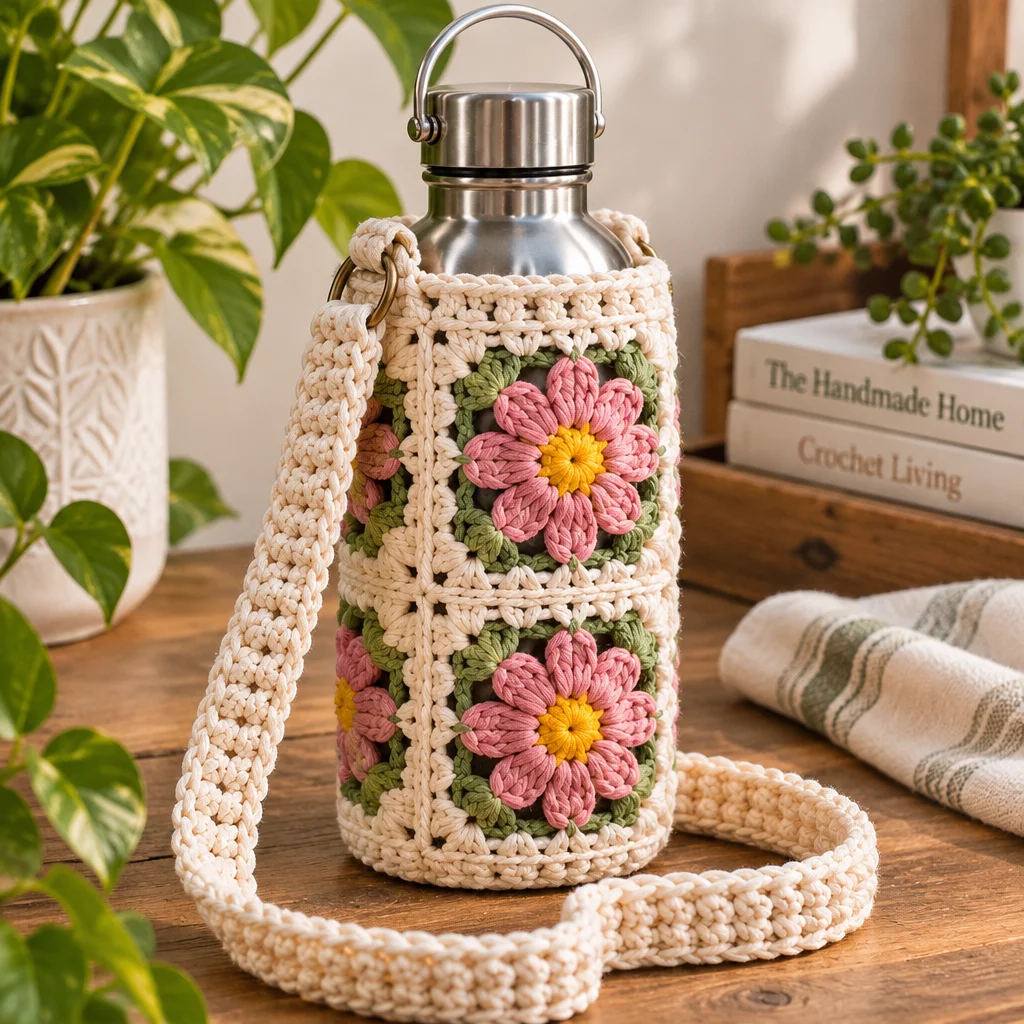
If you have ever stuffed a reusable bottle into a tote only to find it tipping over, leaking, or clanking around, a Crochet Water Bottle Holder Pattern is a simple fix you can make in an afternoon. A good bottle sling keeps your drink upright, leaves your hands free, and makes errands, hikes, and school drop offs easier. This tutorial is designed for beginners who can chain, single crochet, and work in the round, but I will also explain the “why” behind each step so your holder fits your bottle and stays comfortable.
If you enjoy practical crochet accessories, you may also like these easy crochet bag ideas and this roundup of beginner friendly crochet bag patterns, since a bottle holder uses many of the same skills, just on a smaller scale.
What Makes a Comfortable Crochet Water Bottle Holder
The best bottle holder is comfortable on your body and stable for the bottle. Comfort starts with the strap: it should be wide enough not to dig into your shoulder and long enough to sit at a natural crossbody height. Stability comes from two design choices: a firm base that matches the bottle’s diameter and a body stitch pattern that grips without strangling. In other words, your Crochet Water Bottle Holder Pattern needs structure where it counts and stretch only where it helps.
Pay attention to weight distribution. A full 24 oz to 32 oz bottle can feel surprisingly heavy, especially on a thin strap. That is why a strap of at least 4 to 6 stitches wide (or more, depending on yarn) is typically more comfortable than a simple chain strap. It also helps to attach the strap at two strong points on opposite sides of the holder, rather than at one single point, so the bottle hangs upright instead of tipping.
Finally, think about daily life. Will you carry a sweaty gym bottle, a condensation covered metal bottle, or a kids’ plastic bottle? Washability matters. So does abrasion resistance if you will wear it on walks. A practical Crochet Water Bottle Holder Pattern balances breathability, durability, and easy cleaning.
Supplies, Yarn Weight, Hook and Stitch Gauge
You do not need many tools, but the materials you choose will affect stretch, comfort, and how long your holder lasts. For most bottles, worsted weight yarn with a hook slightly smaller than the yarn label suggests gives a fabric that is firm enough to hold shape while still being pleasant to crochet. Gauge is not as strict as a sweater, but it matters for sizing and sag control.
- Yarn: Worsted weight (Category 4) cotton or a cotton blend is beginner friendly and washable. If you prefer lighter weight, use DK and plan for more rounds.
- Hook: Typically 3.5 mm to 4.5 mm for worsted cotton. Choose the smaller end for a denser fabric that stretches less.
- Notions: Stitch marker (highly recommended for working in the round), yarn needle for weaving ends, and scissors.
- Optional support: A small metal ring or D rings for strap attachments, or a strip of twill tape to reinforce the strap.
A quick gauge check: crochet a 4 inch square in single crochet. If your fabric feels floppy or holes are large, go down a hook size. A denser fabric generally makes a more secure Crochet Water Bottle Holder Pattern and reduces stretching over time.
Choosing Washable, Low-Stretch Yarn
Cotton is the go-to because it is washable, heat tolerant, and grips the bottle well. Mercerized cotton is smoother and often stretches a bit less. Acrylic can work, but it tends to stretch and “relax” with weight, which may lead to sagging after a few uses. Blends like cotton linen can feel crisp and sturdy, but may be less forgiving on the hands.
If you only have acrylic, you can still succeed: use a smaller hook, choose a tighter stitch (single crochet rather than tall stitches), and reinforce the strap. For sweaty bottles, cotton wins because it handles moisture and frequent washing better.
Measuring Bottle Diameter, Height and Strap Drop
Measure three things before you start your Crochet Water Bottle Holder Pattern:
- Base diameter: Measure across the bottom of the bottle. Your crocheted base should match or be 0.25 to 0.5 inches smaller for a snug fit.
- Body height: Decide how high you want the holder to come up the bottle. Many people like it to cover 60% to 75% of the bottle height for security while still allowing easy grabbing.
- Strap drop: Put the bottle where you want it to sit (hip or waist). Measure from attachment point to attachment point across your body, then divide by two for each strap side if you are calculating length in parts.
Write these measurements down. They make the pattern below easy to customize without guesswork.
Crochet Water Bottle Holder Pattern
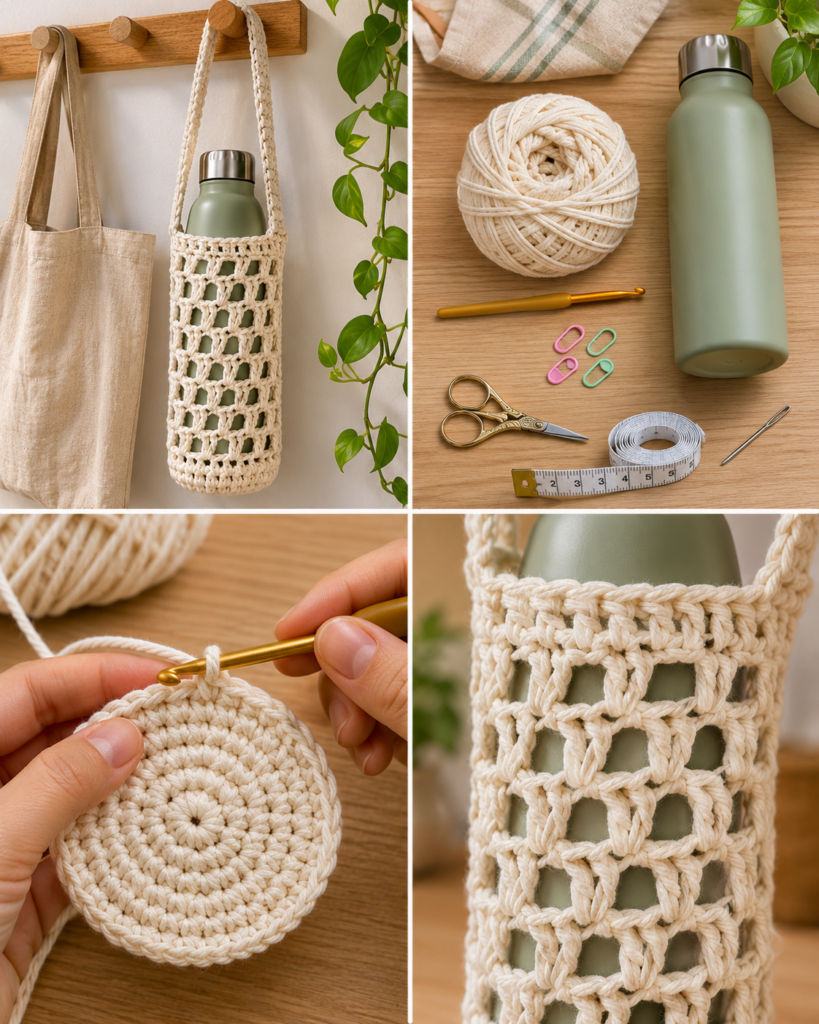
This Crochet Water Bottle Holder Pattern creates a snug base, a breathable body, and a reinforced strap. It is written in plain language and uses common stitches. Abbreviations: ch (chain), sl st (slip stitch), sc (single crochet), dc (double crochet), st(s) (stitch or stitches), inc (increase, 2 sc in same stitch).
Difficulty: Confident beginner. Time: 2 to 4 hours depending on yarn and strap length. Fit: Written for an average 20 to 24 oz bottle, with clear adjustment notes.
Starting a Flat Circular Base
- Make a magic ring (or ch 4 and join): Work 6 sc into the ring. Pull tight. This creates a closed center so the bottle base does not wobble.
- Round 2: Inc in each stitch (12 sc). Place a marker in the first stitch of the round so you do not lose your count.
- Round 3: (Sc 1, inc) repeat around (18 sc).
- Round 4: (Sc 2, inc) repeat around (24 sc).
- Continue increasing: Each round, add one more sc between increases (Round 5: sc 3, inc; Round 6: sc 4, inc). Stop when the circle is about the same diameter as your bottle base or slightly smaller.
Why it matters: A flat, evenly increased circle prevents a “bowl” shape that can cause tipping. If your circle ruffles, you added too many increases. If it cups upward, add one more increase round.
Building a Breathable, Secure Bottle Body
- Transition round (creates a side wall): Crochet 1 round of sc in the back loop only. This makes a crisp fold at the base edge so the holder stands up.
- Body round setup: Work 1 round sc in both loops to stabilize the wall.
- Mesh body (breathable option): Repeat (ch 1, skip 1 st, sc in next st) around. On the next round, sc into each sc and also into each ch space. This makes a simple net that stretches just enough to slide the bottle in.
- Height check: Try the bottle in every few rounds. Stop when the holder reaches your chosen height, usually around the bottle’s widest area for a secure grip.
Tip: If you want a firmer body with less stretch, swap the mesh for plain sc rounds or half double crochet worked tightly. Mesh is great for quick drying and lighter weight, but solid stitches hold shape best.
Creating and Reinforcing a Crossbody Strap
- Mark attachment points: Lay the holder flat. Choose two points opposite each other near the top edge. Use stitch markers to mark them.
- Strap base: At the first marker, crochet a strap 5 sc wide: ch 1, turn, sc across 5. Continue working back and forth in rows until the strap reaches your desired length.
- Reinforce: For less stretch, slip stitch or single crochet evenly along both long edges of the strap. If you have twill tape, stitch it to the underside after crocheting for a strong, non-stretch core.
- Attach: Sew the strap end securely to the second marker with a yarn needle, using a box stitch shape (a rectangle with an X through it) to distribute weight.
Comfort note: If you prefer a softer strap, crochet it wider (7 to 9 stitches) rather than looser. Wider is usually more comfortable than simply increasing hook size.
Joining, Weaving Ends and Checking Fit
- Top edging: Crochet one final round of sc around the opening to firm it up. If you want a slightly tighter rim, use a smaller hook for this round.
- Weave ends thoroughly: Weave each end through at least 2 to 3 inches of stitches, changing direction once. This prevents ends from popping out under weight.
- Fit test: Insert the bottle and pick it up by the strap. The bottle should hang upright, with the base fully supported and the rim not sliding down.
- Adjust if needed: If it slips, add 1 to 2 more rounds to the body or make the rim tighter with a crab stitch style edging (reverse single crochet) if you know it.
This is also a good time to add a small loop for keys. If you like tiny add-ons, these cute crochet keychain ideas can inspire a matching charm.
Adjusting for Slim, Wide and Reusable Bottles
Different bottles behave differently. A slim disposable bottle needs more grip and less stretch, while a wide insulated bottle needs a larger base and often a taller body to prevent top-heaviness. The easiest way to customize any Crochet Water Bottle Holder Pattern is to adjust the base diameter and then crochet the body until it reaches the bottle’s widest point.
Slim bottles: Stop the base earlier. Use solid stitches (single crochet) for the body for the first inch or two, then switch to mesh if you want breathability. Consider a tighter top edging so the bottle does not slide upward and out.
Wide bottles (like 32 oz insulated): Increase the base until it matches the bottle bottom. Add 1 to 2 extra stabilization rounds of sc after the back-loop-only round. Keep the body a bit taller, aiming to cover at least 70% of the bottle height. Also make the strap wider because the weight increases.
Reusable bottles with tapered waists: Mesh works beautifully because it conforms. If your bottle has a rubber boot or textured base, ensure the base is not too tight or it will be hard to insert and remove.
When in doubt, crochet slightly snug. Yarn relaxes with use, especially if you carry a full bottle daily.
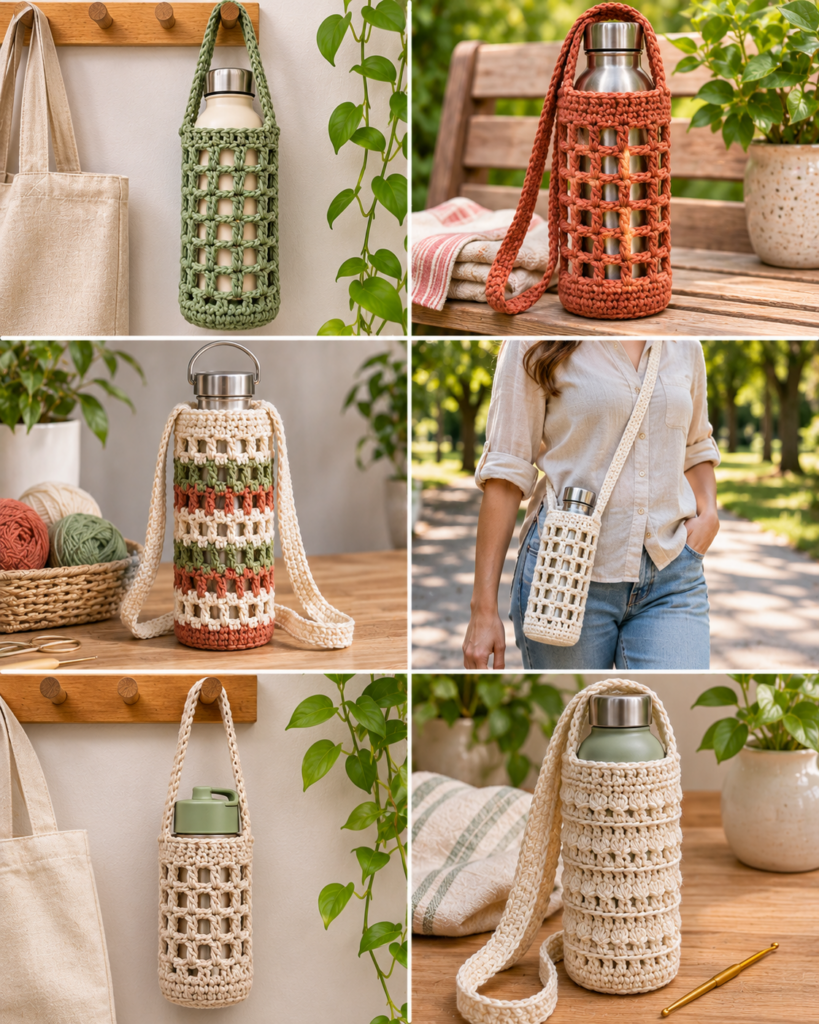
Design Variations: Mesh, Solid Stitch and Color Blocks
Once you have the basic Crochet Water Bottle Holder Pattern down, you can change the look without changing the function. Choose variations based on how you use the holder: sweaty gym bottle, outdoor walks, or everyday commuting.
- All mesh: Fast and breathable, great for summer. Keep the base and top rim solid so the bottle does not distort the netting.
- Solid stitch body: Best for heavy bottles and for reducing stretch. Single crochet creates a firm fabric. Waistcoat stitch (knit-look sc) is also sturdy, though it is slower.
- Color blocks: Change colors every few rounds for a modern look. When switching colors, complete the last yarn over of the final stitch with the new color, then carry or cut yarn depending on how clean you want the inside.
- Textured bands: Add a round of puff stitches or bobbles near the top for grip and decoration, but keep the strap attachment area flatter so it is easier to sew securely.
If you enjoy making coordinated sets, a bottle holder pairs nicely with quick projects like these easy crochet coaster patterns for your desk or nightstand.
Troubleshooting Stretching, Tipping and Loose Straps
Most issues with a Crochet Water Bottle Holder Pattern come from stretch, sizing, or strap placement. The good news is that you can usually fix them without frogging the whole project.
- Problem: Holder stretches longer over time. Use a tighter stitch for the body (more sc, less mesh) and consider a smaller hook. Reinforce the strap with a slip stitch edging or sew twill tape to the underside.
- Problem: Bottle tips outward when worn. This usually means the strap attachment points are too close together or too low. Move attachment points farther apart (true opposite sides) and closer to the top rim so the bottle hangs vertically.
- Problem: Base feels floppy. Go down a hook size for the base, or add one extra round of single crochet with no increases to stiffen it before starting the side wall.
- Problem: Bottle is hard to insert. Mesh may be too tight, or the base is too small. Add one more increase round, or work one round of half double crochet to add a touch of give.
- Problem: Strap feels scratchy or digs in. Make it wider rather than looser, and choose a softer cotton. You can also add a simple shoulder pad by crocheting a short wider section where it sits on your shoulder.
Reader testimonial: “I followed this Crochet Water Bottle Holder Pattern with cotton yarn and a smaller hook, and it finally stopped my bottle from tipping in my bag. The tip about attaching the strap on opposite sides made a huge difference for comfort.”
Washing, Drying and Everyday Use
A bottle holder is meant to be used, which means it will get splashed, sweaty, and tossed around. Cotton and cotton blends are easiest to care for. Most can be machine washed in cool or warm water, but always check your yarn label. To protect the strap and prevent snagging, place the holder in a mesh laundry bag if washing with other items.
Air drying is best for shape. Lay it flat or hang it by the base (not the strap) while it dries so the strap does not stretch under water weight. If you must tumble dry, use low heat and remove while slightly damp, then reshape.
Everyday safety and practicality tips:
- Do not carry open-top hot liquids in a crochet holder. Crochet fabric is not spill-proof and hot spills can burn.
- Check strap seams regularly if you carry heavy bottles. Reinforce at the first sign of loosening.
- Use a bottle with a secure lid to avoid leaks, especially if you store it near electronics in a backpack.
If you like practical crochet items that stand up to washing, you may also enjoy these simple crochet dishcloth patterns because they use similar washable yarns and durable stitches.
Frequently Asked Questions About Crochet Water Bottle Holder Pattern
Which Yarn Works Best for a Bottle Holder?
Cotton is usually the best choice because it is washable, grippy, and handles moisture well. Mercerized cotton often holds its shape a bit better and looks crisp. Acrylic can work, but it tends to stretch with weight, especially for long crossbody straps. If you use acrylic, choose a smaller hook, keep the body stitches tight, and plan to reinforce the strap for long-term durability.
How Do I Size It for My Bottle?
Measure the bottle’s base diameter and crochet your flat circle to match it or be slightly smaller for a snug fit. Then build the body until it reaches the height you want, usually around two thirds of the bottle height or up to the widest point. The easiest way to size confidently is to test fit as you go, inserting the bottle every few rounds to check snugness and height.
How Can I Keep the Strap From Stretching?
First, crochet the strap in rows of single crochet rather than using a long chain. Chains stretch quickly under weight. Second, add reinforcement: slip stitch or single crochet along the strap edges, or sew a strip of twill tape to the underside. Third, consider yarn choice. Cotton generally stretches less than acrylic for straps, especially when crocheted tightly.
Can I make this holder without a magic ring?
Yes. Chain 4 and slip stitch to form a ring, then work your first round of single crochet into the ring. The only downside is a small hole at the center. You can minimize it by weaving the starting tail around the center and pulling it snug, then weaving securely to lock it. A closed center is helpful so the bottle base sits stable.
My circle base is curling or ruffling. What should I do?
If the base curls into a bowl shape, you likely need more increases or your tension is tight. Add one increase round or loosen slightly. If it ruffles and waves, you have too many increases for your stitch count. Rip back one round and redo with fewer increases, or switch to the standard increase pattern where you add 6 stitches per round for single crochet circles.
How do I add a drawstring or top closure?
Near the top, crochet one round that creates eyelets: (sc 1, ch 1, skip 1) repeat around. Then weave a cord, chain, or ribbon through the spaces and tie. Keep the closure gentle, not overly tight, so you can still remove the bottle easily. A closure is especially useful for slim bottles that might slide upward in a mesh body.
Final Thoughts
A well-fitting Crochet Water Bottle Holder Pattern is one of those satisfying projects that you can use every day, and it is a great way to practice working in the round, shaping a flat circle, and building a strong strap. Start with washable cotton, crochet the base to match your bottle, and do frequent fit checks so you end up with a snug, stable sling. If you want to keep exploring practical crochet accessories after this project, try a small matching bag from these beginner friendly crochet bag patterns or experiment with different textures and color blocks on your next holder. Pick your bottle, grab your hook, and make a version you will actually carry.