DIY Valentine’s Decorations: 20 Easy Ideas
If you are searching for diy valentines decorations that look charming but do not require advanced crafting skills, you are in the right place. Valentine’s Day decor is at its best when it feels personal: a garland that fits your mantel length, a wreath in your exact shade of pink, or a centerpiece that survives curious pets and busy tables. In this guide, you will find 20 easy ideas you can finish in an evening or a weekend, plus practical tips for planning, customizing, and storing everything so it is reusable next year. If you also want handmade presents to match your décor, pair these projects with ideas from these thoughtful DIY Valentine’s gifts or browse pretty Valentine’s crafts for adults for more elevated looks.
What you need to get started
The easiest diy valentines decorations start with a small, reliable toolkit and a plan for where each piece will go. You do not need specialty equipment, but quality basics make your cuts cleaner, your glue stronger, and your results more polished.
- Adhesives: A low-temp hot glue gun for quick bonding (ribbon, faux florals) and a craft glue or glue stick for paper. Low-temp reduces burn risk and is safer on delicate materials.
- Cutting tools: Sharp scissors for paper and ribbon, plus a craft knife for precise windows or stencil work. Always cut on a self-healing mat or thick cardboard.
- Measuring and marking: Ruler or tape measure, pencil, and a simple heart template (printable or traced from a cookie cutter).
- Hanging supplies: Painter’s tape, removable adhesive hooks, and clear fishing line. Removable options protect walls and doors.
- Core materials: Cardstock, crepe paper, felt, ribbon, twine, and a few neutral bases like a wire wreath form or foam heart.
Planning decor by room and color scheme
Before cutting anything, do a quick “walk-through plan.” Choose one or two focus areas: the front door, the mantel, or the dining table. Then pick a tight palette so your diy valentines decorations coordinate instead of competing. A beginner-friendly palette is blush, red, and white with a touch of kraft paper or gold. For a modern look, try pink plus terracotta and cream. For a cozy cottage style, mix red checks, lace, and natural twine.
Measure the surfaces you will decorate. Knowing mantel length or window width helps you build garlands that hang neatly without sagging. Finally, decide your “shine level.” If you will use candles or string lights, keep paper and ribbon at a safe distance from heat sources.
20 ideas and projects to try
These diy valentines decorations range from 10-minute quick wins to slightly longer projects that still stay beginner-friendly. Mix a few for a layered, cohesive look.
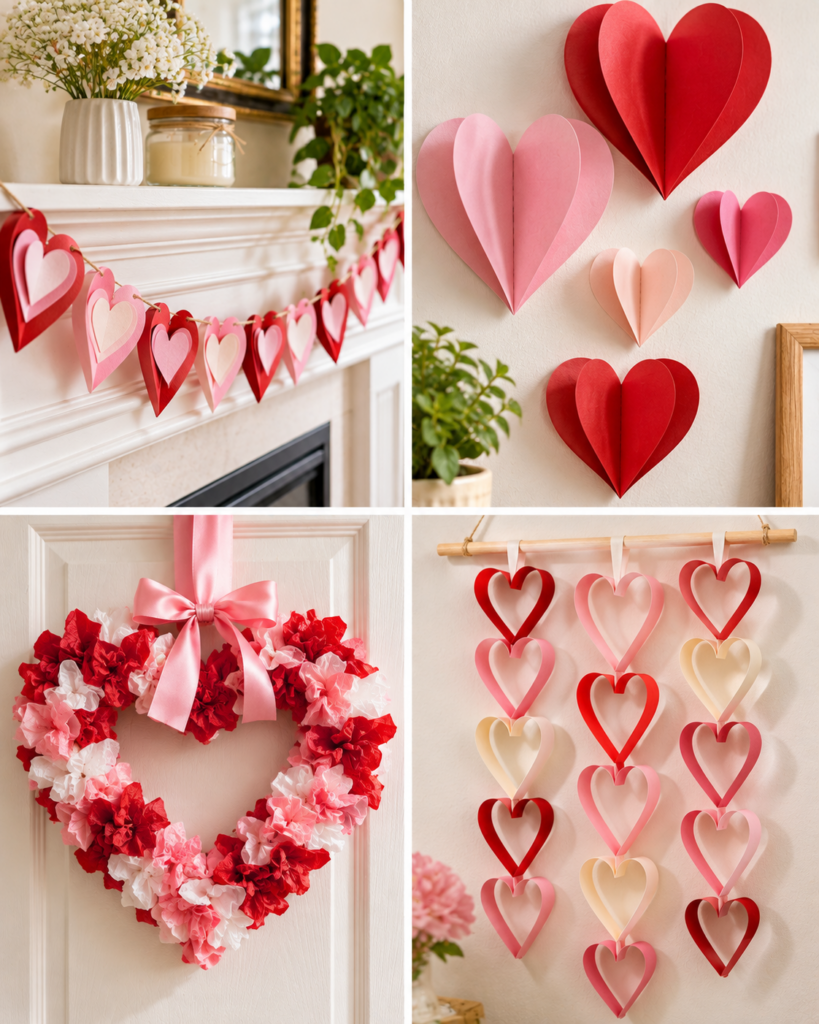
- Paper heart garland: Fold, cut, and string hearts for a classic mantel or stair rail.
- 3D folded heart banner: Glue two folded hearts together to add dimension and shadow.
- Felt heart wreath: A no-mess option that stores flat and reuses well.
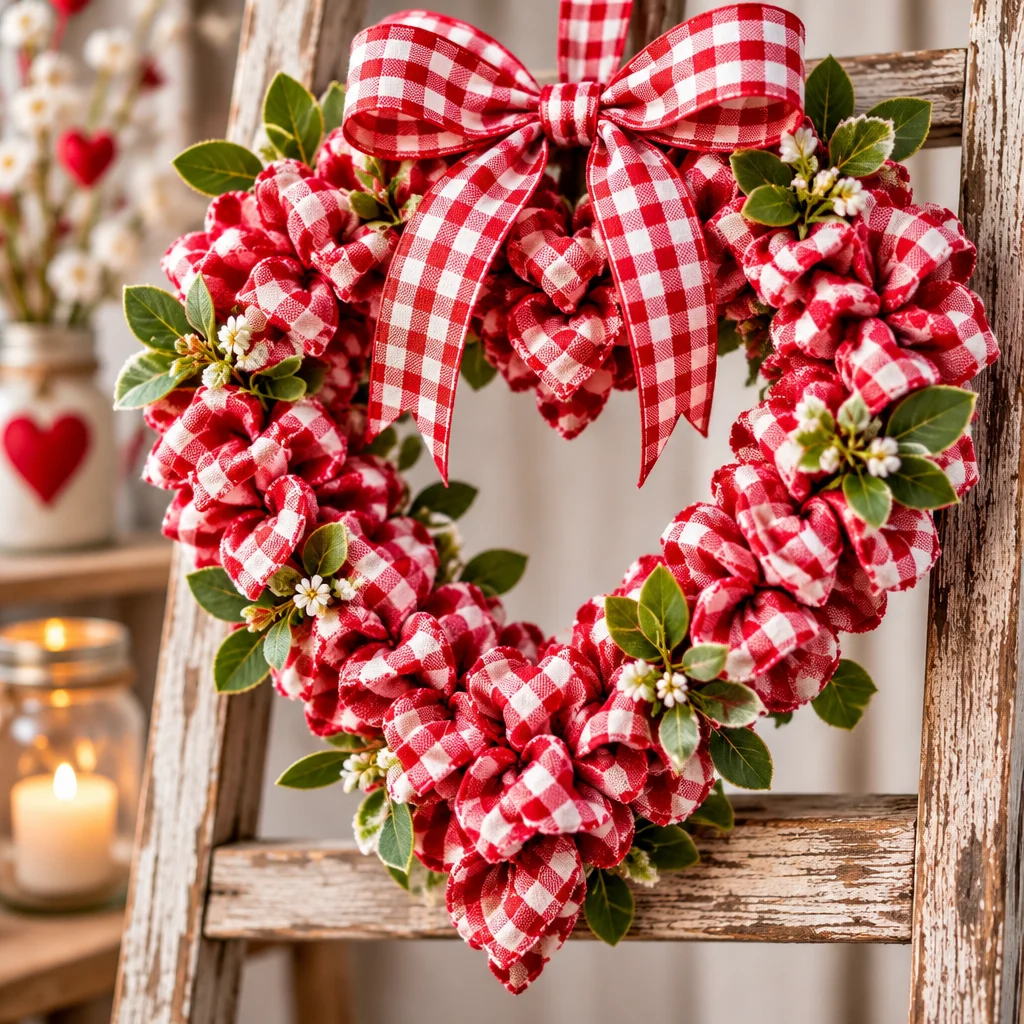
- Ribbon-and-bow wreath: Tie ribbon strips to a wire form for a fluffy, full look.
- Conversation heart wall prints: Hand-letter simple phrases on pastel cardstock, frame, and group as a gallery.
- Heart window clings (non-permanent): Use removable vinyl or painter’s tape hearts for quick window decor.
- Doily heart backdrop: Overlap paper doilies in heart shapes for a photo corner.
- Tissue paper pom-poms: Pink and red clusters add volume fast.
- Crepe paper roses: Create a small bouquet or attach to a wreath base.
- Heart-shaped topiary: Glue felt hearts onto a foam heart and mount on a dowel in a pot.
- Table runner made from kraft paper: Stamp hearts down the center for an easy, disposable runner.
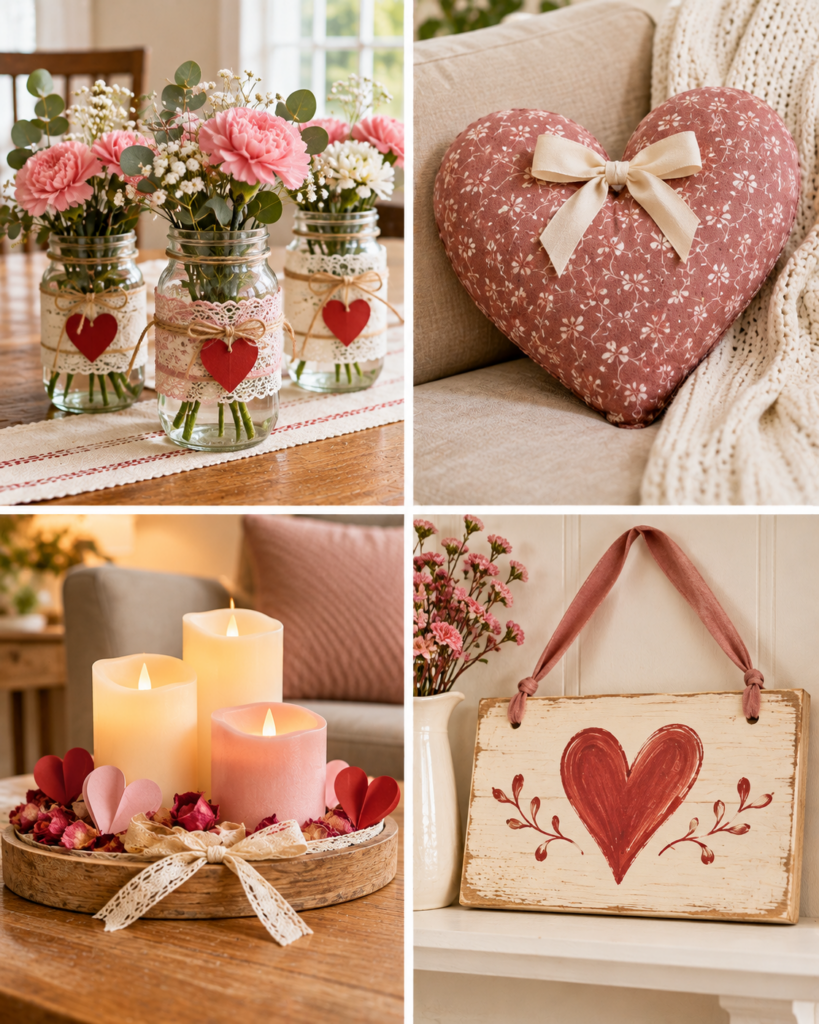
- Mason jar vases with ribbon wraps: Add lace, twine, and a tag for instant centerpieces.
- LED candle cluster: Decorate around flameless candles for safe glow. (If you love candle styling, see these creative DIY candle holder ideas.)
- Heart place cards: Fold cardstock hearts into tent cards for a table setting.
- Chocolate-box inspired shadow box: Fill compartments with paper hearts and love notes (no food required).
- Paper chain in ombré pink: A nostalgic craft that looks surprisingly modern with a gradient.
- Mini bunting for shelves: Tiny triangles or hearts on twine for small spaces.
- Door hanger with layered hearts: Use a wood round or sturdy cardstock base with stacked hearts.
- Heart-shaped balloon alternative: Make a “balloon” cluster from tissue pompoms and hang with ribbon.
- Valentine centerpiece tray: Style a tray with faux flowers, hearts, and a small sign.
Heart wreaths, paper garlands, table centerpieces, mantel decor, window hearts and door hangers
If you only make five diy valentines decorations, choose one from each category for a complete home look:
- Wreath: One bold piece sets the theme at the entry.
- Garland: Adds movement across a mantel, headboard, or shelf.
- Centerpiece: Keeps the dining area festive even if the rest of the house is subtle.
- Mantel decor: Layer framed prints, candles (flameless is safest), and a banner for height variation.
- Window hearts: Great for apartments where outdoor decor is limited.
- Door hanger: A lightweight option when a full wreath is too bulky.
Beginner tip: repeat one material in multiple places, like the same ribbon on your wreath and centerpieces, so everything looks intentional rather than random.
How to make and customize the projects
Below is a versatile method you can apply to most diy valentines decorations, especially garlands, door hangers, and centerpieces. The goal is a clean base, consistent spacing, and secure attachment so your decor lasts through the season.
- Choose a base and measure the space: For a garland, measure the mantel and add 12 to 18 inches for drape. For a door hanger, keep it narrow enough that it will not scrape the door frame.
- Make a template: Trace one heart shape onto cardstock or thin cardboard. Using a template keeps your hearts uniform, which reads more polished from a distance.
- Batch-cut your pieces: Stack paper (no more than 4 to 6 sheets of cardstock) and cut multiple hearts at once. For felt, cut one layer at a time for clean edges.
- Assemble with the right adhesive: Use glue stick for paper-to-paper (less warping), hot glue for ribbon and felt, and double-sided tape for quick, flat mounting.
- Reinforce hanging points: Punch holes and add metal eyelets if you have them, or sandwich twine between two hearts. Reinforcement prevents tearing when you adjust the drape.
- Test-hang before finalizing: Tape it up temporarily, step back, then adjust spacing. This saves you from crooked garlands or centerpieces that block sightlines at the table.
Customization ideas: add hand-lettered initials, use patterned scrapbook paper for instant style, or edge hearts with a metallic marker for a subtle shimmer. Safety note: keep hot glue strands away from pets and small children, and unplug your glue gun when stepping away.
Dollar-store and reusable decor
One of the best parts of diy valentines decorations is that you can make them look high-end with budget supplies. Dollar-store finds like foam hearts, faux florals, ribbon spools, and plastic table scatter can become sophisticated when you edit the colors and repeat textures. For example, buy two kinds of ribbon only (one satin, one textured burlap or velvet) and use them everywhere: on wreath tails, jar wraps, and garlands.
To make decor reusable, build on durable bases. Wrap a wire wreath form with ribbon before adding hearts so hot glue never touches the metal directly. Use removable glue dots for paper accents on frames and mirrors, so you can peel them off without damage. When making banners, string onto twine with mini clothespins instead of gluing, so you can swap shapes for other holidays. If you enjoy seasonal decorating year-round, you may also like these easy DIY Easter decorations for similarly reusable projects.
Storage, removal and small-space styling
Careful storage is what turns one-time crafts into annual favorites. For flat items like paper garlands and banners, wrap them around an empty wrapping paper tube, then secure the ends with painter’s tape. Store wreaths in a large plastic bag or a shallow box so the embellishments do not crush. Label bins by holiday and include a small zip bag of “extras” like matching ribbon, glue dots, and command strips.
For removal, warm hot glue gently with a hair dryer on low to soften it, then peel slowly to reduce paint damage. Always test painter’s tape in an inconspicuous spot first. In small spaces, pick vertical decor: window hearts, a narrow door hanger, or a mini bunting over a bookshelf. A single styled tray on a coffee table can carry the theme without clutter.
Supplies, cost, time and skill level
Most diy valentines decorations here fall into the beginner to confident-beginner range. Expect costs to vary based on what you already own, but many projects can be made for the price of cardstock and ribbon.
- Typical cost: $5 to $25 per project. Garlands and paper crafts are cheapest; wreaths cost more due to the base and florals.
- Time estimate: 15 to 45 minutes for simple garlands, 60 to 120 minutes for a wreath, 20 to 40 minutes for a centerpiece tray if your items are pre-made.
- Skill level: Paper cutting and simple gluing are true beginner. Wreath-making is still beginner-friendly but requires patience for balanced placement.
- Project size/use: Garlands typically span 4 to 8 feet; wreaths 12 to 18 inches; centerpieces should stay under 10 to 12 inches tall to keep conversation easy.
When budgeting, invest in one “hero” item (like a quality ribbon spool) and keep the rest simple. If you are decorating for a party, you can borrow ideas from budget-friendly baby shower decorations because many techniques overlap, like backdrops, garlands, and table styling.
Beginner mistakes and troubleshooting
Most issues with diy valentines decorations are easy to fix once you know what causes them:
- Garland keeps twisting: Alternate heart direction or use double hearts (front and back) so the design looks good from any angle. Heavier twine also reduces spin.
- Paper looks wrinkled: Too much wet glue. Switch to a glue stick or thin double-sided tape, and press under a book for 5 minutes.
- Wreath looks lopsided: Lay pieces without glue first. Take a photo, then adjust until it looks balanced. Photos reveal gaps your eyes miss.
- Hot glue strings everywhere: Lower the glue temperature if possible and pause a beat after squeezing before pulling away. Keep a scrap of cardboard to “wipe” the nozzle.
- Command strips fail: Clean the surface with rubbing alcohol and let it dry. Press firmly for 30 seconds, then wait the recommended time before hanging weight.
“I tried the folded-heart banner method for my mantel, and the tip about test-hanging first saved me. I adjusted the spacing before gluing anything, and it looked so much more even. I also wrapped it around a tube for storage and it came out perfect the next year.”
Frequently Asked Questions About DIY Valentine’s Decorations: 20 Easy Ideas
How can I decorate for Valentine’s Day on a budget?
Focus on paper and reused bases. Cardstock, printer paper, and kraft paper can become banners, garlands, framed prints, and table runners for a few dollars. Choose one accent supply like a ribbon spool and use it across multiple diy valentines decorations for a coordinated look. Shop your home first: jars become vases, picture frames become Valentine print displays, and throw pillows in pink or red can do a lot of heavy lifting.
What can I hang on a door?
A lightweight wreath, a layered heart door hanger, or a ribbon bow cluster works well. If your door gets a lot of use, keep it flat so it does not snag. Use an over-the-door wreath hook for stability, or a removable hook if you cannot use hardware. For apartments, a cardstock door hanger reinforced with two layers and a ribbon loop is a great option and pairs nicely with other diy valentines decorations inside.
How do I make a heart garland?
Cut 12 to 24 hearts from cardstock or felt using a template. Decide whether you want them flat (fast) or sewn/glued into double-sided hearts (more durable). Punch two holes near the top curves of each heart and thread twine through in order, or clip hearts onto twine with mini clothespins. Test-hang and adjust spacing before tying final knots. Store wrapped around a tube so your diy valentines decorations stay crease-free.
How do I keep paper decorations from drooping?
Drooping usually comes from thin paper, too much glue, or long spans without support. Use cardstock instead of copy paper for banners. Apply adhesive sparingly, and let pieces dry flat under a book. For long garlands, add a midpoint support with a small piece of removable tape or a clear hook. If humidity is high, switch some diy valentines decorations to felt or fabric since they hold shape better.
Are flameless candles necessary for Valentine’s centerpieces?
They are strongly recommended if you are placing decor near paper, ribbon, or faux florals, or if kids and pets are around. Real candles can be used safely, but you need generous clearance and constant supervision. A good compromise is to use real candles in glass holders placed away from garlands and to keep everything on a tray. For most beginner centerpieces, flameless candles give the same cozy effect with less stress and keep your diy valentines decorations worry-free.
How do I make my decorations look less “crafty” and more polished?
Limit your palette, repeat materials, and clean up edges. Choose two to three colors and one metallic at most. Cut with sharp scissors, and use a template for consistent shapes. Hide mechanics: cover knots with small bows, conceal glue spots behind layered pieces, and use matching thread or twine. Finally, vary sizes, like small and large hearts together, so your diy valentines decorations look styled instead of flat.
Final tips and next projects
The best diy valentines decorations are the ones you will actually put up and enjoy, so start small: one door piece, one garland, and one tabletop accent. Measure first, batch-cut your shapes, and test-hang before committing with glue. When you finish, take five minutes to store everything neatly so next year is effortless. If you want to keep the handmade momentum going, add matching gifts from these thoughtful DIY Valentine’s gift ideas or build a cozy glow with projects inspired by creative DIY candle holders. Pick one project tonight, gather your supplies, and you will have a warmer, more personal space by the weekend.